2022-1-5 13:54:23 Author: infosecwriteups.com(查看原文) 阅读量:22 收藏
![]()
In the name of God.
Hi researchers,
In this write-up, we are going to walk through implementing a Django-Rest project with Throttling and try to bypass this feature. If you have not worked with Django before or don’t have any idea about it, don’t worry we are going to explain it step by step so we have a clear understanding of what is going on.
According to official blog, Throttling is similar to permissions, in that it determines if a request should be authorized. Throttles indicate a temporary state, and are used to control the rate of requests that clients can make to an API.
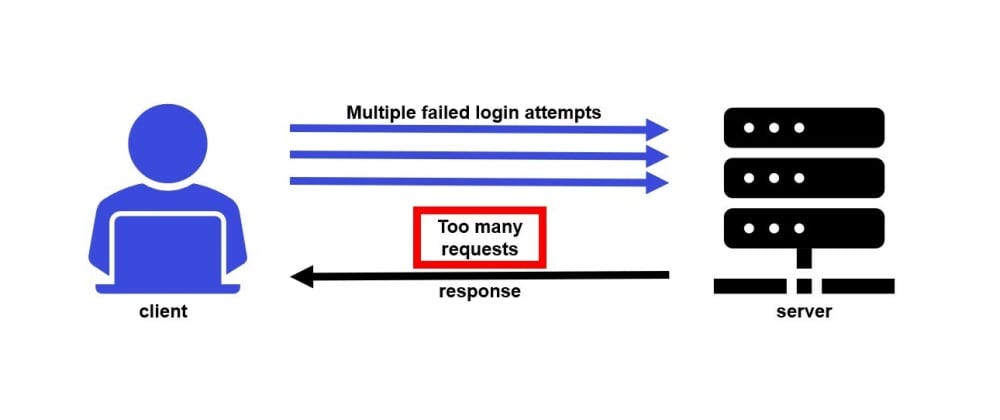
Rate limiting for APIs helps protect against malicious bot attacks as well. An attacker can use bots to make so many repeated calls to an API that it renders the service unavailable for anyone else, or crashes the service altogether. This is a type of DoS or DDoS attack. It is also possible attacker abuse the absence of this service to perform brute force attacks on login forms , password reset pages , OTP’s , and all other attacks that needs lots of requests.
We’re going to create a simple API to allow users to view and edit the users and groups in the system.
First and foremost we need to install Django and Django Rest Framework:
pip install django
pip install djangorestframework
Create a new project with a single application:
django-admin startproject tutorial
cd tutorial
python3 manage.py startapp quickstart
When we use startapp we create a new application in our project , with this feature, we can have multiple application in a single project , for example we can have an Ecommerce application and another application for supporting.
Now let’s sync database :
python3 manage.py migrate
python3 manage.py makemigrations
In sake of testing our application with and without user , we need to create one:
python3 manage.py createsuperuserSerializers allow complex data such as querysets and model instances to be converted to native Python datatypes that can then be easily rendered into JSON.
For this we need to create a new file named “serializers.py” in our quickstart application project tutorial/quickstart/serializers.py and add below code to it :
from django.contrib.auth.models import User, Group
from rest_framework import serializersclass UserSerializer(serializers.HyperlinkedModelSerializer):
class Meta:
model = User
fields = ['url', 'username', 'email', 'groups']
class GroupSerializer(serializers.HyperlinkedModelSerializer):
class Meta:
model = Group
fields = ['url', 'name']
Views are some sort of things that we are gonna to show it to end users, open tutorial/quickstart/views.py and add this content to it:
from django.contrib.auth.models import User, Group
from rest_framework import viewsets
from rest_framework import permissions
from quickstart.serializers import UserSerializer, GroupSerializer
from rest_framework.response import Response
from rest_framework.throttling import UserRateThrottle
from rest_framework.views import APIViewclass UserViewSet(viewsets.ModelViewSet):
    queryset = User.objects.all().order_by('-date_joined')
    serializer_class = UserSerializer
    permission_classes = [permissions.IsAuthenticated]class GroupViewSet(viewsets.ModelViewSet):
    queryset = Group.objects.all()
    serializer_class = GroupSerializer
    permission_classes = [permissions.IsAuthenticated]
Urls.py is a file that we define our routing in our project, add below code to tutorial/urls.py.
from django.urls import include, path
from rest_framework import routers
from quickstart import viewsrouter = routers.DefaultRouter()
router.register(r'users', views.UserViewSet)
router.register(r'groups', views.GroupViewSet)urlpatterns = [
    path('', include(router.urls)),
    path('api-auth/', include('rest_framework.urls', namespace='rest_framework'))
]
Ok now we add pagination to our settings to define how many objects is going to show in each page open your tutorial/settings.py and add these lines to it:
REST_FRAMEWORK = {
    'DEFAULT_PAGINATION_CLASS': 'rest_framework.pagination.PageNumberPagination',
    'PAGE_SIZE': 10
}
The last one is to add ‘rest_framework’ to INSTALLED_APPS in the settings file that you opened above:
INSTALLED_APPS = [
    ...
    'rest_framework',
]
Ok now are done , we can sumply run our server with python3 manage.py runserver command , if you wanna access it through network you can do this python3 manage.py runserver IP:PORT but just make sure that you add your IP to ALLOWED_HOST in your settings.py.
The default throttling policy may be set globally, using the DEFAULT_THROTTLE_CLASSES and DEFAULT_THROTTLE_RATES settings. For example. add these lines to your settings.py
REST_FRAMEWORK = {
    'DEFAULT_THROTTLE_CLASSES': [
        'rest_framework.throttling.AnonRateThrottle',
        'rest_framework.throttling.UserRateThrottle'
    ],
    'DEFAULT_THROTTLE_RATES': {
        'anon': '50/day',
        'user': '100/day'
    }
}
“Anon” are known as unauthenticated users and “User” are authenticated ones so they are allowed to create 100 requests per day and Anon’s are allowed to create 50 requests per day.
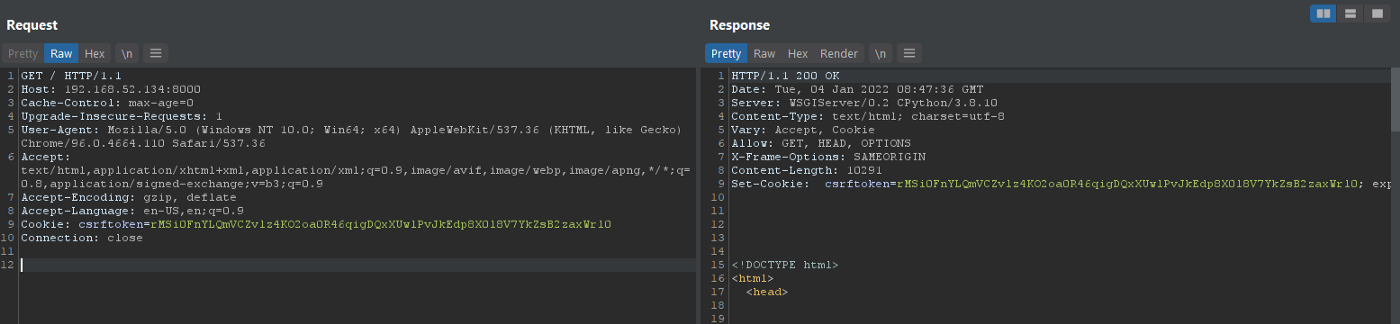
Let’s fire up our burpsuite and issue our first request to our application:
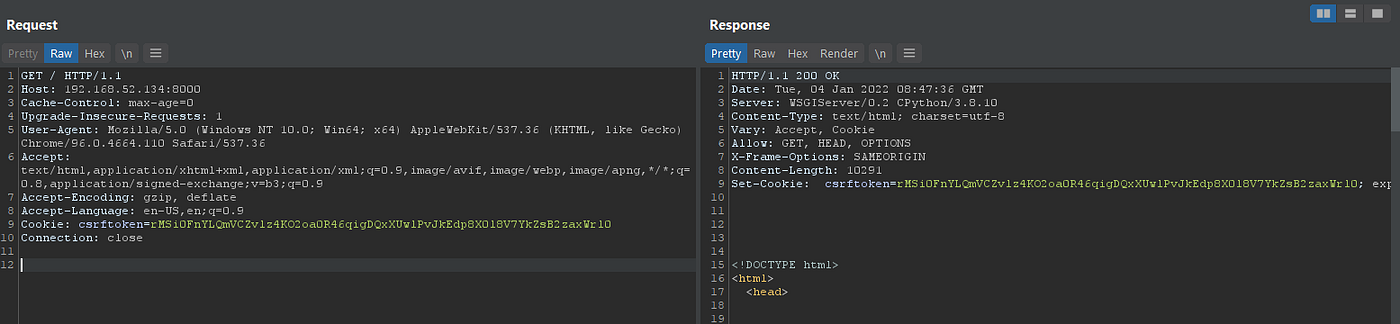
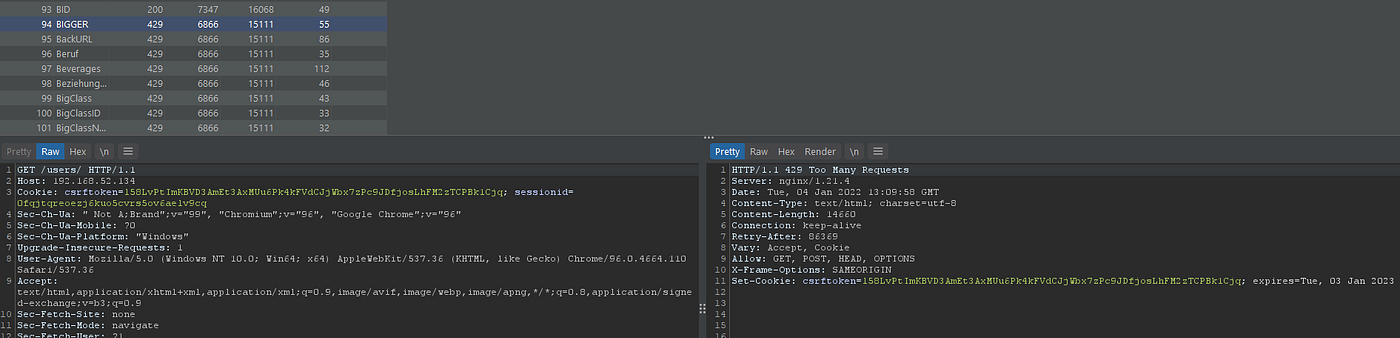
As you can see it’s up and working well , Ok now since we are still Unauthenticated let’s send more than 50 requests to check if we are get blocked or not:
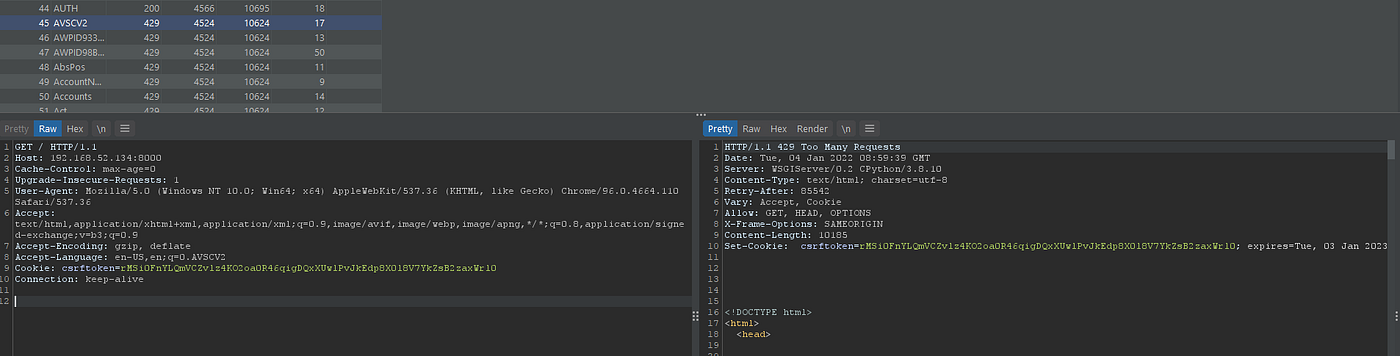
As expected we are blocked now and receiving 429 status code from server , now the main idea is how to bypass it , without any further investigating let’s first take a look at official document that talks about how clients are identified:
The
X-Forwarded-ForHTTP header andREMOTE_ADDRWSGI variable are used to uniquely identify client IP addresses for throttling. If theX-Forwarded-Forheader is present then it will be used, otherwise the value of theREMOTE_ADDRvariable from the WSGI environment will be used.
With this in mind , we are far ahead to test all of those http headers , so lets make a request again with X-Forwarded-For header :
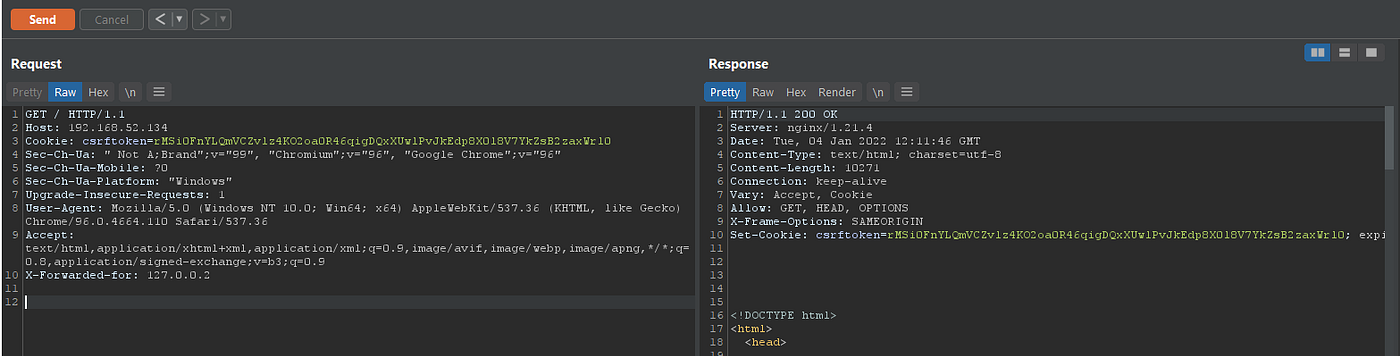
By doing this we got our access again ! But there is a little trick here that we should change the IP of forwarded header after each 50 requests, with this we have unlimited access to server , as I checked IPs like 127.0.0.111111 will work too.
Some reverse proxies like Nginx may add X-Forwarded-For header to tell the server the IP address of users:
Traditionally, an HTTP reverse proxy uses non-standard headers to inform the upstream server about the user’s IP address and other request properties:
X-Forwarded-For: 12.34.56.78, 23.45.67.89
X-Real-IP: 12.34.56.78
X-Forwarded-Host: example.com
X-Forwarded-Proto: https
If we add the X-Forwarded-For header ourselves , Our added IP address will be the first value and the Nginx’s one will be the second one, so we are not gonna facing any issue with that.
There is some different situation when you are authenticated let’s login to see:
As logged user we’ve been blocked due to overcome the Throttling policy , By testing above method and some others, the user will still remain blocked , So the behavior here is may that user and IP get blocked together.
如有侵权请联系:admin#unsafe.sh