2021-10-06 21:12:28 Author: www.rtl-sdr.com(查看原文) 阅读量:48 收藏
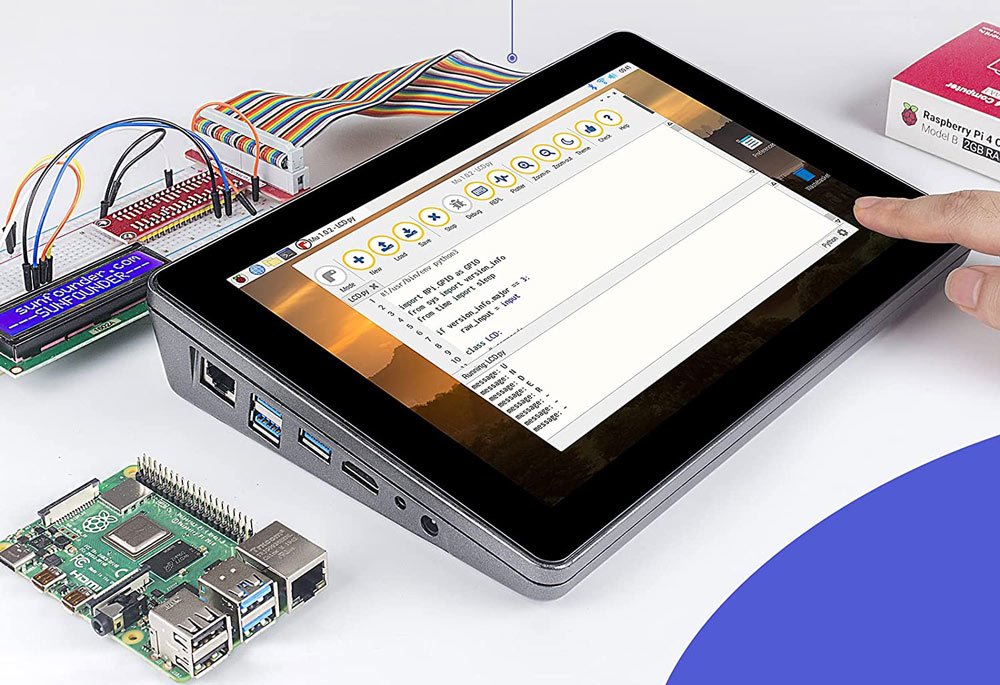
The Raspad 3.0 is a portable tablet enclosure for the Raspberry Pi 4B. It comes with a high resolution 1280 x 800 10.1 inch touch LCD screen, built in speakers, built in battery and a plastic enclosure that houses the LCD driver board and Raspberry Pi. Accessible on the side of the enclosure are the USB, HDMI, ethernet and audio ports which connect via the LCD driver board. They also include an accelerometer shim which allows the screen to autorotate.
The Raspad 3.0 is available on Amazon USA for $259, or directly via their website for $219 with free worldwide shipping.
A few months ago SunFounder, the company behind the RasPad 3.0 reached out to us and asked if we wanted to review the product with a free sample. Normally we don't review products unrelated to SDR like this, but given the amount of RTL-SDR software available for the Raspberry Pi, and what appeared to be sufficient internal space, we were curious if there was a way to turn this into a portable RTL-SDR tablet...
Unboxing
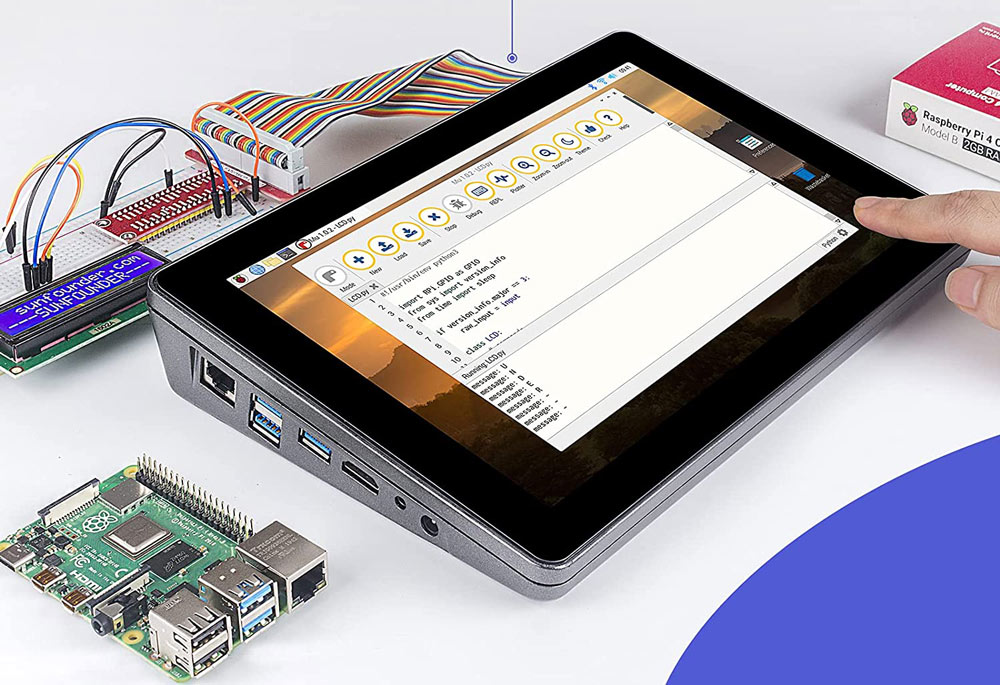
A few weeks ago the Raspad 3.0 arrived, well packed and with all the advertised components. Note that the Raspad 3.0 does not come with a Raspberry Pi 4B, this is something you will need to provide on your own.
Inside was a mains power cable, 15V DC power brick, two HDMI jumpers, a USB jumper, accelerometer shim, SD card ribbon, small 5V fan, heatsinks for the Pi, screwdriver and mounting screws, a manual and the RasPad LCD screen itself.
Assembly
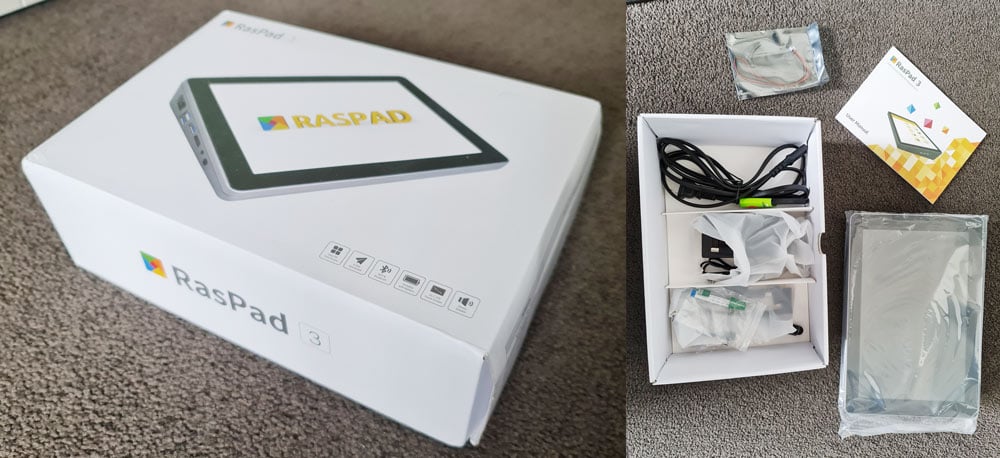
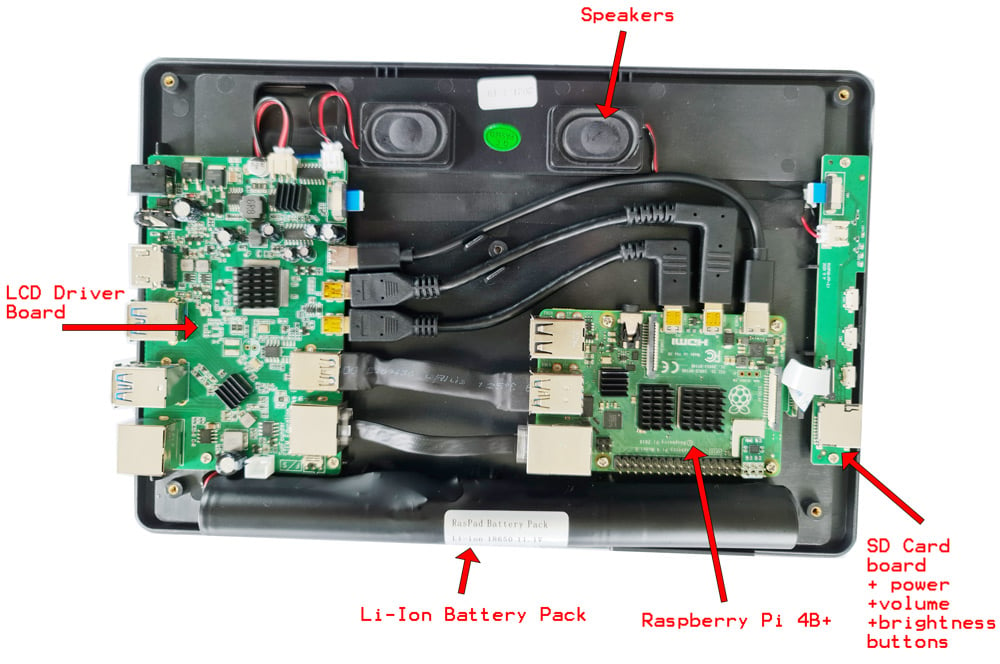
Assembly is straight forward. You unscrew the enclosure using the provided screw driver, insert the Pi 4B, screw it down, connect all the cables from the Pi to the LCD driver board and SD card slot, then reassemble. After inserting the Raspberry Pi 4B and attaching all the cables this is what the inside looks like.
Now we could have reassembled the enclosure here, but we wanted this to be a portable RTL-SDR tablet, with the RTL-SDR and an SMA antenna port built in.
It turns out that the best way to fit in an RTL-SDR Blog V3 is to directly connect it the spare USB port on the Pi. You might also consider using a micro style RTL-SDR which would fit more easily, but those do tend to get quite hot in a small package, and can be quite bad with internal noise. Also good shielding is probably quite critical in this application due to the dongles proximity with the LCD driver board which could be an RFI source.
The SMA side of the RTL-SDR Blog V3 rests nicely on top of the USB port of the LCD driver board providing some stability, and when the bottom lid is assembled there is plenty of clearance and no squashing.
Next we drilled a hole on the rear wall of the bottom half of the enclosure for the SMA female port, and tightened the SMA connector down with a nut. In the future we'll be upgrading this to a long barrel style SMA female connector, as a regular SMA female connector is a bit short. Then a short well shielded SS405 coax cable was used to connect to the RTL-SDR dongle.

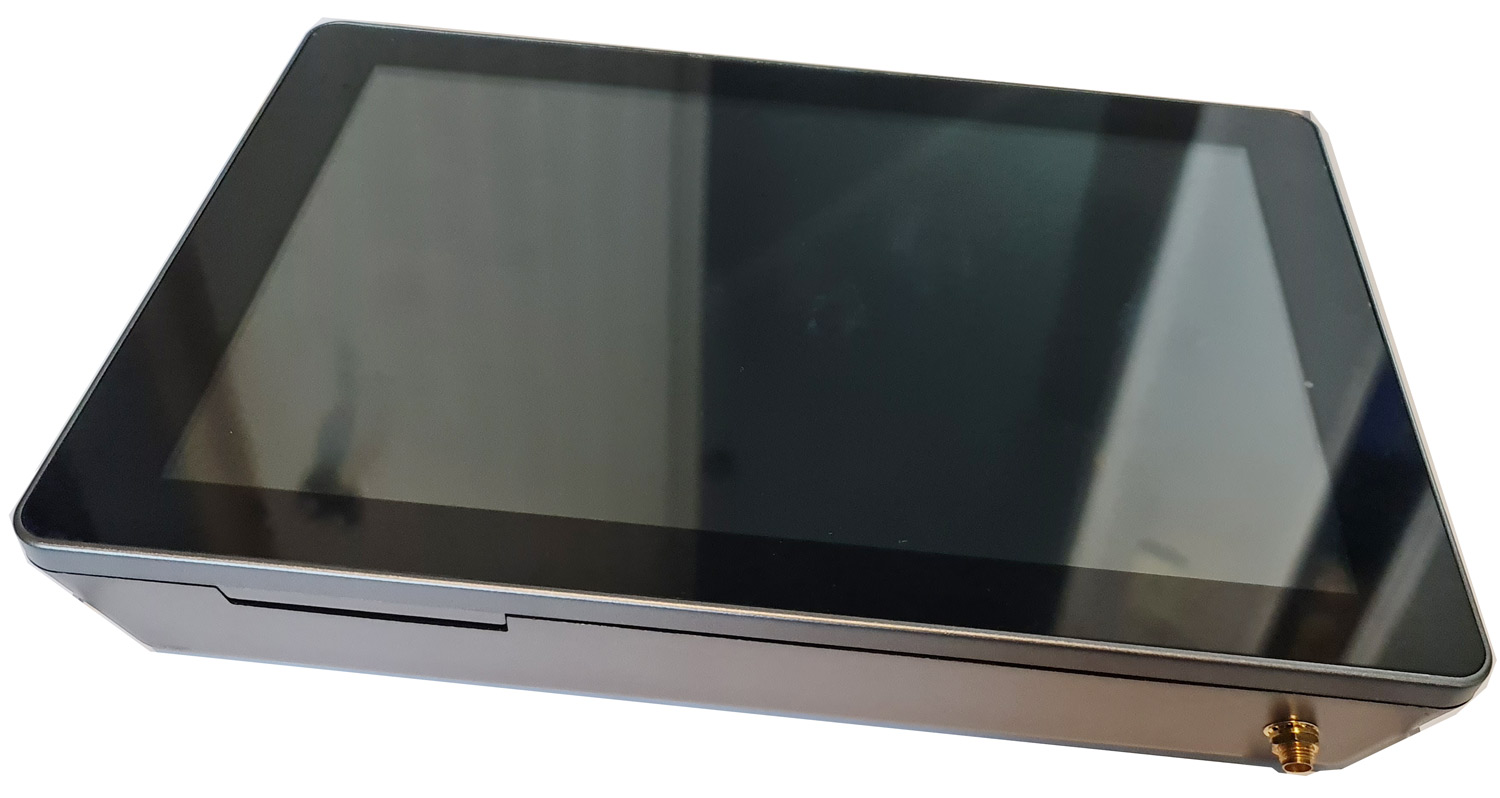
ProTip: Do take care to remember to remove the SD card when disassembling the RasPad! If you don't you'll end up with the SDcard slot getting ripped from it's ground traces. This happened to us, but we were able to easily solder it back on. There is a sticker on the backside of the enclosure warning about this.
Software & Testing
SunFounder provide a custom Raspbian distribution designed specially for the RasPad. However, we decided to instead install the DragonOS Pi64 Distro which is an Ubuntu distribution for the Raspberry Pi 4B that has many built in SDR programs. We burnt the image to a SD card, inserted it on the side, plugged the Raspad in to the power connector, and held the power button down for a few seconds to turn it on. Despite a few initial error messages saying it cannot enable the USB ports, everything eventually booted just fine.
We then plugged in a cable going to one of our multipurpose dipole antennas mounted just outside the office window, and tested both SDR++ and GQRX. In both cases we were immediately able to connect to the RTL-SDR and receive signals with signal strength equivalent to that received by our desktop PC, indicating that LCD interference was not a problem.
The resolution of the screen is high enough and images and text are clear. The screen is also decently bright, and brightness can be adjusted using the buttons on the side.

DragonOS Tablet Compatibility Issues & Fixes
As DragonOS is not designed for a tablet setup, there were a few bugs. It should be noted however that these issues are not a reflection on the Raspad hardware, as obviously the official Raspad OS will not have these issues as it's designed specifically for tablet use.
We initially had no sound from the built in speakers. After some troubleshooting we managed to get sound by adding the line "dtparam=audio=on" to the /boot/firmware/usercfg.txt file. The speakers won't win awards for sound quality, so if it matters to you then you might want to use headphones, but they are decent enough for basic use. If you are experiencing distortion, turn down the volume on the software, and increase it using the volume button on the side of the Raspad.
In DragonOS the touch screen works fine, although it is difficult to click on small buttons. There is no onscreen keyboard available by default. We couldn't find a way to enable a tablet mode in DragonOS, so instead opted to install an onscreen keyboard called 'onboard' via 'sudo apt install onboard'. The accelerometer is also not enabled in DragonOS. We did not attempt to fix this as we have no need for screen rotation.
Interference
LCD screens are well known to be sources of RF interference, and putting an SDR in close proximity to one could result in the spectrum being very noisy. However, without an antenna connected we did not notice any interference across the spectrum from the LCD screen. It appears that the LCD RFI noise levels are not too bad, and the shielding on the RTL-SDR Blog V3 and the coax jumper cable is good enough to prevent any being received. When an antenna with a few meters of coax was connected (such as a magwhip or our portable dipole) we also didn't notice any LCD interference.
However, when a SMA telescopic antenna was connected directly to the SMA port we did start noticing the telltale spikes across the spectrum that are typically generated from LCD screens. If the magwhip or dipole was also moved within 2-3cm of the LCD screen, we also saw these interference spikes appear.
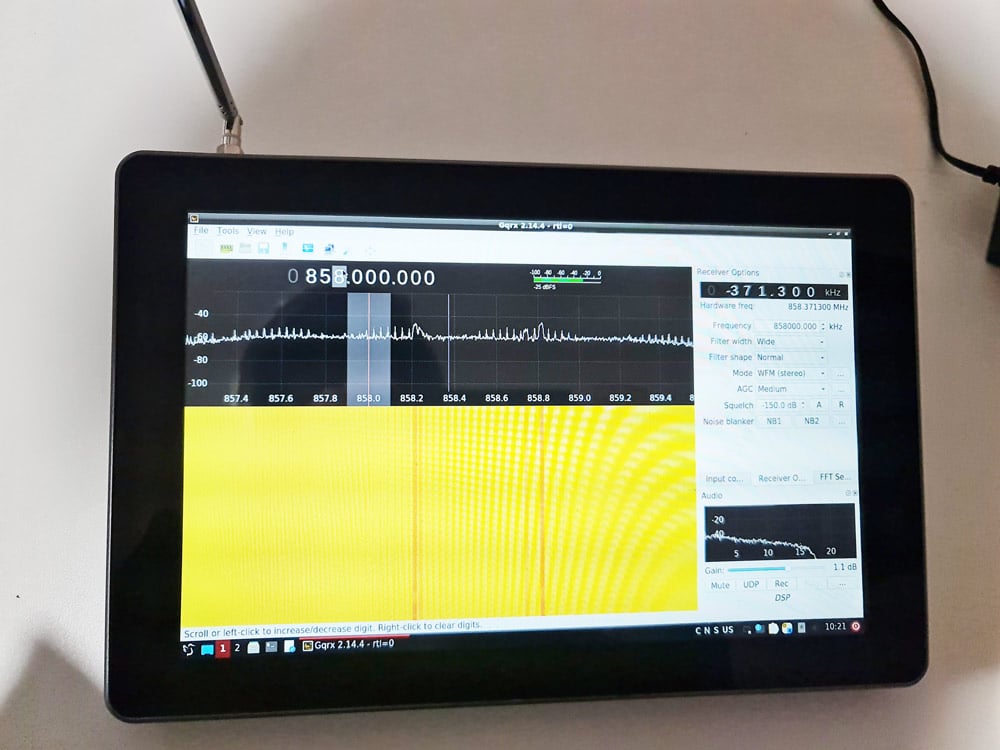
So it would be recommended to use a magwhip or dipole that has a coax run that can sit a few centimeters away from the screen. This limits the handheld ability of the RasPad a little, but you'd probably want a magwhip, dipole or other antenna over a directly connected telescopic whip for better reception anyway.
Battery Life
We tested a worst case scenario, with the RasPad running the RTL-SDR and SDR++ continuously at the brightest screen setting. With this test the battery lasted 2 hours and 10 minutes from a full charge. Presumably if the screen was dimmed and turned off for some periods of time, it would easily last 3-4 hours.
Portability
The total weight of the Raspad including our mods is just under 1 kg (2.2 lbs). About double the weight of a modern tablet, but still light enough to be easily carried.
Other Notes
The small 5V fan provided in the kit is unfortunately a bit noisy, and it's cooling ability is seems limited. We've seen these small fans on other Raspberry Pi cooling accessories and found that they are next to useless at cooling. It would be good to see a slightly larger and quieter fan, or perhaps a better passive cooling heatsink.
The power brick output is 15V, 2A. Ideally we would be able to charge the RasPad via a car/boat 12V connection as well. We're awaiting a response to see if this is possible.
Conclusion
The RasPad 3.0 in our opinion overall a good product. It allows you to easily go portable with your Raspberry Pi 4. While it was designed for other projects, there was just enough hackability left in it for us to fit a RTL-SDR Blog V3 and antenna port into the enclosure, yielding us a clean and portable SDR solution.
With at least 2 hours of battery life when running an RTL-SDR and software, we can easily see this being taken out in the field for spectrum analysis, decoding with rtl_433, or for portable listening to the airband, trunking etc. However, some customization of DragonOS or the RaspadOS is going to be needed to get the most out of the touchscreen.
There are also alternative LCD screen products designed for the Raspberry Pi where you sit the Raspberry Pi on the back of the screen. But it's unclear if there would be enough space inside to fit an RTL-SDR, and not to mention the lack of a battery. We also previously reviewed the Elecrow CrowPi which is somewhat similar, but a lot more clunky if you're just after a pick up and go portable SDR tablet solution. There are also higher end higher priced laptop style enclosure products for the Pi, like the Pi-Top but we're unsure if they're likely to fit the RTL-SDR internally this easily.
Disclaimer: We do not receive any compensation for this review apart from a free Raspad 3.0.
We also recently came across this review from German YouTuber Manuel Lausmann who installed and ran SDR++ on the Raspad with an SDRplay RSP SDR.
SDR ++ mit dem RASPAD 3 -Raspberry PI 4-
如有侵权请联系:admin#unsafe.sh