2021-07-12 02:36:06 Author: infosecwriteups.com(查看原文) 阅读量:79 收藏
Steps:
- Run DVWA to on http://localhost/login.php
- Select the login request in which username and password parameters are passing.

2. Switch to the Project Options tab in Burp Suite and Click on Sessions, then click on Add for adding session handling rules.
3. In the Session handling rule editor , fill in the Rule Description : auto-login.
In the Rule Actions , click on Add then Run a macro .

4. In the Macro Recorder , we need to select two requests. The first one is the login.php with 200 OK (request 385 in the Burp history) and login.php with 302 Found (request 382 in the Burp history).
First selected request is when user logs out of DVWA and login form is present in the response along with CSRF value.
The second select request is used to login the user, it contains user credentials along with CSRF token in the request.
First login request sends the value to second response along with the CSRF token in the user_value.

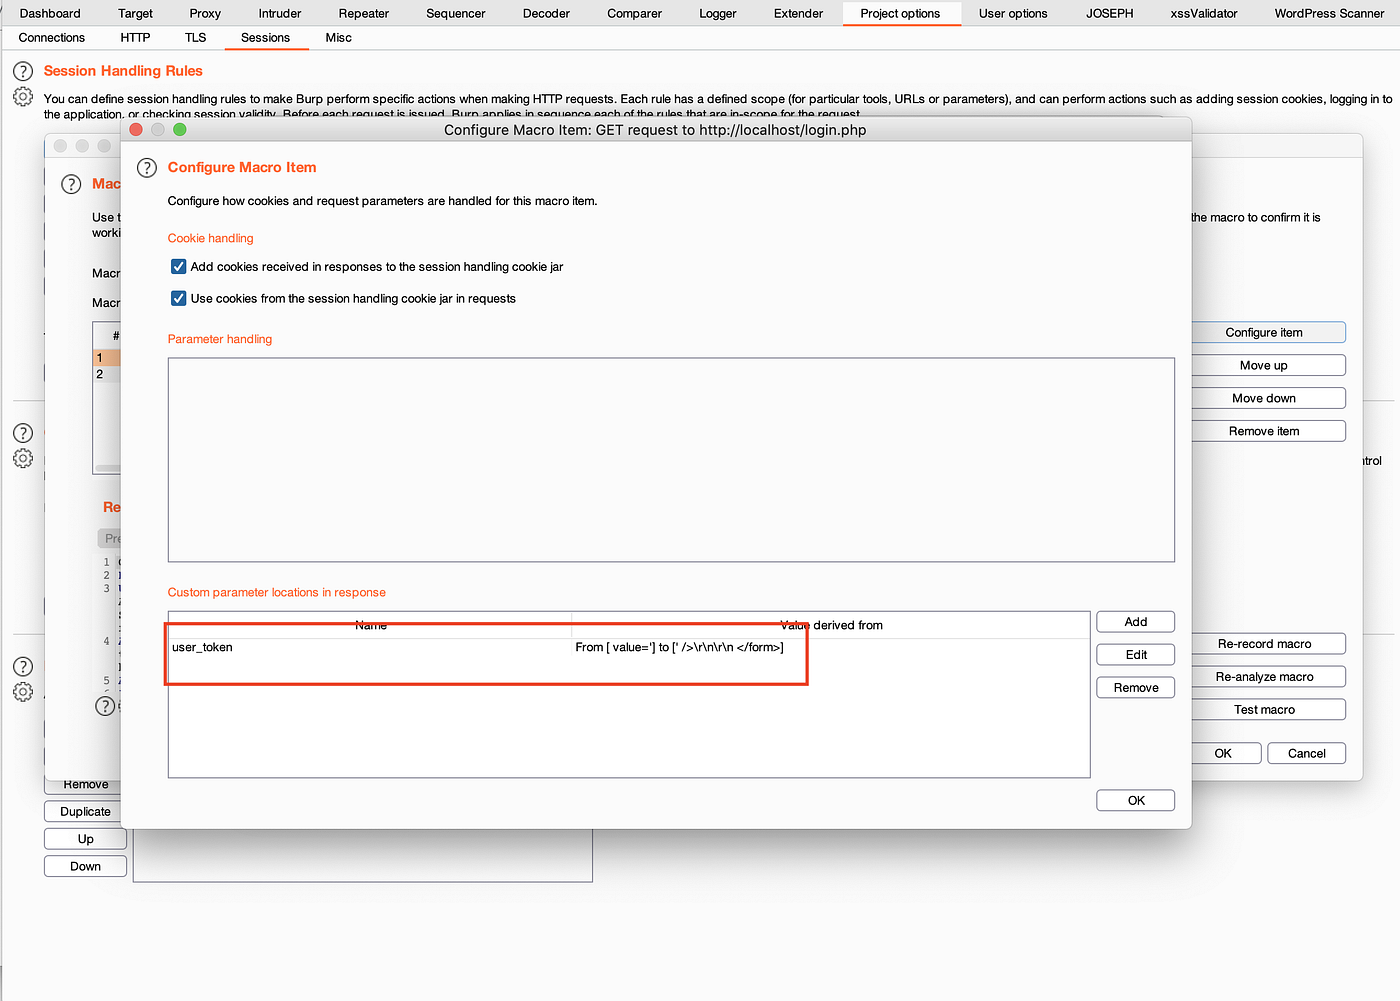
5. Click ok and then in the configure item .

6. In the Define Custom Parameter , select the login.php with 302 Found response and select the value from the response body.
value='97acfb61671983c229de45434931fcea'

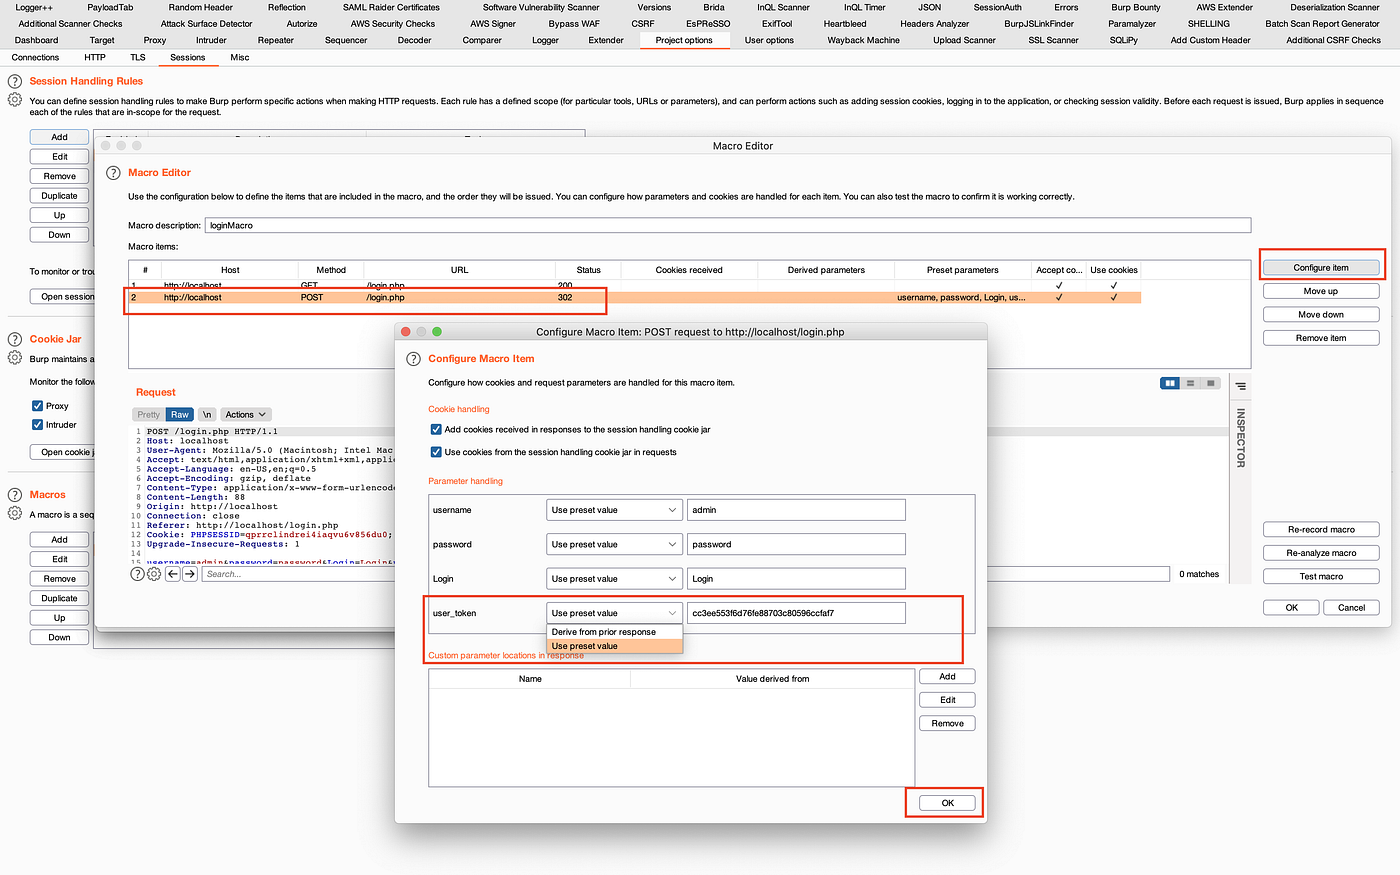
7. Then click ok and select the 200 OK requests in the Macro Editor
8. Then select the 2 requests with status 302 Found. And click on Configure item , and in the parameter handling select user_token , then select Derive from prior response . Click OK.
This is where the fetched token value is linked to the value in the second
Macro.
9. Then select Response 1 for linking the CSRF value and click OK.

10. Then change the Macro Description and review the selected requests again. Finally, click OK.

11. Then in the Session handling action editor and select both the values present below for Update current request.

12. The in the Session handling rule editor , Select scope in Tools Scope and URL Scope accordingly.

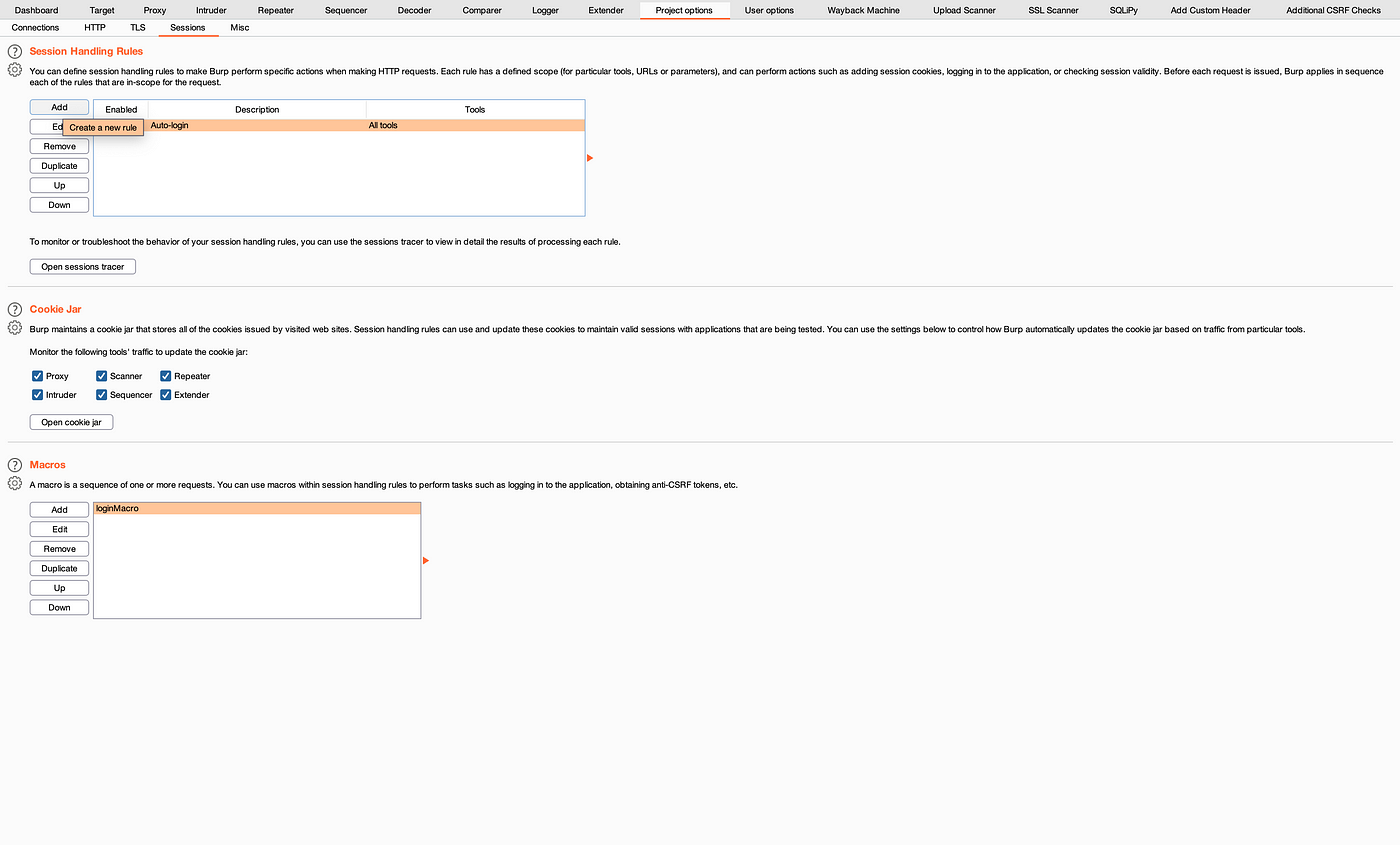
13. Now we have to create a session validation rule which will be triggered when the session is invalid.
Again Create a new rule by clicking on Add .
14. Then Session handling action editor opens up, Click on Add and in Rule Actions select Check session is valid .

15. In the Location(s) select URL of redirection target . For Look for expression: entering login.php
This login.php is based on the Location header when user tries to visit authenticated URL
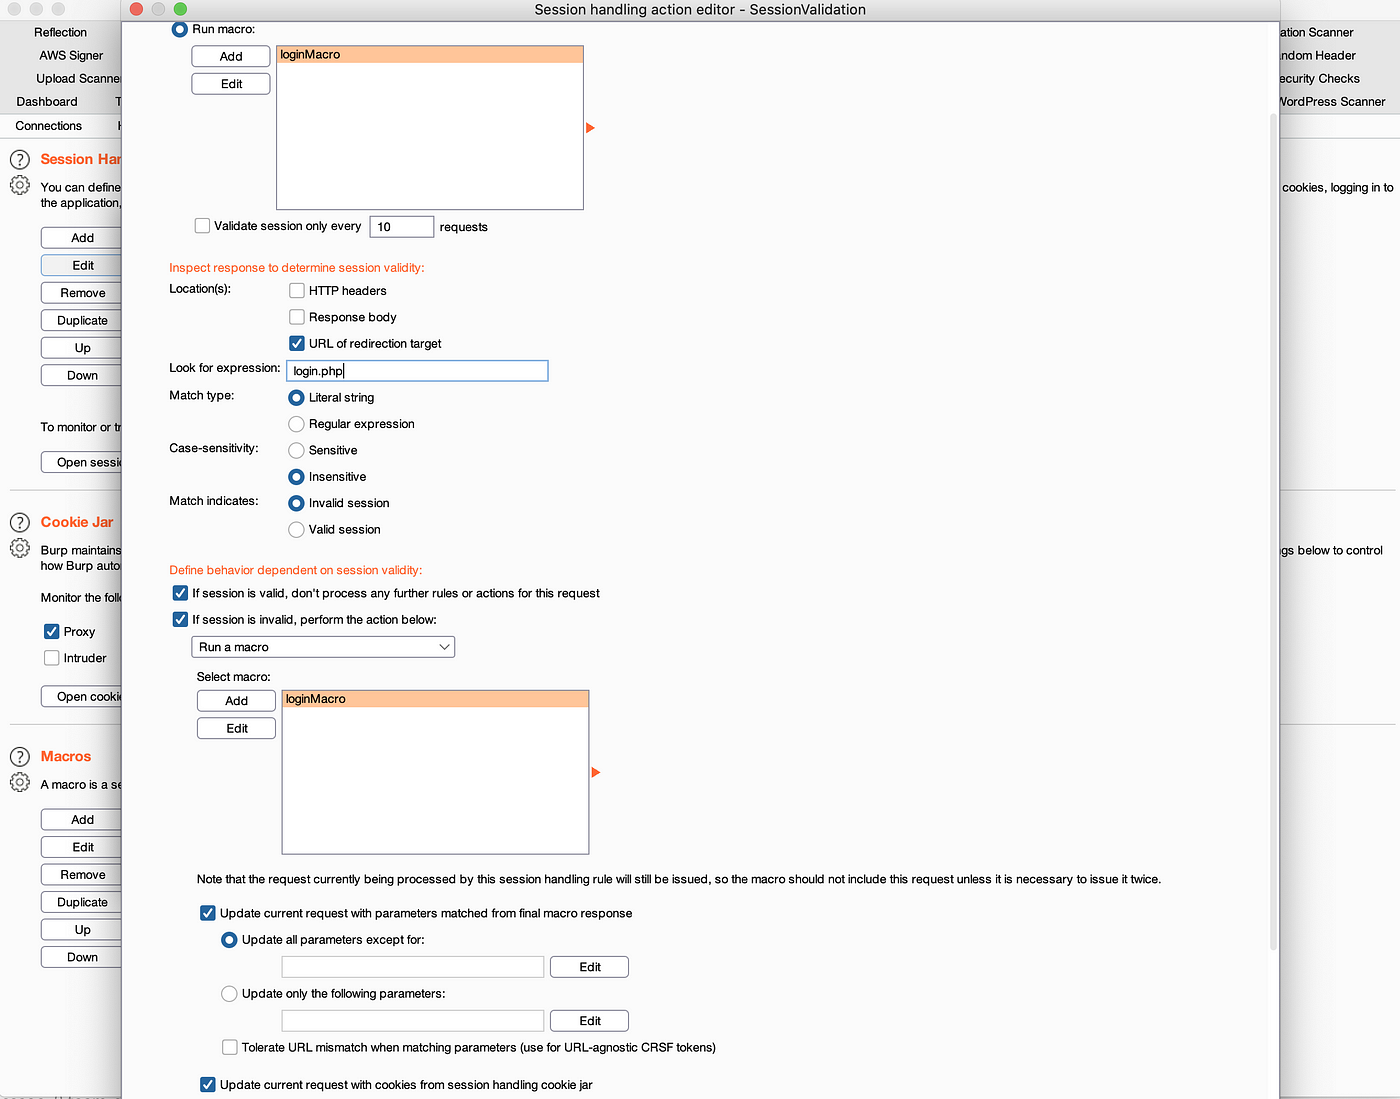
15. This first check session is valid is validating the authenticated URLs user tries to visit and if the user is not logged in, then it checks and authenticates the user.
Now we need to create another
check session is validto make sure user gets logged in when user tries to visit login.php. In the case of localhost/login.php the page sends login form with user name and password in the body. This primarily happens when user logs out of the session.

16. Lets edit Session handling rule editor and in the Rule Actions select check session is valid .

17. In the Session handling action editor , select Run macro then for the Location(s) select the Response body . And in the Look for expression: fill the username (Because response body contains username and password form with user_token value).

18. Let’s review the macro.
a) First macro is for auto login and it takes CSRF value from the another macro.
b) Second macro checks for all the authenticated pages in which session is invalidated.
c) Third macro check if the response body contains username then it authenticates user by calling the auto-login macro.

18. In the Session handling rule editor switch to Scope tab and then select Scope and URL Scope accordingly.

19. Let’s validate our login request in the repeated. Disable the Session Handling Rules .

20. Now on visiting the authenticated URL (http://localhost/vulnerabilities/sqli/), the response is 302 Found .

21. Now enable both the session handling rule and check the request in repeater.

22. Send the request and check the response . On rendering the page we can see user is logged in automatically.

This completes the third part of Burp Suite automation. There is another part where it was possible to add a custom header from the response body having user_token directly to the request header. The only difference in the 1st and 3rd tutorial is about session validation for invalid sessions.

如有侵权请联系:admin#unsafe.sh