
2021-06-18 22:27:08 Author: infosecwriteups.com(查看原文) 阅读量:103 收藏
![]()
This is an unofficial Nessus blog which deals with advance scans for better results and compliance. There will be section for authentication in the Nessus as well.

Here, we will create a more in-depth scan, where we will try to perform an advance Nessus Scan. This will provide us with better results and scan efficiency. We will also set up authentication using the HTTP form plugin.
These settings always can be tweaked according to own need, there is no correct way of setting up the advance scan. So there might be settings that are required by a certain application and others might not be suitable in our case.
We will use internal IP i.e. http://192.168.1.125/ to perform the scan
Prerequisites:
- Nessus is installed and the currently running version used here is 8.14.0.
2. Demo domain up and running.
3. Basic idea about Nessus and scanning
Setup:
- Start the Nessus service on ubuntu via
service nessusd start.

2. Then check the status of Nessus daemon via service nessusd status .
3. The Nessus portal can be accessed on https://localhost:8834 or via the private IP of the host. Here we are accessing it via the system’s internal IP.
You can check it via ifconfig .
It can be configured and for now, we have default credentials of admin/admin.

4. Log in to the Nessus portal, then it lands up on https://192.168.56.108:8834/#/scans/folders/my-scans

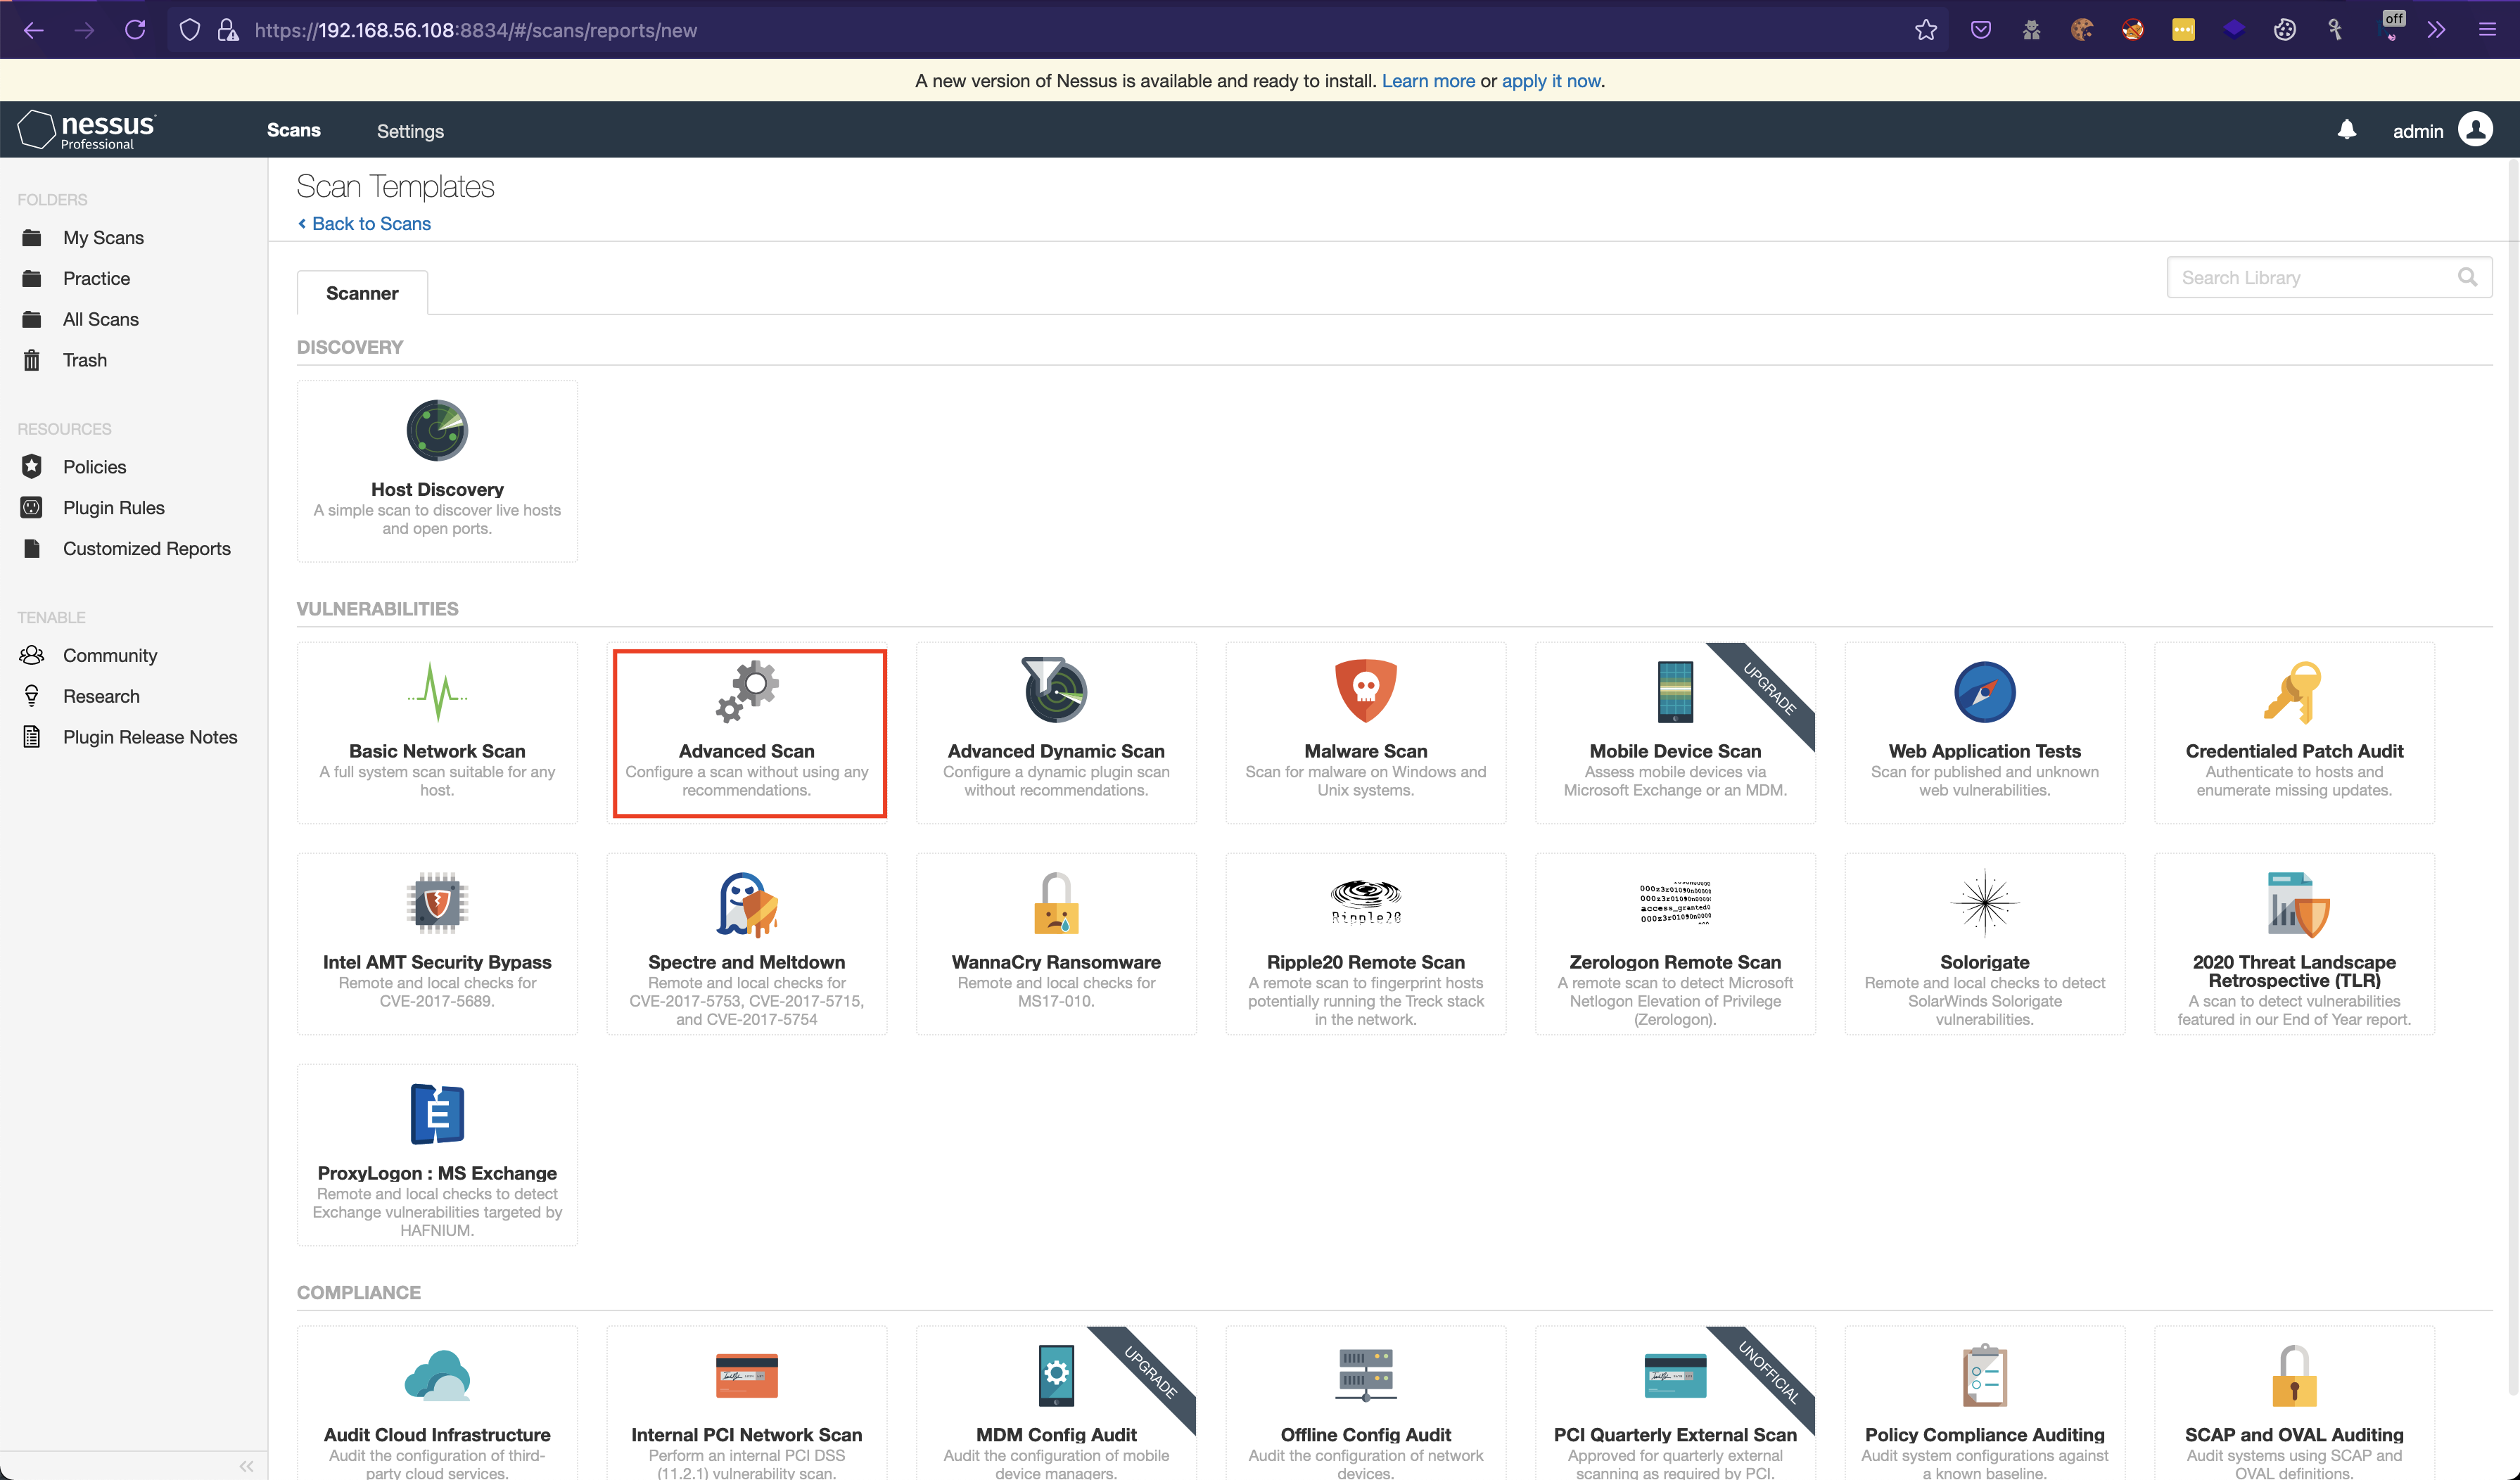
5. Click on create a New Scan and select Advanced Scan .
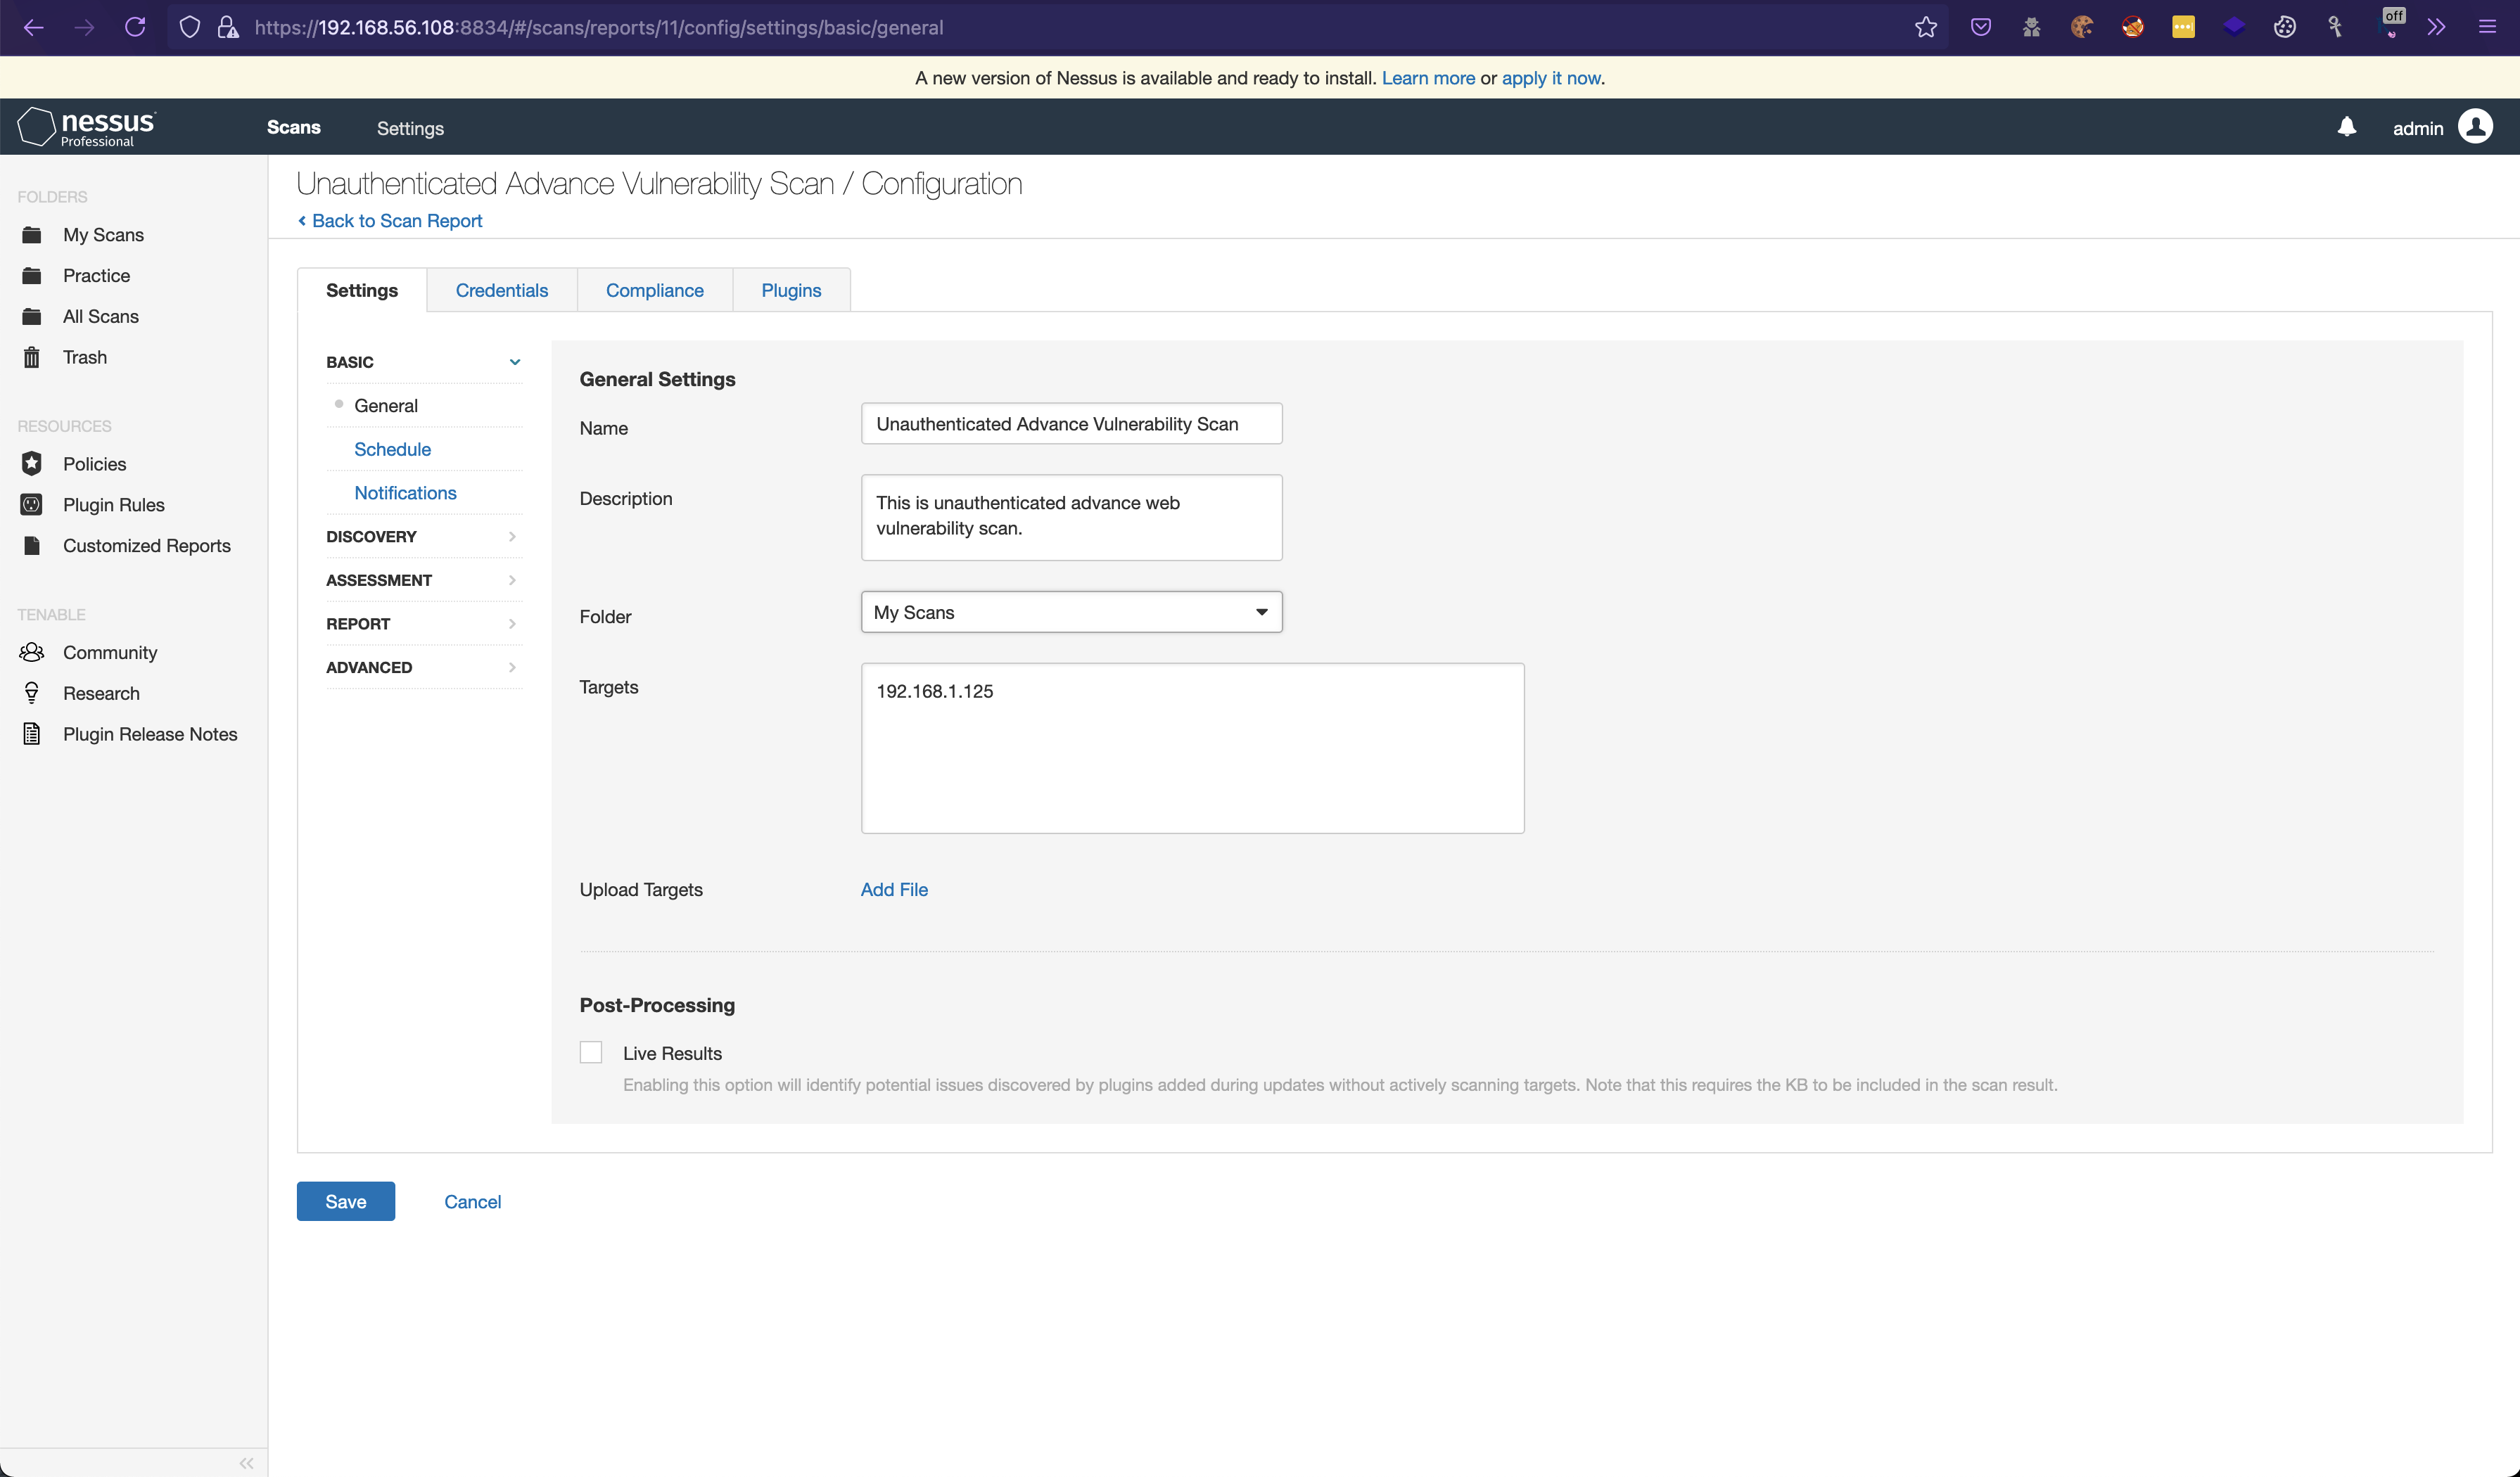
6. Fill the details in the Generalas needed. In the Targets , enter the 192.168.1.125 . Also In the case of multiple addresses, we can use comma (,). Example 192.168.1.126,192.168.2.126 . Also, for range, we can use 192.10.0.1/24 .
7. Then select Schedule and enable the switch to ON . Then select the start time and the time zone.

8. Then switch to Notifications , if SMTP is configured we can send direct mail with the report attached every time the scan is complete. Leave it to default for now.

9. Then click on Discovery and switch to Host Discovery and enable Remote Host Ping . In the General Settings , select the values as provided in the image.
For Ping Methods > TCP , change Destination Ports to 1–65535.
If the scan is for the whole network range, check the Scan Network Printers and Scan Operational Technology Devices .

10. Switch to
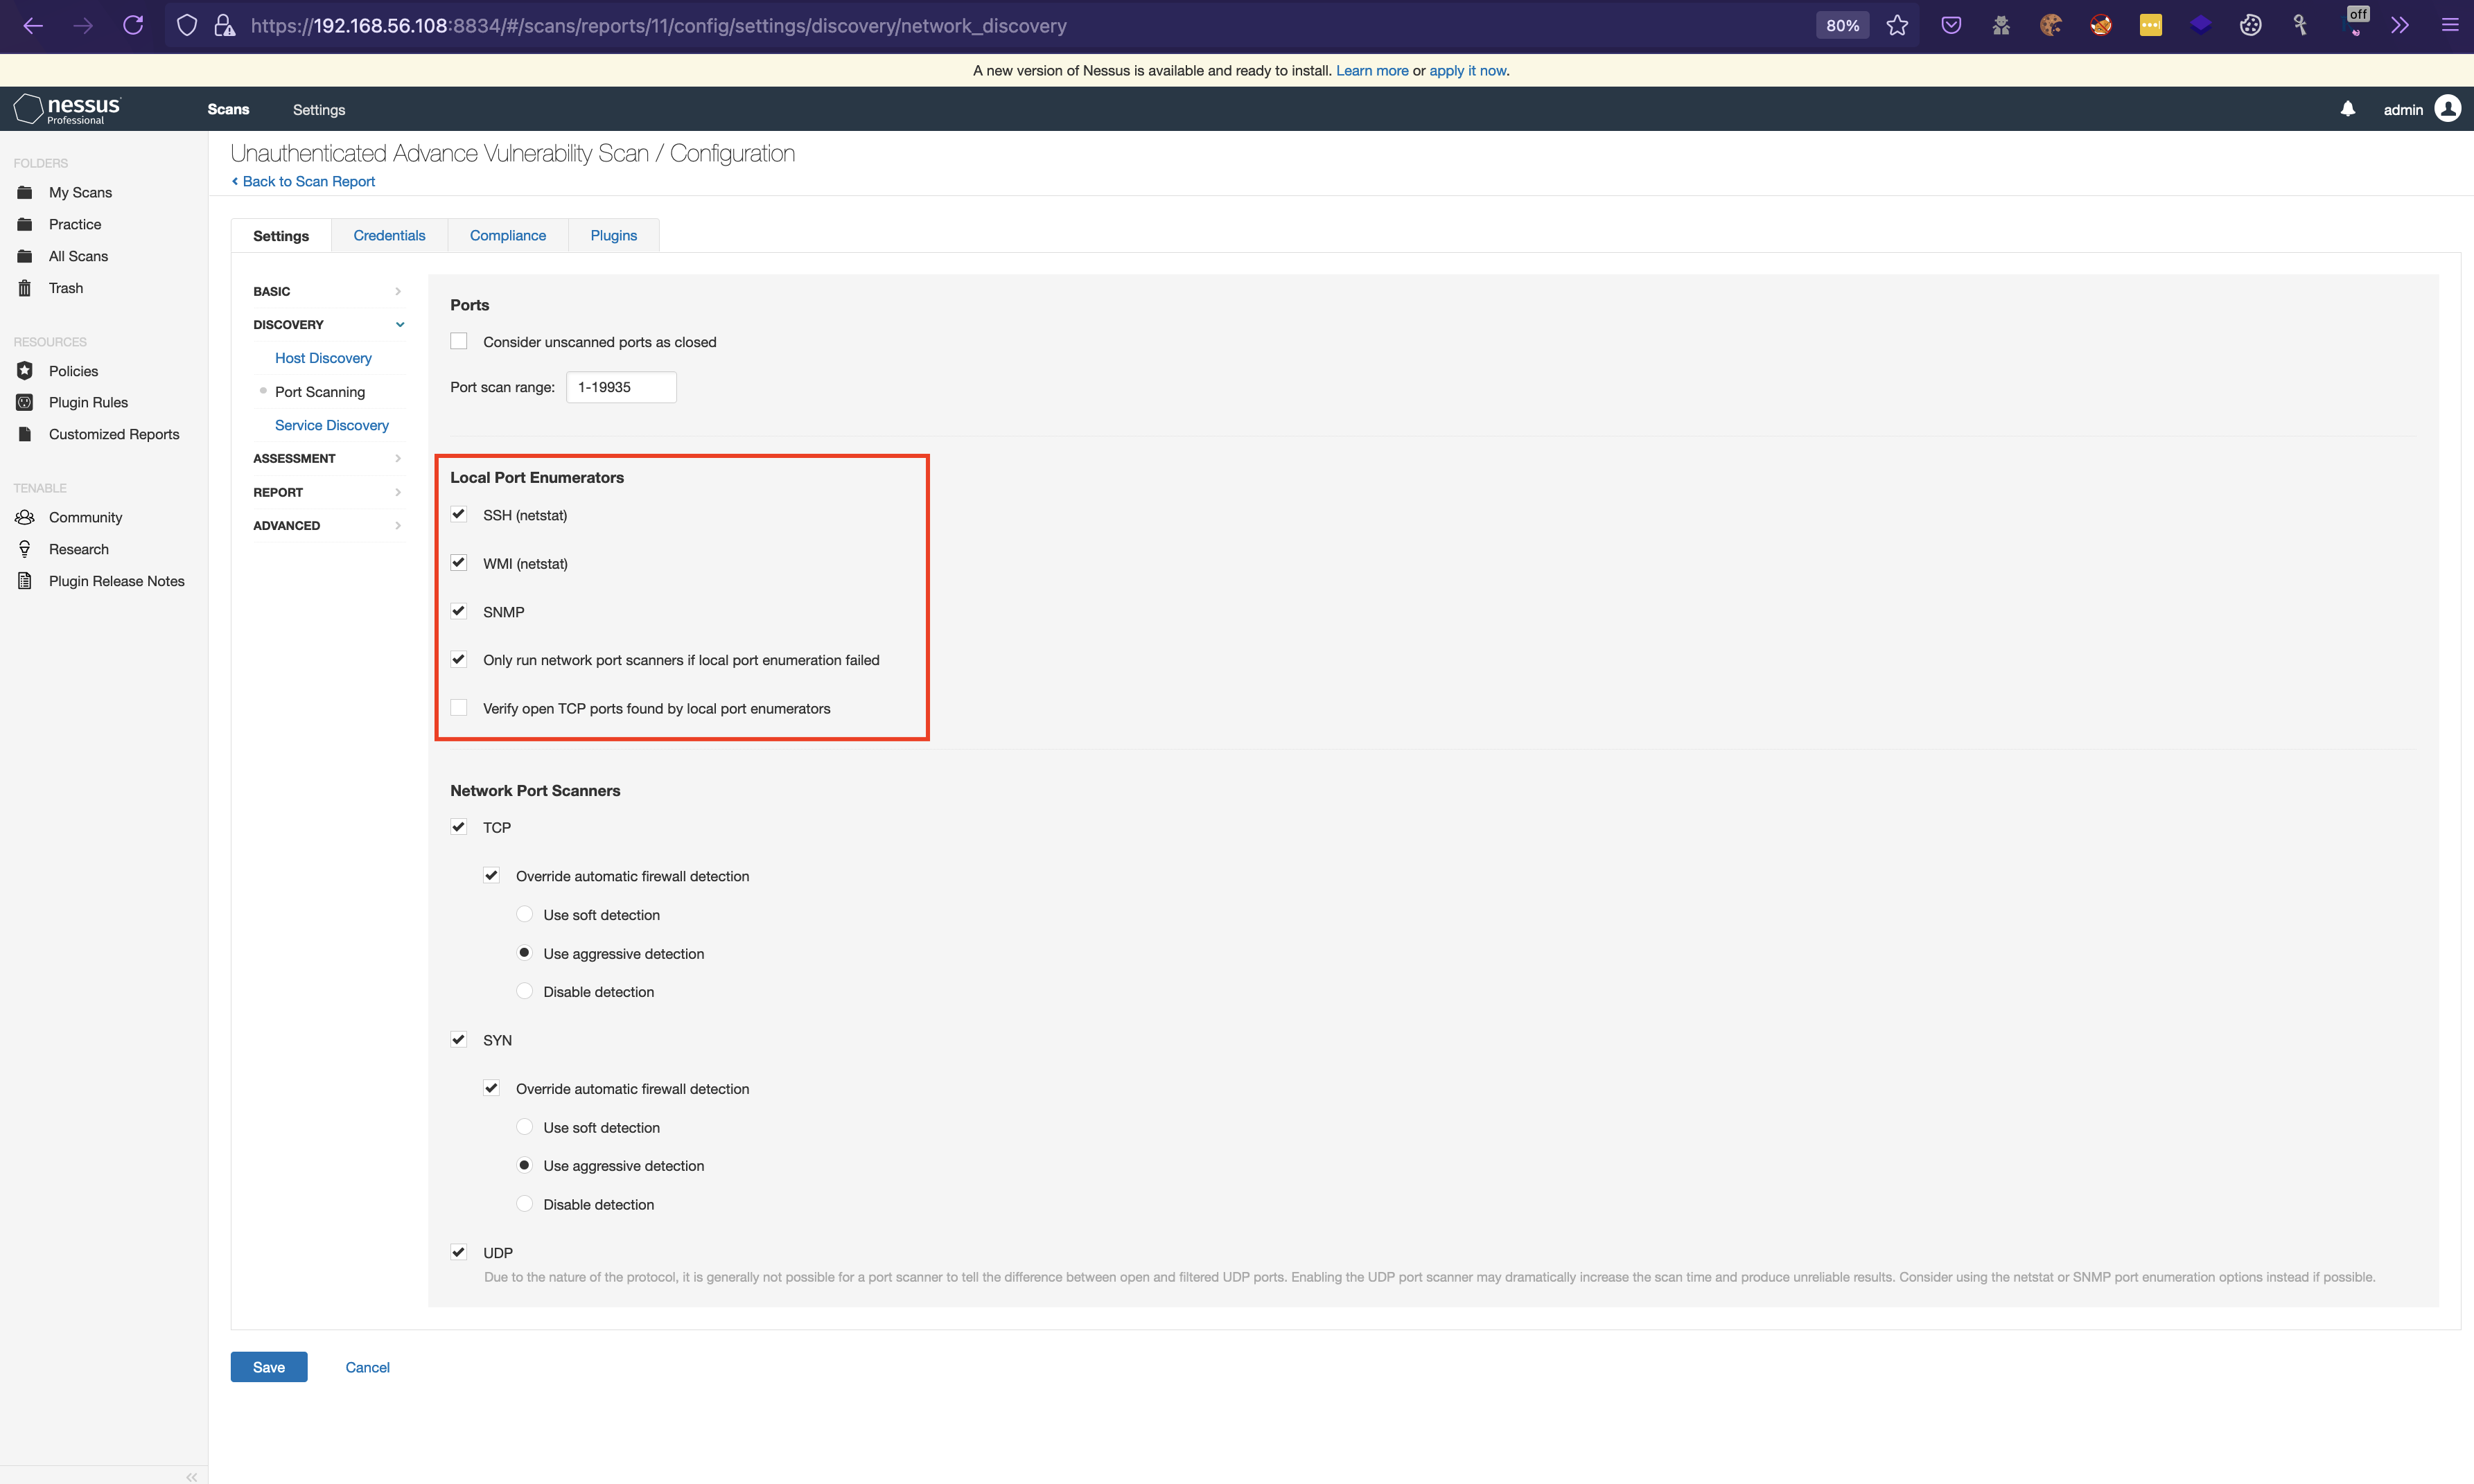
Uncheck the Consider unscanned port as closed .
Consider Unscanned Ports as Closed - Disabled
When enabled, if a port is not scanned with a selected port scanner (for example, the port falls outside of the specified range), the scanner considers it closed.
Also keepLocal Port Enumeratorsas default because it works if Nessus can runsystem commandsvia ssh(When enabled, the scanner uses netstat to check for open ports from the local machine. It relies on the netstat command being available via an SSH connection to the target. This scan is intended for Linux-based systems and requires authentication credentials.) or WMI or SNMP if configured in theCredentials.
Then for the Network Port Scanners , select the TCP , SYN , UDP and then select override automatic firewall detection > use aggressive detection.
11. Then switch to Service Discovery , in the General Settings select Probe all ports to find the service and enable Search for SSL/TLS/DTLS services and select the values as in the snapshot below. Also select Enumerate all SSL/TLS ciphers and Enable CRL Checking (certificate revocation checking).

12. Then switch to ASSESSMENT then in General for Accuracy select Override normal accuracy and select show pontential false alarms and also select Perform thorough tests . Leave the rest as default.

13. Then switch to Brute Force, in the Genetal Settings and uncheck the Only use credentials provided by the user . Then select the values according to the type and scan. If there are other credentials provided during the scan then fill in the details or leave it default.
Enabling
Hydawill slow down the scan.

14. Then switch to Web Applications and enable Scan web applications . Then update the Maximum depth to crawl : 30 (For maximum crawling, change it according to need).
Select Follow dynamically generated pages . Then the Application Test Settings fill in the details as mentioned in the snapshot below.
Go through each the checks and select according to need or else use mentioned values.
Please be careful while making changes as this can slow down the scan.

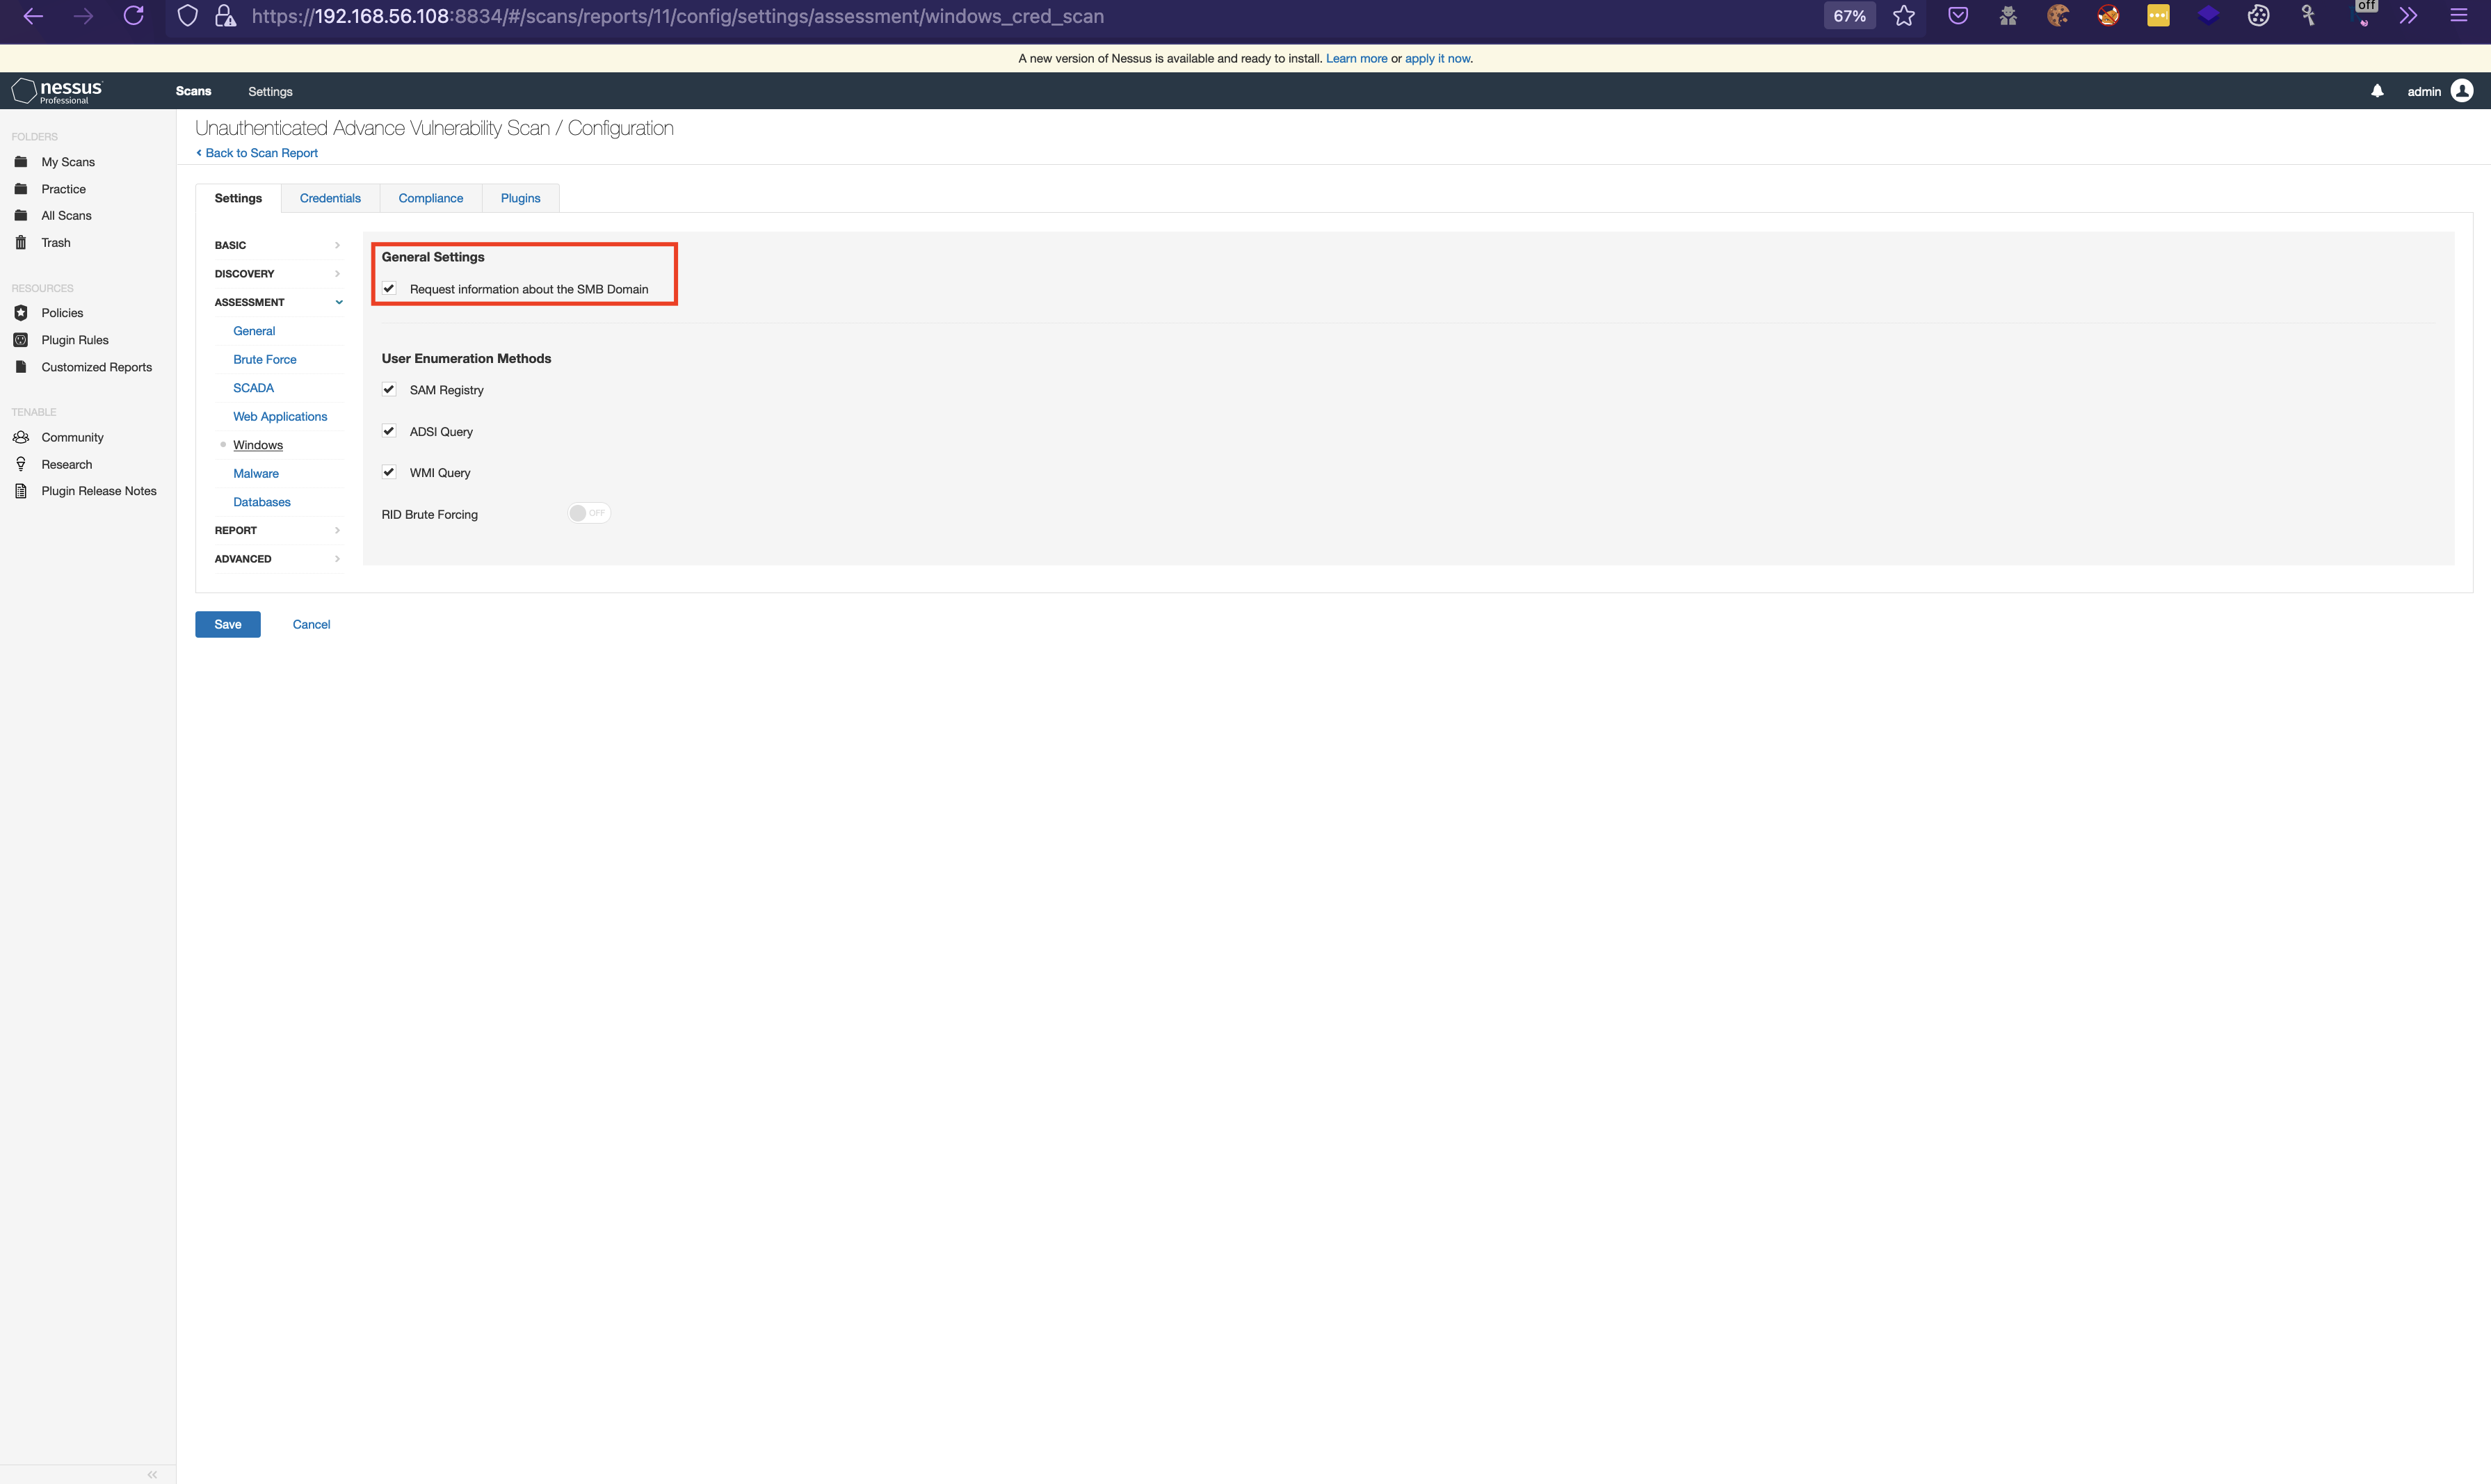
15. Then switch to Windows and enable General Settings .
This can be used in case of windows OS else mark is disabled.
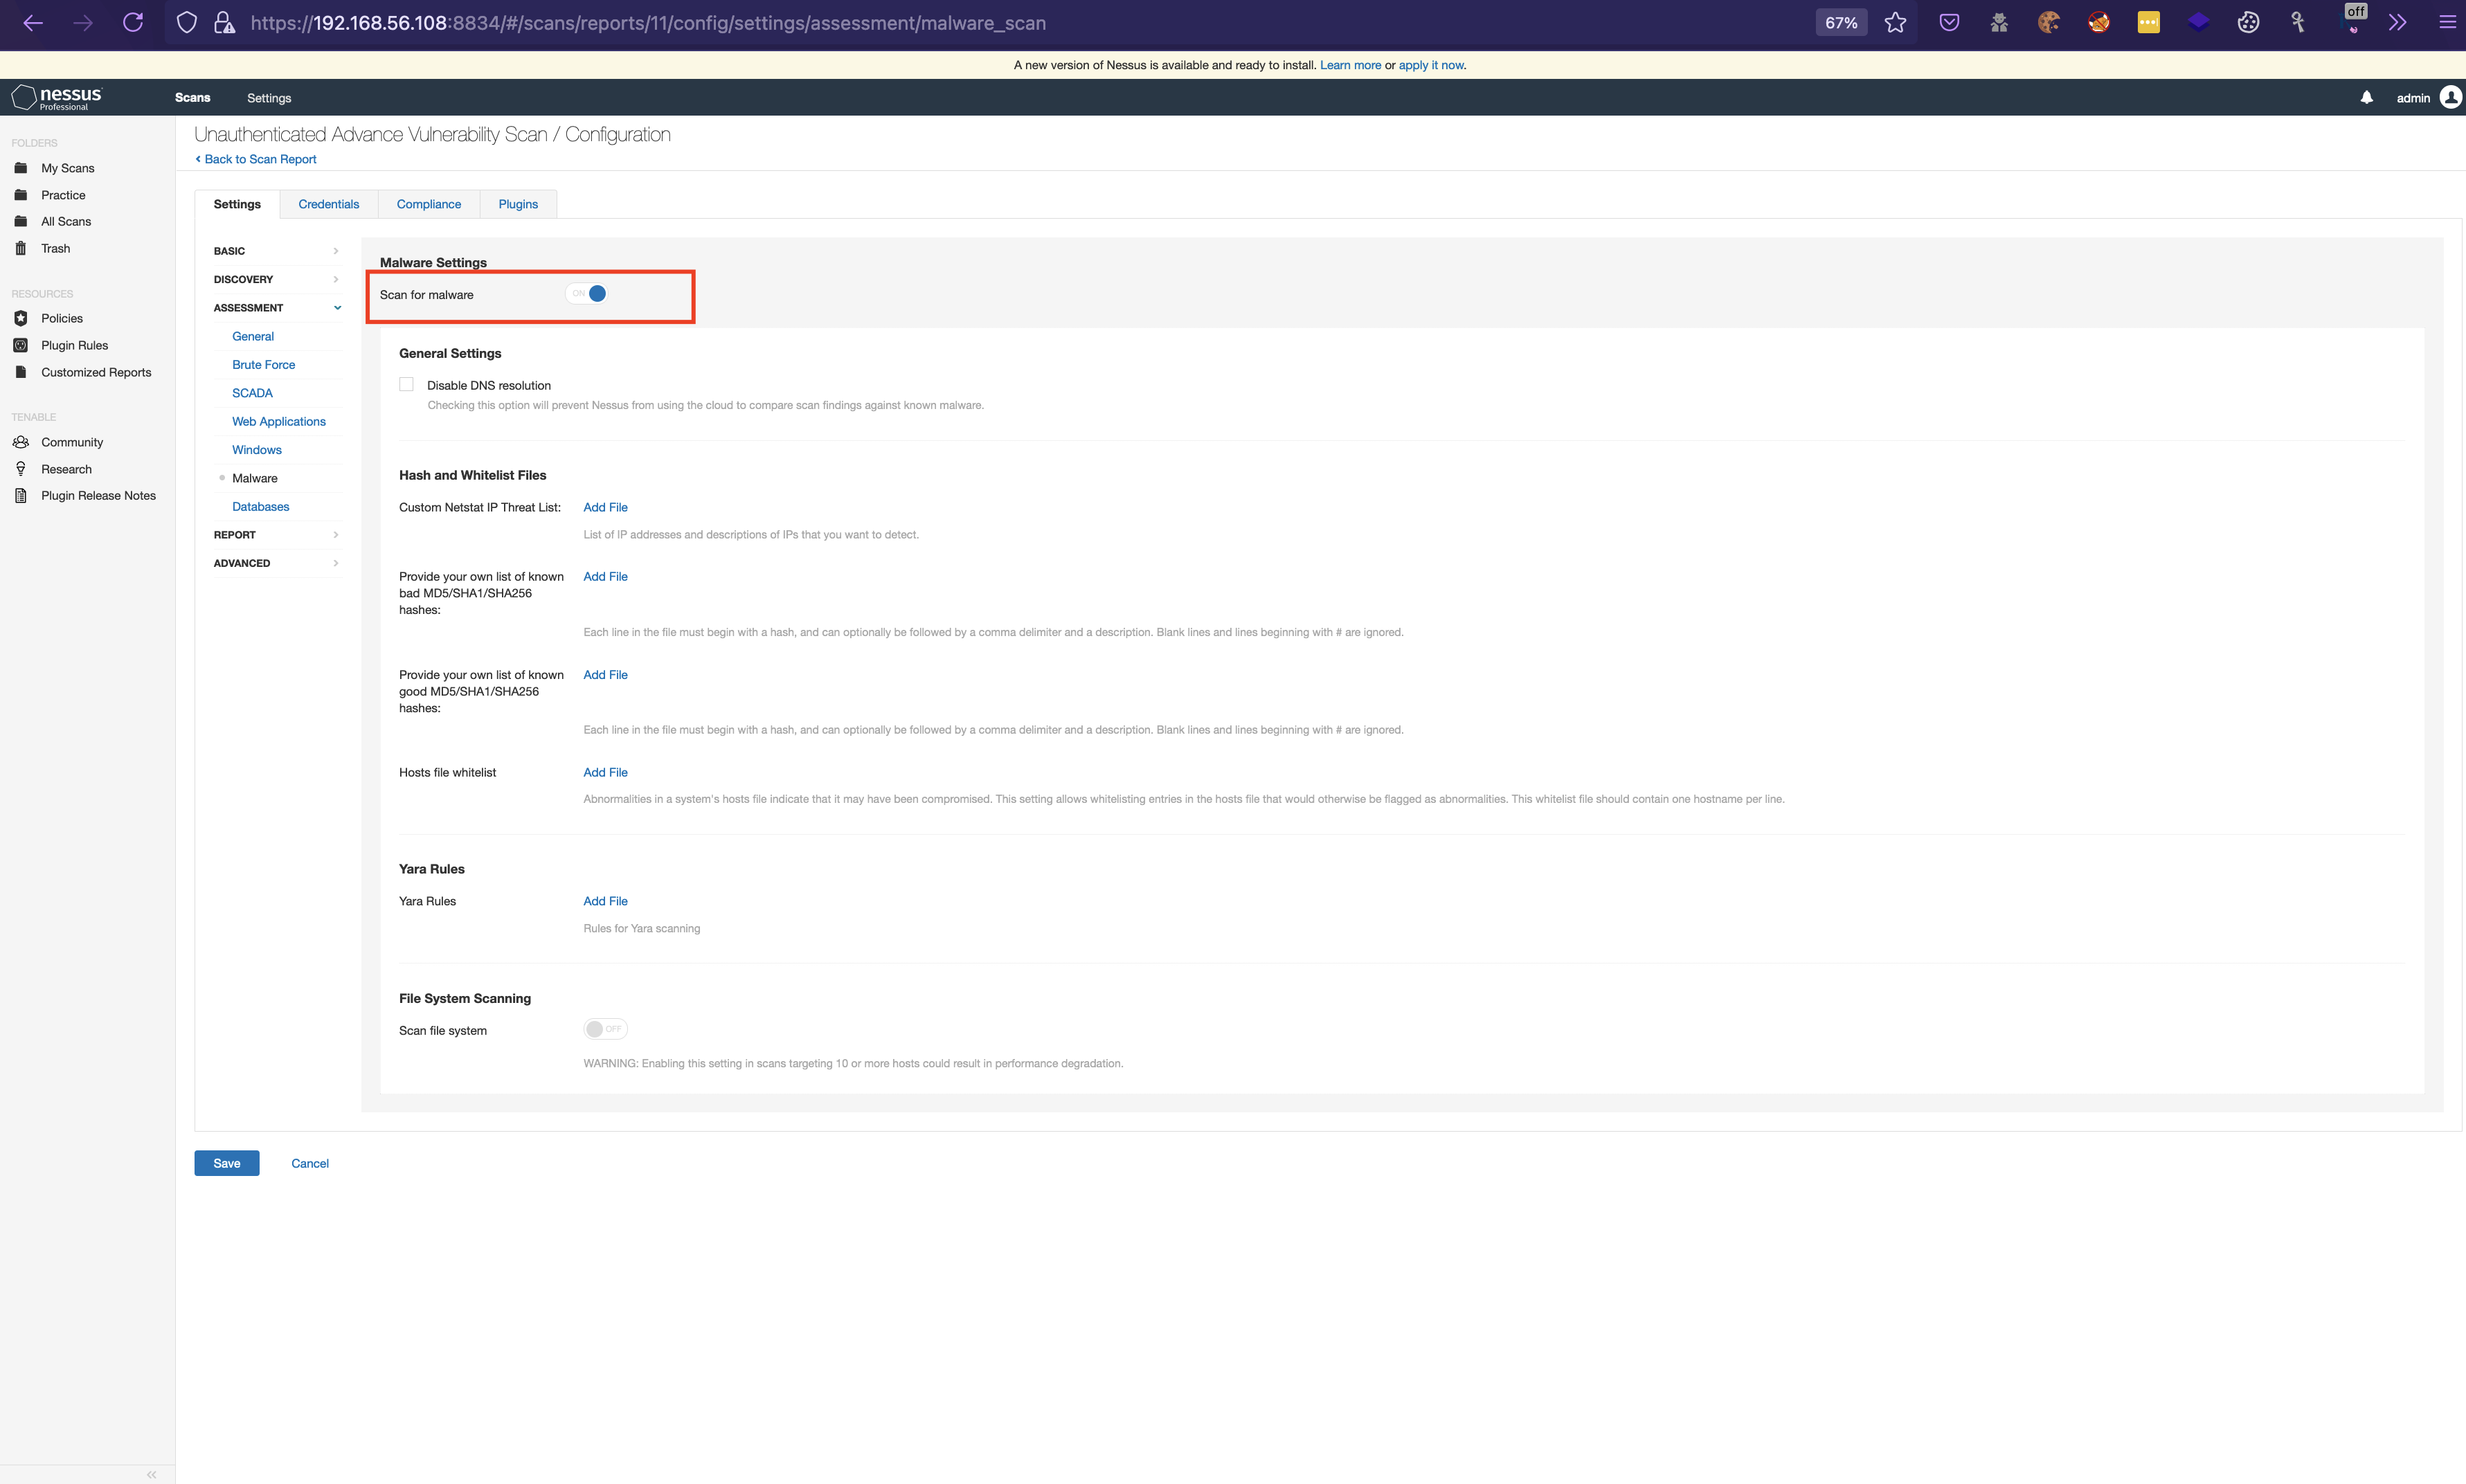
16. Then switch to Malware and enable /disableMalware Settings .Since we are not logging via SSH we can keep it disabled else just enable it. It will enable additional plugins and increase scan time.
17. Then leave the Databases as default as we are not dealing with it.

18. The switch to REPORT enable the Processing and select Override normal verbosity > Report as much information as possible .
Also select Output as in the snapshot below.
Make sure to enable
Display unreachable hostsas this will appear in the report else there will be no information if any host is unreachable and left without scanning.

19. The switch to ADVANCED and enable the General Settings as in the snapshot.
Make sure to enable Debug Settings .

20. Then save the scan and leave the Credentials, Compliance and Plugins .

21 Switch back to All Scans and launch the scan.

Voila !! The scanning has started.
Note: This is not the official blog and these settings mentioned may change. There might be a difference in the result based on the plugins installed and applications running. This is not the best practice and can be used as a reference to perform the advanced scan. Please visit the Tenable website for reading the documentation.
Disclaimer: Do not perform the Nessus scan on production environment without the prior consent of the owners. All information provided is for educational purposes only. The information related to ethical hacking and information security found on this page is not meant to be used maliciously/illegally and the author is not responsible for any misuse of the provided information.
如有侵权请联系:admin#unsafe.sh