On May 18, 2020, an 18‑year‑old researcher, Bill Demirkapi, published a lengthy write-up on his blog on a very curious topic. He managed to install his own rootkit in Windows using Trend Micro’s RootkitBuster utility. Today’s article tells the story of how this young researcher pulled it off.
While studying rootkit detection techniques, Bill Demirkapi came across Trend Micro’s free tool RootkitBuster. The vendor presents it as a scanner for hidden files, registry entries, and the master boot record (MBR), designed to detect and remove rootkits. According to its description, RootkitBuster can uncover several different rootkit infiltration and persistence mechanisms. This caught the researcher’s attention, and he decided to see what was really going on under the hood. A closer look at the program revealed a notable vulnerability in its code that can be abused to turn the tool not only into a scanner for deeply hidden Windows malware, but also into a vehicle for installing your own rootkits on the system.
www
This article is based on the original research by Bill Demirkapi. If you’re comfortable reading English, you can check out his write‑up on his blog.
Installation
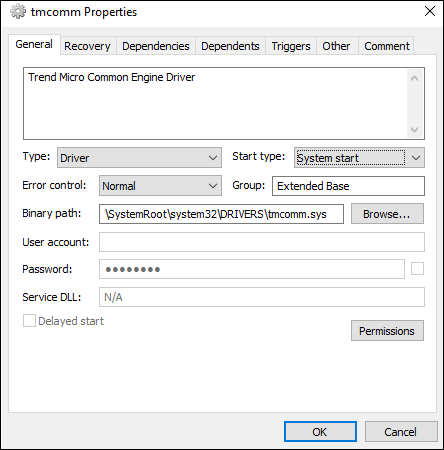
Right after launching the RootkitBuster installer, Bill noticed a Process Hacker alert saying the tool was trying to install a file called tmcomm. on his system — a driver used by some Trend Micro applications.

Interestingly, both the driver and the scanner’s executable had already been unpacked to the %TEMP%\ folder on disk before the license agreement text even appeared on Bill’s screen. Among other things, the agreement stated that the RootkitBuster user agrees “not to attempt to reverse engineer, modify, disassemble, decompile, analyze the source code, or create derivative works based on this program.”
So Bill simply killed the installer via the “Close window” item in the context menu, never actually accepting the license terms. That let him, with a clear conscience, “disassemble, decompile,” and do other things to this Trend Micro product that polite society prefers not to mention out loud. A great little trick for sidestepping the legal complications!
The tmcomm.sys Driver
This driver, identified as the Trend Micro Common Module, can receive messages from privileged user‑mode applications and can perform functions that are not limited to the RootkitBuster utility. In other words, it’s used by many other Trend Micro programs as well.
One of the first things the driver does is create a device object at \ to receive IOCTL messages from user mode. It then creates a symbolic link for this device at \ (accessible as \\.\).
The entry point initializes a large number of classes and structures used by the driver, but for research purposes—namely, executing kernel-mode code—there’s no need to examine each of them in detail.

Bill pointed out that to use the virtual device created by the driver you need SYSTEM privileges—meaning at least local administrator rights. This significantly limits how any potential vulnerabilities in the driver could be exploited, but doesn’t rule them out entirely.
The TrueApi Class
One of the most important components of the driver is the TrueApi class, which is created at the entry point and holds pointers to the imported functions used by the driver. The structure of this class looks as follows:
struct TrueApi
{
    BYTE Initialized;
    PVOID ZwQuerySystemInformation;
    PVOID ZwCreateFile;
    PVOID unk1; // Initialized as NULL
    PVOID ZwQueryDirectoryFile;
    PVOID ZwClose;
    PVOID ZwOpenDirectoryObjectWrapper;
    PVOID ZwQueryDirectoryObject;
    PVOID ZwDuplicateObject;
    PVOID unk2; // Initialized as NULL
    PVOID ZwOpenKey;
    PVOID ZwEnumerateKey;
    PVOID ZwEnumerateValueKey;
    PVOID ZwCreateKey;
    PVOID ZwQueryValueKey;
    PVOID ZwQueryKey;
    PVOID ZwDeleteKey;
    PVOID ZwTerminateProcess;
    PVOID ZwOpenProcess;
    PVOID ZwSetValueKey;
    PVOID ZwDeleteValueKey;
    PVOID ZwCreateSection;
    PVOID ZwQueryInformationFile;
    PVOID ZwSetInformationFile;
    PVOID ZwMapViewOfSection;
    PVOID ZwUnmapViewOfSection;
    PVOID ZwReadFile;
    PVOID ZwWriteFile;
    PVOID ZwQuerySecurityObject;
    PVOID unk3; // Initialized as NULL
    PVOID unk4; // Initialized as NULL
    PVOID ZwSetSecurityObject;
};
If you look closely at this structure, it becomes clear that it’s being used as an alternative to direct function calls. Bill suggested that Trend Micro’s software caches these imported functions during initialization to avoid interception of the delay import table. With delayed imports, a linked DLL is loaded only when the application actually calls one of its functions. If there’s a rootkit on the system that can hook the import table at the moment the driver is loaded, you need to have a protection mechanism in place to counter that.
The XrayApi Class
The driver contains another important class called XrayApi. It’s used to access several low‑level devices and interact directly with the file system. This class includes an XrayConfig structure, which holds its main configuration:
struct XrayConfigData
{
    WORD Size;
    CHAR pad1[2];
    DWORD SystemBuildNumber;
    DWORD UnkOffset1;
    DWORD UnkOffset2;
    DWORD UnkOffset3;
    CHAR pad2[4];
    PVOID NotificationEntryIdentifier;
    PVOID NtoskrnlBase;
    PVOID IopRootDeviceNode;
    PVOID PpDevNodeLockTree;
    PVOID ExInitializeNPagedLookasideListInternal;
    PVOID ExDeleteNPagedLookasideList;
    CHAR unkpad3[16];
    PVOID KeAcquireInStackQueuedSpinLockAtDpcLevel;
    PVOID KeReleaseInStackQueuedSpinLockFromDpcLevel;
    ...
};
Among other things, this structure contains information about where certain internal and undocumented variables are located inside the Windows kernel, such as ExInitializeNPagedLookasideListInternal, IopRootDeviceNode, ExDeleteNPagedLookasideList, and PpDevNodeLockTree. The researcher suggested that the purpose of this class is to gain direct access to low-level devices while bypassing the documented methods (and therefore the ones that are well known to malware authors).
IOCTL Requests
Before digging into the driver’s capabilities and features, Bill Demirkapi focused on how it processes IOCTL requests. These are I/O system calls specific to certain (mostly low-level) devices that can’t be implemented using regular calls. In its main dispatch function, the Trend Micro driver converts the data from an IRP_MJ_DEVICE_CONTROL request into its own structure, which the researcher called TmIoctlRequest:
struct TmIoctlRequest
{
    DWORD InputSize;
    DWORD OutputSize;
    PVOID UserInputBuffer;
    PVOID UserOutputBuffer;
    PVOID Unused;
    DWORD_PTR* BytesWritten;
};
Thus, IOCTL request handling in the tmcomm. driver is implemented using custom “dispatch tables,” where a “base table” holds the IOCTL code and a corresponding helper function. For example, if an IOCTL request with the code 0xDEADBEEF needs to be sent, the driver compares the request against each entry in the base dispatch table and forwards it only if a match is found. Each entry in such a table has a structure similar to the one shown below:
typedef NTSTATUS (__fastcall *DispatchFunction_t)(TmIoctlRequest *IoctlRequest);
struct BaseDispatchTableEntry
{
    DWORD_PTR IOCode;
    DispatchFunction_t DispatchFunction;
};
After the DispatchFunction call, the data being passed is usually validated—starting with a nullptr check and continuing with verification of the input and output buffers. These “auxiliary dispatch functions” then perform another lookup based on a code supplied in the user input buffer, in order to find the corresponding entry in a helper table. Such entries use a structure of the following form:
typedef NTSTATUS (__fastcall *OperationFunction_t)(PVOID InputBuffer, PVOID OutputBuffer);
struct SubDispatchTableEntry
{
    DWORD64 OperationCode;
    OperationFunction_t PrimaryRoutine;
    OperationFunction_t ValidatorRoutine;
};
Immediately before calling the PrimaryRoutine module, which performs the requested action, the SubDispatchTableEntry function invokes ValidatorRoutine. This subroutine validates the input buffer—that is, it checks the data that will later be used by PrimaryRoutine. The main routine runs only if ValidatorRoutine completes the validation successfully.
While studying how IOCTL requests are processed, Bill Demirkapi examined each entry in the main dispatch table and the functions stored there. This, in turn, allowed him to determine the purpose of the auxiliary dispatch tables.
IoControlCode == 9000402Bh
The first table Bill examined is responsible for interacting with the file system. The code for this auxiliary dispatch table is obtained by dereferencing a DWORD located at the beginning of the input buffer. In other words, to determine which entry in the auxiliary table should be executed, you place a DWORD corresponding to a specific opcode at the start of the input buffer.
To make life easier for researchers, the Trend Micro developers left a lot of debug strings in the driver code. Using these, Bill Demirkapi reconstructed the PrimaryRoutine function table stored in the auxiliary dispatch table and described what each function does.
| Opcode | PrimaryRoutine Function | Description |
|---|---|---|
| —— | ———————- | ———– |
| 2713h | IoControlCreateFile | Calls NtCreateFile; all parameters are taken from the request |
| 2711h | IoControlFindNextFile | Returns STATUS_NOT_SUPPORTED
|
| 2710h | IoControlFindFirstFile | Does nothing; always returns STATUS_SUCCESS
|
| 2712h | IoControlFindCloseFile | Calls ZwClose; all parameters are taken from the request |
| 2714h | IoControlCreateFileIRP | Creates a new FileObject and associates a DeviceObject for the requested disk with it |
| 2715h | IoControlReadFileIRPNoCache | References the FileObject using the HANDLE from the request, calls IofCallDriver, and reads the result |
| 2716h | IoControlDeleteFileIRP | Deletes a file by sending an IRP_MJ_SET_INFORMATION request |
| 2717h | IoControlGetFileSizeIRP | Retrieves the file size by sending an IRP_MJ_QUERY_INFORMATION request |
| 2718h | IoControlSetFilePosIRP | Sets file metadata by sending an IRP_MJ_SET_INFORMATION request |
| 2719h | IoControlFindFirstFileIRP | Returns STATUS_NOT_SUPPORTED
|
| 271Ah | IoControlFindNextFileIRP | Returns STATUS_NOT_SUPPORTED
|
| 2720h | IoControlQueryFile | Calls NtQueryInformationFile; all parameters are taken from the request |
| 2721h | IoControlSetInformationFile | Calls NtSetInformationFile; all parameters are taken from the request |
| 2722h | IoControlCreateFileOplock | Creates an oplock using IoCreateFileEx and other filesystem APIs |
| 2723h | IoControlGetFileSecurity | Calls NtCreateFile, then ZwQuerySecurityObject; all parameters are taken from the request |
| 2724h | IoControlSetFileSecurity | Calls NtCreateFile, then ZwSetSecurityObject; all parameters are taken from the request |
| 2725h | IoControlQueryExclusiveHandle | Checks the file handle and how it is being used |
| 2726h | IoControlCloseExclusiveHandle | Forcibly closes the file handle |
IoControlCode == 90004027h
This dispatch table is primarily used to control the process scanner. Many of its functions use a dedicated scanning thread to synchronously enumerate processes using various techniques, both documented and undocumented. Bill Demirkapi has also compiled descriptions of the main functions in this table.
| Opcode | PrimaryRoutine Function | Description |
|---|---|---|
| —— | ———————- | ———– |
| C350h | GetProcessesAllMethods | Scans for processes using ZwQuerySystemInformation and WorkingSetExpansionLinks
|
| C351h | DeleteTaskResults* | Deletes results produced by other routines such as GetProcessesAllMethods
|
| C358h | GetTaskBasicResults* | Retrieves basic analysis results produced by other routines such as GetProcessesAllMethods
|
| C35Dh | GetTaskFullResults* | Retrieves full analysis results produced by other routines such as GetProcessesAllMethods
|
| C360h | IsSupportedSystem | Returns TRUE if the system is “supported” (regardless of whether hardcoded offsets exist for the current build) |
| C361h | TryToStopTmComm | Attempts to stop the driver |
| C362h | GetProcessesViaMethod | Scans for processes using the specified method |
| C371h | CheckDeviceStackIntegrity | Checks for device tampering on devices associated with physical disks |
| C375h | ShouldRequireOplock | Returns TRUE if an opportunistic lock is required for certain scanning operations |
All these functions use several structures that the researcher named MicroTask and MicroScan. Here’s how they look in the disassembled code.
struct MicroTaskVtable
{
    PVOID Constructor;
    PVOID NewNode;
    PVOID DeleteNode;
    PVOID Insert;
    PVOID InsertAfter;
    PVOID InsertBefore;
    PVOID First;
    PVOID Next;
    PVOID Remove;
    PVOID RemoveHead;
    PVOID RemoveTail;
    PVOID unk2;
    PVOID IsEmpty;
};
struct MicroTask
{
    MicroTaskVtable* vtable;
    PVOID self1; // ptr to itself
    PVOID self2; // ptr to itself
    DWORD_PTR unk1;
    PVOID MemoryAllocator;
    PVOID CurrentListItem;
    PVOID PreviousListItem;
    DWORD ListSize;
    DWORD unk4; // Initialized as NULL
    char ListName[50];
};
struct MicroScanVtable
{
    PVOID Constructor;
    PVOID GetTask;
};
struct MicroScan
{
    MicroScanVtable* vtable;
    DWORD Tag; // Always 'PANS'
    char pad1[4];
    DWORD64 TasksSize;
    MicroTask Tasks[4];
};
For most IOCTL requests in this helper table, the MicroScan structure is populated on the client side that calls the driver. Demirkapi decided to exploit this exact behavior as a potential vulnerability.
The Exploit
Bill Demirkapi admits that while reversing the functions stored in this auxiliary dispatch table, he was completely puzzled. It turned out that the kernel pointer MicroScan, returned by functions like GetProcessesAllMethods, was being passed directly to other client-side functions, such as DeleteTaskResults. These functions accept this untrusted kernel pointer and, with almost no validation, invoke functions from the virtual function table defined in the class.

If you look closely at the “verification subroutine” of the DeleteTaskResults helper dispatch table function, you can see that for the MicroScan instance specified in the input buffer at offset +0x10, there is effectively only one check: it just verifies that the instance holds a valid kernel memory address.

There is one more simple check used in DeleteTaskResults.

Next, the DeleteTaskResults function calls the constructor specified in the MicroScan instance’s virtual function table. To invoke an arbitrary kernel function this way, the following conditions must be met.
- Allocate at least 10 bytes of kernel memory (for the
vtableandtag). - Manage that kernel memory to set the virtual function table pointer and the
tagparameter. - Learn how to determine the address of that kernel memory from user mode.
The researcher writes that the right approach to finding a way to allocate and manage kernel memory from user mode was suggested to him by his mentor, Alex Ionescu. In the Hack In The Box magazine back in 2010, an article by Mateusz “j00ru” Jurczyk titled “Windows 7 Reserved Objects” was published. The core idea is that you can craft an APC queue for an APC Reserve Object in a special way, and then use NtQuerySystemInformation to locate the desired APC Reserve Object in kernel memory. This lets a user‑mode application allocate and control up to 32 bytes in kernel memory (in a 64‑bit environment) and determine exactly where that memory is located.
This technique still works in Windows 10, which means we can meet all the requirements. By using a spare Apc object, we can allocate at least 10 bytes for the MicroScan structure and completely bypass the checks mentioned above. As a result, we gain the ability to invoke arbitrary kernel pointers.

Bill Demirkapi concluded that this type of vulnerability is not limited to the DeleteTaskResults function, but affects all dispatcher functions marked with an asterisk in the table. They all trust the kernel pointer supplied by the client and invoke the constructor from the virtual function table of the MicroScan instance without any additional validation.
IoControlCode == 90004033h
This dispatch table controls the TrueApi class and includes the following functions.
| Opcode | PrimaryRoutine Function | Description |
|---|---|---|
| EA60h | IoControlGetTrueAPIPointer | Retrieves function pointers from the TrueApi class |
| EA61h | IoControlGetUtilityAPIPointer | Retrieves pointers to the driver’s utility functions |
| EA62h | IoControlRegisterUnloadNotify* | Registers a callback function to be called on driver unload |
| EA63h | IoControlUnRegisterUnloadNotify | Unregisters a previously registered unload callback function |
The IoControlRegisterUnloadNotify function first caught Bill Demirkapi’s attention because it appeared in debugging strings. By using this function from the auxiliary dispatch table, an “untrusted client” can register up to 16 arbitrary routines that will be invoked when the driver is unloaded.
The validator for this function checks whether the pointer from the client-side buffer is valid. If the caller is running in user mode, the validator calls ProbeForRead on the pointer. If the caller is running in kernel mode, the validator checks that the pointer refers to a valid kernel memory address.
This function can’t be used directly in a user‑mode exploit. The problem is that if we invoke it from user mode, we have to pass it a user‑mode pointer, because the validator uses ProbeForRead. When the driver is unloaded, this user‑mode pointer is called, but it doesn’t do much because of restrictions imposed by SMEP (Supervisor Mode Execution Prevention), a memory page protection mechanism. We’ll come back to this quirk later.
IoControlCode == 900040DFh
This auxiliary dispatch table is used to interact with the Xray API. While the Xray API is normally used by the core scanning engine, the functions in this table provide limited access for the client to interact with physical disks.
| Opcode | PrimaryRoutine Function | Description |
|---|---|---|
| 15F90h | IoControlReadFile | Reads a file directly from disk |
| 15F91h | IoControlUpdateCoreList | Updates kernel pointers used by the Xray API |
| 15F92h | IoControlGetDRxMapTable | Retrieves the table mapping disks to their corresponding devices |
IoControlCode == 900040E7h
The last dispatch table examined by the researcher is used to search various system structures for hooks that might be used by different rootkits. It lists the checks performed by Trend Micro software to detect hooked function calls and other types of hooks.
| Opcode | PrimaryRoutine Function | Description |
|---|---|---|
| 186A0h | TMXMSCheckSystemRoutine | Checks certain system routines for hooks |
| 186A1h | TMXMSCheckSystemFileIO | Checks core file I/O functions for hooks |
| 186A2h | TMXMSCheckSpecialSystemHooking | Checks the file object type and the Itoskrnl function for hooks |
| 186A3h | TMXMSCheckGeneralSystemHooking | Checks the Io for hooks |
| 186A4h | TMXMSCheckSystemObjectByName | Recursively traces system objects (directory or symbolic link) |
| 186A5h | TMXMSCheckSystemObjectByName2* | Copies a system object into user‑mode memory |
Before diving into a detailed analysis of the TMXMSCheckSystemObjectByName2 function, Bill Demirkapi presents the disassembled listing of several structures used by this function:
struct CheckSystemObjectParams
{
    PVOID Src;
    PVOID Dst;
    DWORD Size;
    DWORD* OutSize;
};
struct TXMSParams
{
    DWORD OutStatus;
    DWORD HandlerID;
    CHAR unk[0x38];
    CheckSystemObjectParams* CheckParams;
};
The TMXMSCheckSystemObjectByName2 function takes a source pointer, a destination pointer, and a size in bytes.
The validator invoked for TMXMSCheckSystemObjectByName2 checks the following:
-
ProbeForReadin theCheckParamsobject of theTXMSParamsstructure -
ProbeForReadandProbeForWritein theDstobject of theCheckSystemObjectParamsstructure
In essence, this means we need to pass a valid CheckParams structure, while the Dst pointer we pass in resides in user‑mode memory. Now let’s look at the function itself.

The for loop may look intimidating, but all it really does is provide an optimized way to scan a range of kernel memory. For each memory page in the range from Src to Src , the function calls MmIsAddressValid. The truly scary parts are the operations that follow.

These lines take an untrusted Src pointer and copy Size bytes into an untrusted Dst pointer. We can use memmove operations to read from an arbitrary kernel pointer, but what about writing to an arbitrary kernel pointer? The problem is that the TMXMSCheckSystemObjectByName2 checker requires the destination to be user‑mode memory. Fortunately, Bill Demirkapi found another bug in the code.
The line *params-> takes the Size field from our structure and writes it into the pointer specified by OutSize. There’s no check on what OutSize actually points to, so we can write an arbitrary DWORD in any IOCTL call. One caveat: the Src pointer must refer to valid kernel memory whose length in bytes matches the value in Size. To satisfy this requirement, Demirkapi simply used the base address of the ntoskrnl module as the source.
Using this arbitrary write primitive, we can reuse the previously discovered unload-procedure trick to execute arbitrary code. Although the validation routine doesn’t let us pass a kernel pointer when the call originates from user mode, there’s actually no need to go through the validator at all. Instead, with our write primitive we can place any pointer we want into the unload-procedure array located in the driver’s . section.
Bypassing Microsoft’s WHQL Certification
So far we’ve covered methods for reading and writing arbitrary kernel memory, but we’re still missing one step to deploy our own rootkit. While it’s possible to run kernel shellcode using only a read/write primitive, Bill Demirkapi suggested taking the path of least resistance. Since we’re dealing with a third‑party driver, it’s very likely using NonPagedPool allocations, which we can repurpose to place and execute our malicious shellcode.
Let’s take a look at how Trend Micro handles memory allocation. Right at the driver’s entry point, the program checks whether the operating system is supported by determining its version and build number. Trend Micro does this because the program has several hard‑coded offsets that differ between various editions of Windows.
Fortunately, the global variable PoolType, which is used when allocating nonpaged memory (NonPagedPool), is set to 0 by default. Bill Demirkapi noticed that although this value starts out as 0, the variable still resides in the . section, meaning it can be modified. When he looked at what was being written into the variable, he found that the function responsible for checking the operating system version was, in some cases, also setting the value of PoolType.

If the computer is running Windows 10 or a more recent version of Windows, the driver prefers to use NonPagedPoolNx. Good for security, but bad for our purposes. To exploit the vulnerability, we need to find an alternate ExAllocatePoolWithTag call with a hard‑coded NonPagedPool argument; otherwise we won’t be able to use the driver’s allocated memory on Windows 10. But that’s not so easy. What about the MysteriousCheck( function?

The MysteriousCheck( function checks whether Microsoft is enabled. Instead of simply using the NonPagedPoolNx flag, which is supported starting with Windows 8, Trend Micro performs an explicit check so it can use only safe memory allocation.
Trend Micro’s driver is WHQL-certified, and obtaining that certificate requires driver verification. In Windows 10, drivers are not allowed to allocate executable memory, and Driver Verifier enforces this rule. Trend Micro chose to ignore these security requirements and implemented its driver so that it would work in any testing or debugging environment that detects such violations.

Trend Micro could have just relied on the standard Windows 10 check, so why explicitly add a separate check for Driver Verifier at all? The only working theory, originally suggested by Bill Demirkapi, is that for some reason most of their drivers are incompatible with NonPagedPoolNx (only their entry point is compatible); otherwise, tricks like this make no sense.
Installing Your Own Rootkit with RootkitBuster
So how can you actually use RootkitBuster to plant your own rootkit in a system? It only takes three simple steps.
Locate any
NonPagedPoolallocation that the driver is currently using. As long as Driver Verifier is not enabled, you can rely on any non-paged allocations whose pointers are stored in the.section. Ideally, pick an allocation that is not used very often.data Write your kernel shellcode somewhere inside that allocated memory, using the arbitrary kernel write primitive
TMXMSCheckSystemObjectByName2.Execute your shellcode by registering an unload routine (directly in the
.section), or by using one of the other methods exposed via the dispatch table atdata 0x90004027.
That’s basically it. In his research, Demirkapi notes that the tmcomm. driver developed by Trend Micro looks like pieces of code roughly duct-taped together. While the developers did implement some security measures, a large portion of the code inside the IOCTL handlers uses rather unsafe techniques that attackers could easily abuse for malicious purposes. Moreover, the tmcomm. driver is used not only in the RootkitBuster utility, but also in other Trend Micro products, which means those potential vulnerabilities affect them as well.