嗯,用户让我帮忙总结一篇文章,控制在100字以内,而且不需要特定的开头。首先,我需要仔细阅读文章内容,抓住主要信息。 文章主要介绍了一款名为uConsole的便携式Linux电脑。它模块化设计,带有5英寸屏幕、QWERTY键盘和内置电池。支持多种操作系统,如Kali、Ubuntu、RetroPie等,并且可以通过扩展板增加功能。 用户可能是一位对硬件和Linux系统感兴趣的开发者或安全研究人员。他们需要一个简洁的总结来快速了解产品特点和用途。 我应该突出uConsole的主要功能、适用人群以及其优势。确保在100字以内涵盖这些要点,同时保持语言简洁明了。 </think> ClockworkPi uConsole 是一款便携式模块化 Linux 计算机,配备 5 英寸屏幕、QWERTY 键盘和内置电池,支持 Raspberry Pi Compute Module 4 等核心。它可运行 Kali、Ubuntu 等系统,并通过扩展板(如 LTE 模块、SDR/LoRa/GPS 卡)增强功能。适用于安全任务、开发及便携娱乐。 2026-3-30 10:35:25 Author: www.mobile-hacker.com(查看原文) 阅读量:9 收藏
![]()
Today we will look at the ClockworkPi uConsole as a pocket‑sized Linux. I will explain what the device is, what comes in the box, how to install popular OS images (Kali, Ubuntu, Arch, RetroPie), how to expand it with the growing lineup of expansion boards, and practical workflows you can reproduce. Where helpful, I link to official sources and community threads for deeper dives. I have received uConsole for testing in December 2025 from my friends at Sapsan Store.
What is the uConsole
The uConsole is a modular, handheld Linux computer with a 5‑inch 1280×720 IPS display, a compact QWERTY keyboard, built‑in speakers, and an internal battery sled. It supports multiple compute “cores” – most commonly – and what I have – is the Raspberry Pi Compute Module 4 (CM4) via an adapter—so it can serve as a tiny laptop or an on‑the‑go console that boots Kali, Ubuntu, or RetroPie. The mainboard offers USB, micro‑HDMI, audio, GPIO, and a dedicated expansion bay for add‑on cards such as cellular modems, radios, USB hubs, and LoRa modules.
What you can turn it into—portable cyberdeck, Kali box, SSH/serial crash‑cart, or even a RetroPie console—depends on the core and the image you flash.
Who is this for?
The uConsole is for people who want a self‑contained, pocketable Linux terminal—a quick‑boot device with its own screen, keyboard, and battery that excels at focused, scoped security tasks like triage, short captures, serial/console access, and note‑taking, with the option to add radios or wired I/O via expansions.
It’s not the right fit if you need desktop‑class performance, plan to run long, heavy GUI sessions, or prefer a zero‑tinker experience.
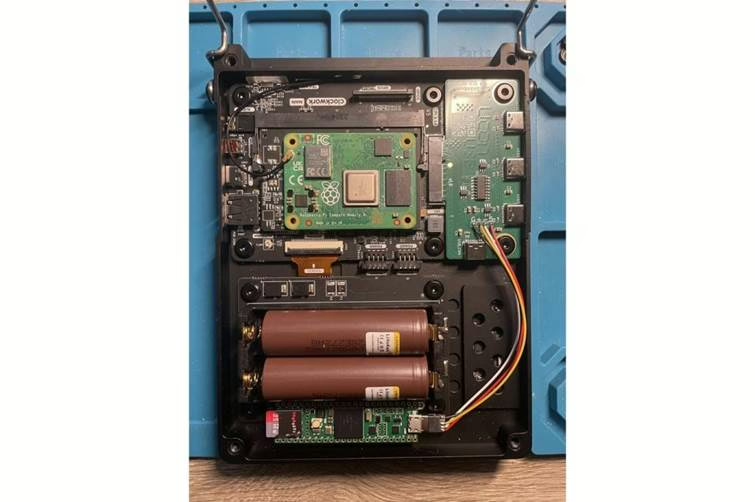
Hardware overview
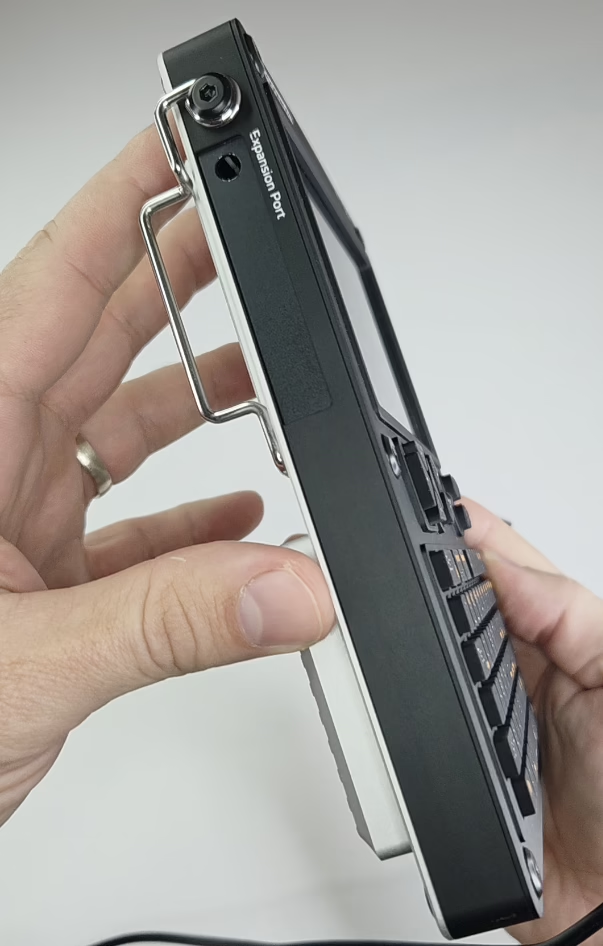
- Mainboard (v3.14 rev.5): compact 95×77 mm board with 802.11ac Wi‑Fi + BT 5.0, micro‑HDMI, 3.5 mm audio, a standard USB 2.0 port plus internal USB headers, GPIO, and a 52‑pin Mini‑PCIe‑style “EXT” slot for expansion cards.
- Screen & keyboard: 5″ 720p IPS; the compact keyboard is genuinely usable for terminal work and note‑taking on the go. (More on night use later).
- Power: bring your own 18650 cells (x2). The onboard PMU handles charge/discharge; USB‑C is used for charging.
- Compute options: CM4 via adapter or ClockworkPi’s own cores (A‑04/A‑06/R‑01). I use CM4 for the mature Pi ecosystem and ARM images.
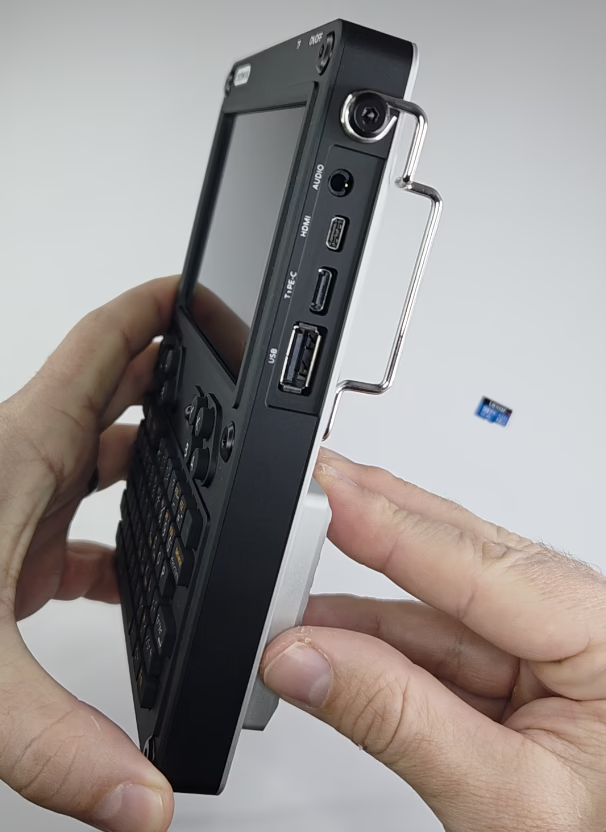
Input/Output
- USB‑A (external): Unfortunately, only one port, so having hub can help.
- micro‑HDMI out: output to bigger screen.
- 3.5 mm audio.
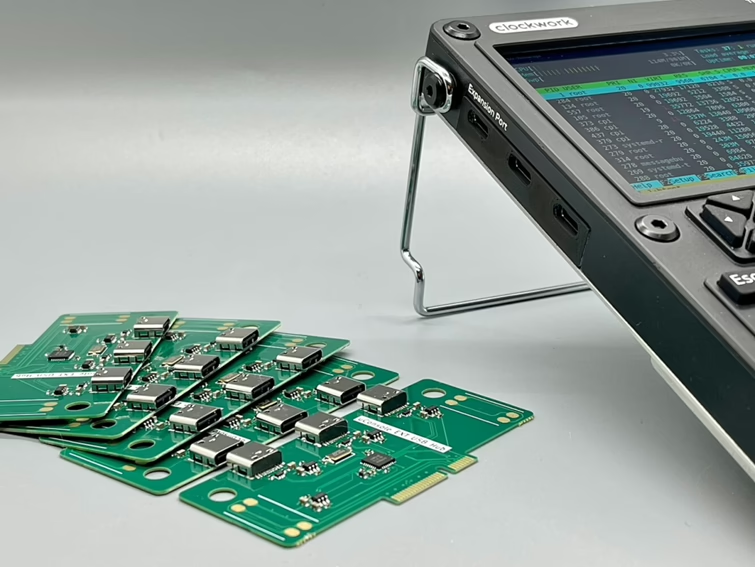
- EXT bay (Mini‑PCIe‑like): expansion cards (cellular, SDR/LoRa/GPS, KVM, Ethernet, hubs).

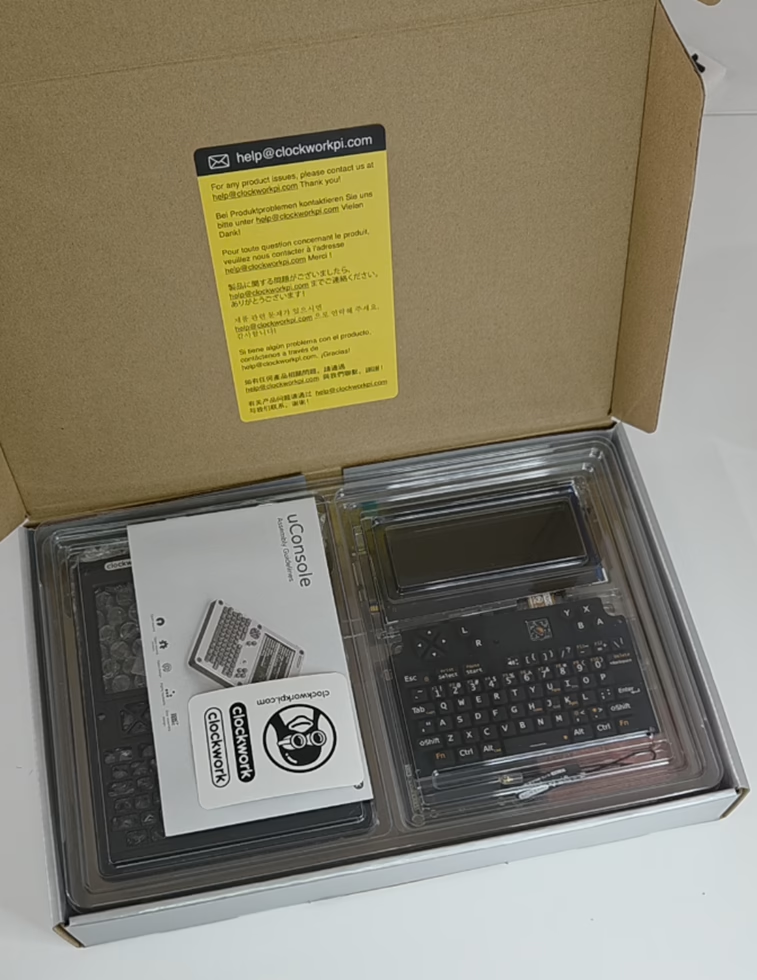
What comes in the package
Kits list the mainboard, 5″ IPS screen, keyboard, shells and bracket system (with 2.5 mm hex key), speaker, battery sled, and (for CM4 builds) the CM4 adapter. Batteries are not included—you must supply them. I assembled mine in ~30 minutes, the process is straightforward.
Initial setup: OS, first boot, and beginner‑friendly options
You have several solid OS choices; flashing is the usual Raspberry Pi workflow (Imager/Etcher → boot → basic config).
Popular images for CM4:
- Kali Linux (ARM) — official ARM images include Raspberry Pi builds.
- Ubuntu for Raspberry Pi (Server/Desktop) — Canonical’s images support CM4.
- Raspberry Pi OS (Trixie) — the familiar, lightweight baseline for most tinkering.
- Arch Linux ARM — rolling release if you prefer to build your own stack.
- RetroPie — if you want to use the uConsole as a retro game console between lab sessions. (RetroPie provides setup scripts/images for Pi; use the latest Pi‑4/CM4‑capable release.)
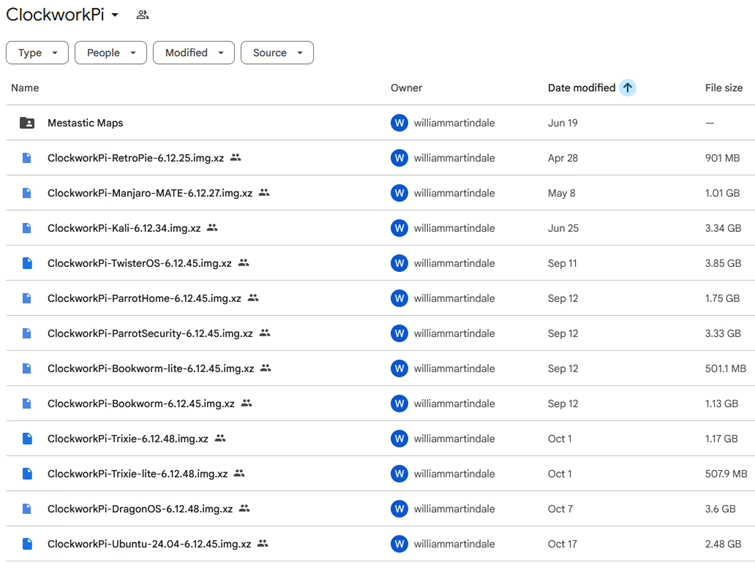
And few more can be downloaded from ClockworkPi, see Figure below.
Expansion options
One of uConsole’s biggest advantages is its expansion bay. Third‑party makers have turned it into an increasing ecosystem, offering everything from SDR and LoRa boards to USB hubs and GPIO cards for hackers, tinkerers, and CyberDeck enthusiasts. Here is a comprehensive list of the most popular:
- Openterface KVM Expansion — HDMI input + USB HID emulation to turn your uConsole into a portable KVM for BIOS‑level rescue of headless machines.

- Joe’s USB‑C Extension Board — simple USB 2.0 hub (3× USB‑C external + internal headers) for extra peripherals; not for back‑powering the deck.
- HackerGadgets AIO (V1/V2) — RTL‑SDR + LoRa (SX1262) + GPS + RTC + USB hub in one card; v2 adds USB 3.0 + GbE when paired with their internal upgrade kit. Great for RF analysis and Meshtastic tinkering.

- uEther Ethernet + USB‑C — neat way to add 10/100 RJ45 plus a spare USB‑C; frequently sells out.

- ClockworkPi LTE Modem — official 4G/LTE (Quectel EC25) with GNSS; generally bundled at purchase.

- Quadbit uPico (RP2040 GPIO) — microcontroller/GPIO expansion (design open‑sourced if you want to build one yourself).

- Quadbit uHub — another USB hub option, open‑sourced design (availability varies).

If you’re specifically eyeing the SDR/LoRa/GPS/RTC/USB Hub “All‑in‑One”, HackerGadgets publishes a setup guide with OS notes (e.g., Bookworm/Trixie images, SDR++, Meshtasticd), GPIO toggles (v2), and RTC configuration.
The SDR/LoRa/GPS concept has been covered in the community and press, with early hands‑on videos and forum builds.
Practical use cases
- On-the-go terminal: SSH into lab servers and network gear.
- Dev box: Python/Go/Rust on the train, if you are comfortable with the screen size, git commits etc.
- Root an Android lab device (ADB via USB‑C OTG).

- Run a portable nmap checks and scans.
- Reproduce a Bluetooth HID attack pattern (“BlueDucky”‑style) in a lab, to validate mitigations.

- Connect a HackRF and run quick SDR captures; swap to the AIO SDR/LoRa/GPS card when traveling light. Below you can see a quick demo by n3rdcev.
- SSH to my workstation and kick off long builds or server restarts from anywhere.
- Attach an external Wi‑Fi adapter to monitor lab SSIDs and spot noisy clients. If your external Wi-Fi adapter is not recognized, I advise you to install its drivers.

- Decompile APKs (jadx) to analyze mobile samples in the field.
- Act as a network proxy (Burp Suite/mitmproxy) for app testing on my devices within an isolated VLAN.
- Portable hack box: A portable Kali Linux environment.
- Retro break: boot RetroPie on a second microSD when you’re off duty.
Legal/ethical reminder: keep everything consented, scoped, and lab‑bounded; don’t intercept traffic you don’t own and don’t test devices or networks without written authorization.
Where to buy
A convenient Europe source is Sapsan Store with worldwide shipping, if you want the CM4 Lite flavor and local accessories. They also stock Samsung INR18650‑35E (3500 mAh) 18650 cells, which are a good fit (you need two; the kit does not include batteries).
Join the community
Before you go deep on kernels or expansion boards, bookmark the ClockworkPi uConsole forum – OS images, tuning tips, and hardware mods are discussed daily. It’s the best place to sanity‑check an idea before you break out something.
One thing I still want
Keyboard lighting. The compact keyboard works well in daylight, but I’d love a brighter adjustable backlight option for night work.
Conclusion
The uConsole won’t replace a high‑end laptop—but that’s not the point. It boots fast, runs real Linux, fits in a bag, and has a modular bay that lets you carry exactly the hardware you need (LTE, SDR/LoRa/GPS, KVM, Ethernet, extra USB). As a portable security lab and sysadmin sidekick, it does the two things that matter most: reduce friction and increase time‑to‑insight—without taking over your backpack. Also: it’s just cool to carry a custom cyberdeck that you assembled yourself.
如有侵权请联系:admin#unsafe.sh