嗯,用户让我帮忙总结一下这篇文章的内容,控制在100个字以内,而且不需要用“文章内容总结”或者“这篇文章”这样的开头。直接写文章的描述即可。 首先,我需要通读整篇文章,抓住主要信息。文章的作者参加了新加坡网络安全局组织的SPIRITCYBER IoT硬件黑客竞赛,发现了TP-Link Tapo C260摄像头中的几个漏洞。他详细描述了逆向工程固件的过程,包括拆解设备、读取闪存、解密文件系统以及分析Tapo Discovery Protocol v2。 接下来,作者提到了使用Qiling框架进行二进制仿真来测试自动生成的TDP数据包,并成功实现了与摄像头的通信。最后,他总结了逆向工程的挑战和AI工具在其中的作用,并提到未来会有更多细节分享。 现在,我需要将这些信息浓缩到100字以内。要突出作者的研究对象、主要过程和成果。同时,保持语言简洁明了。 可能的结构是:研究对象(Tapo C260摄像头)、研究过程(逆向工程、拆解、读取闪存、解密、分析协议)、工具(Qiling框架)、成果(成功测试数据包)以及未来展望。 整合后的大意是:作者通过逆向工程TP-Link Tapo C260摄像头固件,分析了Tapo Discovery Protocol v2协议,并使用Qiling框架成功测试自动生成的数据包。整个过程涉及拆解硬件、读取闪存和解密文件系统。 这样控制在100字以内的话,可以表达为:作者通过逆向工程TP-Link Tapo C260摄像头固件,分析了Tapo Discovery Protocol v2协议,并使用Qiling框架成功测试自动生成的数据包。整个过程涉及拆解硬件、读取闪存和解密文件系统。 检查一下字数是否符合要求,并确保没有遗漏关键点。 </think> 作者通过逆向工程TP-Link Tapo C260摄像头固件,分析了Tapo Discovery Protocol v2协议,并使用Qiling框架成功测试自动生成的数据包。整个过程涉及拆解硬件、读取闪存和解密文件系统。 2026-1-2 00:1:4 Author: spaceraccoon.dev(查看原文) 阅读量:4 收藏
· 1471 words · 7 minute read
Earlier in 2025, I participated in the SPIRITCYBER IoT hardware hacking contest organised by the Cyber Security Agency of Singapore with YesWeHack. Among several devices, I found several RCEs and other interesting vulnerabilities that are still pending patches and CVE assignment.
One of the devices was TP-Link’s latest Tapo C260 camera, and while I do not plan to share any details of vulnerabilities yet (if there were any 😉), I want to share about the process of reverse engineering the firmware.
In addition, as part of my research I reverse-engineered the Tapo Discovery Protocol version 2. Version 1 has been thoroughly research and exploited by others before including at Pwn2Own, but since I couldn’t find any resources on the new version I thought it might be interesting to share.
In any case, I thought the C260 was a nice step up in difficulty from my previous ventures into the Nokia Beacon 1 and the LAU-G150-C Optical Network Terminal.
The C260 is a tough nut to crack, quite literally. It has a high-quality shell with no exposed screws - not even hidden under stickers or pads.
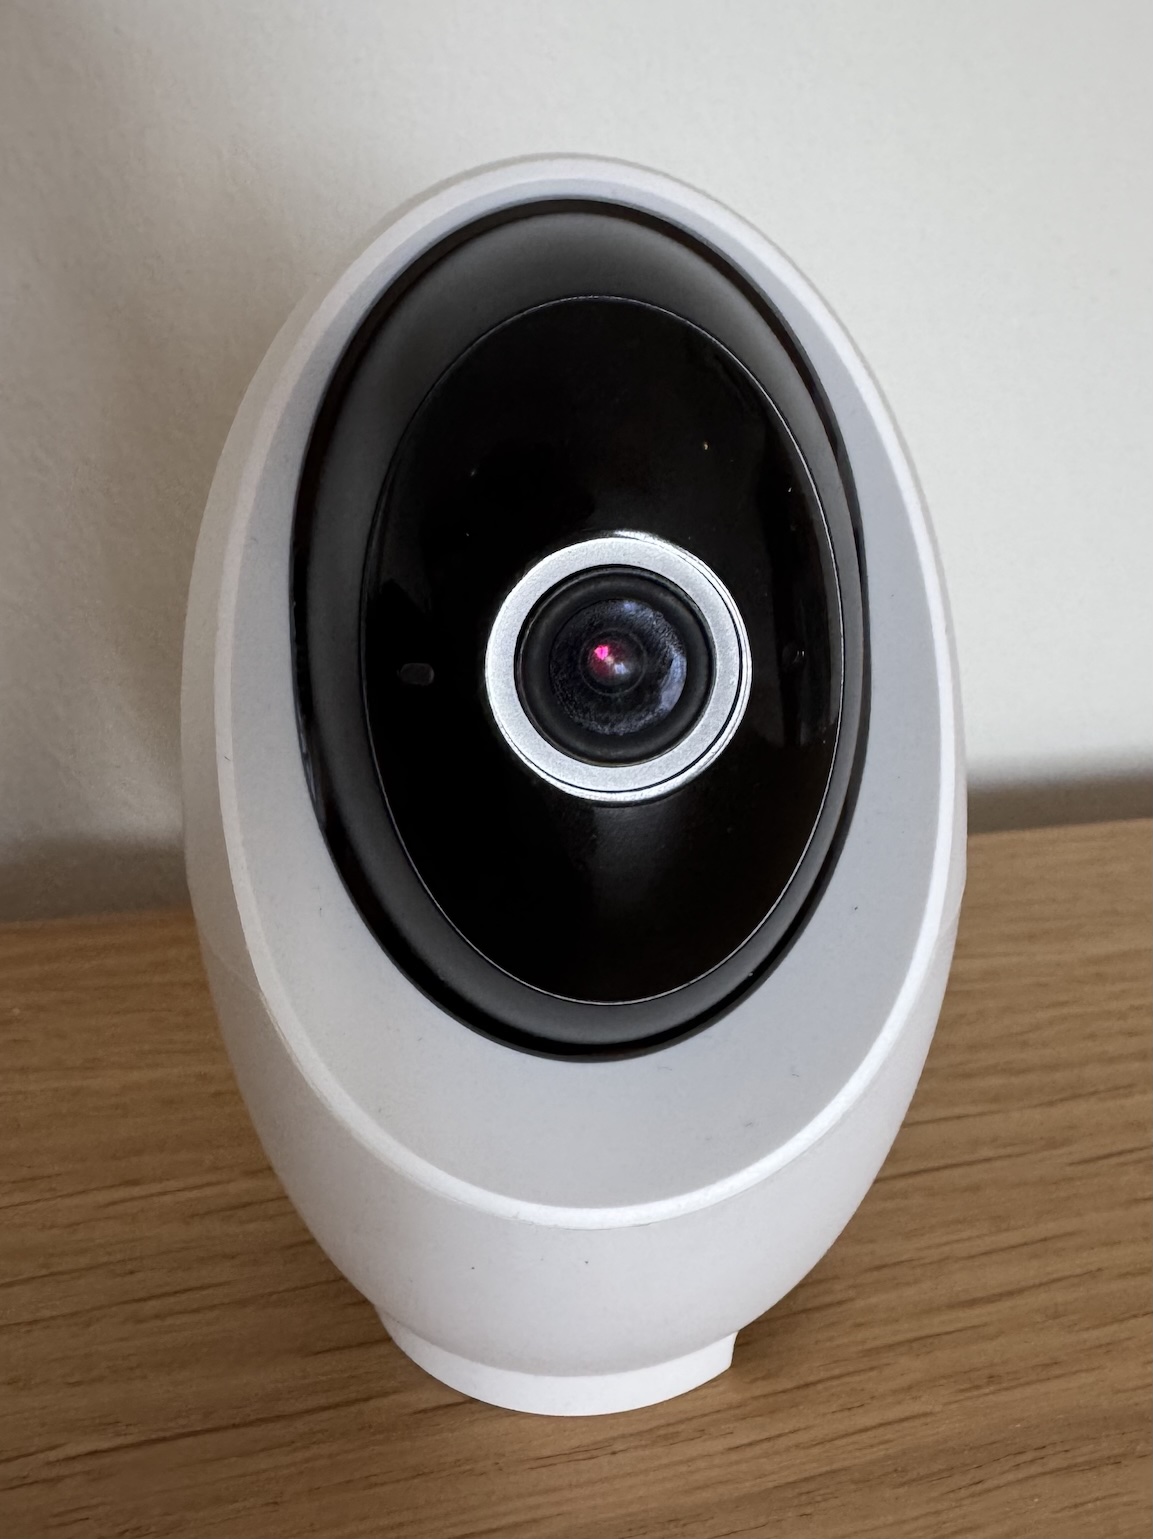
I found the iFixit Jimmy (they were actually giving them out for free at DEF CON) invaluable here in prying the case apart. There’s a bit of technique involved here - instead of trying to use it as a lever or cutter, first get part of the blade into the gap, then wobble it up and down so it slowly gets deeper into the gap. This creates a lot more leverage and room to maneuver.
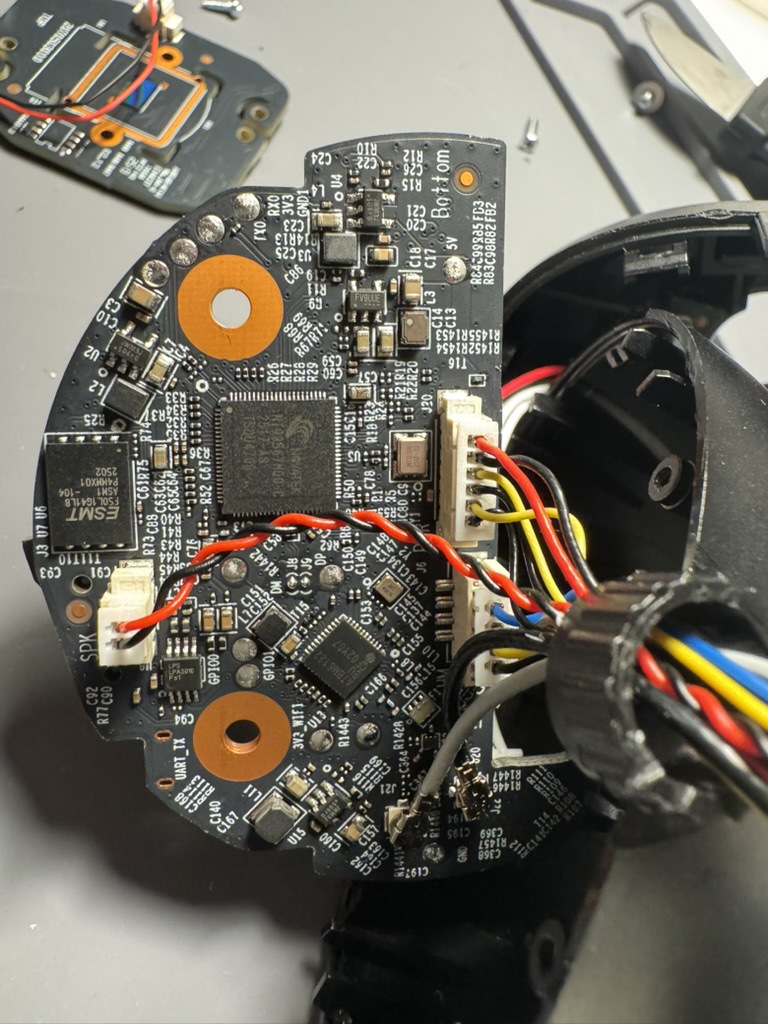
After that, there are a few more screws and cases to pry open before getting to the juicy internals:
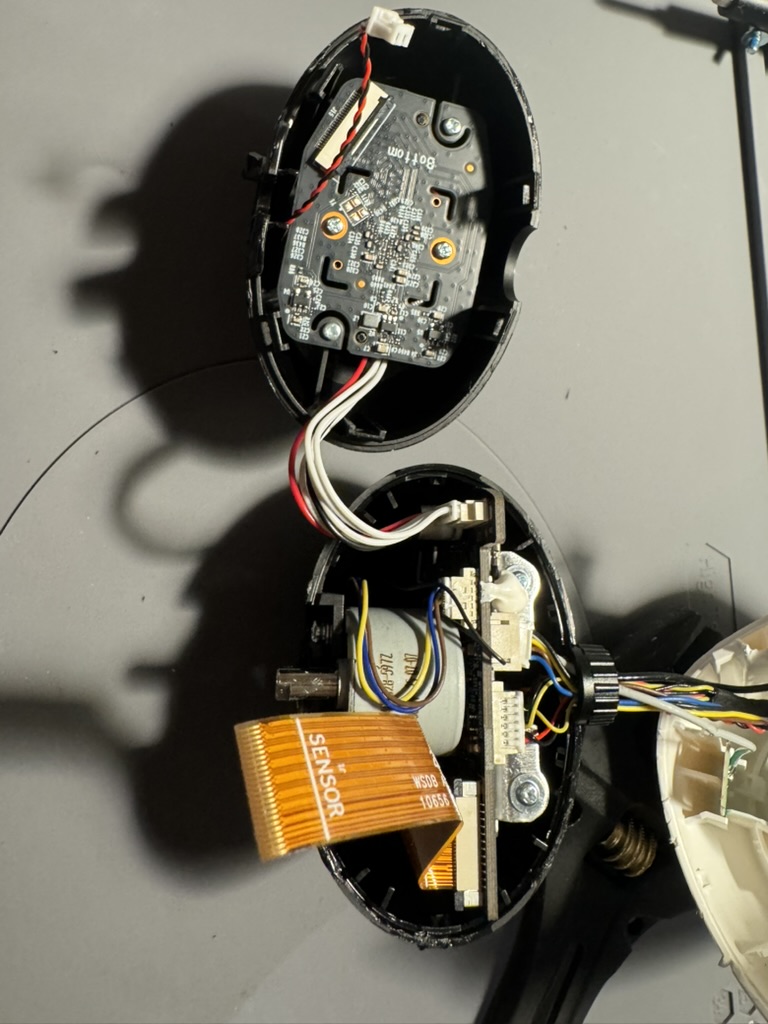
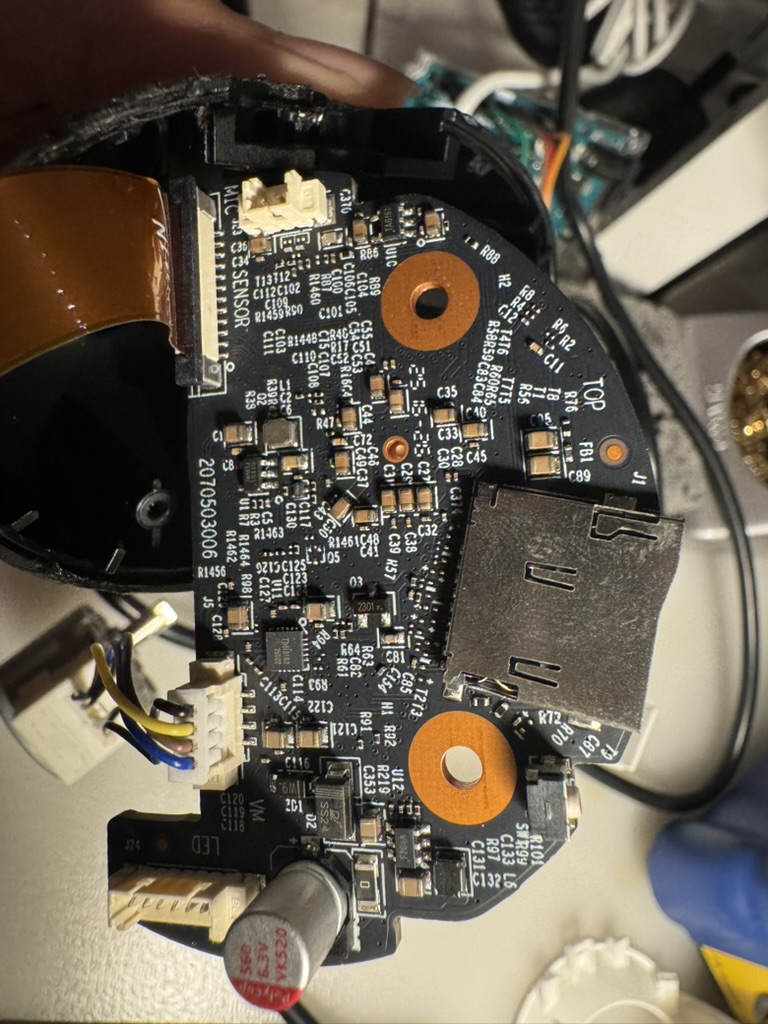
This is a fairly advanced camera with a multiple features like 4k camera, AI object recognition, microSD support, BT, and WiFi, with the components spread out across a few boards.

You may have noticed a UART_TX label in the first picture but they don’t work out of the box. Previous researchers of other Tapo devices typically had to reconnect these pins first to get them working.
More importantly, I located the flash memory - an ESMT F50L1G41LB chip in the WSON8 package (left side of first image).
The next step was to read it using the XGecu T48 programmer. Unfortunately, the provided WSON8 adapter for T48 was actually too small to fit the chip. To get around this, I used their alligator clip adapter (which fit the WSON8 pins) and connected it to the SOP8 adapter instead.
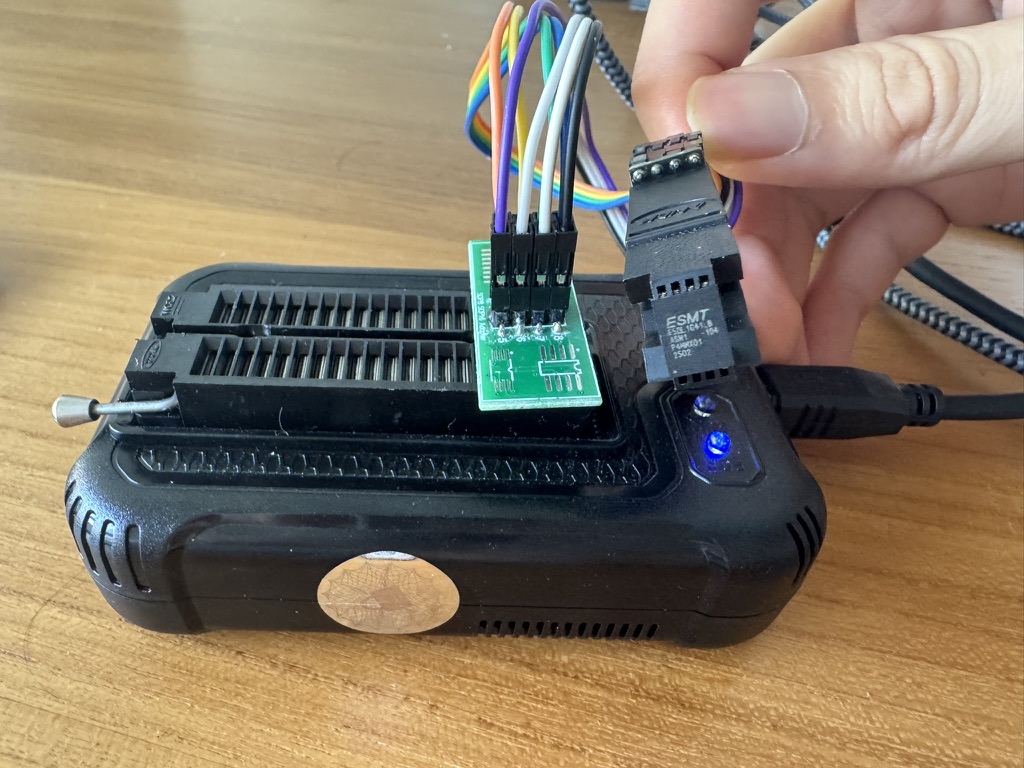
From there, it was fairly straightforward to read the chip as it was one of the supported devices for the T48. This time, I also made sure to remove the extra 64-byte OOB data as documented in the chip’s data sheet:
The device contains 1024 blocks, composed by
64 pages consisting in two NAND structures of 32 series
connected Flash cells. Each page consists 2112-Byte and is
further divided into a 2048-Byte data storage area with a
separate 64-Byte spare area. The 64-Byte area is typically used
for memory and error management.
Next was decrypting the filesystem - yes, Tapo devices do use filesystem encryption. Fortunately, a lot of work has already been done by Quentin Kaiser as detailed in his C200 blogpost (which also includes reconnecting the UART port), and the same hardcoded AES-128-CFB1 scheme and key are still in use!
Once I unpacked the Squash filesystem, I zoomed into the /bin/main binary, which contained most of the relevant handlers for web requests and other protocols.
As I’m saving some details for another blogpost on other parts of the C260 firmware, I’ll focus on the handler for Tapo Discovery Protocol.
Tapo Discovery Protocol v2 🔗
The main binary has a lot of helpful logging messages that help identify the name of the function. In this case, I started in tdpd_listen_thread at offset 0x2a7e0, which creates UDP sockets on port 20002 and 20010.
Next, the handler parses the incoming packet and helpfully logs the various struct values:
  puVar8 = (undefined8 *)
           recvfrom(param_1,&DAT_00323530,0x1000,0,(sockaddr *)&DAT_00323310,&local_3c);
  if ((int)puVar8 < 1) {
    pcVar15 = "[TDPD]tdpd recv error.";
    uVar11 = 0x966;
    pcVar25 = "tdpd_handle";
LAB_0002a694:
    uVar18 = 3;
    goto LAB_00029c3c;
  }
  if ((int)puVar8 < 0x10) {
    bVar37 = 0x10;
    pcVar15 = "[TDPD]recvbuf length = %d, less than hdr\'s %d";
    pcVar25 = "tdpd_handle";
    uVar11 = 0x96c;
LAB_0002a236:
    msg_debug(0,0x10,3,pcVar25,uVar11,pcVar15,puVar8,bVar37);
    return;
  }
  uVar20 = (uint)DAT_00323534;
  uVar21 = (uint)DAT_00323532;
  uVar22 = (uint)DAT_00323537;
  uVar23 = (uint)DAT_00323536;
  puVar39 = &DAT_00323540;
  uVar11 = _DAT_00323538;
  uVar38 = DAT_0032353c;
  msg_debug(0,0x10,1,"tdpd_handle",0x971,
            "[TDPD]recv packet:\nversion:%d\nreserved:%d\nflag:%d\nresult:%d\nopcode:%d\npayloadleng th:%d\nsn:%lu\nchecksum:%lu\npayload=%s\n"
            ,DAT_00323530,DAT_00323531,uVar23,uVar22,uVar21,uVar20,_DAT_00323538,DAT_0032353c,
            &DAT_00323540);
As can be seen in the final logging call, there’s a version value. It uses the version in an if/else statement further down that either uses the old handler for version 1 packets (which previous researchers have reverse-engineered), or a new set of handlers for version 2 packets via a switch statement:
  switch(uVar28) {
  case 1:
    input_obj = jso_from_string(&DAT_00323540);
    if (input_obj == 0) {
      puVar32 = &DAT_00323540;
      msg_debug(0,0x10,3,"tdpd_build_discovery_app_packet",0x717,
                "[TDPD][Error] invalid json string = %s",&DAT_00323540,puVar14);
      jso_add_int(0,"error_code",0xffffffff);
    }
    else {
      out_root_obj = jso_new_obj();
      if (out_root_obj == 0) {
        msg_debug(0,0x10,3,"tdpd_build_discovery_app_packet",0x720,
                  "[TDPD][Error] failed to create out_root_obj",puVar32,puVar14);
        jso_add_int(0,"error_code",0xffffffff);
        jso_free_obj(input_obj);
      }
      else {
        result_obj = jso_new_obj();
        if (result_obj == 0) {
          msg_debug(0,0x10,3,"tdpd_build_discovery_app_packet",0x728,
                    "[TDPD][Error] failed to create result_obj");
          jso_add_int(out_root_obj,"error_code",0xffffffff);
LAB_0002a282:
          jso_free_obj(input_obj);
          iVar30 = jso_to_string(out_root_obj,&DAT_00324540,0xff0);
          if (iVar30 < 0) goto LAB_0002a48a;
        }
        else {
          iVar12 = tdpd_get_basic_info_v2(input_obj,result_obj);
In short, version 2 unlocks a lot more interesting functionality. I won’t dive into all the details here, but some of the interesting differences from version 1 are:
- Big-endian instead of little-endian
- CRC32 checksum instead of custom checksum
- A
tdpd_get_encrypt_info_v2function that uses RSA encryption to send more comprehensive system data
While static analysis was helpful, I wanted to send real packets to a running camera. However, my rudimentary script failed. I knew I needed to have some sort of debugging set up to ensure I had correctly set the right struct sizes and values. There were two options - try to get UART access (and potentially encounter more blockers before getting a proper shell) or perform emulation.
Fortunately, with the entire filesystem, I could approximately emulate the running binary using Qiling framework. There were a few hurdles along the way, such as requiring some configuration values to be initiated. I intercept the read_config function using ql.hook_address and simply wrote to memory the missing values. Furthermore, since the main function executed several other handlers besides TDP, I manually redirected execution by changing the PC register to the address of the tdpd_handle function.
Next, I injected my generated TDP packet by hooking the recvfrom call.
Another final tweak I made was to modify the debug logging function to output to stdout (3) instead of null, allowing me to get the highly-informative logging messages and errors in my Qiling output.
PACKET = create_tdpd_packet(version=2, opcode=2, payload=OPCODE_2_PACKET)
print(PACKET)

def read_c_string(ql: Qiling, address: int, max_length: int = 256) -> str:
    raw_bytes = b""
    for i in range(max_length):
        byte = ql.mem.read(address + i, 1)
        if byte == b'\x00':
            break
        raw_bytes += byte
    return raw_bytes.decode('utf-8', errors='ignore')  # or 'ascii'

def my_recvfrom(ql: Qiling, sockfd: int, buf: int, length: int, flags: int, addr: int, addrlen: int):
    ql.mem.write(buf, PACKET)
    return len(PACKET)

def redirect_tdpd_handle(ql: Qiling) -> None:
    ql.arch.regs.lr = EXIT_ADDRESS
    ql.arch.regs.pc = 0x29728 | 1

# hook debug wrapper to also output to stdout
def msg_debug_wrapper(ql: Qiling) -> None:
    ql.arch.regs.r2 = 3


def read_config_enter(ql: Qiling) -> None:
    config_key = read_c_string(ql, ql.arch.regs.r0)
    print(f'Reading config {config_key}')
    if config_key == '/cloud_config/extra_bind':
        ql.mem.write(ql.arch.regs.r1, b'data_collect')

def read_config_exit(ql: Qiling) -> None:
    print(f'Value is {read_c_string(ql, ql.arch.regs.r5)}')

def debug_tmp(ql: Qiling) -> None:
    print(read_c_string(ql, ql.arch.regs.r0))
    print(read_c_string(ql, ql.arch.regs.r1))

EXIT_ADDRESS = 0x2ABC0

def main():
    executable_path = 'squashfs-root/bin/main'
    rootfs_path = 'squashfs-root'

    ql = Qiling([executable_path], rootfs_path, archtype=QL_ARCH.ARM, ostype=QL_OS.LINUX, multithread=True)#, verbose=QL_VERBOSE.DEBUG)

    ql.os.set_syscall('recvfrom', my_recvfrom, QL_INTERCEPT.CALL)

    ql.hook_address(redirect_tdpd_handle, 0x1CB66)

    ql.hook_address(msg_debug_wrapper, 0x1C514)

    # read_config hooks
    ql.hook_address(read_config_enter, 0x134394)
    ql.hook_address(read_config_exit, 0x134444)
    ql.hook_address(read_config_exit, 0x1343B2)

    ql.hook_address(debug_tmp, 0x2B280)

    ql.run(end=EXIT_ADDRESS)


if __name__ == "__main__":
    main()
Despite being held together with the code equivalent of duct tape and a prayer, it worked well enough that I could get a working generated packet on a running camera! I’ve shared the script on GitHub; do let me know if there are any corrections or improvements I can make.
Conclusion 🔗
I’ve quickly coming to understand that reverse-engineering each new device comes with its own quirks and rabbit holes. While it might appear relatively straightforward in this post, I spent countless hours hunting down the right research, fighting with hardware, and stepping through broken code.
I found that AI-assisted RE was pretty helpful but not comprehensive enough for key details like structs, endianness, and so on. There’s been a lot of exciting developments recently focusing on plugging directly into disassemblers like AETHER with IDA Pro MCP that would certainly improve the user experience from simply plonking the pseudocode into Gemini.
As hinted in the beginning, I’m still not at liberty to share more details until I’m sure patches from SPIRITCYBER have been completed, but stay tuned for more exciting details!
如有侵权请联系:admin#unsafe.sh