![]()
In this blog, I’ll walk you through:
- What Pi‑hole is and how DNS sinkholes work.
- Typical Pi‑hole deployments (e.g., Raspberry Pi) and why they’re popular.
- Running Pi‑hole on a spare Android device using the community project Pi‑hole‑for‑Android.
- Step‑by‑step install on Android based on the project’s README & releases.
- Benefits for security & privacy nerds—plus the perk that you don’t need to buy new hardware.
If you’re a tech‑savvy security enthusiast who loves practical, low‑cost hardening tips, this one’s for you.
Pi‑hole 101: A DNS “sinkhole” for ads, trackers and junk
Pi‑hole is a network‑level ad and tracker blocker. Instead of installing ad‑blockers on each device, Pi‑hole runs as your DNS server, intercepting domain lookups and returning a null/blocked response for domains on curated blocklists (ads, telemetry, some malware C2s, etc.). That means cleaner, faster browsing and fewer trackers across your entire network—phones, laptops, smart TVs, and even IoT devices.
The “standard” way: Raspberry Pi
Most guides set up Pi‑hole on a Raspberry Pi: low‑power, always‑on, and stable on Ethernet. Installation is straightforward, and then you point your router’s DNS to the Pi‑hole or enable Pi‑hole’s DHCP so all clients are forced to use it.
This works great—but what if you don’t have a Raspberry Pi?

Run Pi‑hole on your spare Android (root required)
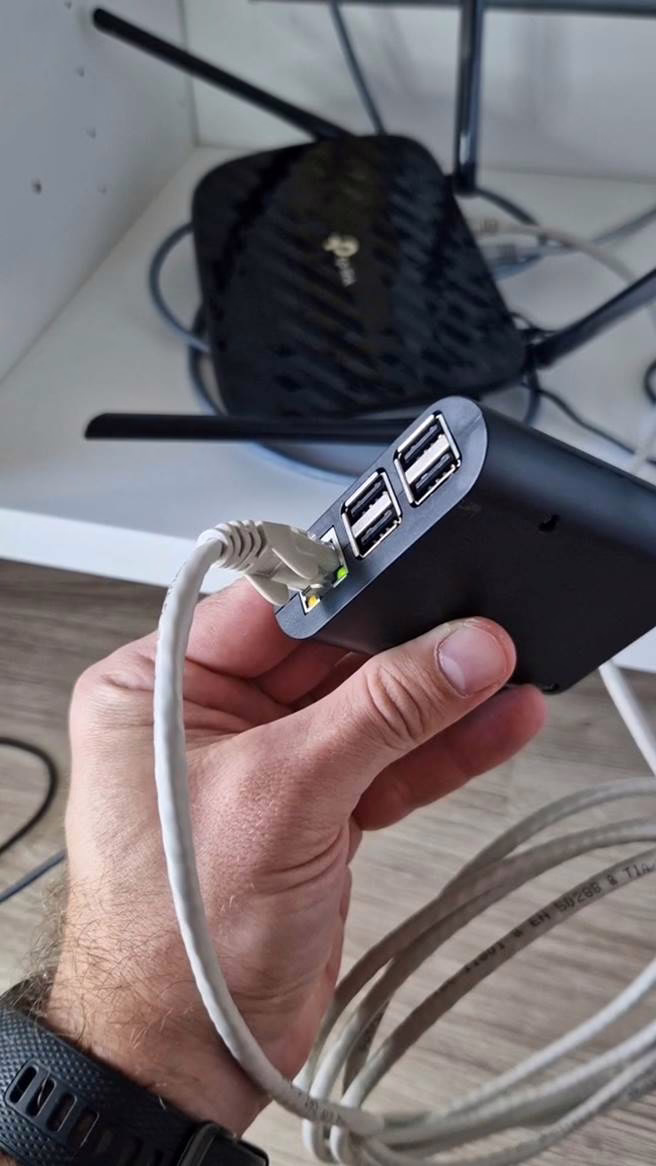
There’s a community project that turns almost any rooted Android 5.0+ device (ARMv7 or newer) into a Pi‑hole box using a Debian image and an installer called Pi Deploy. You can use a phone, tablet, HDMI stick—form factor doesn’t matter. This means you can repurpose old hardware sitting in your drawer.
Heads‑up: You must have root on the Android device. The project installs a full Debian user space and runs Pi‑hole in that environment.
Step‑by‑step: Install Pi‑hole on Android with Pi Deploy
Below is a summarized, practical version of the official project steps. Keep the phone plugged into power and on Wi‑Fi (or Ethernet via USB‑OTG) for reliability.
1) Prepare your rooted Android
- Verify the device is rooted (Magisk or equivalent).
- Ensure a stable network (ideally set a static/reserved IP in your router for this device).
2) Install Pi Deploy (APK)
- From the project Releases page, download and install the latest Pi Deploy APK.
- Open the app, tap the three‑dot menu (
⋮) →New Deploymentto pull the Debian image.- Default downloads a 64‑bit image; for 32‑bit devices: tap Properties and change Source Path ending from
/raspbian.tgzto/raspbian32.tgz.
- Default downloads a 64‑bit image; for 32‑bit devices: tap Properties and change Source Path ending from
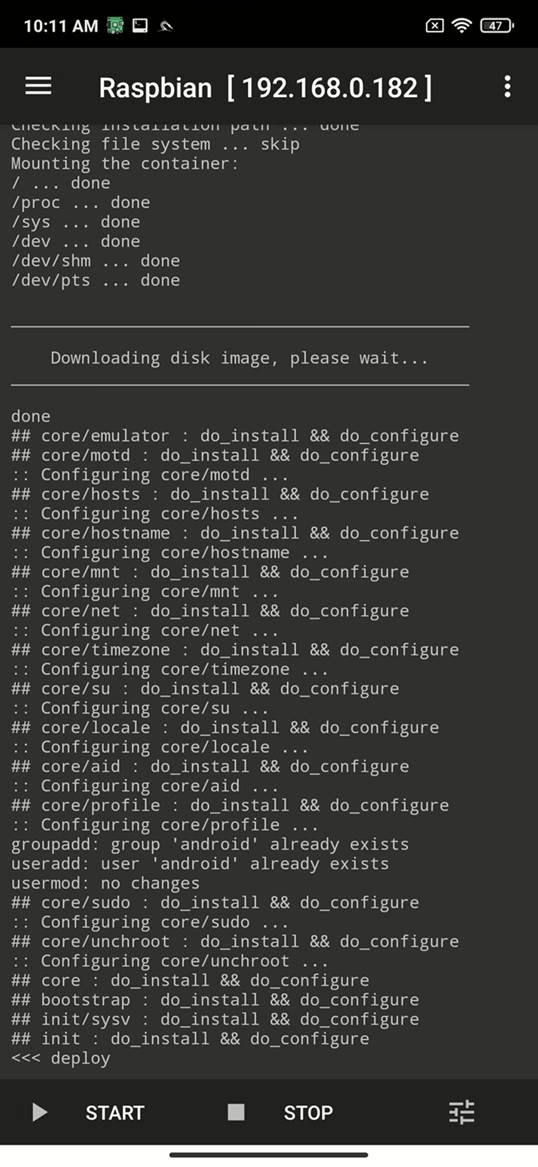
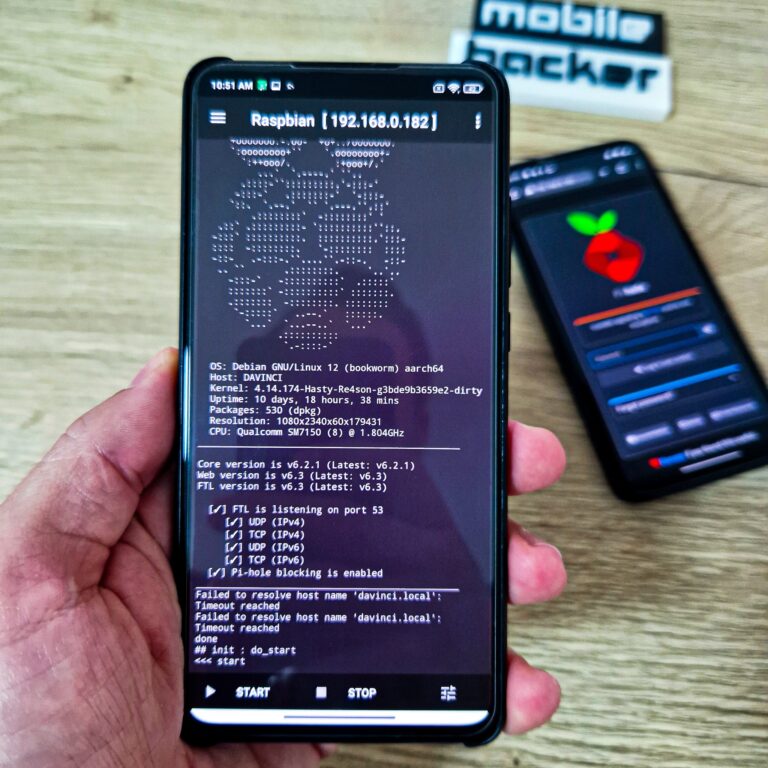
3) Start the Debian + Pi‑hole instance
- When the image download and install finishes, tap [
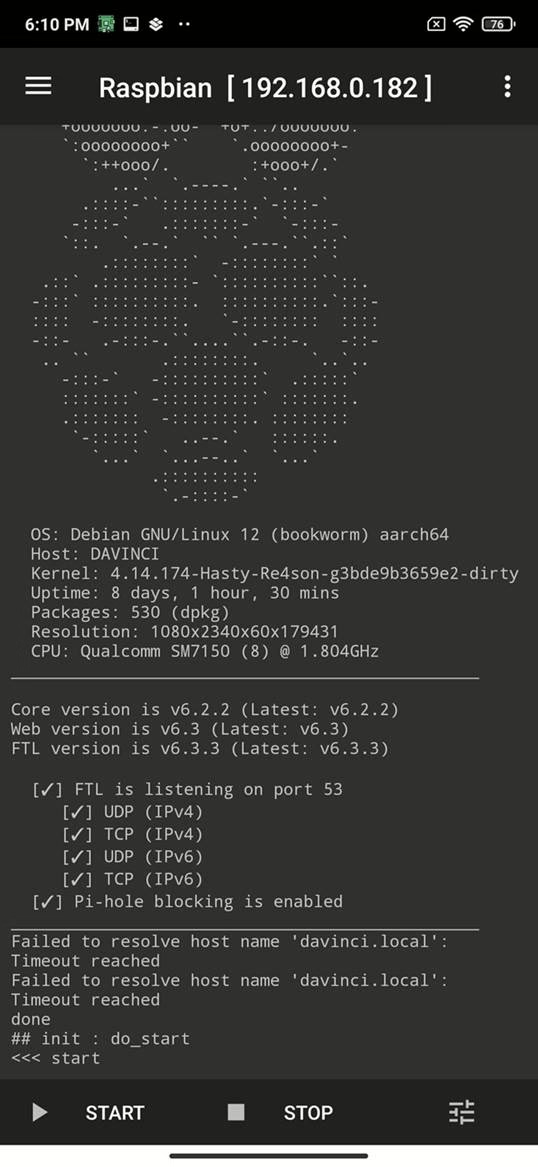
▷ START]. - The instance performs installation of Pi‑hole (and Unbound if configured by the image).
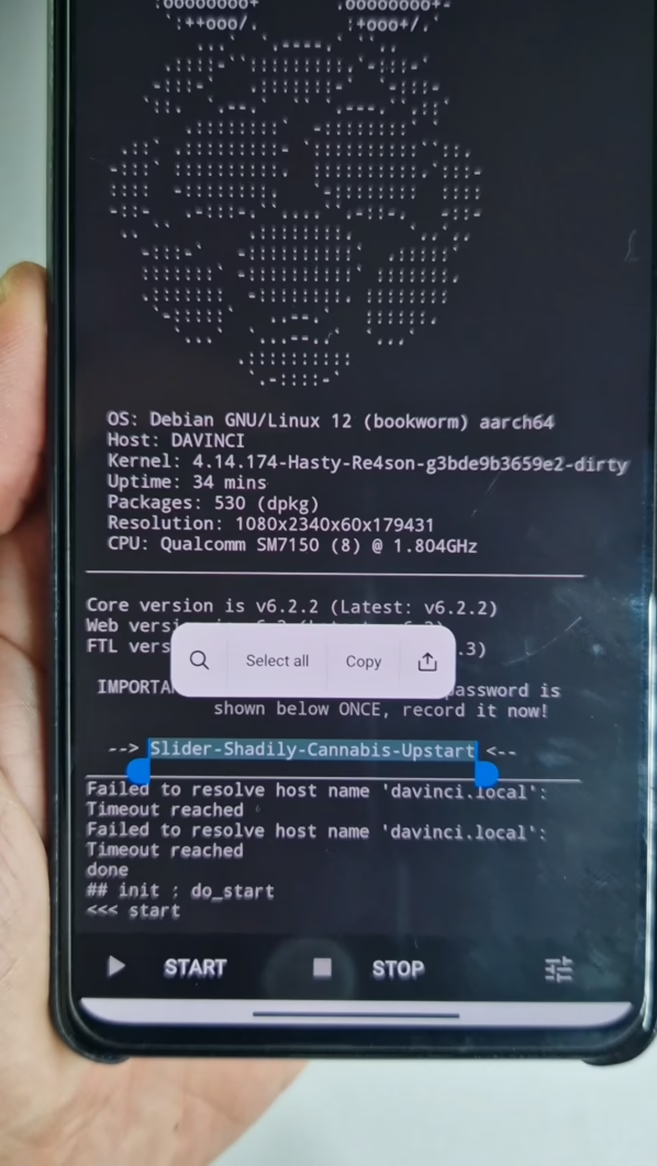
- You’ll see a generated password for Pi‑hole admin, SSH, and RDP (username:
android). Copy it now; it’s shown once.
4) Point your network to Pi‑hole
Pick one of these:
- Router DNS method:
In your router’s DHCP/DNS settings, set the DNS server to the Android device’s IP. All clients will automatically use Pi‑hole.

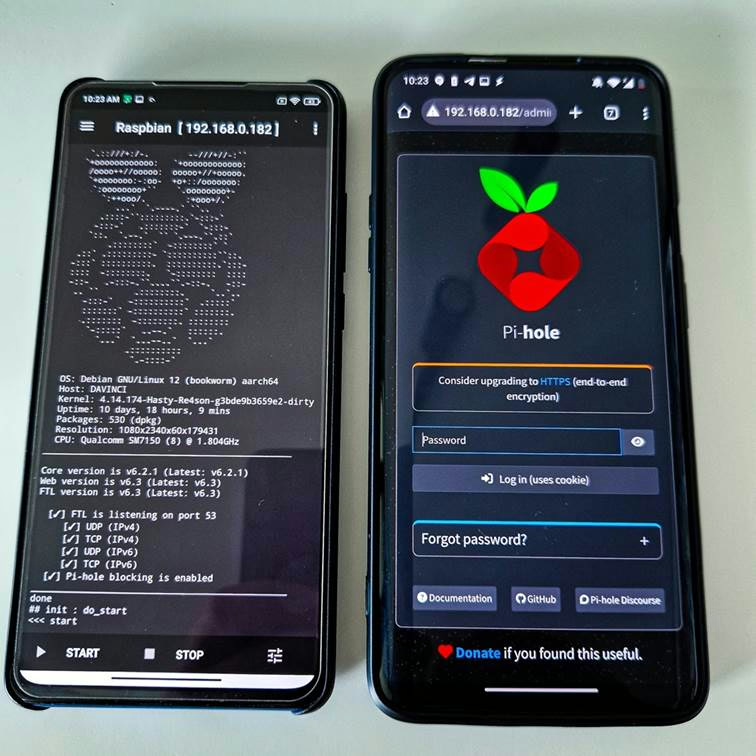
Then, log into the admin UI at:http://<android-device-ip>/admin using password generated by the app.
Troubleshooting tip: If you need to check whether your Android is 32‑bit vs. 64‑bit for the correct image, the release notes suggest running sudo unchroot uname -m inside the deployment shell to decide if you must switch the Source Path to /raspbian32.tgz.
Why security folks love this setup
From a practical blue‑team/home‑lab perspective:
- Reduce attack surface: Block known malvertising and tracker domains before they reach endpoints.
- Visibility: The query log/dashboards are a mini DNS telemetry feed—super helpful for profiling noisy devices, hunting suspicious lookups, or building allow/deny policies.
- Performance: Less junk → faster page loads and saved bandwidth.
- Optionally go recursive: Pair Pi‑hole with Unbound to resolve directly and avoid 3rd‑party resolvers (privacy & resilience).
- Portable privacy: Because it runs on a phone, you can pair with a travel router or tethering for on‑the‑go filtering (hotel Wi‑Fi, conferences, etc.). General capability via Pi‑hole + VPN or by setting devices to use your resolver.
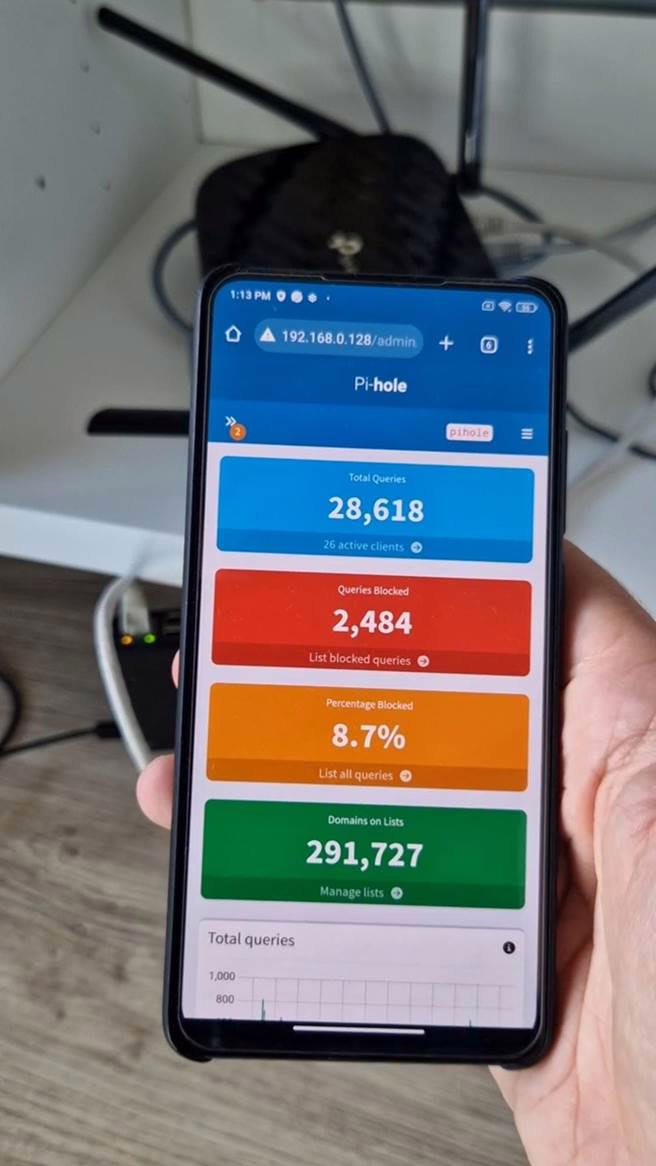
How to verify it’s working
Visit the Pi‑hole dashboard and check Queries/Blocked climbing as clients use it.

You can add additional and new domains to block using web interface. Great explanation on which domains to use can be found at The Best Pi-Hole Blocklists and The Big Blocklist Collection.
Conclusion: DNS filtering from a phone in your drawer
Pi‑hole remains one of the highest ROI tools for privacy, performance, and visibility on home and small office networks. While the Raspberry Pi is the canonical host, the Pi‑hole‑for‑Android project proves you can achieve the same outcome with no new hardware—just a rooted spare Android you probably already own.
Benefits recap:
- Network‑wide ad/tracker/malware blocking
- Better page load times & lower bandwidth usage
- DNS telemetry
- Optional DHCP and Unbound for centrally enforced, recursive privacy
- Zero new purchases—repurpose existing Android hardware