
AutoRecon是由Tib3rius开发的网络侦察工具,支持多目标并发扫描和自定义插件,自动化渗透测试枚举过程,提升效率并减少遗漏。 2025-5-20 13:50:53 Author: www.blackmoreops.com(查看原文) 阅读量:1 收藏
Are you tired of manually running countless enumeration commands during penetration testing or OSCP preparation? Let me introduce you to AutoRecon – a powerful multi-threaded network reconnaissance tool that will revolutionise your enumeration process. When tackling CTFs, OSCP labs, or real-world penetration testing engagements, efficient enumeration is crucial. However, manual enumeration can be tedious and time-consuming, often leading to overlooked services or vulnerabilities. AutoRecon solves this problem by automating the reconnaissance process, allowing you to focus on the more exciting aspects of penetration testing – exploitation and privilege escalation. AutoRecon, created by Tib3rius, performs automatic port scanning and service detection, then launches appropriate enumeration tools based on discovered services. As Tib3rius puts it, “It’s like bowling with bumpers” – a perfect analogy from @ippsec that highlights how AutoRecon provides guidance while still letting you do the actual penetration testing work.

Key Features of AutoRecon
AutoRecon isn’t just another scanning tool; it’s a comprehensive Network Reconnaissance Tool or framework with numerous powerful features:
- Multi-target support: Scan IP addresses, IP ranges (CIDR notation), and resolvable hostnames, including IPv6
- Concurrent scanning: Utilise multiple processors to scan several targets simultaneously
- Advanced plugin system: Easily create new scans with customisable port and service scanning plugins
- Manual command suggestions: Get recommended follow-up commands when automation isn’t sufficient
- Port scan customisation: Limit port scanning to specific TCP/UDP ports
- Pattern matching: Highlight and extract important information from scan results
- Intuitive directory structure: Logically organised results for easy analysis
- Comprehensive logging: Full command logging with error reporting
- Configurable settings: Use a powerful config file to maintain your preferred settings
- Tagging system: Include or exclude specific plugins as needed
- Timeout controls: Set global and per-target timeouts for time-limited engagements
- Variable verbosity: Four levels of verbosity, adjustable during scans
- Accessibility options: Turn off colourised output if needed
Installation
There are four ways to install AutoRecon:
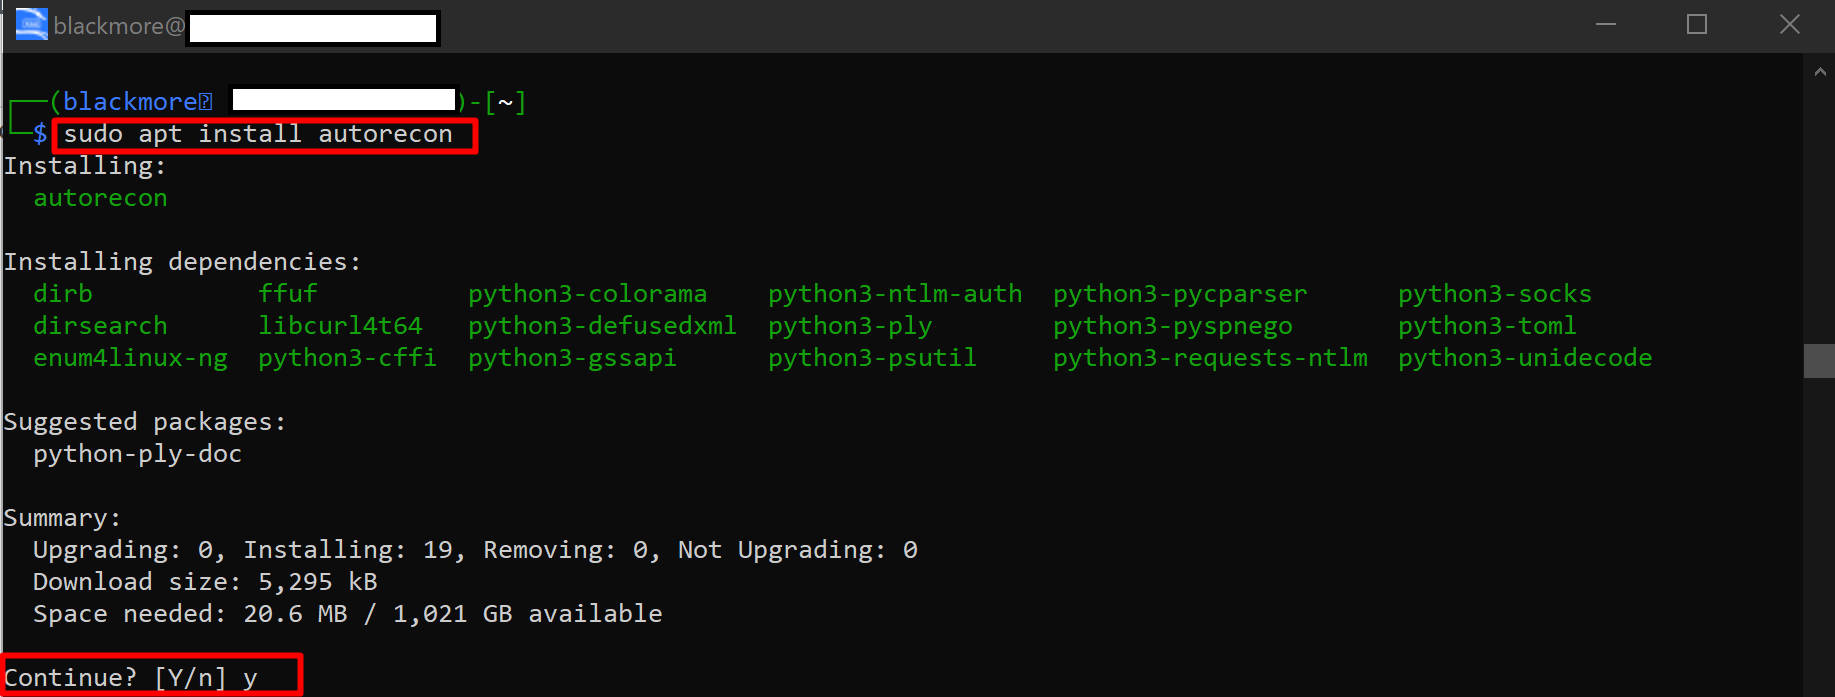
Method #1: Using apt (Recommended in Kali Linux)
Good news, Autorecon has been added to Kali Linux, so simply run the following command:
sudo apt install autorecon
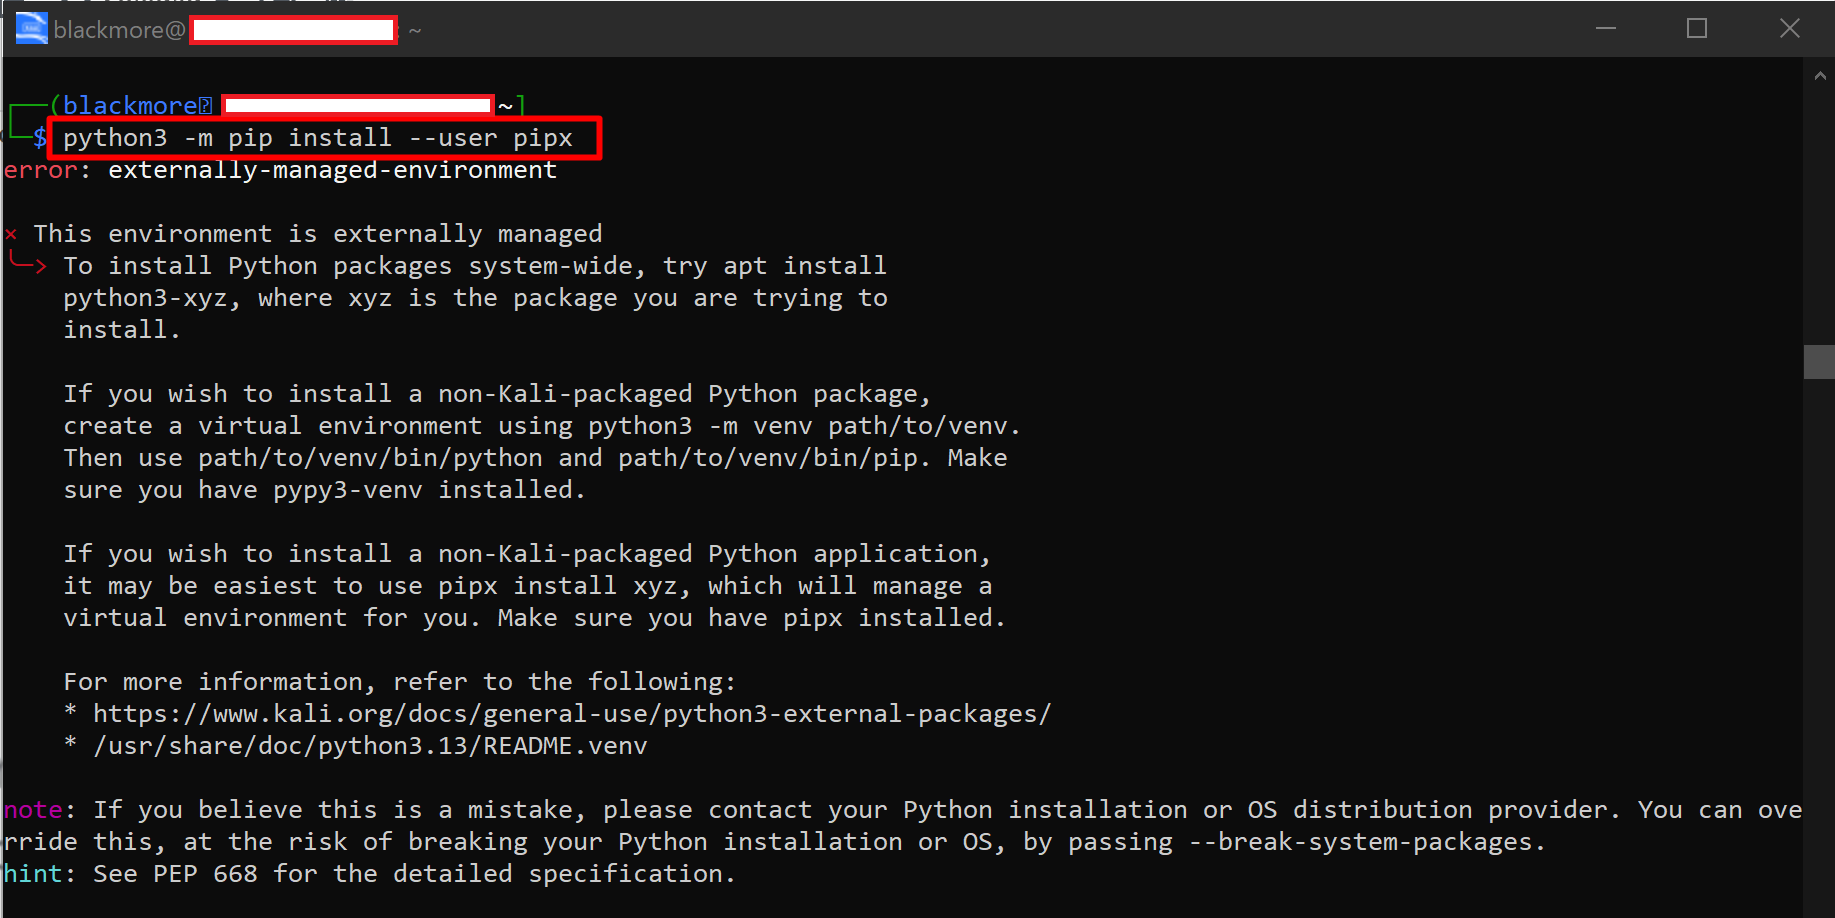
Method #2: pipx (Recommended for other Linux distros)
sudo apt install python3-venv
python3 -m pip install --user pipx
python3 -m pipx ensurepath
pipx install git+https://github.com/Tib3rius/AutoRecon.git
To run AutoRecon with sudo (for faster SYN scanning and UDP scanning):
sudo env "PATH=$PATH" autorecon [OPTIONS]
or
sudo $(which autorecon) [OPTIONS]
Just know that you might get the following error if you try to install Autorecon in Kali Linux using above method:
asd
┌──(blackmore㉿kali)-[~]
└─$ python3 -m pip install --user pipx
error: externally-managed-environment

× This environment is externally managed
╰─> To install Python packages system-wide, try apt install
    python3-xyz, where xyz is the package you are trying to
    install.

    If you wish to install a non-Kali-packaged Python package,
    create a virtual environment using python3 -m venv path/to/venv.
    Then use path/to/venv/bin/python and path/to/venv/bin/pip. Make
    sure you have pypy3-venv installed.

    If you wish to install a non-Kali-packaged Python application,
    it may be easiest to use pipx install xyz, which will manage a
    virtual environment for you. Make sure you have pipx installed.

    For more information, refer to the following:
    * https://www.kali.org/docs/general-use/python3-external-packages/
    * /usr/share/doc/python3.13/README.venv

note: If you believe this is a mistake, please contact your Python installation or OS distribution provider. You can override this, at the risk of breaking your Python installation or OS, by passing --break-system-packages.
hint: See PEP 668 for the detailed specification.
Method #3: pip
python3 -m pip install git+https://github.com/Tib3rius/AutoRecon.git
Method #4: Manual Installation
git clone https://github.com/Tib3rius/AutoRecon.git
cd AutoRecon
python3 -m pip install -r requirements.txt
python3 autorecon.py [OPTIONS] 127.0.0.1
How AutoRecon Network Reconnaissance Tool Works
AutoRecon operates in two main phases:
- Initial Port Scanning: AutoRecon performs port scans and service detection to identify open ports and running services.
- Service Enumeration: Based on the port scan results, AutoRecon automatically launches appropriate enumeration tools for each discovered service.
For example, if HTTP is detected on a target, AutoRecon will automatically run other Network Reconnaissance Tool like feroxbuster, nikto, whatweb, and others to thoroughly enumerate the web service.
Results Organisation
AutoRecon creates a well-organised directory structure for each target:
.
├── exploit/
├── loot/
├── report/
│   ├── local.txt
│   ├── notes.txt
│   ├── proof.txt
│   └── screenshots/
└── scans/
    ├── _commands.log
    ├── _manual_commands.txt
    ├── tcp80/
    ├── udp53/
    └── xml/
This structure provides:
- exploit/: For storing exploit code
- loot/: For storing interesting files or hashes
- report/: Templates for notes, flags, and screenshots
- scans/: All scan results, with subdirectories for each open port
- _commands.log: Record of all commands run
- _manual_commands.txt: Suggested manual commands for further enumeration
Verbosity Levels
AutoRecon offers four levels of verbosity to suit your preferences:
- None: Minimal output showing only when target scanning starts and ends
- -v: Announces when plugins start running and reports open ports and identified services
- -vv: Shows exact commands being run, highlights pattern matches, and announces when plugins finish
- -vvv: Outputs everything, including live output from all running commands
You can adjust verbosity mid-scan using the up and down arrow keys.
Automated reconnaissance is essential for efficient penetration testing. AutoRecon has become a go-to tool for many security professionals ethical hackers due to its comprehensive scanning capabilities time-saving features. This guide will walk you through practical use cases of AutoRecon demonstrating its functionality with real examples.
Basic AutoRecon Usage
To get familiar with AutoRecon’s capabilities, first check the available options:
autorecon -h
This displays a comprehensive help screen showing all parameters targets you can specify. The most important parameter is the target itself, which can be a space-separated list of IP addresses, CIDR notations, or hostnames.
For a basic scan of a single target:
autorecon 192.168.126.132
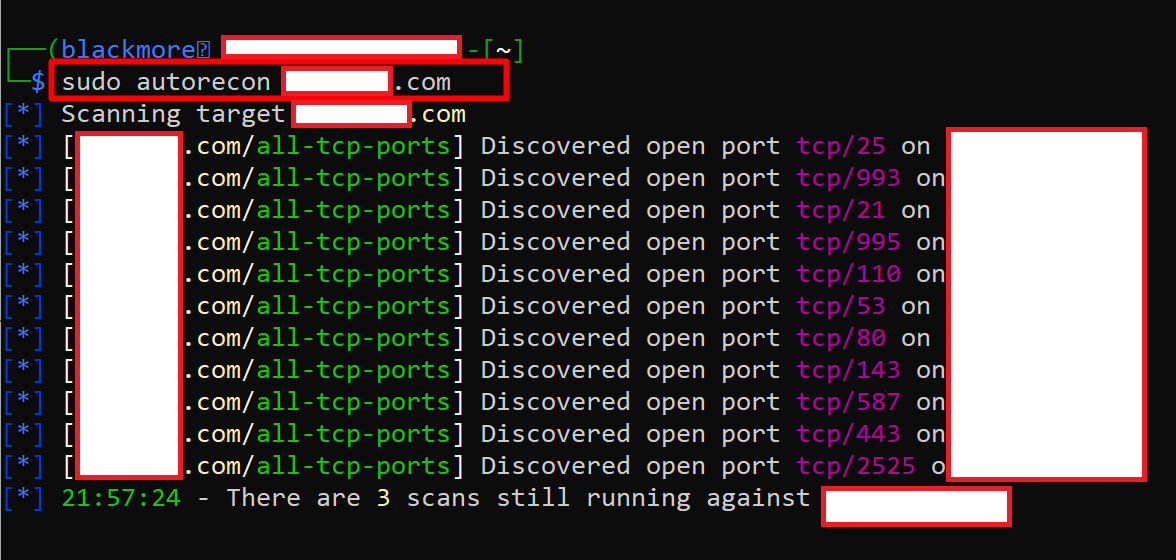
Automatic Network Reconnaissance using Autorecon in Kali Linux
Running this command initiates a full scan of the specified IP address using AutoRecon’s default settings. The tool will first perform port scanning using Nmap then automatically launch appropriate enumeration tools based on the discovered services.
Scanning Multiple Targets Simultaneously
Using Target List Files
When performing reconnaissance against multiple targets, you can create a text file containing all target IP addresses (one per line) then use the -t flag:
# First, create or view your targets file
cat targets.txt

# Then run AutoRecon against all targets
autorecon -t targets.txt
By default, AutoRecon scans 5 targets simultaneously. The output will show AutoRecon initializing scanning each target in parallel.
Adjusting Concurrent Target Scanning
You can control how many targets are scanned simultaneously using the -m parameter:
autorecon -m 3 -t targets.txt
This limits AutoRecon to scanning only 3 targets at once. If you have 10 targets, AutoRecon will scan the first 3, then move on to the next 3 when slots become available.
Controlling Scan Intensity Per Target
Concurrent Scans Per Target
The -cs parameter controls how many scans run simultaneously per target. The default is 10 concurrent scans, which can be adjusted based on your needs system capabilities:
autorecon -cs 5 192.168.126.132
This restricts AutoRecon to running only 5 simultaneous scans against the target. For example, if AutoRecon would normally run Nmap TCP scan, UDP scan, SMB enumeration HTTP service enumeration all at once, with -cs 5 it might only run 5 of these scans at a time, queueing the rest.
Each target typically has at least 3 Nmap scans running:
- A full TCP scan
- A top 1000 ports TCP scan
- A top 20 ports UDP scan
Reducing the concurrent scans can be useful on systems with limited resources or when you want to remain less noticeable on the target network.
Customizing Directory Structure
Single Target Mode
The –single-target argument modifies the output directory structure:
autorecon 192.168.126.133 --single-target
With this option, AutoRecon doesn’t create a separate directory named after the target IP. Instead, results are stored directly in the main results directory.
You can verify this directory structure:
ls -la results
cat results/report/notes.txt
Notice that the report notes file is directly accessible at results/report/notes.txt rather than results/192.168.126.133/report/notes.txt.
Only Scans Directory Mode
If you’re only interested in the scan results not the additional directories for exploitation loot:
autorecon 192.168.154.130 --only-scans-dir
This creates only the “scans” directory excluding the exploit, loot, report directories. Check the structure with:
ls -la results
ls -la results/192.168.154.130
This is useful when you want to focus solely on reconnaissance data without the additional categorization.
Controlling Information Flow
Heartbeat Updates
The –heartbeat parameter controls how frequently AutoRecon provides status updates:
autorecon 192.168.126.133 --heartbeat 5
By default, AutoRecon provides updates every 60 seconds. This command changes it to every 5 seconds, giving you more frequent information about running scans their progress. This is particularly useful during time-sensitive assessments when you need constant visibility into the scan progress.
Verbosity Levels
AutoRecon offers multiple verbosity levels to control the amount of information displayed:
# Basic verbosity - shows commands service detection
autorecon -v 192.168.154.130
With -v, AutoRecon provides more detailed output, showing the commands being executed services detected. You’ll see scan initialization progress updates, plus notifications when services are detected their ports.
# High verbosity - shows all commands pattern matches
autorecon -vv 192.168.154.130
The -vv flag provides even more detailed output, showing the exact commands being run pattern matches in the command output. This level of detail can be useful for learning or troubleshooting but may be overwhelming during normal operations.
# Maximum verbosity - shows all output in real-time
autorecon -vvv 192.168.154.130
The highest verbosity level outputs everything, including the real-time output from all running commands. This produces a significant amount of console output is generally only useful for debugging purposes.
By default, without any verbosity flag, AutoRecon only informs you when scans start finish.
Customizing Nmap Scans
Replacing Default Nmap Parameters
You can override AutoRecon’s default Nmap parameters with your own:
autorecon 192.168.126.133 --nmap "-sV"
This replaces the default parameters (-vv –reason -Pn) with your specified -sV parameter. You can verify this by checking the commands log:
cat results/192.168.126.133/scans/_commands.log
In the log, you’ll see Nmap commands using only the service version detection parameter.
Appending to Default Nmap Parameters
Instead of replacing the defaults, you can append additional parameters:
autorecon 192.168.126.133 --nmap-append "-sS"
This maintains AutoRecon’s default parameters adding your specified TCP SYN scan parameter. The commands log will show Nmap commands using both the default parameters (-vv –reason -Pn) plus your added -sS parameter.
Analyzing AutoRecon Results
After running AutoRecon, a wealth of information is available in the results directory. The structure varies depending on the options used, but typically includes:
results/
└── 192.168.126.132/
    ├── exploit/
    ├── loot/
    ├── report/
    │   ├── local.txt
    │   ├── notes.txt
    │   └── proof.txt
    └── scans/
        ├── _commands.log
        ├── _manual_commands.txt
        └── [service-specific results]
Understanding Key Result Files
The report/notes.txt file provides a quick overview of discovered services:
cat results/192.168.126.132/report/notes.txt
This displays a summary of all services detected by Nmap, organized by port. It serves as a quick reference for planning your next steps.
The full Nmap scan results provide comprehensive information:
cat results/192.168.126.132/scans/_full_tcp_nmap.txt
Service-Specific Enumeration Results
SMB Service Enumeration
If SMB services are detected, check the Enum4Linux results:
cat results/192.168.126.132/scans/enum4linux.txt
This file contains detailed enumeration of the SMB service, including workgroup information, domain details, users, shares, password policy information.
For share permissions, examine the SMBMap results:
cat results/192.168.126.132/scans/smbmap-share-permissions.txt
This shows available shares their corresponding access permissions, helping identify potentially accessible sensitive data.
SMTP Service Enumeration
If SMTP services are found, check for user enumeration results:
cat results/192.168.126.132/scans/tcp_25_smtp_user-enum.txt
This file shows the results of SMTP user enumeration, listing valid email accounts on the target server. This information can be valuable for further attacks like password spraying.
Web Service Enumeration
For HTTP services, WhatWeb results provide technology fingerprinting:
cat results/192.168.126.132/scans/tcp_8180_http_whatweb.txt
This identifies web technologies, versions frameworks running on the web server.
Nikto scan results reveal potential vulnerabilities:
cat results/192.168.126.132/scans/tcp_8180_http_nikto.txt
Nikto performs comprehensive web vulnerability scanning, identifying potential security issues misconfigurations.
Visual Web Service Assessment
AutoRecon automatically captures screenshots of web services:
results/192.168.126.132/scans/tcp_8180_http_screenshot.png
These screenshots provide a visual reference of discovered web interfaces without manually visiting each site. This is particularly helpful when multiple web services are running on different ports, as it allows you to quickly identify interesting targets for further investigation.
Practical Workflow Example
Here’s a practical workflow example using AutoRecon:
- Run initial scan with default settings:
autorecon 192.168.126.132
- While scanning is in progress, check for early results:
cat results/192.168.126.132/report/notes.txt
- Once complete, examine service-specific results based on discovered services:
# For web services
cat results/192.168.126.132/scans/tcp_80_http_whatweb.txt
cat results/192.168.126.132/scans/tcp_80_http_nikto.txt

# For SMB services
cat results/192.168.126.132/scans/enum4linux.txt
cat results/192.168.126.132/scans/smbmap-share-permissions.txt
- Check the manual commands file for suggested next steps:
cat results/192.168.126.132/scans/_manual_commands.txt
- Begin targeted exploitation based on the discovered information.
Real-World Success Stories
The effectiveness of AutoRecon as a Network Reconnaissance Tool is clear from numerous testimonials from successful OSCP candidates:
“AutoRecon was invaluable during my OSCP exam… I was able to start on a target with all of the information I needed clearly laid in front of me.” – b0ats (rooted 5/5 exam hosts)
“On the OSCP exam I left the tool running in the background while I started with another target, and in a matter of minutes I had all of the AutoRecon output waiting for me.” – tr3mb0 (rooted 4/5 exam hosts)
“After running AutoRecon on my OSCP exam hosts, I was given a treasure chest full of information that helped me to start on each host and pass on my first try.” – rufy (rooted 4/5 exam hosts)
Conclusion
AutoRecon significantly streamlines the reconnaissance phase of penetration testing, automating tedious enumeration tasks while producing well-organised, comprehensive results. By understanding these practical use cases examples, you can effectively leverage AutoRecon to enhance your penetration testing workflow save valuable time during assessments. By automating the reconnaissance phase, it saves valuable time and ensures thorough enumeration of targets. The Network Reconnaissance Tool’s multi-threading capabilities, customisable plugins, and well-organised output make it an essential addition to any penetration tester’s toolkit.
Whether you’re preparing for the OSCP exam, participating in CTFs, or conducting professional penetration tests, AutoRecon will significantly improve your efficiency and effectiveness. As one satisfied user puts about this Network Reconnaissance Tool, “AutoRecon takes out a lot of the tedious work… while at the same time providing well-organised subdirectories to quickly look over so you don’t lose your head.” Check out AutoRecon on GitHub!
如有侵权请联系:admin#unsafe.sh