2024-4-30 06:26:58 Author: securityboulevard.com(查看原文) 阅读量:2 收藏
Welcome to the fourth and final part of our How to build a Phishing Playbook series. If you haven’t read the other parts, take a look using the links below. In this part we’ll be running test data through our playbook, filling out the dynamic inputs, then publishing it to production.
Testing
Once a playbook is built to follow the specifications laid out in part two, sample email alerts can be used to verify the playbook’s functionality. We recommend setting up a mailbox account that you can forward different email formats to in order to make sure the playbook can handle edge cases.


To test new playbooks, we will use Postman to push custom alerts into the platform. We can create a webhook endpoint for our sample email data in the Office 365 Fetch Event command.

With this webhook active, we can now send test data into the platform and push it through our playbook.
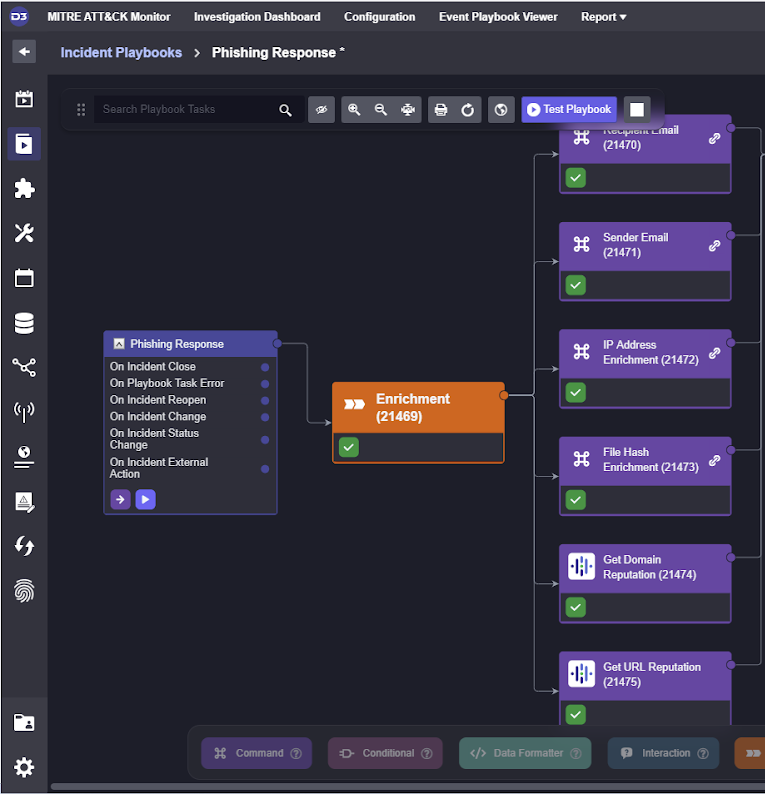
Event Playbook
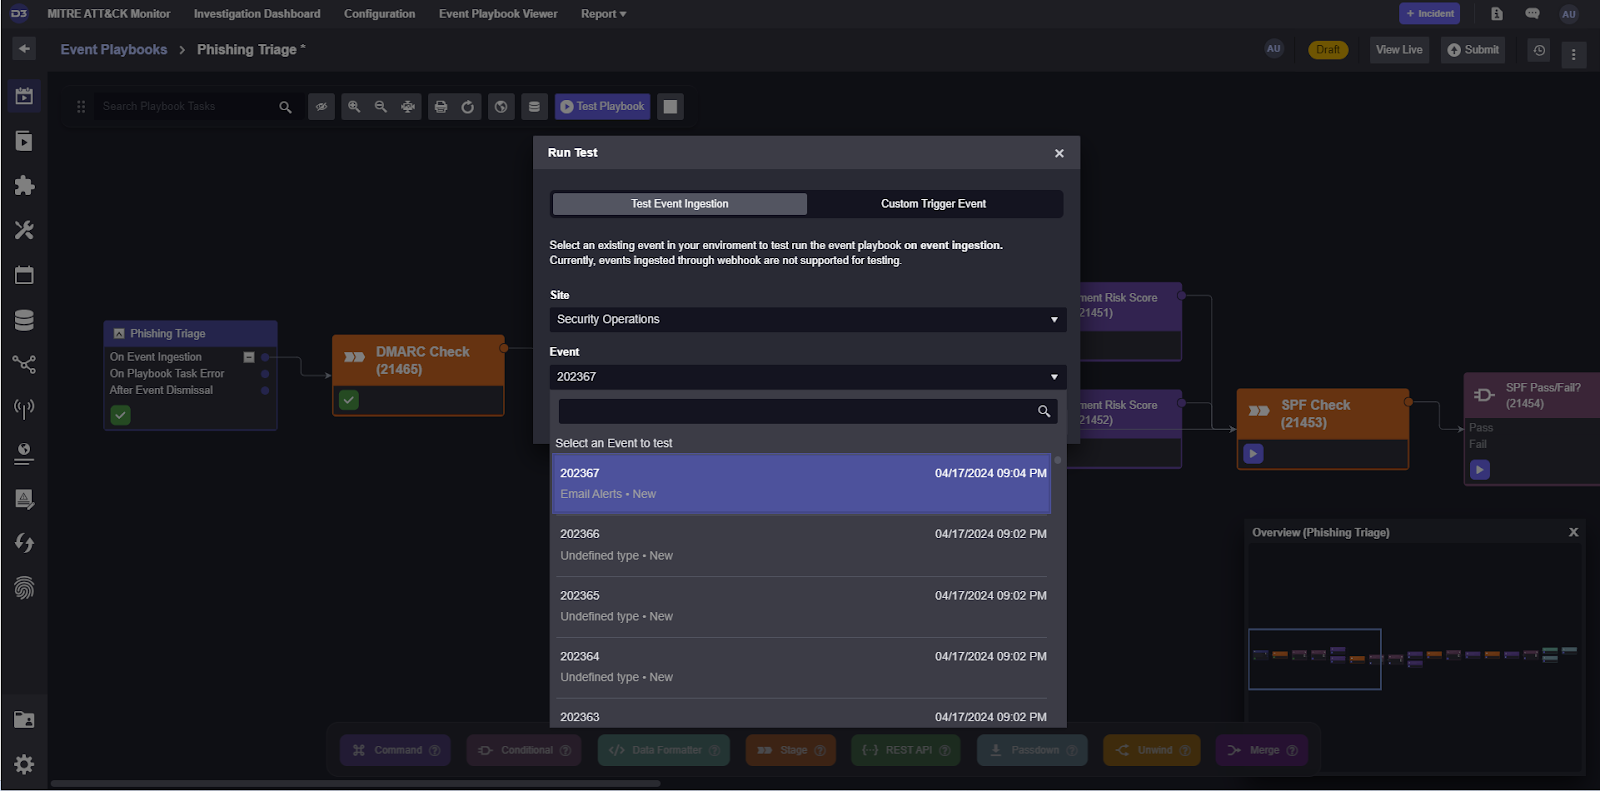
Once the event is in the system, we can select Test Playbook at the top of the playbook editor, and select the email alert we just created. This will run data through the playbook and allow us to fill out the various inputs each task may need.
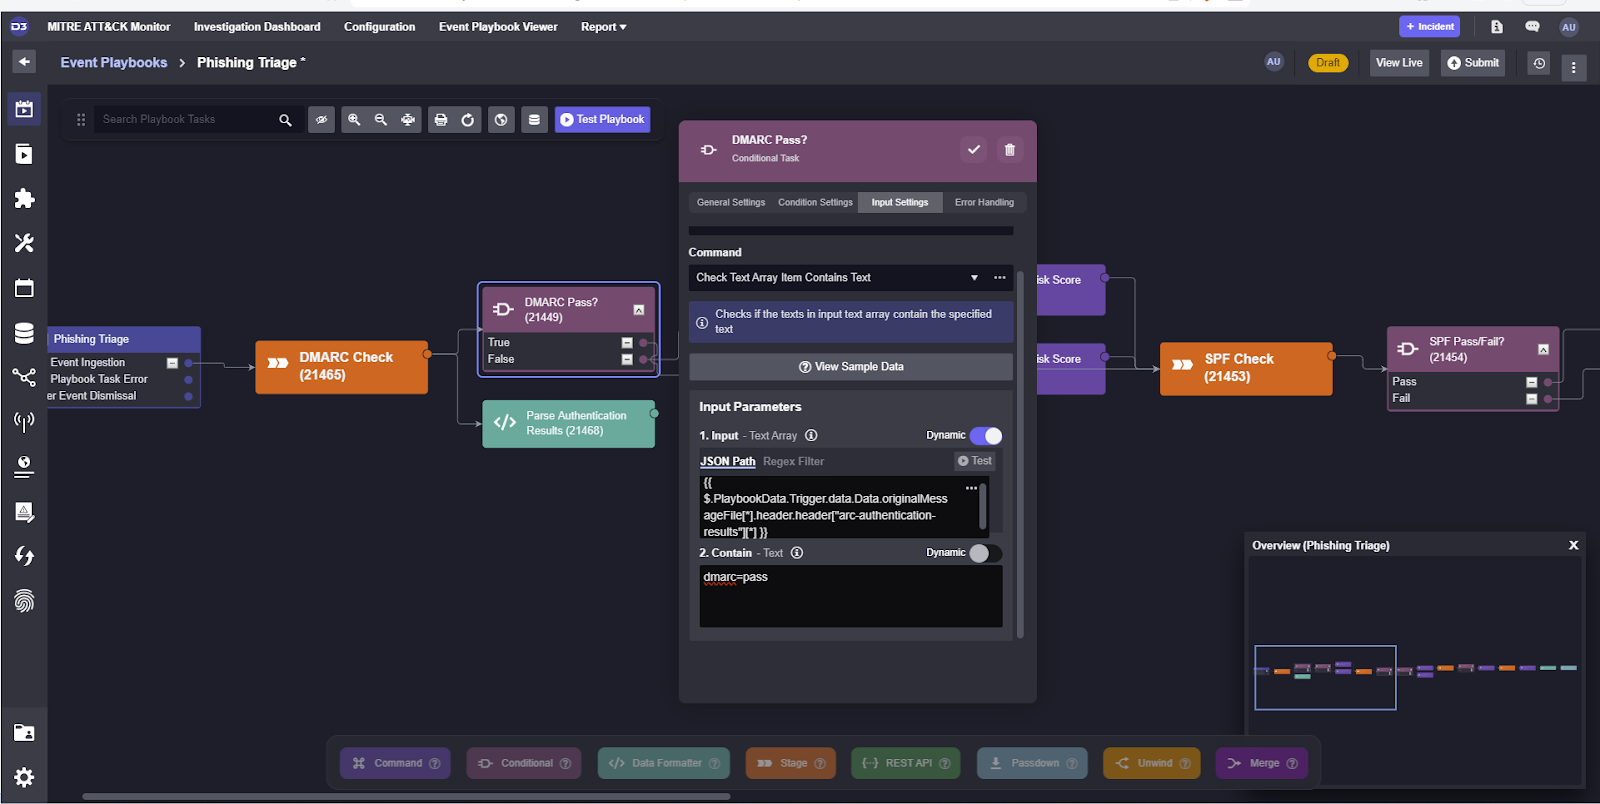
For example, the authentication checks can be configured to search for [authentication_parameter]=pass and return True if found. Here, we’ve set the conditional to search for dmarc=pass from the authentication results.

After running test data through it, we can see that it returned True and proceed to the SPF check workflow.
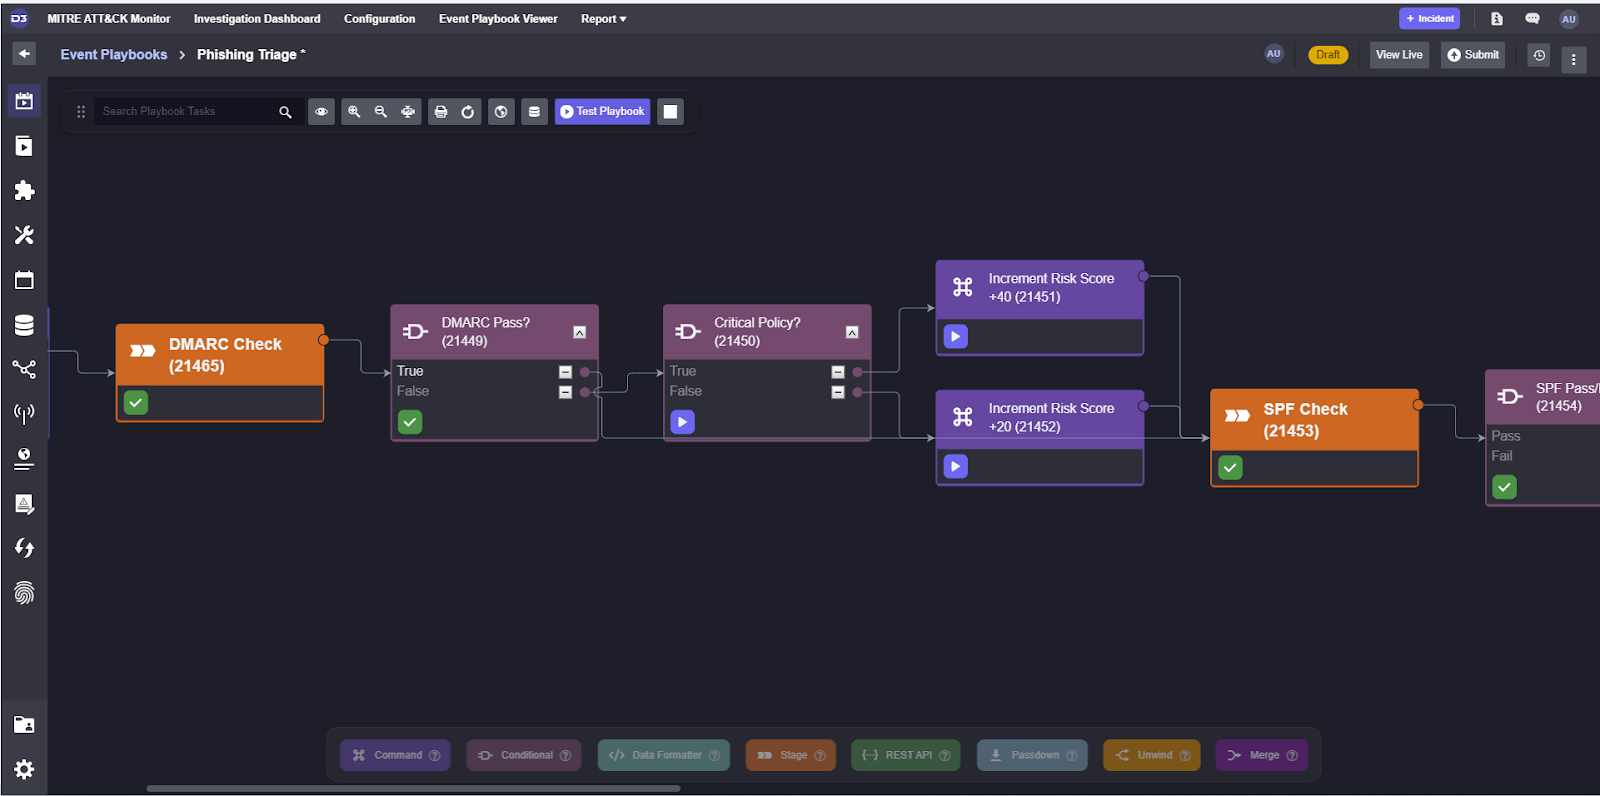
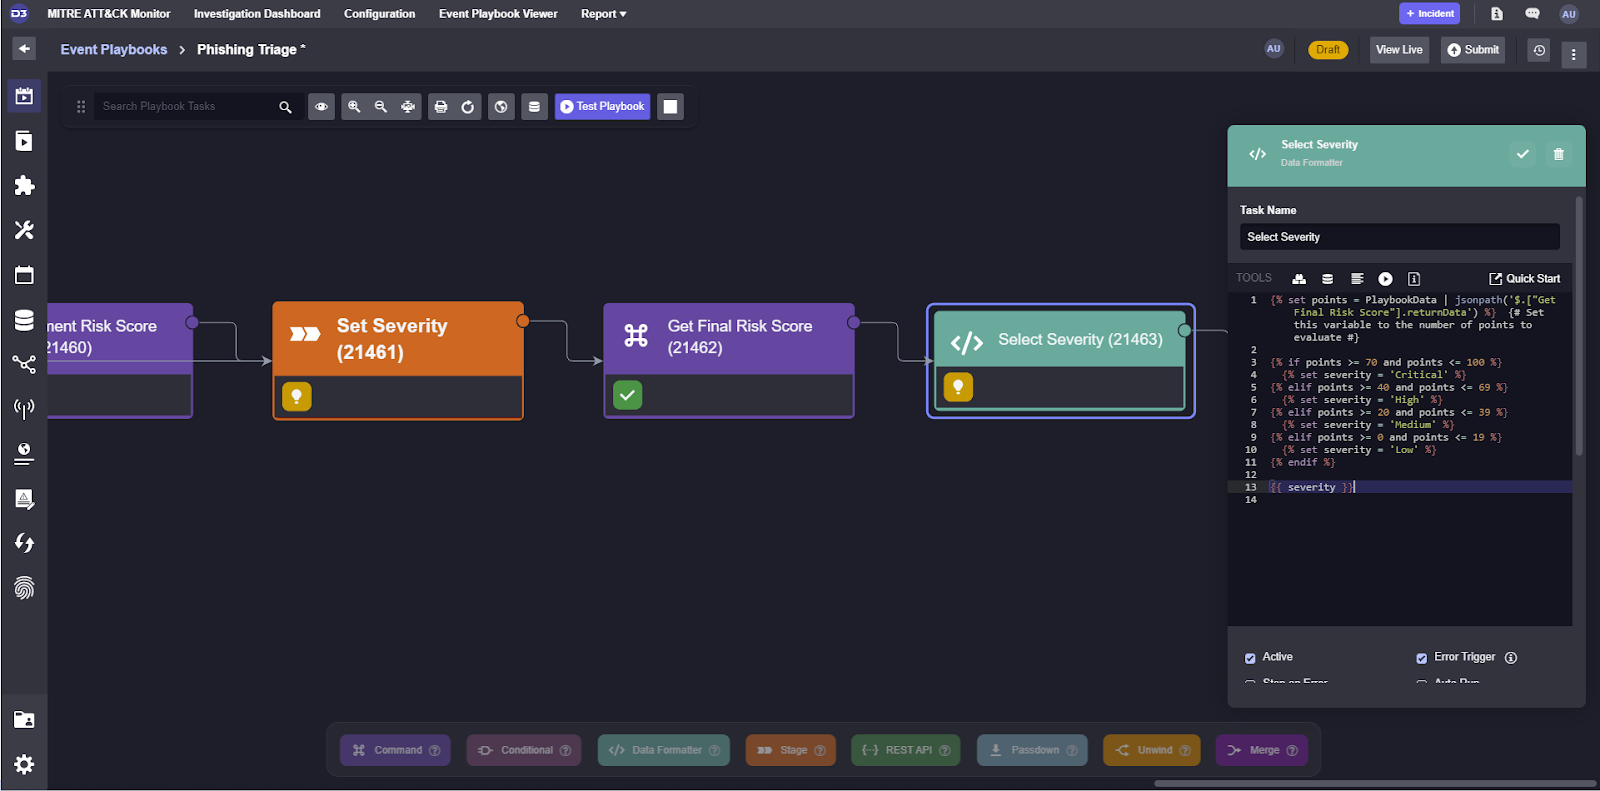
Then we can do the same for SPF and DKIM and before making sure that the severity calculation at the end is correct.
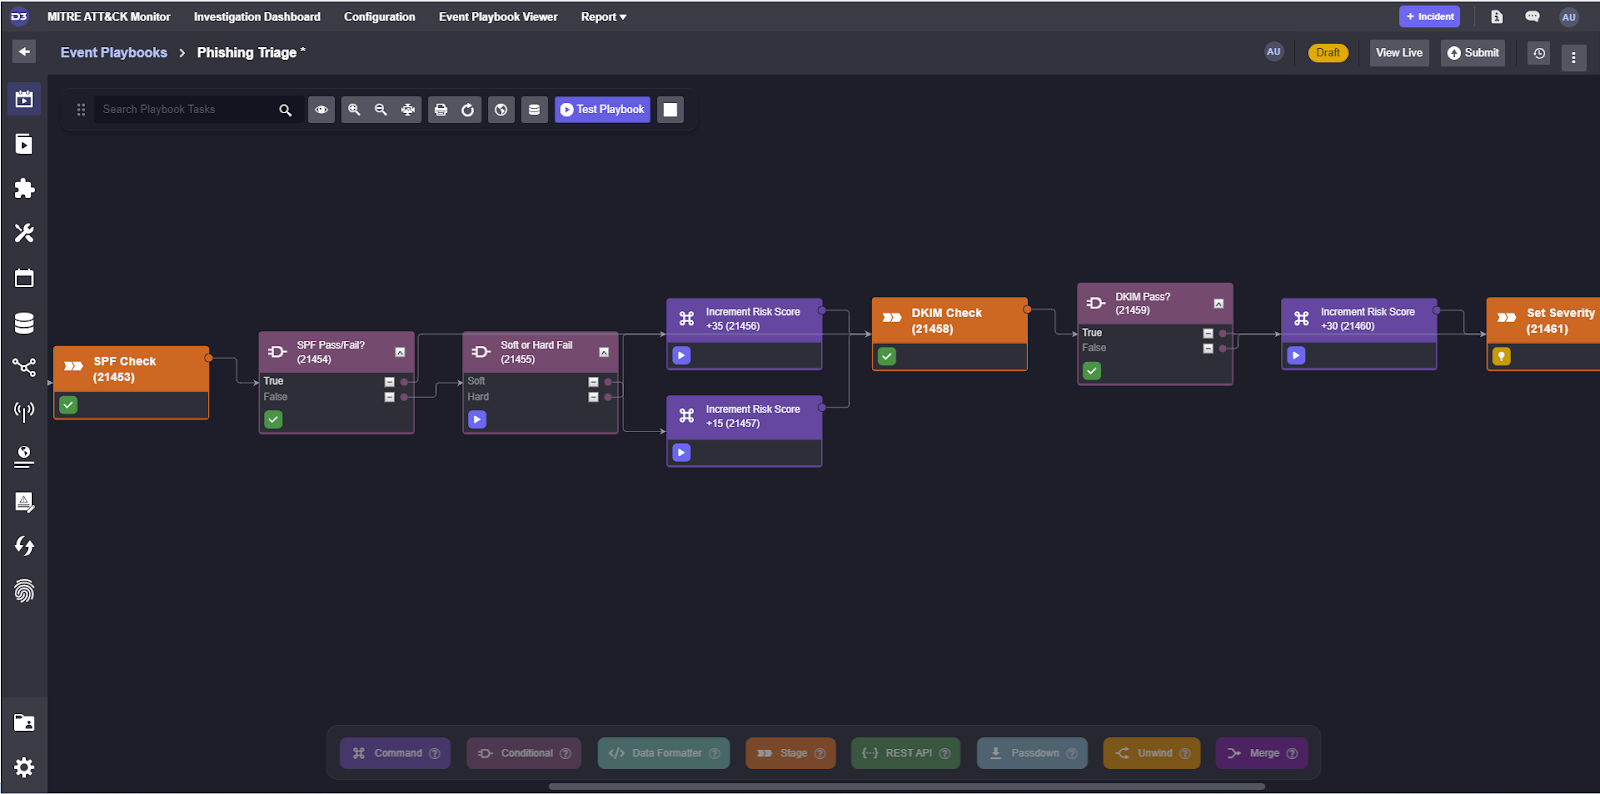
The severity value can be set with the Data Formatter task, a small development environment where you can write jinja scripts to transform data. Here, we’re pulling the risk score and setting the severity given the range we defined in Part 2 of this series.
Now that we’ve covered how to test various types of commands in the event playbook, we can proceed to configuring the incident playbook.
Incident Playbook
In our incident playbook, many of the tasks are nested playbooks. In order to configure nested playbooks in the most efficient way possible, we can make the value they’re looking at a custom input and point all tasks within them to that same value. For the recipient email enrichment task, for example, we can create a text input labeled Recipient Email.
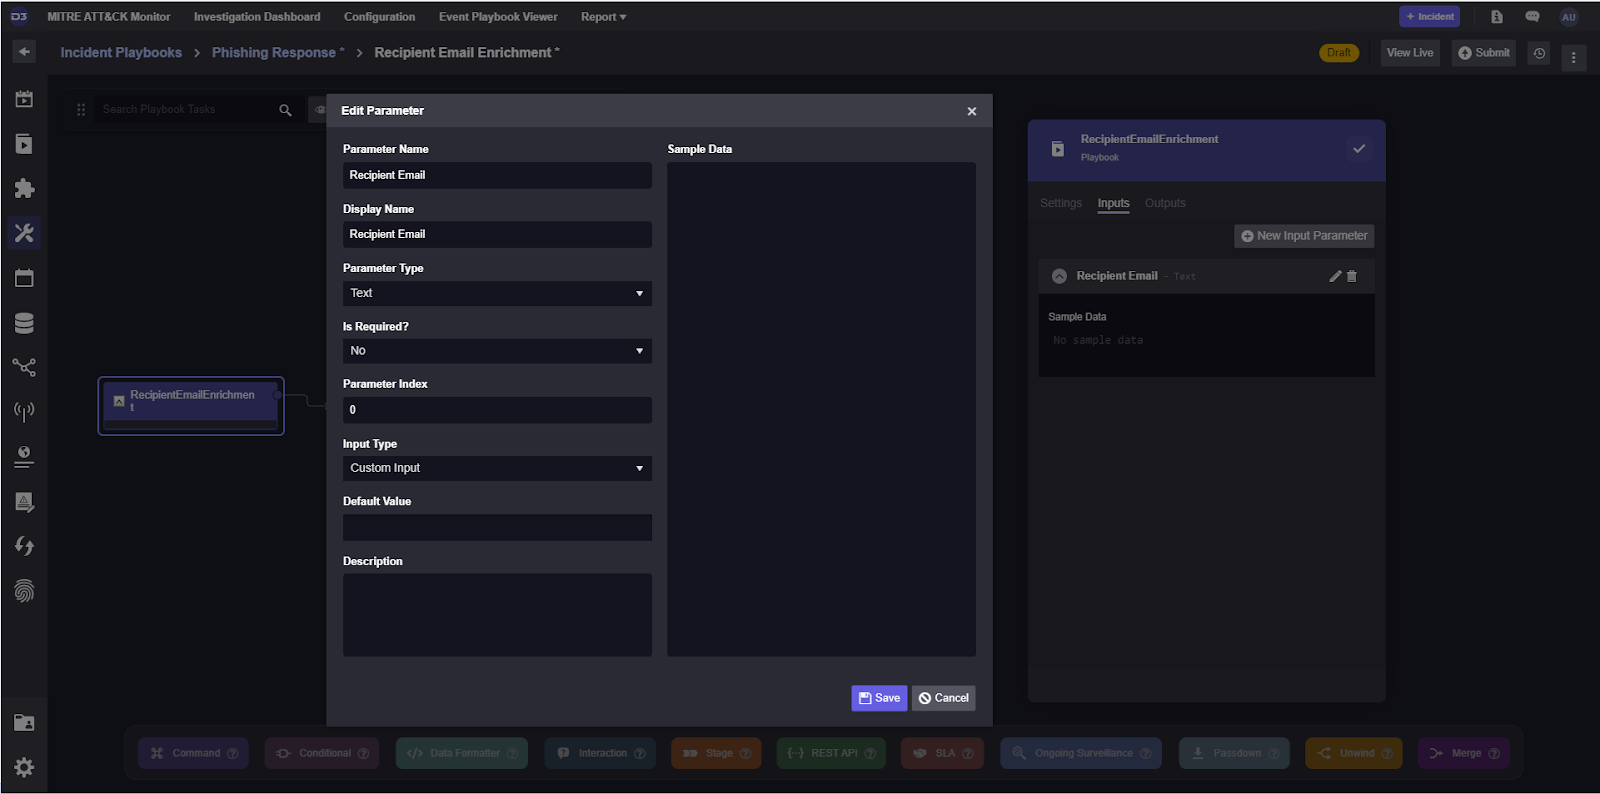
When we test the playbook, now it will ask us for a text input:

The value filled in here can now be selected in the integration commands as a dynamic value.
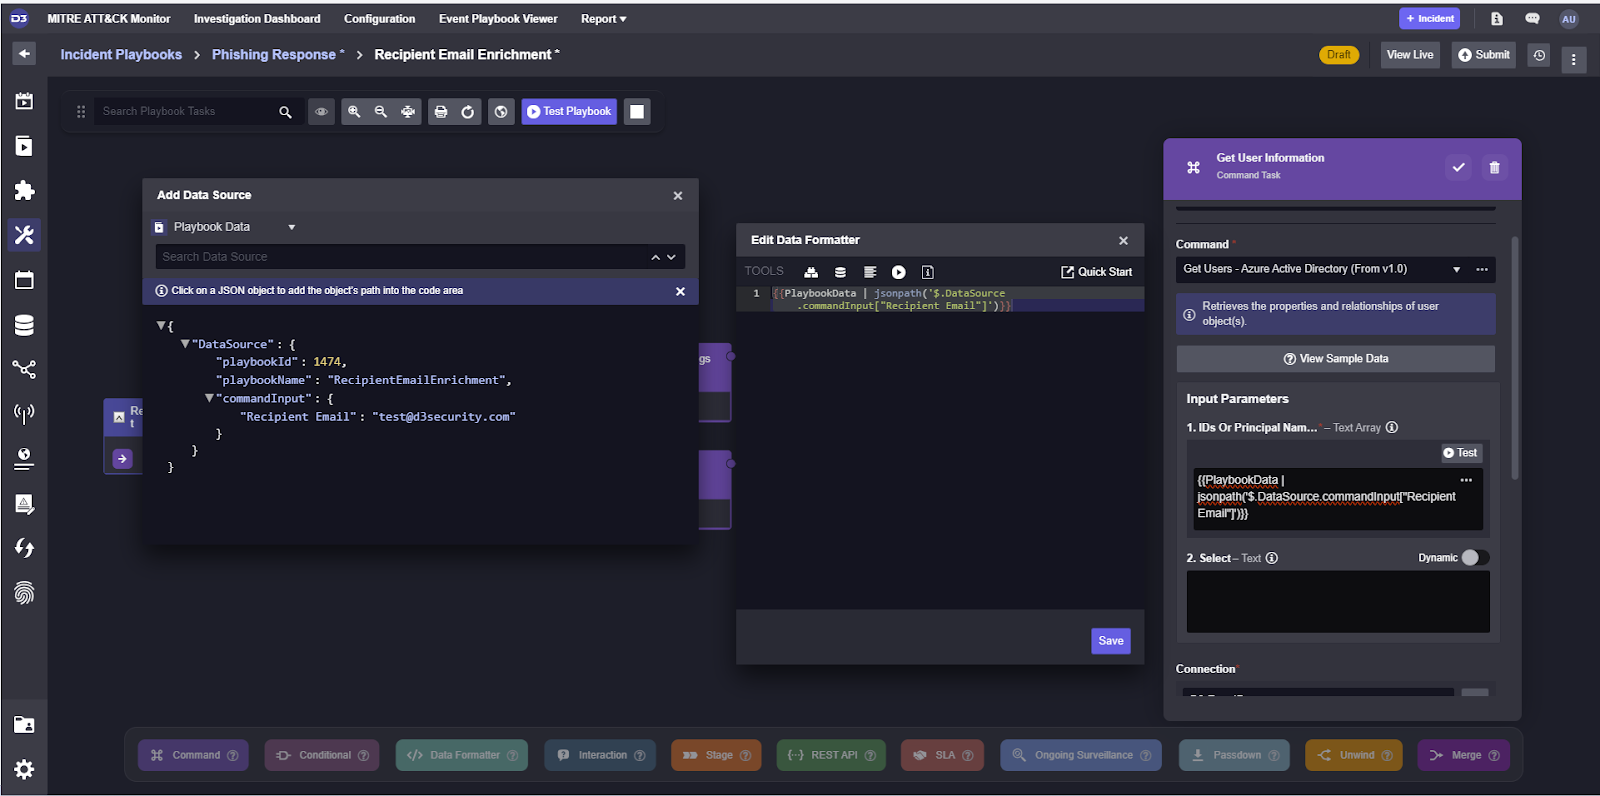
Now, all we need to do is set the path for the parent task’s input and the commands within it will be passed the correct value.
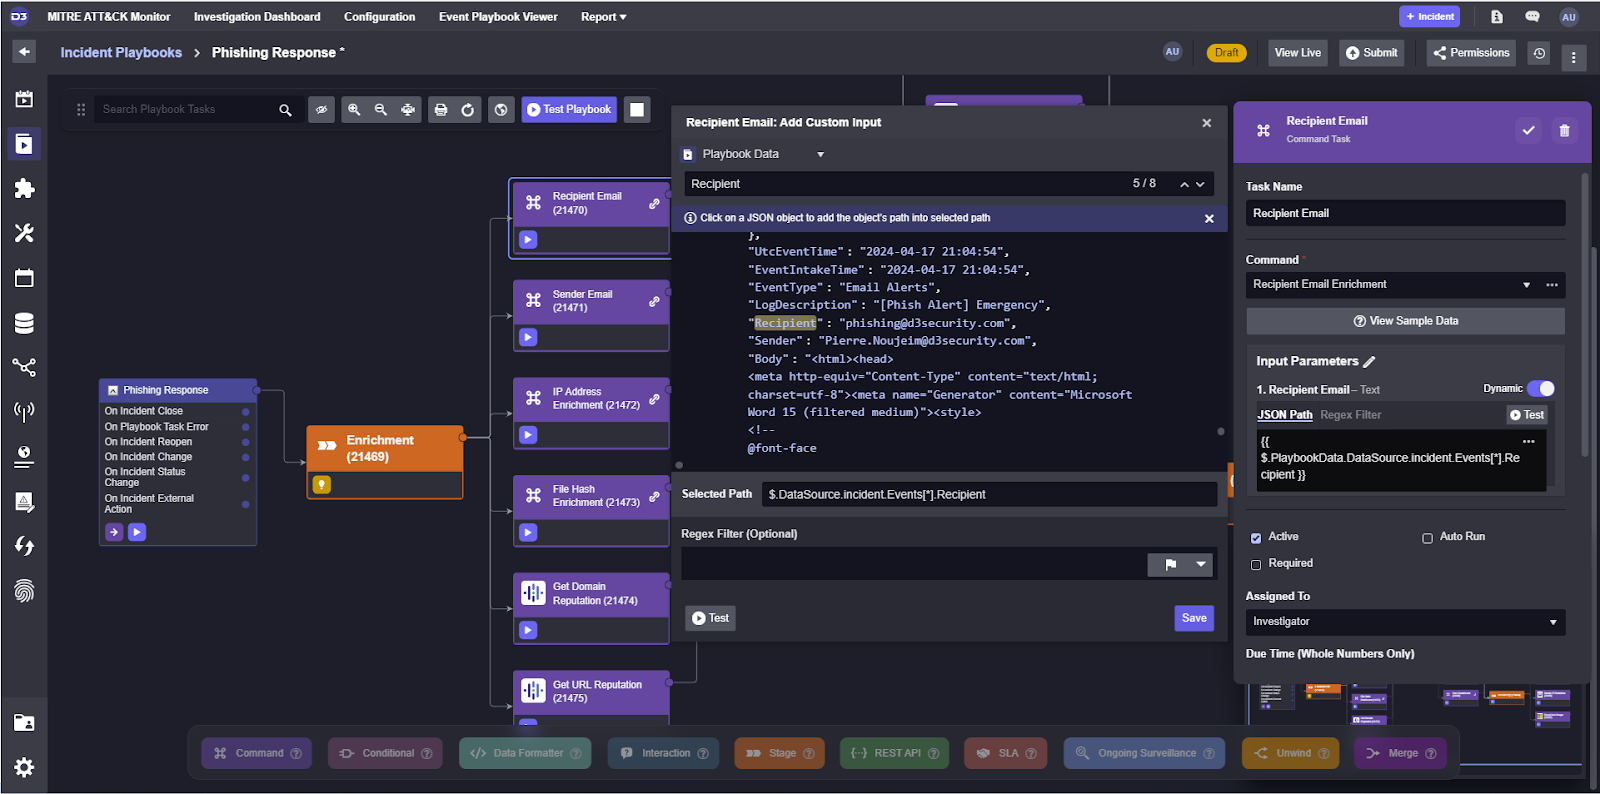
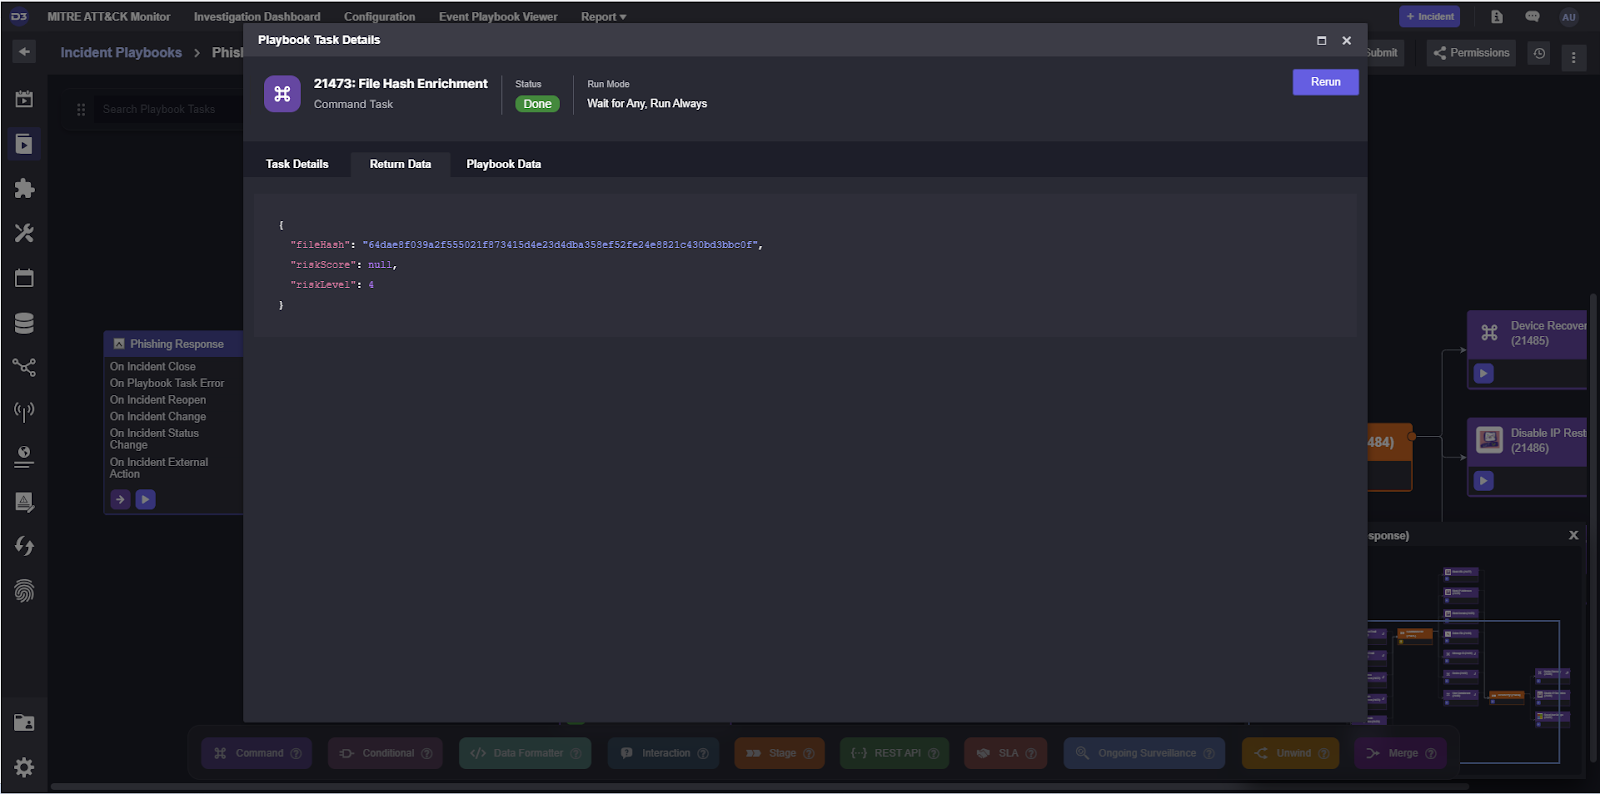
Following a similar process for all other commands, we can test the playbook through and verify the output of our tasks to ensure data is being passed through them properly.
Deployment
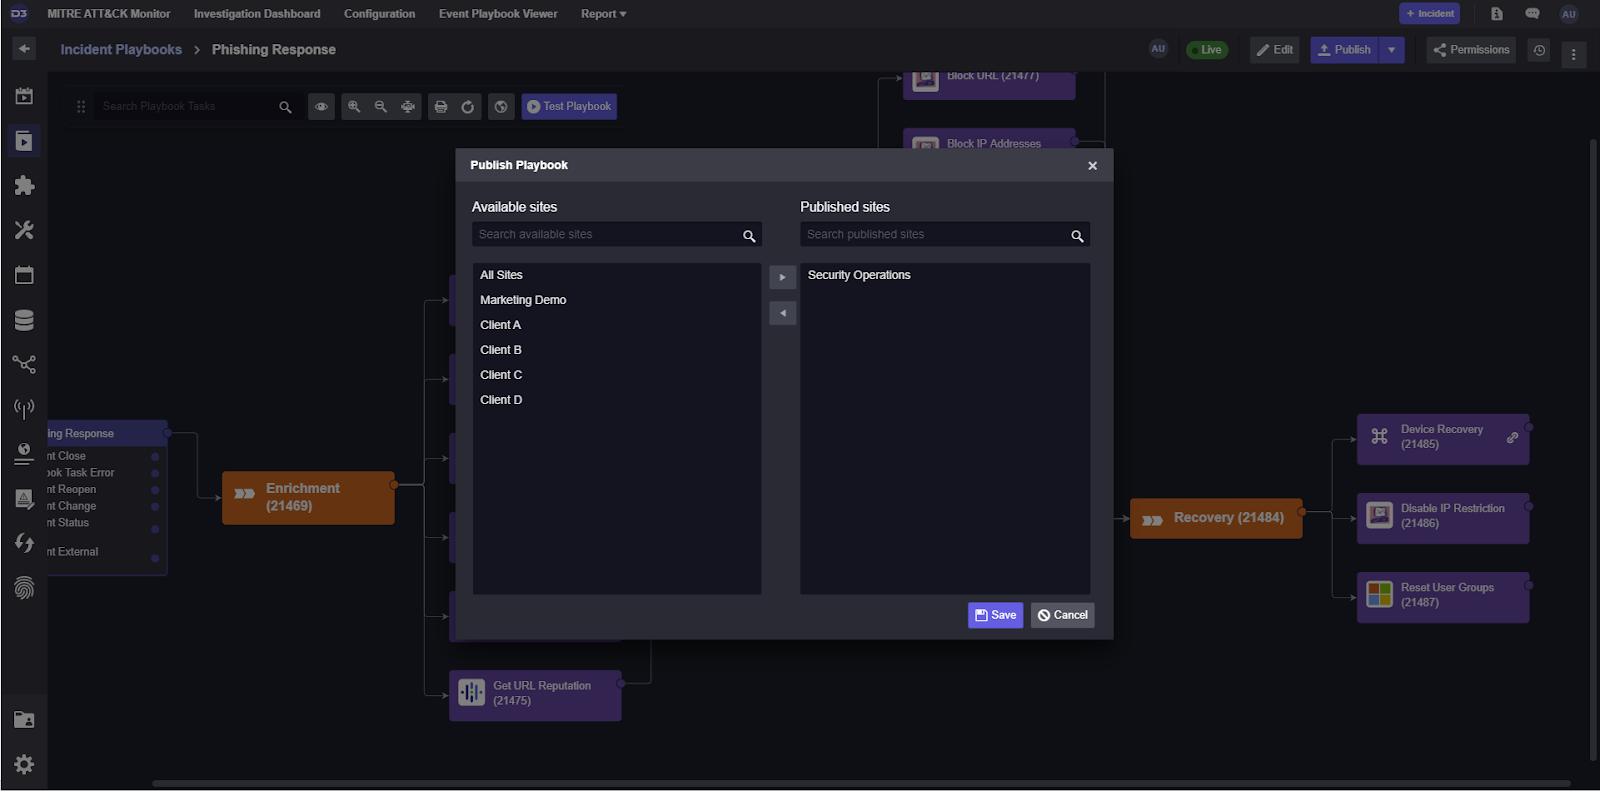
When each command has been configured to intake and output the correct values, the playbook can be published and made available for use by investigators.
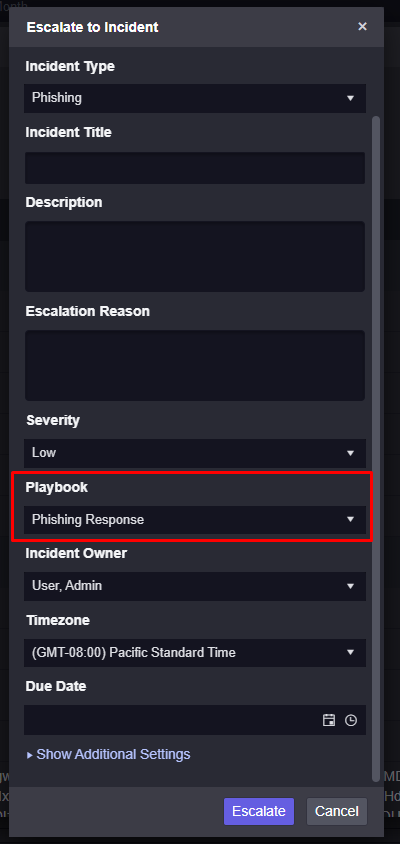
Now, when an event is escalated into an incident, the system can assign the Phishing Response playbook and assist the investigation team with automated enrichment, containment, and recovery.
Thank you for reading this How to Build a Phishing Playbook series. For more use-cases, feel free to read our collection of automated incident response playbooks here.
The post How to Build a Phishing Playbook Part 4: Testing and Publishing appeared first on D3 Security.
*** This is a Security Bloggers Network syndicated blog from D3 Security authored by Kartik Subramanian, Engineering. Read the original post at: https://d3security.com/blog/build-a-phishing-playbook-testing-and-publishing/
如有侵权请联系:admin#unsafe.sh