
In August of last year, @tifkin_, @0xdab0, and I released Nemesis, our offensive data enrichment platform. After lots of feedback, operational testing, hundreds of commits, and another solid dev cycle, we’re proud to finally announce Nemesis’ 1.0.0 release. This post will detail several of the major changes we’re excited about, from host modeling, to a streamlined installation process, dashboard improvements, and more!
Host Modeling
Since the beginning of development, one of our visions for Nemesis has been for it to provide guidance to operators agnostic of their C2 tooling. If we want Nemesis to be able to perform analysis like PowerUp’s privilege escalation, we have to build a proper offline data model to handle the analysis we want. Part of this involves the very specific problem of host “uniqueness” when you have data coming in from a number of different C2 sources.
This, however, ended up being a more challenging task than we anticipated. We will be releasing a detailed post diving into all of the nuances of this problem in the next few weeks, but we wanted to at least highlight the problem as we viewed it. We also have a specific temporal issue that we’ll touch on briefly as well.
The host uniqueness problem is a consequence of the variety of ways host data can be ingested into Nemesis. In order to perform host-based analysis, we have to collapse data from potentially multiple ingested sources into a single host abstraction so we don’t miss any details. I.e., consider the situation of having multiple C2 agent types on the same host. C2 agents can report a host’s short name(e.g., NetBIOS name), fully qualified name, or IP addresses. We might be performing an action against a remote host from a C2 agent, i.e., downloading a file from a host that doesn’t have an agent on it, but the connection is being routed through an existing agent. And finally, we might have manual data we’re uploading through the Nemesis interface in case there isn’t an existing connector.
With all of these options, the way to elegantly (well, at least as elegantly as possible) combine data from multiple ingestion sources in a way that we can break sections back apart if there is a mapping mistake was…tricky. We also ran across a “temporal problem” for specific types of data like file or process listings where these data are ephemeral and can be influenced by operator events. For example, if you took a file listing but then uploaded or deleted a file on the host, the ground truth (as far as you know) for the filesystem state has to be built from multiple pieces. This data may also be ingested out of order (e.g., ingesting long-term collection output from a tool running on another host). Luckily, we believe we have a solution for this too!
If you’re as interested in this type of problem as we are (Bueller? Bueller?) keep an eye out for our upcoming modeling deep dive post.
HELM Charts!

One of the most common pieces of negative, yet legitimate, feedback we received about Nemesis was the complexity of its installation. Previously, setting up Nemesis required a number of prerequisites like Docker, Helm, and Kubernetes via Minikube. In response to this feedback, we’ve now adopted k3s, which can be installed with one command and doesn’t depend on Docker. Our updated quickstart guide outlines the full installation process in just five steps, making it quicker to get up and running.
We’ve significantly improved the deployment process of Nemesis with the transition from Skaffold to Helm. Max worked hard on creating three new Helm charts: quickstart, nemesis, and monitoring. The quickstart chart is designed to configure all the secrets and dependencies necessary for Nemesis, providing an easy setup for most users. Advanced users, who might want to manually manage these settings or integrate with a Kubernetes secrets manager will want to replicate the functionality of the quickstart chart themselves. The nemesis chart sets up all the required Nemesis services like before. The monitoring chart is an optional installation that deploys monitoring services like Fluentd, Grafana, and Prometheus for those who want more insight into logging and performance. Additionally, this change has allowed us to eliminate the need for the janky nemesis-cli.py script!
Additionally, we have builds of Nemesis Docker images pushed to Dockerhub, meaning users no longer have to go through the build process. The entire setup process is described here in the documentation, but involves setting up the prerequisites, running the Nemesis quickstart chart to configure a handful of secrets/configs, and running the Nemesis Helm chart from a local clone or the remote repo. Here’s how the actual core Nemesis deployment looks like from running the local Helm chart:
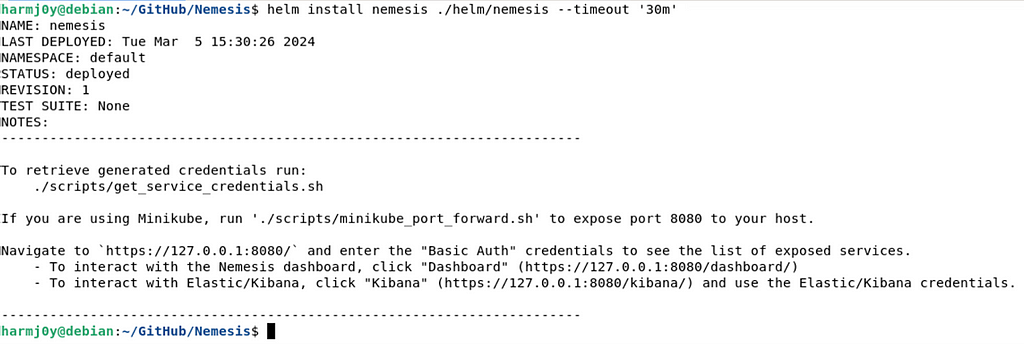
Another nice side effect of this is that Max was able to get self-signed TLS working, so communication to the Nemesis endpoint is now all over HTTPS. Additionally, the monitoring infrastructure is now optional, which can help save on resources. Big thanks to @M_alphaaa for helping us out with some Helm issues!
And finally, for those who really like Minikube or Docker Desktop, we do have documentation for setting up Nemesis using the new installation procedure. Note that we will only be officially supporting k3s going forward (it’s way easier, we promise!).
Text Search Modifications
The “Summoning RAGnarok With Your Nemesis” post we released in March has complete details on these modifications, but TL;DR we completely redid how text search works under the hood for Nemesis.
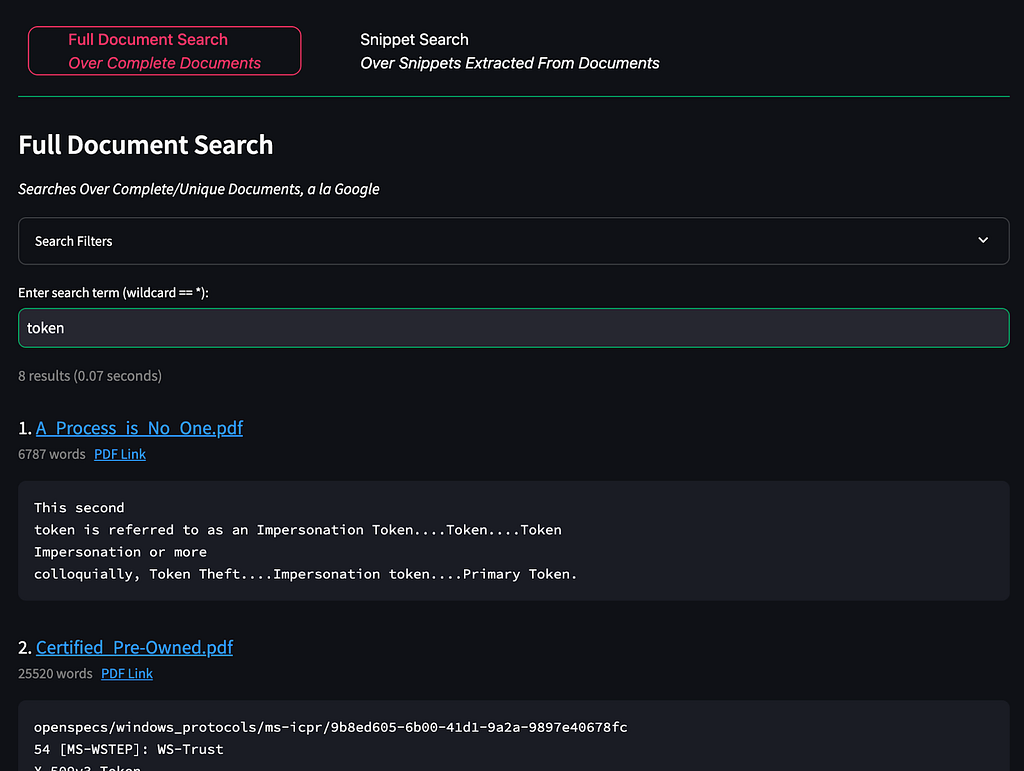
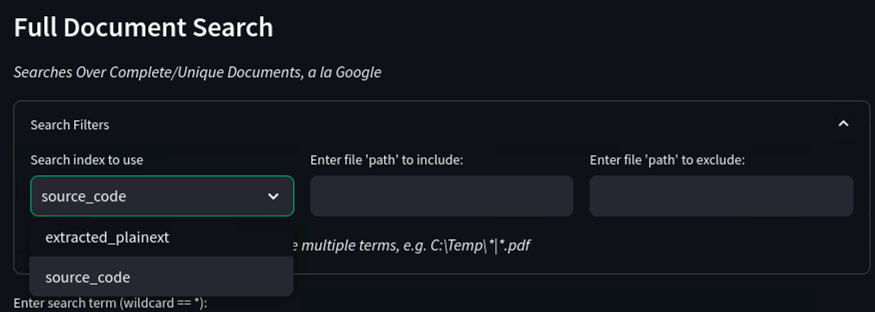
In the Document Search page, there are now two tabs. The first, “Full Document Search”, searches for text phrases over the entire text extracted from any compatible document, à la Google:
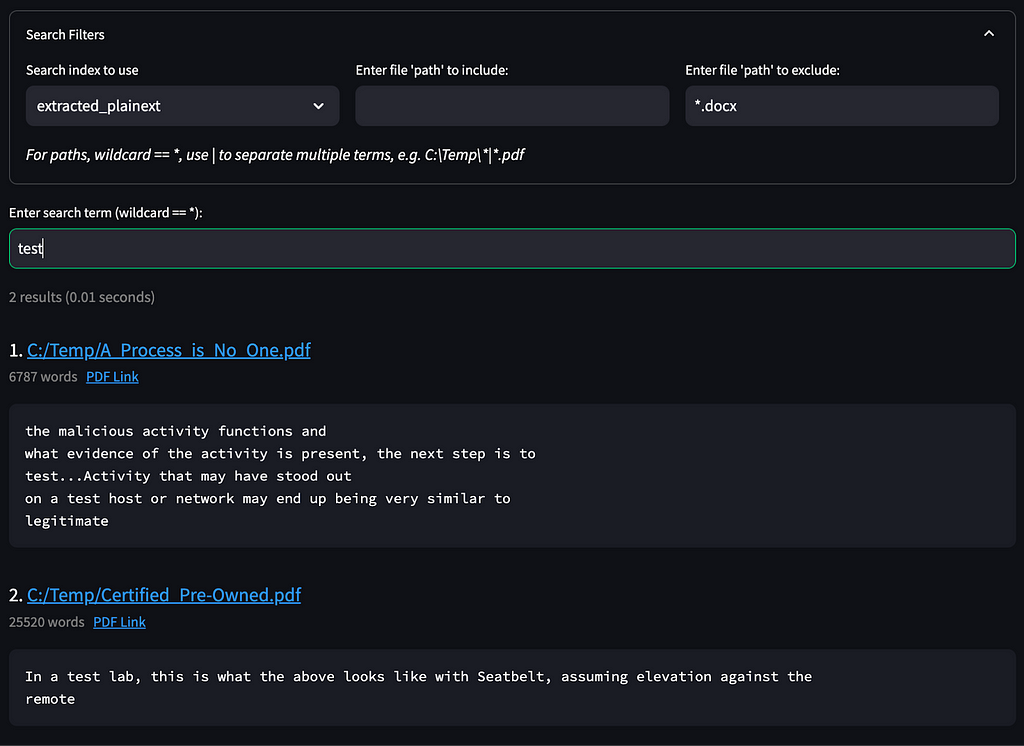
The main difference here is that we now have search filters that let you include or exclude specific paths, name patterns, or file extensions:
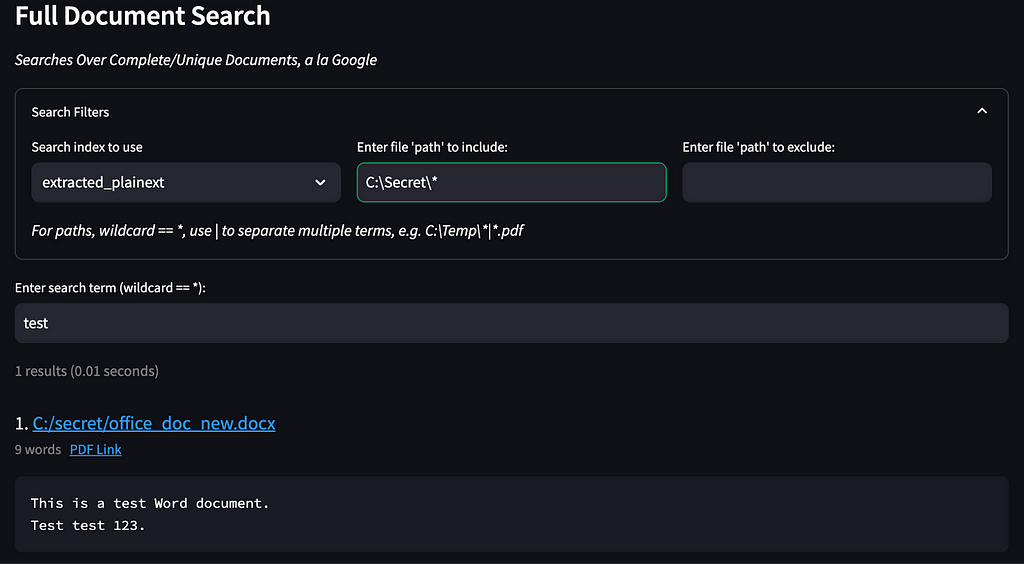
We also collapsed the old “Source Code Search” tab into “Full Document Search”. In order to search indexed source instead of extracted document text, select source_code as the index in the expanded search filter section:
The “Text Snippet Search” tab now replaces the old “Semantic Search” tab and has received a complete overhaul. This tab searches over snippets of text extracted from compatible documents, where each snippet/chunk is ~400–500 words. If you want to know more about why this chunking was used, check out the “Summoning RAGnarok With Your Nemesis” post!
When you type a term or question into this search, the query is passed to the new https://<NEMESIS>/nlp/ endpoint, specifically the /nlp/hybrid_search route. Nemesis calculates the embedding vector for the query and searches the closest vector/text pairs, as well as performing a more classic BM25 “fuzzy” search of the text and the indexed document title. These results are fused together through Reciprocal Rank Fusion and returned reordered to the user:
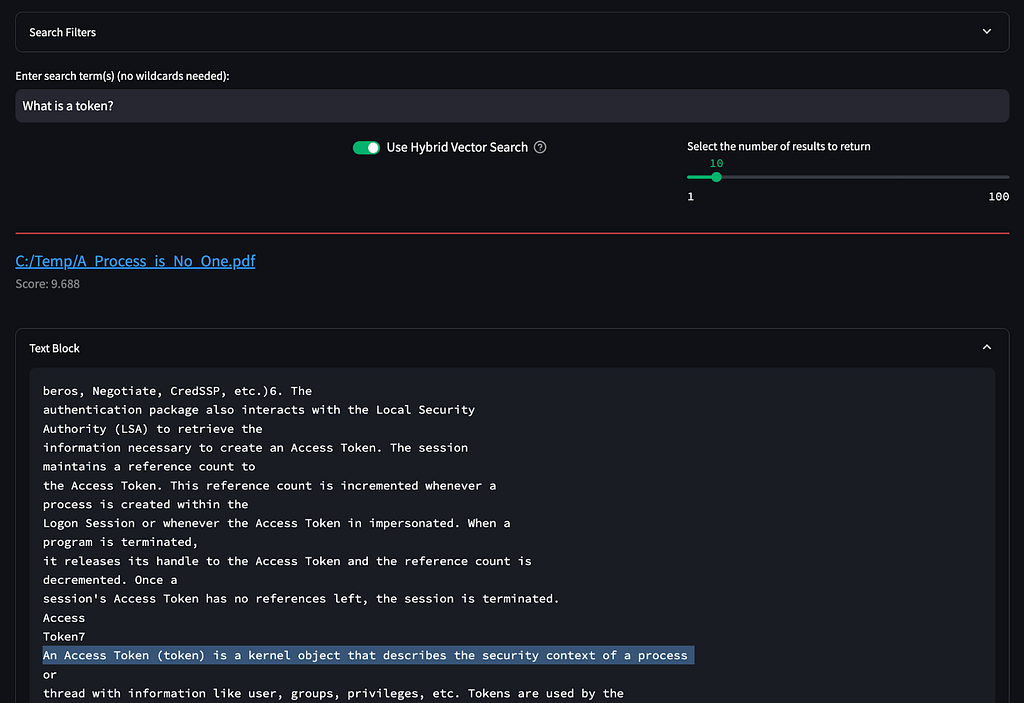
Note: deselecting “Use Hybrid Vector Search” will remove the embedding vector approach and use just the BM25 “fuzzy” search. “Snippet Search” also has the same include/exclude filters that the “Full Document Search” tab has.
If you want to use a local LLM to chat over text extracted from Nemesis documents, check out RAGnarok!
Hasura API
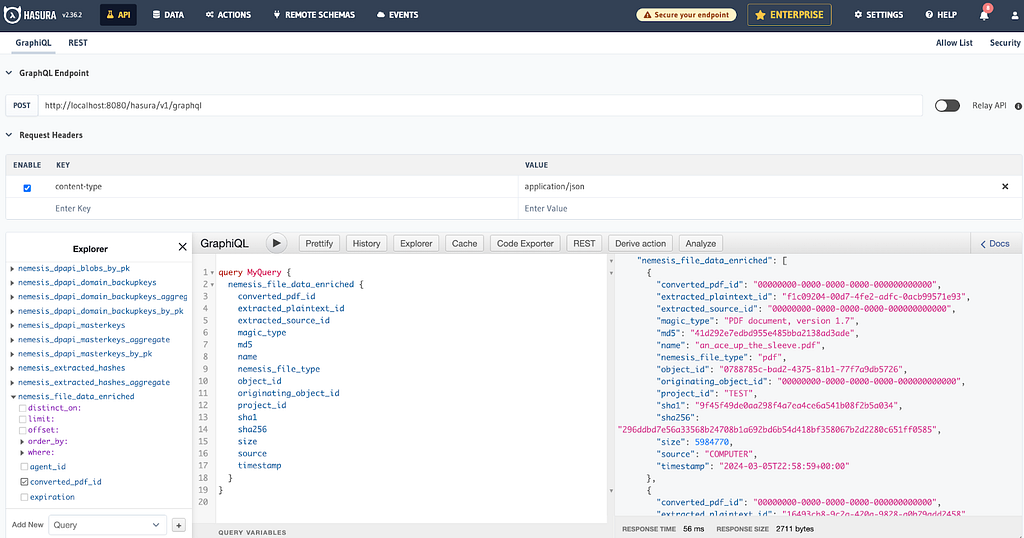
Nemesis has a very rich backend data model that’s presented in two ways: a semi-structured and easily searchable form in Elasticsearch, and a highly structured form in PostgreSQL. While Kibana/Elastic have been accessible in Nemesis since the beginning, one piece of feedback we commonly heard was there was no way to easily access the structured data. We have had pgAdmin present for basic troubleshooting but nothing programmatically accessible.
Hasura fixes that! Hasura lets us easily construct GraphQL and REST APIs on top of our existing PostgreSQL database. Once it’s deployed, we get an awesome interface where we can play around with query and subscription construction:
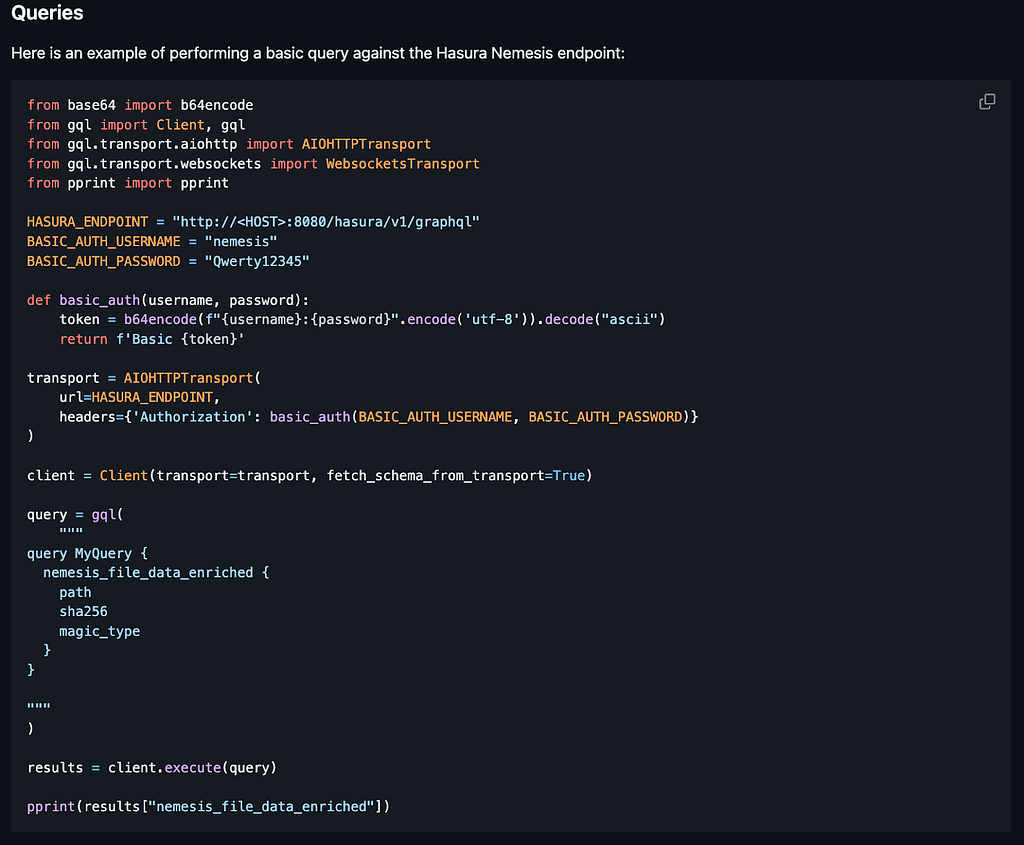
This also means we can do some basic scripting to process existing data or new data as it comes in. We have some improved documentation (another 1.0.0 “feature”!) which includes information about scripting with Hasura here:
Dashboard Changes
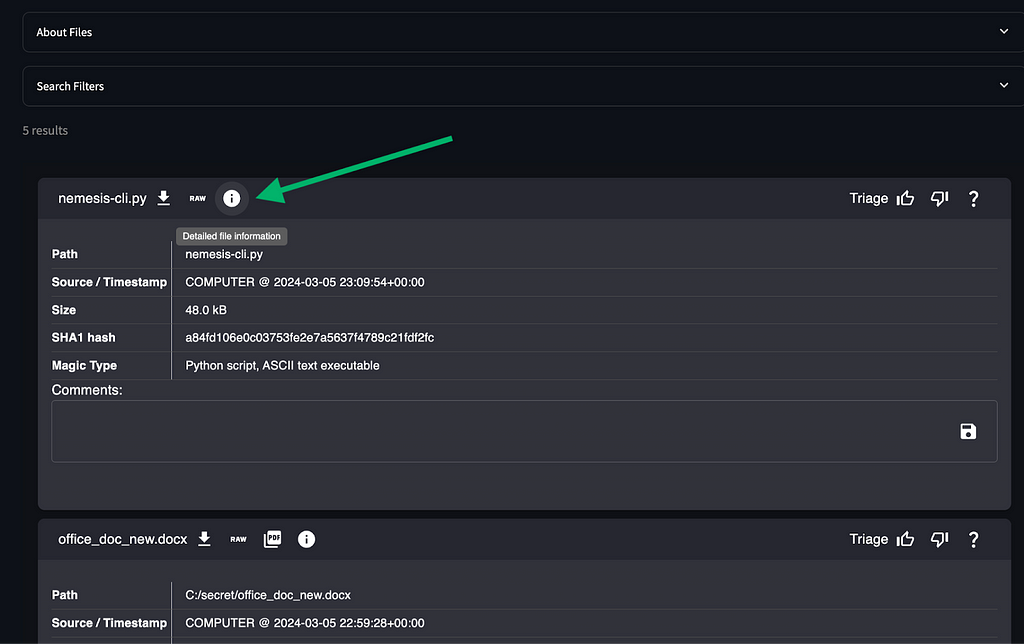
As the Nemesis /dashboard/ route is the main way operators interact with Nemesis, it’s one of the pieces we received the most feedback on. There are nearly too many quality-of-life changes to count, but we’ll highlight a few of them here:
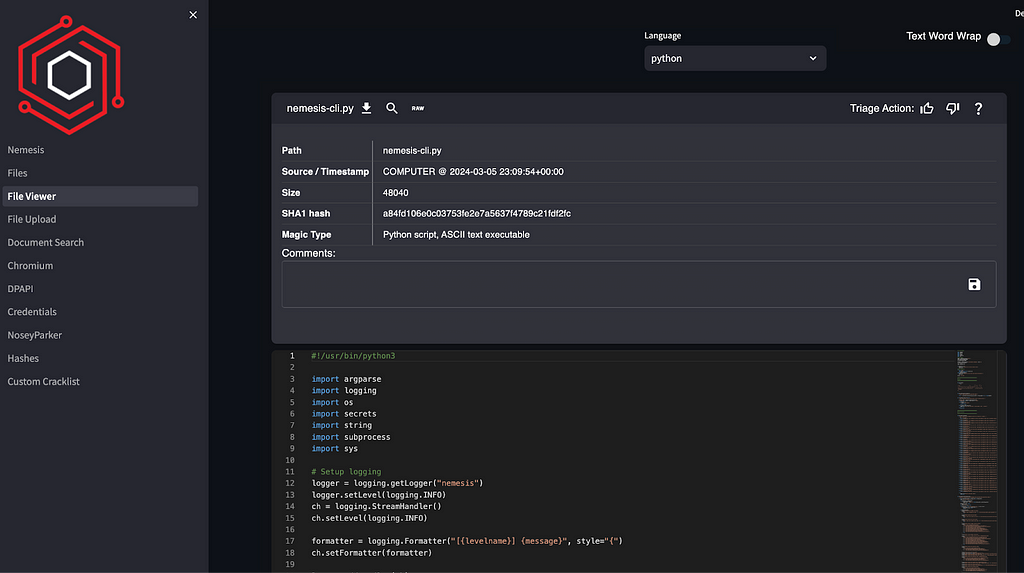
The File Viewer page was broken out which displays syntax-highlighted text, or raw hex of a binary file. This page is accessible via the i icon on the main files page:
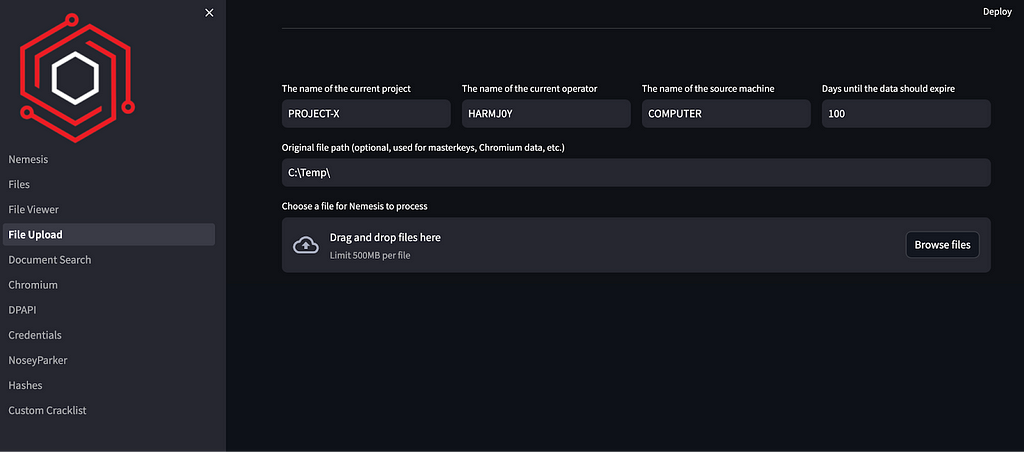
The File Upload was broken out into its own page with values saved in cookies for persistence between runs:
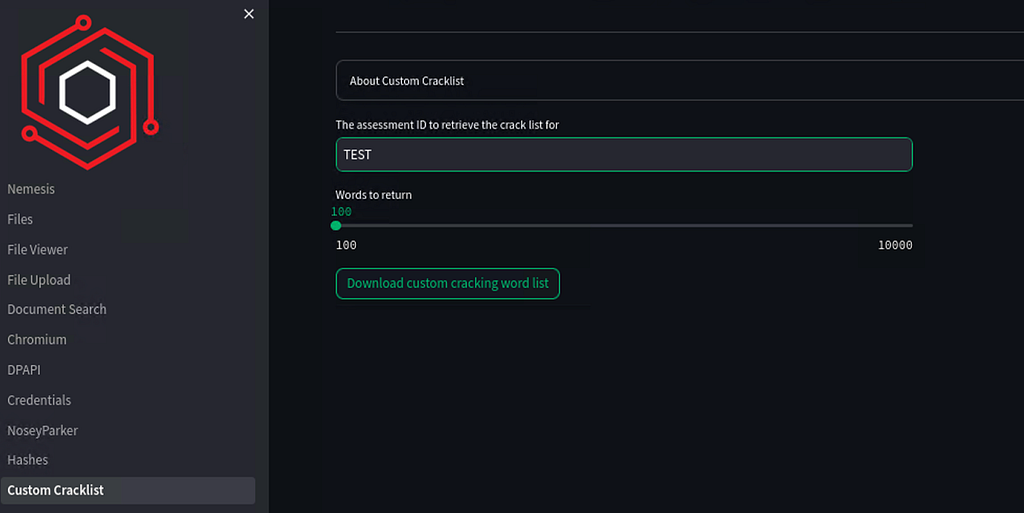
We finally exposed the Custom Cracklist endpoint in the interface. This service keeps a unique list of non-dictionary words extracted from documents and lets you download the X most common:
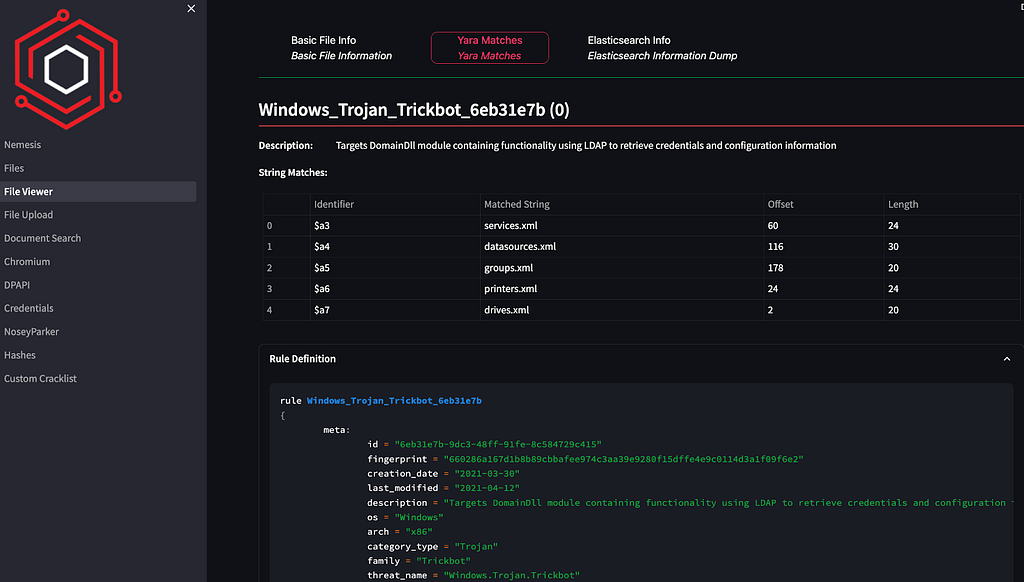
If there are any Yara rule matches against a downloaded file, the match is displayed in a new sub-tab along with the matching rule text. The appropriate icon on the Files page will link you directly to these results now as well:
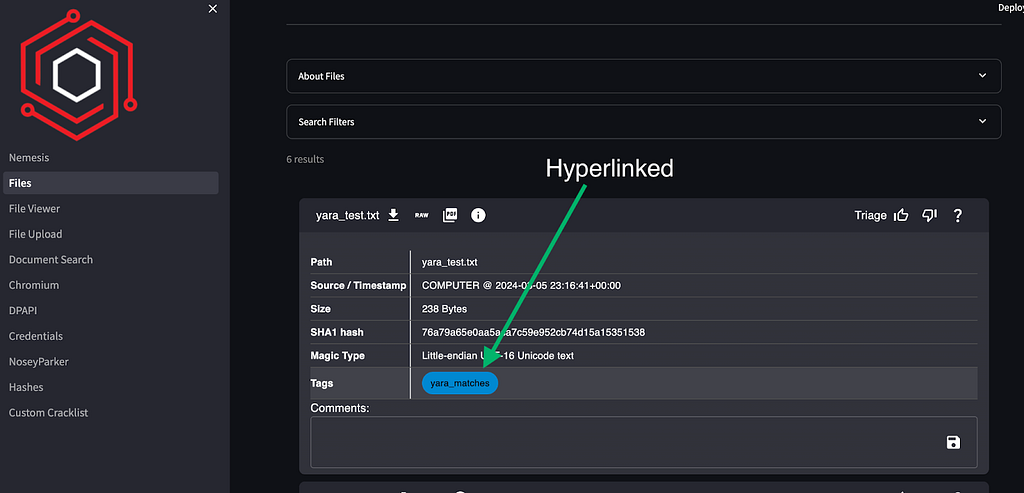
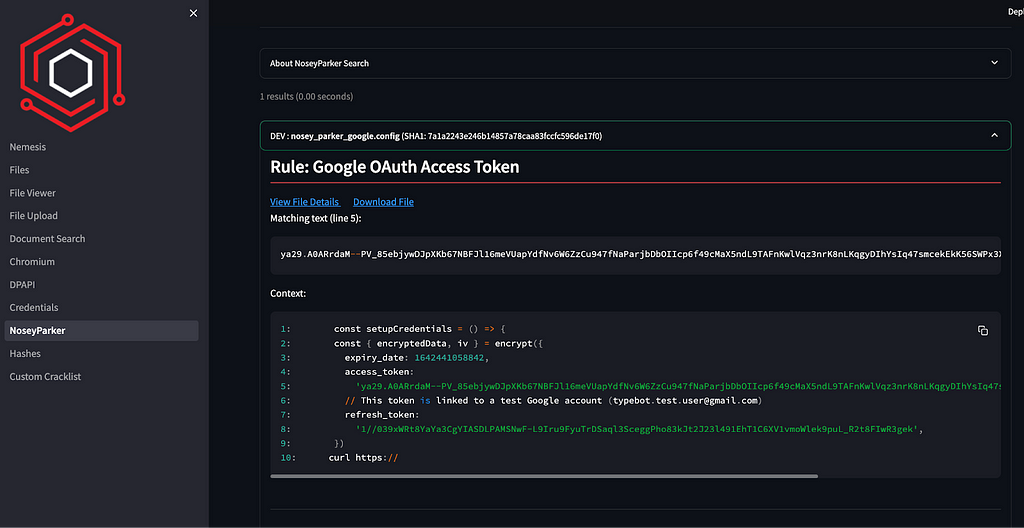
The NoseyParker tab was revamped and hyperlinked from the displayed tag bubbles as well:
Countless Miscellaneous Changes
There were, of course, countless other bug fixes and tweaks as well. We’ll run through a grabbag of them here:
- Added additional documentation, including (finally) a usage guide to get people started.
- Streamlined NLP indexing to prevent choking and exposed a /nlp/ route for search.
- Removed the Tensorflow model hosting and DeepPass as the model just wasn’t accurate enough to be useful.
- Streamlined hash cracking and added in deduplication so hashes aren’t cracked twice.
- Added a `monitor` command to submit_to_nemesis.sh for continual file submission.
- Any compatible file is now handled by Apache Tika instead of a subset.
- Detection of already processed files and suppression of alerts.
- Automatic expunging of expired data via the `data_expunge` task.
- Added Jupyter notebooks back into the stack.
- Processing for Chromium JSON cookie dumps.
- Countless other bug fixes and small usability changes.
Wrapup
We’ve put a lot of blood, sweat, and tears (mostly at k8s) into Nemesis, and we’re incredibly excited for this official 1.0.0 release! With the quality of life changes and ease of installation with Helm, we’re looking forward to more people getting to play with Nemesis hands on.
If you play around with Nemesis, let us know what works and what doesn’t! Come join us in the #nemesis-chat channel of the BloodHound Slack! We (the main Nemesis devs- @tifkin_, @harmj0y, and @Max Harley) are all active in that channel.
Nemesis 1.0.0 was originally published in Posts By SpecterOps Team Members on Medium, where people are continuing the conversation by highlighting and responding to this story.
*** This is a Security Bloggers Network syndicated blog from Posts By SpecterOps Team Members - Medium authored by Will Schroeder. Read the original post at: https://posts.specterops.io/nemesis-1-0-0-8c6b745dc7c5?source=rss----f05f8696e3cc---4
如有侵权请联系:admin#unsafe.sh
