2023-12-11 03:35:1 Author: blogs.sap.com(查看原文) 阅读量:9 收藏
In this blog I am going to discuss about how using a JAVA Application we can generate CSV from HANA tables and save in a place. We can done it using two ways i.e. by creating a Dynamic web application and upload it into the HCP platform. If HCP platform is of NEO platform it is better to create a web application to deploy.
You can not schedule an java standalone program in HCP NEO platform as no scheduler is given by default and you can not install it. You need the HCP Cloud Foundry version for it.
A. First discuss about the HANA Dynamic web application which will create a CSV file a save it in project workspace in server.
Steps :
1. Crate a Dynamic Web project .

2. Create file generateCSV.java inside the SRC folder as java resource.

BEGIN
package book;

//public class GenerateCSV {


import java.io.*;
import java.sql.*;

import au.com.bytecode.opencsv.CSVWriter; // You'll need to add the OpenCSV library to your classpath

public class GenerateCSV {
    public String transferMethod() {

		System.out.println("Java version: " + com.sap.db.jdbc.Driver.getJavaVersion());
	    System.out.println("SAP driver details: " + com.sap.db.jdbc.Driver.getVersionInfo() + "\n");

        String jdbcUrl = "jdbc:sap://localhost:30015/?encrypt=true&validateCertificate=false&traceFile=stdout&traceOptions=CONNECTIONS";
        String username = "PPPPPPP";
        String password = "LLLLLLLLL";
        Connection connection = null;

        try {
            connection = DriverManager.getConnection(jdbcUrl, username, password);


            if (connection != null) {
                Statement statement = connection.createStatement();

                String query = "SELECT  \"EMP_ID\",\"EMP_NAME\",\"CRD_THRD\"  FROM \"_SYS_BIC\".\"CreditHistory/E_CREDIT_HISTORY\" ";;
                ResultSet resultSet = statement.executeQuery(query);


                // Initialize CSV writer
                FileWriter fileWriter = new FileWriter("output.csv");
                CSVWriter csvWriter = new CSVWriter(fileWriter);
               /*
                while (resultSet.next()) {
                    // Extract data from ResultSet and write to CSV
                    // You can use resultSet.getString("column_name") to get column values
                    // Write the values to the CSV using csvWriter.write(...)
                	String plant = resultSet.getString(1);
                	//csvWriter.write(plant);
                    System.out.println(" Employee ID value is - " +EMP_ID);


                }
                */

                // Write column headers
                ResultSetMetaData metaData = resultSet.getMetaData();
                int columnCount = metaData.getColumnCount();
                String[] headers = new String[columnCount];
                for (int i = 1; i <= columnCount; i++) {
                    headers[i - 1] = metaData.getColumnName(i);
                }
                csvWriter.writeNext(headers);

                // Write data rows
                while (resultSet.next()) {
                    String[] rowData = new String[columnCount];
                    for (int i = 1; i <= columnCount; i++) {
                        rowData[i - 1] = resultSet.getString(i);
                    }
                    csvWriter.writeNext(rowData);
                }

                System.out.println(" CV value is - " + csvWriter);
                // Clean up

                csvWriter.close();
                statement.close();

                resultSet.close();
                statement.close();
                connection.close();
            }


        } catch (Exception e) {
            e.printStackTrace();
        }

        return("The Excel Generated");
    }
}
3. Call the Java file from index.jsp file .
<%@ page language="java" contentType="text/html; charset=UTF-8"
    pageEncoding="UTF-8"%>
<%@ page import="book.GenerateCSV"%>
<!DOCTYPE html>
<html>
<head>
<meta charset="UTF-8">
<title>File Transfer</title>
</head>
<body>

	<jsp:useBean id="test" class="book.GenerateCSV" />
  <%
  	book.GenerateCSV gc = new book.GenerateCSV();
      gc.transferMethod();
      out.println(gc.transferMethod());
  %>
</body>
</html>
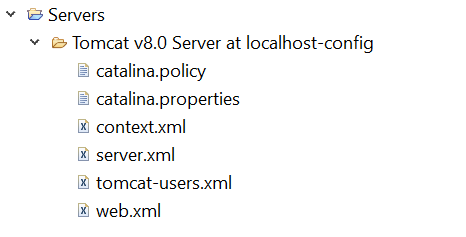
4. Install Apache Tomcat web server –

5. Please make sure that the following Library files( Jar files) available in the classpath.

5. Run the application in sever as web application –

The Excel file will be generated in the project workspace.
B. Now we will create a CSV file a save it in the project workspace on the server using a Standalone Java Application –
Steps :
1. Create a Java Applications an add all the required libraries one by one –


2. create the Java file GenerateCSV.java using the below code.
package report;

//public class GenerateCSV {


import java.io.*;
import java.sql.*;

import au.com.bytecode.opencsv.CSVWriter; // You'll need to add the OpenCSV library to your classpath

public class GenerateCSV {
    public static void main(String[] args) {

		System.out.println("Java version: " + com.sap.db.jdbc.Driver.getJavaVersion());
	    System.out.println("SAP driver details: " + com.sap.db.jdbc.Driver.getVersionInfo() + "\n");

        String jdbcUrl = "jdbc:sap://localhost:30015/?encrypt=true&validateCertificate=false&traceFile=stdout&traceOptions=CONNECTIONS";
        String username = "PPPPPPPPPPPPPP";
        String password = "LLLLLLLLLLLL";
        Connection connection = null;

        try {
            connection = DriverManager.getConnection(jdbcUrl, username, password);


            if (connection != null) {
                Statement statement = connection.createStatement();

                String query = "SELECT  \"EMP_ID\",\"EMP_NAME\",\"CRD_THRD\"  FROM \"_SYS_BIC\".\"CreditHistory/E_CREDIT_HISTORY\" ";
                ResultSet resultSet = statement.executeQuery(query);


                // Initialize CSV writer
                FileWriter fileWriter = new FileWriter("output.csv");
                CSVWriter csvWriter = new CSVWriter(fileWriter);
               /*
                while (resultSet.next()) {
                    // Extract data from ResultSet and write to CSV
                    // You can use resultSet.getString("column_name") to get column values
                    // Write the values to the CSV using csvWriter.write(...)
                	String plant = resultSet.getString(1);
                	//csvWriter.write(plant);
                    System.out.println(" Plant value is - " + plant);


                }
                */

                // Write column headers
                ResultSetMetaData metaData = resultSet.getMetaData();
                int columnCount = metaData.getColumnCount();
                String[] headers = new String[columnCount];
                for (int i = 1; i <= columnCount; i++) {
                    headers[i - 1] = metaData.getColumnName(i);
                }
                csvWriter.writeNext(headers);

                // Write data rows
                while (resultSet.next()) {
                    String[] rowData = new String[columnCount];
                    for (int i = 1; i <= columnCount; i++) {
                        rowData[i - 1] = resultSet.getString(i);
                    }
                    csvWriter.writeNext(rowData);
                }

                System.out.println(" CV value is - " + csvWriter);
                // Clean up

                csvWriter.close();
                statement.close();

                resultSet.close();
                statement.close();
                connection.close();
            }


        } catch (Exception e) {
            e.printStackTrace();
        }
    }
}
3. Execute as a Java application.
4. You can the the files generated on the project workspace.

Hope this will help.
如有侵权请联系:admin#unsafe.sh