
MailerLite is an email marketing tool and website builder for businesses of all shapes and sizes. The key idea behind MailerLite is simplicity. We provide our customers with straightforward and user-friendly tools such as a Drag & drop email editor, a website builder, and an intuitive subscriber management interface.
The DKIM and SPF records given to you on the Domains page cannot be changed within MailerLite and the exact records must be added to your DNS page for the authentication to work.
- Login into your MailerLite account.
- Head to the Account settings page and select the Domains tab as in the screenshot below.
- Enter the email address you wish to use to send emails from and click Save as in the screenshot below.
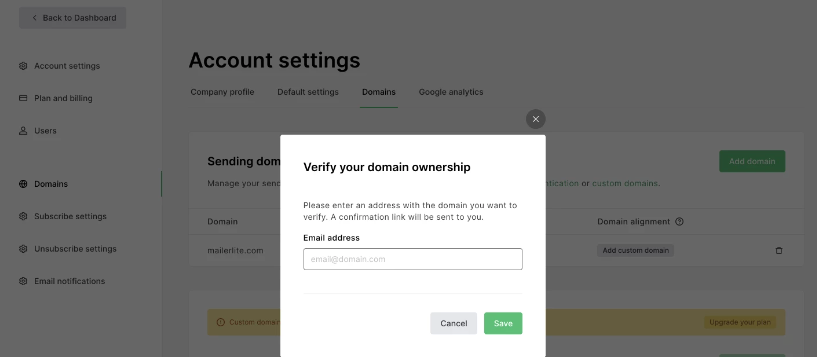
- Once you receive the confirmation email, click on the Confirm my email address link.
- You will see a success message confirming the domain verification.
How to authenticate your domain
- Head to the Settings page and select the Domains tab.
- Click on Authenticate for a verified domain, or Add a domain for an unverified one (and then click on Send confirmation email).
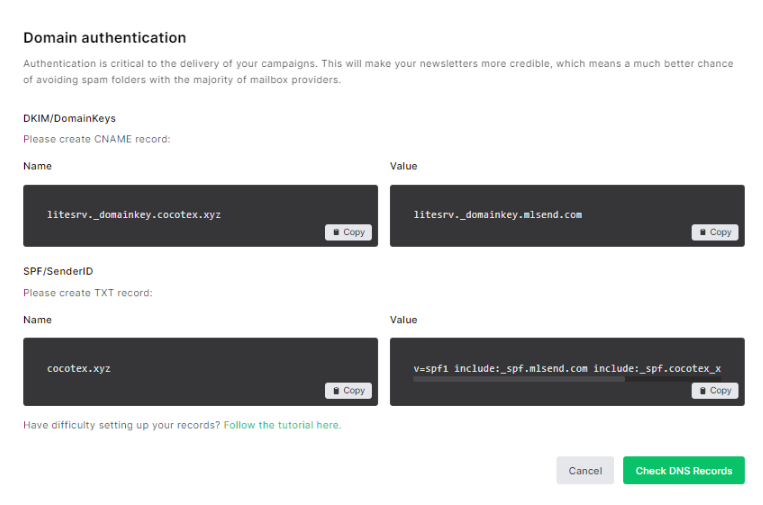
- You’ll get the Name and Value fields for the DKIM and SPF records of this domain as in the screenshot below.
- Add the DKIM as a CNAME record and the SPF as a TXT record with their respective Name and Value fields that you have received from the pop-up window into your DNS zone.

Note: It’s only possible to have one SPF record on your DNS zone. If you have more than one, they need to be merged.
- Now after adding the provided records to your DNS head back to your MailerLite Domain Authentication tab and click on Check DNS Records.
- Once everything is added properly, you will be able to see a checkmark under the Authentication part as in the screenshot below.

Setup Custom Domains
In addition to completing the authentication process, it is important to also focus on the alignment process to ensure that emails pass the alignment check.
Please be aware that MailerLite only supports SPF alignment on the subdomain level, and emails may fail on the root domain level. To activate alignment, please follow the steps below:
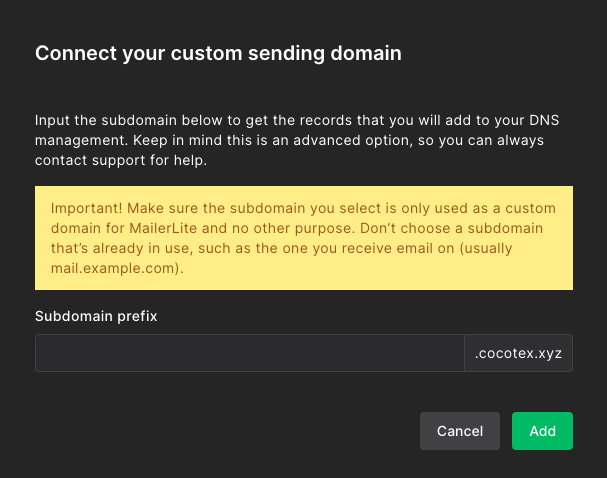
- Click on the Add custom domain under Domain Alignment
- Fill in your preferred subdomain for Mailerlite
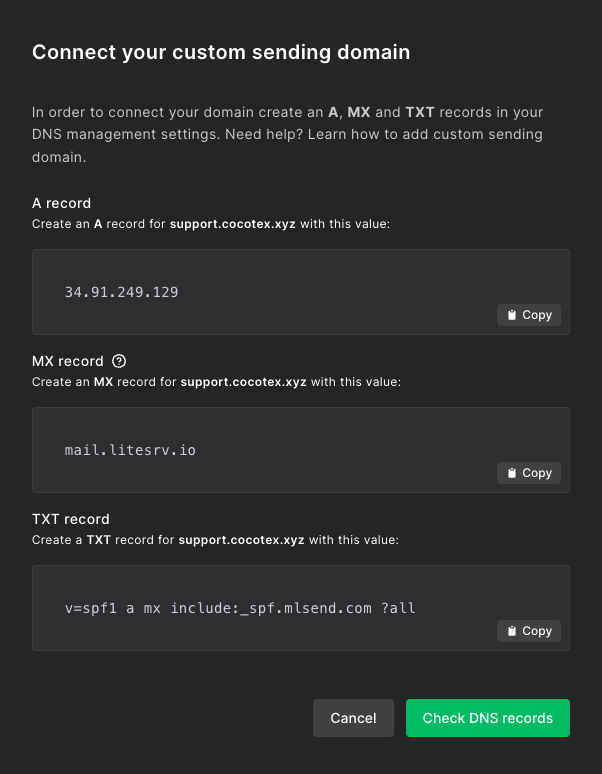
- Click on Check DNS records under Domain Alignment

- Create DNS records in your DNS zone for each MX, A and your TXT SPF record
For this example, we used Cloudflare as our DNS zone.


Important Note: Please make sure to use either hardfail (-) or softfail (~) for the SPF record. It is fully recommended not to use +all and ? all now. You can read more about it in this article.

- Save the records
- Click on the subdomain and toggle it On
- Click on Confirm enable
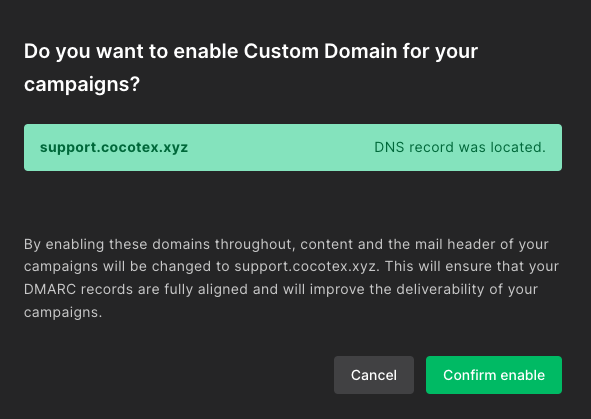
- Enable the subdomain by toggling it on

Congratulations, you now successfully authenticated your outgoing mail stream from MilerLite with SPF and DKIM.
The post MailerLite SPF and DKIM Configuration: Step By Step appeared first on EasyDMARC.
*** This is a Security Bloggers Network syndicated blog from EasyDMARC authored by EasyDmarc. Read the original post at: https://easydmarc.com/blog/mailerlite-spf-and-dkim-configuration/