2023-11-1 03:9:34 Author: blogs.sap.com(查看原文) 阅读量:8 收藏
1. Overview
This blog is inspired by my insights gained from the Custom Code Migration Guide for SAP S/4HANA 2020 .
I have been inspired by the blogs authored by @olga.dolinskaja. These blogs offer clear explanations regarding the importance of custom code management in S/4HANA system conversion and how application Custom Code Migration can assist in identifying which parts of the custom code need to be modified.
I highly recommend you read the guidance (Custom Code Migration Guide for SAP S/4HANA 2020 ) and the blogs from @olga.dolinskaja before read the blog.
In this blog, I will summarize my practical experience using the Custom Code Migration application in my BTP (Business Technology Platform) account to perform custom code checks for an S/4HANA 1909 system. It’s important to note that the configurations and code examples provided are tailored to my specific system and account settings. And this blog is not a guidance for configurations, as your own experience may differ based on your unique scenarios.
2. Settings
The term ‘guidance’ as mentioned below refers to the ‘Custom Code Migration Guide for SAP S/4HANA 2020’.
I opted for the manual setup method as detailed in section 2.3 of the guidance, to configure the application in my BTP account.
It’s important to note that guidance ‘Custom Code Migration Guide for SAP S/4HANA 2023‘ (section 2.3.1) introduces a new automated setup method.
2.1 Prerequisites Check
As indicated in section 2.3.1.1 of the guidance, it is essential for the BTP account and subaccount to be prepared for use. And the nessary authorizations have been assigned to the related users.
To establish an ABAP environment in the BTP account by booster, you can follow the setup process outlined on the SAP Help Portal.
The Cloud Connector should has been installed and can be opened.
More detail information of the prerequisites check can be found from the guidance.
2.2 Cloud Connector
As mentioned in the guidance, Custom Code Migration applicaiton in the BTP ABAP environment will link to the on-premise SAP system by RFC.

(Screenshot from the guidance)
2.2.1 Process
- Open Cloud Connector with URL https://localhost:8443/ and logon to it.
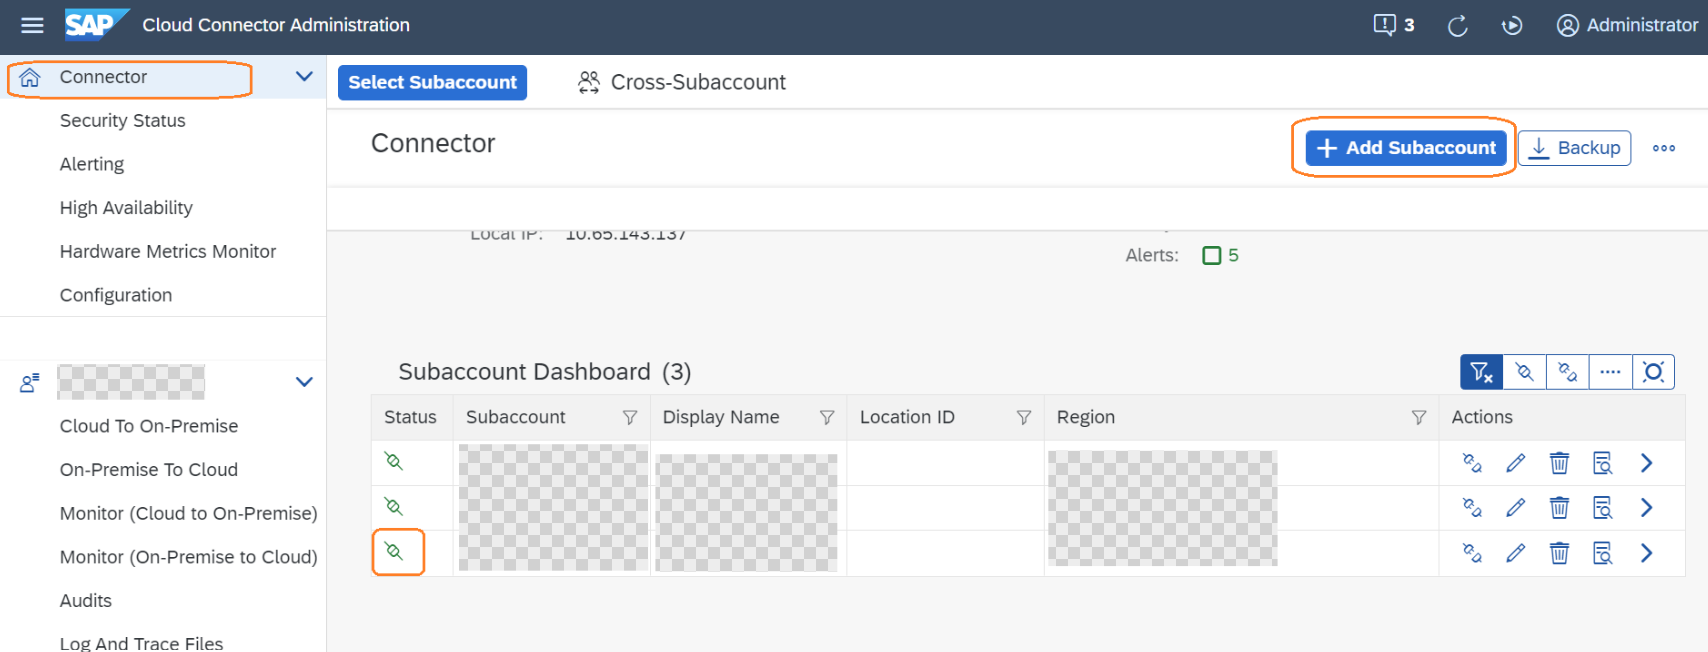
2. Add the subaccount to Cloud Connector.
In my practice, a new BTP subaccount was created by the booster for the BTP ABAP environment. So the new subaccount should be configured in Cloud Connector. Make sure the status of the subaccount is connected.

3. Establish a connection between the BTP ABAP environment and the on-premise system, where the custom code will be examined.
As previously mentioned, this connection is established through RFC. You can find detailed configuration steps in section 2.3.1.3.2 of the guidance.

2.3 BTP Account
As a component of the booster process, a service instance will be generated for the BTP ABAP environment within the BTP subaccount.

Clicking it will open the Fiori Launchpad for the ABAP environemnt.
2.3.1 Create a Destination Service Instance and a Service Key for the instance
Since the BTP subaccount was created by the booster, a space in Cloud Foundry has also been generated.

Click the tile to access the space and create an instance of the Destination Service. After that, create a Service Key for the instance. The detail configuration steps can be found from the guidance.

Copy the Service Key of the Destination Service instance, it will be used later.
2.3.2 Assign a role to the user to enable the usage of the application Custom Code Migration
As introduced, click the instance name will open the Fiori Launchpad.
Open Fiori application ‘Maintain Business Roles’.

Create a new role from template SAP_BR_IT_PROJECT_MANAGER and assige the new role to the user who should use application Custom Code Migration. Detail configuration steps can be found from the guidance.

Be sure to select ‘Unrestricted’ from the dropdown list in the Write, Read, and Value Help tab in the new role.
2.3.3 Maintaining Communication System and Communication Arrangements
In my practical experience, I utilized communication arrangements SAP_COM_0276 and SAP_COM_0464. Detail configuration steps can be found from the guidance.
Open Fiori applicaiton ‘Communication Arrangements’.

Firstly create a communication arrangement for SAP_COM_0276 (SAP Cloud Platform Desination Service Integration).
Utilize the service key mentioned in section 2.3.1 of the blog to create a new communication arrangement.

Before creating the communication arrangement for SAP_COM_0464 (SAP Custom Code Migration Integration), I initially established a new communication system.
Access the Fiori application ‘Communication System,’ create a new system, and utilize the instance of communication arrangement SAP_COM_0276 which just created as the destination service.

Following this, return to the Fiori application ‘Communication Arrangements’ and create a new communication arrangement for SAP_COM_0464 (SAP Custom Code Migration Integration). Use the communication system you just created in the ‘Communication System’ field.

2.3.4 Custom Code Migration Application
2.3.4.1 Create a new project
There are three types project can be created in the application.

- SAP S/4HANA Migration Project
- SAP BTP Migration Project
- Custom Code Analysis Project
In this blog, I have initiated a project of type ‘SAP S/4HANA Migration Project’ to assess and identify the custom code in my existing S/4HANA 1909 system that may require modifications to facilitate the migration to S/4HANA 2023.
- Target Release: SAP S/4HANA 2023
- Location of Custom Code: as the custom code is stored in the S/4HANA 1909 system so select ‘In remote system’.
- Connection to Remote System: the Communcation Arrangement which created for the destination (created in section 2.3.1 of the blog).

2.3.4.1.1 Usage Data
Usage data can be collected by transaciton code SUSG in the checked system (in this blog, it is the S/4HANA 1909 system).
For more information on understanding which parts of the code require analysis, please check the blogs (blog and blog) from @olga.dolinskaja.
Create a snapshot in transaction code SUSG and the snapshot will be used in the application.

The snapshot can be found in the application as Usage Data.

After the project is created, the analysis state will be changed to ‘Schedule’.

Further scope settings can be found from the guidance.
It will be changed to ‘In Process’ later.

2.3.4.2 Result Analysis
After the analysis is completed, the application will display the number of findings.

After clicking on the number, a new page will open with detailed analysis.

After clicing the ‘Object Name’ in the list, a new page will be opened with the detail information of the custom code.
My favorite part is that the suggested SAP Notes have been listed, along with the availability of a quick fix for the finding.

3 Conclusion
In this blog, I’ve summarized my practical experience using the Custom Code Migration application in my BTP (Business Technology Platform) account to perform custom code checks for an S/4HANA 1909 system. It’s essential to note that the configurations and code examples provided are tailored to my specific system and account settings. This blog is not intended as a step-by-step guide for configurations, as your own experience may differ based on your unique scenarios.
Best rgards,
Jason
My Linkedin
如有侵权请联系:admin#unsafe.sh