2023-10-10 14:14:58 Author: blogs.sap.com(查看原文) 阅读量:8 收藏
SAP Build Process Automation now includes the Custom Variables feature.
Custom variables are variables that can be referenced globally within a process. The absence of such variables has made workflow design tricky.
Using them allows for greater flexibility in workflow design.
In this blog, I would like to introduce a sample using it.
You will be able to solve things that have been difficult or have been solved by using Actions and Automation.
Tidbits
When you enter multiple recipients in the recipient section of the approval form, as shown below,

or three recipients in the following case, and when you enter a branch as shown below, you will get three approval forms.

The former is “If any one of the three performs the process, the process continues according to the selection of it (the request for approval to the other two disappears)”
The latter is “subsequent processing continues if all three people process the approval/rejection.”
The former works the same when recipients are grouped.
There is such a difference. You need to use them according to your requirements.
Workflow for majority voting
I hear requirements for majority voting in workflow. In the case of majority voting, we need to compare the number of approvals with the number of rejections, so we need to count the number of approvals and rejections.
Until now, SAP Build Process Automation did not have a variable that could be used anywhere, so there was a problem of how to store the counted values. The addition of the custom variable functionality will make this easier.
The first step is to set the custom variables. Custom variables can be set from the Process Details screen. This screen appears when you click on an empty area in the Process Edit screen.
This time, as follows

I set up two variables of numeric type: supporter, meaning the number of approvers, and denier, meaning the number of deniers.
These variables are just defined. First, we want to assign 0 to these variables.
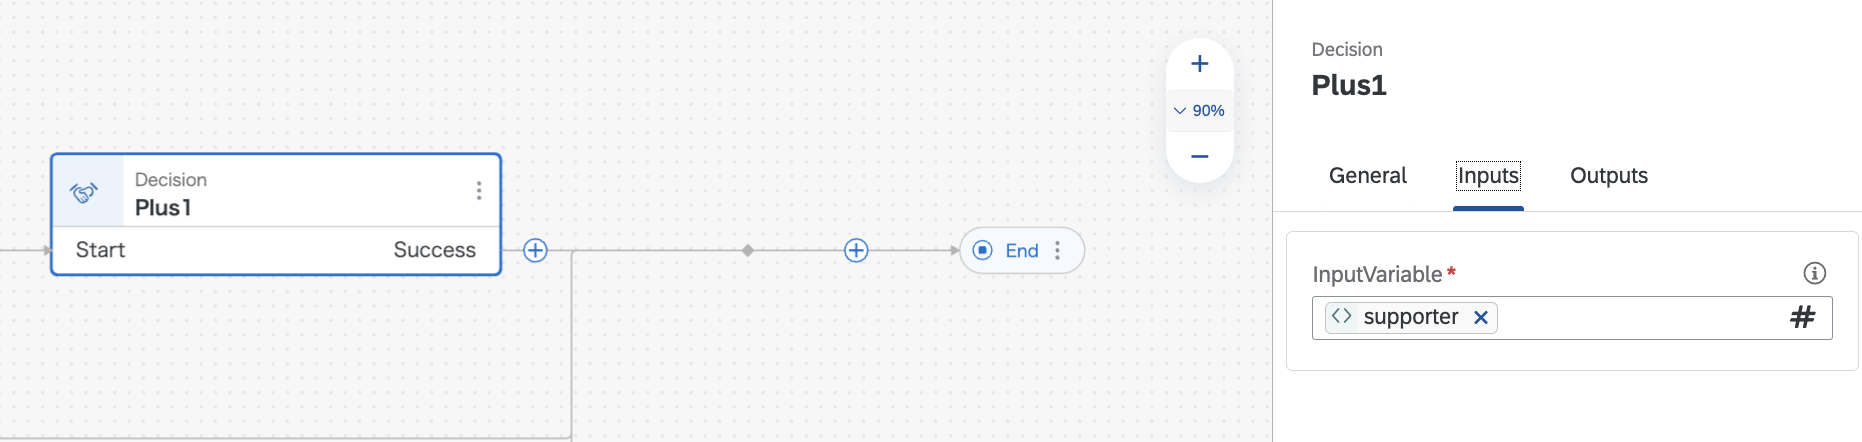
This can be assigned using the Decision method described previously.

The condition that must equal in Decision, the snapshot above, is to have the value of the parameter of the input be compared to the value of the parameter of the input (i.e., the same variable), and if they match, return the number 0. This will result in an output of 0 for this Decision.
Assigning Decision output values to custom variables can be done in the Decision output settings. It is also possible to assign to multiple custom variables.
Majority rule basically requires everyone to vote. Therefore, it is necessary to use the latter method introduced in the trivia section.
In this sample, the flow is divided into three parts. And we will place an approval form for each of them.


Originally, these three approval forms should be sent to separate recipients, but if you want to run it sample-wise, one person would be fine. That person will receive three approval requests.
Now, here is the point of this project. The approval form gives you an approval and a denial output. We will add logic to the form to set the custom variable Supporter to +1 if the form is approved, and to set the custom variable denier to +1 if the form is rejected. This is an application of Decision, which we have just assigned 0 to.
The custom variable Supporter or denier is set in the input, and the +1 value is set in the output.


You can see that the logic is +1 to the Supporter for approval and +1 to the denier for rejection.
This is done for the approval/rejection output of all three approval forms.

I would like to connect this to the same place as the subsequent process of approval, which is the place to connect in the case of reject. However

It is not a simple connection. Therefore, we will use one trick here.
Create an appropriate Decision. This is not used for anything in effect, so it can be anything as long as it works.
Place the created Decision next to the Approval and connect the process from the Reject to the Approval.

This will make the subsequent process in the case of a rejection the same as the approval one.
This is done for the rest of the subsequent approval forms.

The subsequent processing of all approval forms is now a single process that returns from the branch.
The next step is to compare Supporter and DINIER.
Add a condition

The conditional expression is

Thus suppoter > denier. If the majority vote is approved, then the majority vote is approved; otherwise, it is denied.
The majority vote is then used to approve or deny the request.

This completes the process.
*In the case of this majority vote flow, the trigger should originally be the API, but for the purpose of this sample, a form is used as the trigger. This form has no content.
Without custom variables, this majority voting process is surprisingly difficult because it is not possible to perform an addition process on a single variable. I used to handle this by creating a separate REST API for the process that performs the addition and the process that calls the current value, and calling it using Action. This function can also easily handle the Rework process described in the sample in the manual, which is called “application return” processing.
Please try out SAP Build Process Automation, which enables even more flexible processing.
如有侵权请联系:admin#unsafe.sh