✎首先利用开源的工具做恶意代码自动化并不是什么高大上的东西,但是你需要会恶意代码相关的知识,手动分析过病毒,会一些内存取证的手段,最好是一个Python熟练工,完全可以自己部署自己的开源自动化。
➥本系列只是个人在学习过程中一些心得杂谈。后面有机会我们一起聊一聊沙箱二次开发或者蜜罐,当然那将是后话。
✍ 为什么需要部署恶意代码自动化?
也许你是一个病毒分析师,也许你是一个安全分析师、应急响应安全团队或者从事相关的工作。日常工作?大量的样本辨黑白,网络流量日志分析,或者针对某些样本做深度分析,编写yara规则入库,出相关分析报告。
如果你接触的更深入一些,有蜜罐集群,沙箱集群,每天来自于全国各地甚至国外的恶意样本,多则几万或者几十万,这不是依赖于人工就可以大规模的对样本进行识别、归纳、分析,而是要有完善的系统与机制,流程化的去采集处理。当然那些高精度的系统并不是开源工具就能做到的,是长期的经验与总结,不断的开发与维护。
✍ 与威胁情报有关吗?
个人认为威胁情报本身字面意思,威胁已经包含了恶意代码,有一本很有意思的书叫做《情报驱动应急响应》,书中也提了到捕获的恶意来源,恶意软件及漏洞的价值。
微步在线情报社区与Venuse,你能通过ip、url、sha256等信息获取一条相对完整的恶意链,恶意链包含了该ip通信有那些样本,时间节点,国家地区、恶意域名,邮箱等等,相对于情报来讲这就是价值。
✍ 需要准备点什么?
- maltrieve
- viper
- clamav
- Online API(virustotal api, weibuyun api....
- CuckooSandBox
- HoneyDrive or t-pot
- volatility
- Python Django or Pulsar
上述工具列举的并不算太齐全,会在文中继续补充,列举一个国外的网站,这是一个热爱恶意研究的二进制工程师个人网站:https://fumik0.com/
Tracker模块子网页Home主页有大量的恶意ip及样本在Web上展示,动态更新而且它提供了api接口,在线获取这些样本数据,可以做到恶意查询,类似于在线微步情报社区这种。但是好像没有提供沙箱的页面接口,如果能有沙箱功能,让别人提交样本分析,关联这些恶意的数据,在Web中展现出来,理论上这就是简单的情报社区。
✍ 目标是什么?
没错,一个假的情报社区......。利用蜜罐,有条件可以国外部署节点,当然也可以随便部署节点,只要放到了公网上就好。
还可以利用cuckoo提供的web页面,收集提交的样本,这时候你会发现每天捕获的样本非常少,我们需要共享的样本,公网没钱就玩开源样本就好。
❀ 你可以考虑这样干::
- maltrieve在不同的站点上下载共享的恶意样本。
- viper对恶意代码进行分类。
- 因为都是公开的,所以已经被大多数的杀软厂商识别入库,用clamav辨别病毒家族,将识别的样本家族分类,也就是给样本打上标签。
- 利用线上api接口获取样本详细的数据。
- 将字段整合保存在数据库中,后面会对这些数据进行关联、分析、展示等工作。
- cuckoo配合volatility模块,将某些样本或者指定的样本详细分析,生成报告,也就是沙箱功能。
- 对恶意样本数据进行聚合、清洗、关联性分析产生有价值的数据。
通过线上api分析后,也许会得到c&c通信的ip或者url、域名,也可能是代理服务器。会发现你没有海量的ip数据支撑,每天仅仅靠蜜罐捕获与共享样本中获取的数据是有限的,你没有承载大量的c&c或者ddos攻击,很难收集来自于大网的数据,但是少量的数据并不影响去做恶意代码同源性与情报。
✍ 工具部署:
你必须认识这些新伙伴,你能帮助你实现"梦想"。了解与部署一款新的工具、应该去官方查阅权威文档,因为它能够提供最新的帮助与支持。虽然很多都是英文,你手中也有翻译法宝不是,这样你就避免百度谷歌找到的都是前几年的部署博客,虽然能提供思路,但是部署起来困难重重。
下面关于工具的介绍很简单,列举网站中有详细的介绍,你需要去查阅。如果你不知道什么是蜜罐技术,或者沙箱技术你需要格外的普及一些常识。
1. Maltrieve Github: https://github.com/krmaxwell/maltrieve
Maltrieve起源于mwcrawler的一个分支。 它直接从多个站点列出的源检索恶意软件
2. viper :https://viper.li/en/latest/ Github: https://github.com/viper-framework/viper
Viper是一个二进制分析和管理框架
3. clamav:https://www.clamav.net/
一款开源Linux下杀毒软件,同样提供了c与Python接口
4. CuckooSandBox:https://cuckoosandbox.org/ CuckooSandBox github:https://github.com/cuckoosandbox/cuckoo
Cuckoo Sandbox是领先的开源自动恶意软件分析系统,也即是沙箱。
5. HoneyDrive or t-pot or Other:
HoneyDrive:https://bruteforcelab.com/
一个蜜罐系统,里面有很多不同类型的蜜罐。
6. t-pot :http://dtag-dev-sec.github.io/ Github: https://github.com/dtag-dev-sec/tpotce
一个多蜜罐平台,而且提供非常友好的可视化,es插件也很不错。
当然你可以选择部署单个蜜罐,比如只部署中交互cowrie或者低交互kippo都是可以的,高级/复杂蜜罐是有一定的风险。
7. volatility:https://www.volatilityfoundation.org/
个人认为这是个强大的利器,非常灵活,cuckoo内存分析也是依赖于它,不得说这是一个很优秀的内存分析、取证工具。
8. Python Django or Pulsar or webpy:
这个随便,你需要开发一个Web页面,爬也行!能与后端的数据库交互,用js,css或者其他框架语言都可以,数据展示到前端即可。
这时候你也需要注意自己网站的安全,起码对自己的网站做一下简单的测试....,被别人脱库就不好了,加一个20G的抗DOS(很多厂商都可以给你免费申请的)。
★ Install部署: 环境:Ubuntu 18 system
① Maltrieve你只需要在Github下载,并且在操作系统上解压,就算安装成功,当然这里会输出一些引导与帮助:
运行格式:python maltrieve.py
| 问题 | 解决方案 |
|---|---|
| ImportError: No module named feedparser | pip install feedparser |
| Import grequests | pip install grequests |
| ImportError: No module named magic | pip3 install magic |
| ImportError: No module named bs4 | pip install bs4 |
♫ 经过上面的问题,你应该明白,以后遇到这些类的报错是依赖环境没有模块,pip安装即可.
② viper你需要参考用户手册,手册会告诉你功能与如何去使用.
$ apt-get install git gcc python3-dev python3-pip
$ apt-get install libssl-dev swig libffi-dev ssdeep libfuzzy-dev unrar p7zip-full
以上是依赖环境Python3与一些工具包,下面你还会需要做这些操作:
Install:
$ git clone https://github.com/viper-framework/viper
$ cd viper
$ git submodule init
$ git submodule update
$ sudo pip3 install setuptools wheel --upgrade
$ sudo pip3 install .

Uninstall:
$ cd viper
$ pip3 uninstall -y viper
$ pip3 uninstall -y -r requirements.txt
执行命令:./viper-cli,也许会报错如下
| 问题 | 解决方案 | 注意 |
|---|---|---|
| ModuleNotFoundError: No module named 'sqlalchemy' | pip3 install sqlalchemy | pip3 python3的环境 |
③ clamav部署,如果你是Ubuntu或者Centos那么apt-get or yum就可以满足你的安装需求:
Debian
  apt-get update
  apt-get install clamav

RHEL/CentOS
  yum install -y epel-release
  yum install -y clamav
在部署的时候特别是联调Python接口的时候遇到了一些问题,个人环境Ubuntu 18,安装后你就会出现以下几条指令:
| 指令 | 功能 |
|---|---|
| clamdscan | 监控 |
| clamscan | 扫描 |
| clamsubmit | 提交 |
可以利用clamscan进行测试,指令后带上文件夹或文件名扫描,就会输出扫描结果,如下所示:
root@ubuntu:~# clamscan ./virustest/15/
./virustest/15/1.exe: OK
./virustest/15/4.exe: Win.Packed.Noon-6997872-0 FOUND
./virustest/15/13.vbs: OK
./virustest/15/6: OK
./virustest/15/9.exe: Win.Malware.Smdd-7006691-0 FOUND
./virustest/15/5.exe: OK
./virustest/15/11.jar: OK
./virustest/15/10.jar: OK
./virustest/15/3.exe: OK
./virustest/15/2.exe: OK
./virustest/15/7.exe: OK
./virustest/15/14.exe: OK
./virustest/15/12.exe: Win.Malware.Wacatac-7007712-0 FOUND
./virustest/15/15.exe: OK
./virustest/15/8.exe: OK

----------- SCAN SUMMARY -----------
Known viruses: 6170445
Engine version: 0.100.3
Scanned directories: 1
Scanned files: 15
Infected files: 3
Data scanned: 9.30 MB
Data read: 8.69 MB (ratio 1.07:1)
Time: 41.171 sec (0 m 41 s)
ps aux | grep clam 看一看后台是否开启了freshclam与clamd进程,如果有报错信息请进一步查阅官方资料
root@ubuntu:~# /etc/init.d/clamav-daemon start/stop/status/restart  开启关闭状态重启

root@ubuntu:~# /etc/init.d/clamav-daemon start
[ ok ] Starting clamav-daemon (via systemctl): clamav-daemon.service

root@ubuntu:~# ps aux | grep clam
clamav    35244  0.0  5.8 1057096 725688 ?      Ssl  Jul06   1:42 clamd restart
clamav    35436  0.0  5.8 983108 725204 ?       Ssl  Jul06   1:46 clamd stop
clamav    35442  0.0  5.8 983204 725424 ?       Ssl  Jul06   1:42 clamd start
root      49855  100  4.6 735636 578764 ?       Rs   17:56   0:23 /usr/sbin/clamd --foreground=true
clamav      538  0.0  0.2 156876 25232 ?        Ss   Jul05   0:25 /usr/bin/freshclam -d --foreground=true
root      49876  0.0  0.0  22920  2272 pts/1    S+   17:57   0:00 grep --color=auto clam
Python提供了库Pyclamd,当然你可以利用Lib库,这里介绍Python联调clamav api,你需要配置clamav配置文件,且监听端口设置为3310,当然这都是默认配置。
指令clamconf,如果你发现没有该指令请apt-get install clamav-daemon ,该指令是新版本中的clamav配置文件稍微有些不同,clamconf是ClamAV提供的工具,用于检查整个系统配置。 /etc/clamav/clamav.conf没有相关的TCP监听信息,而且配置文件无效。最终在官方的 Configuration专栏中找到了参考文档,但是内容不详细,经过一番尝试终成功。
root@ubuntu:~# clamconf
Checking configuration files in /etc/clamav
Config file: clamd.conf
-----------------------
BlockMax disabled
PreludeEnable disabled
PreludeAnalyzerName disabled
LogFile disabled
LogFileUnlock disabled
LogFileMaxSize = "1048576"
LogTime disabled
LogClean disabled
LogSyslog disabled
LogFacility = "LOG_LOCAL6"
LogVerbose disabled
LogRotate disabled
ExtendedDetectionInfo disabled
PidFile disabled
TemporaryDirectory disabled
DatabaseDirectory = "/var/lib/clamav"
OfficialDatabaseOnly disabled
LocalSocket = "/tmp/clamd.socket"
LocalSocketGroup disabled
LocalSocketMode = "660"
FixStaleSocket = "yes"
TCPSocket = "3310"
TCPAddr = "36.27.214.218"
MaxConnectionQueueLength = "30"
StreamMaxLength = "26214400"
.........................
.........................
你应该会看到以上的配置信息,检测了clamav的运行环境变量,如果你配置文件中没有TCP相关的字段,你可以在配置文件中直接添加如下:
# A TCP port number the daemon will listen on.
# Default: disabled
TCPSocket 3310

# By default clamd binds to INADDR_ANY.
# This option allows you to restrict the TCP address and provide
# some degree of protection from the outside world.
# Default: disabled
TCPAddr 36.27.xxx.xxx

LocalSocket /tmp/clamd.socket

# Sets the permissions on the unix socket to the specified mode.
# Default: disabled (socket is world accessible)
LocalSocketMode 660
如何让配置文件生效呢?你需要查找注释以下内容:
# Comment or remove the line below.
  #Example  默认没有注释
你也可以重新生成一个新的配置文件,命令如下:
options:
clamd.conf freshclam.conf clamav-milter.conf
root@ubuntu:~# clamconf --generate-config=clamd.conf
当然你也可以选择向导性设置文件,指令如下,会出现选择配置界面,会配置很多模块如扫描线程、文件大小等等,我选择使用了默认:
dpkg-reconfigure clamav-daemo
这时候你重启服务,稍等一下可看到监听端口:
/etc/init.d/clamav-daemo restart
netstat -an | grep clam
netstat -tlunp | grep 3310
下面你可以利用pycharm或者其他IDE,安装pyclamd库即可,后面通过端口3310调用扫描等操作:
pip install pyclamd
➃cuckoo杜鹃沙箱,安装过程相对复杂,以前搭建的时候,也是花了几天时间去阅读官方配置与文档,这次部署的版本Version 2.0.6(最新2.0.7)。
下面安装部署过程中,会把以前遇到的错误,解决方案一起整理如下:
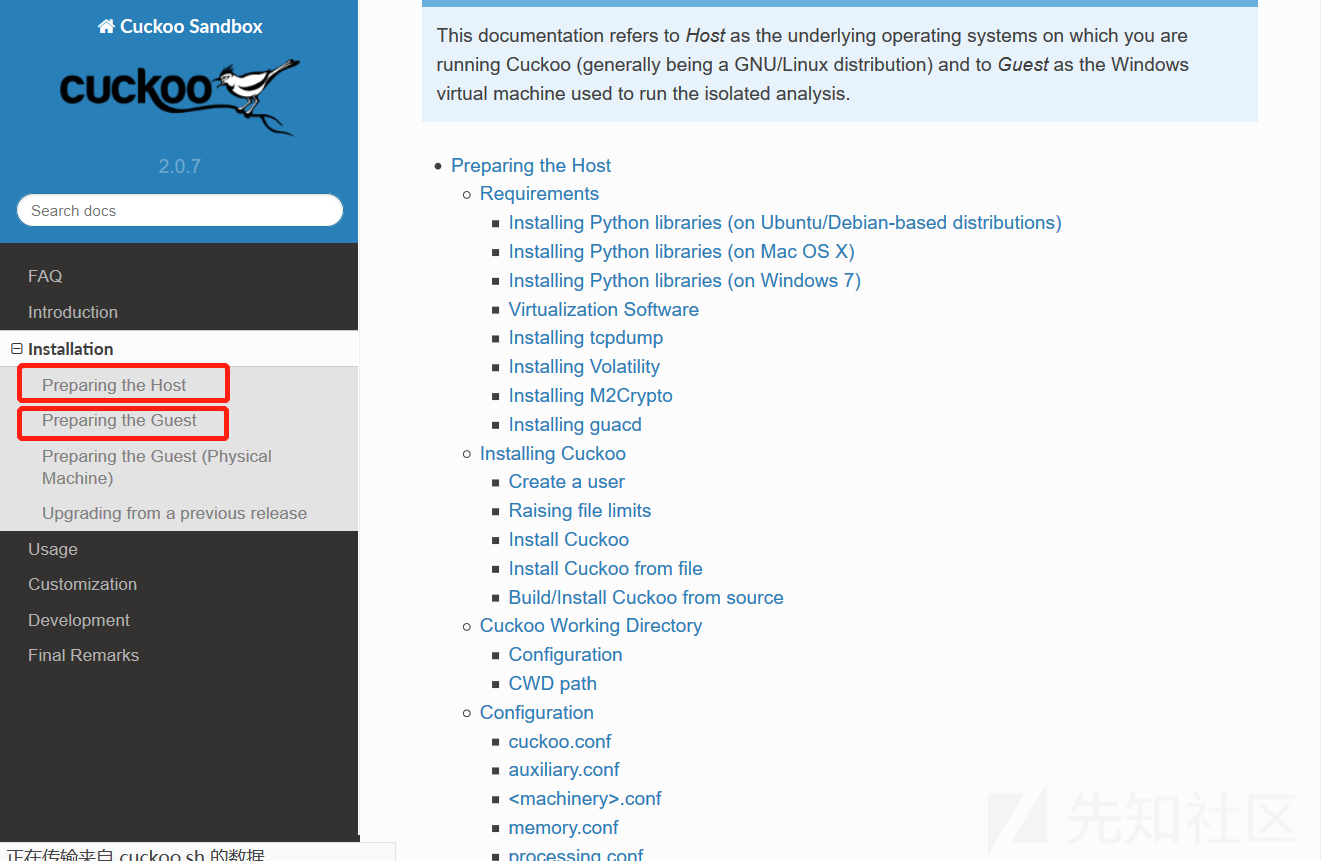
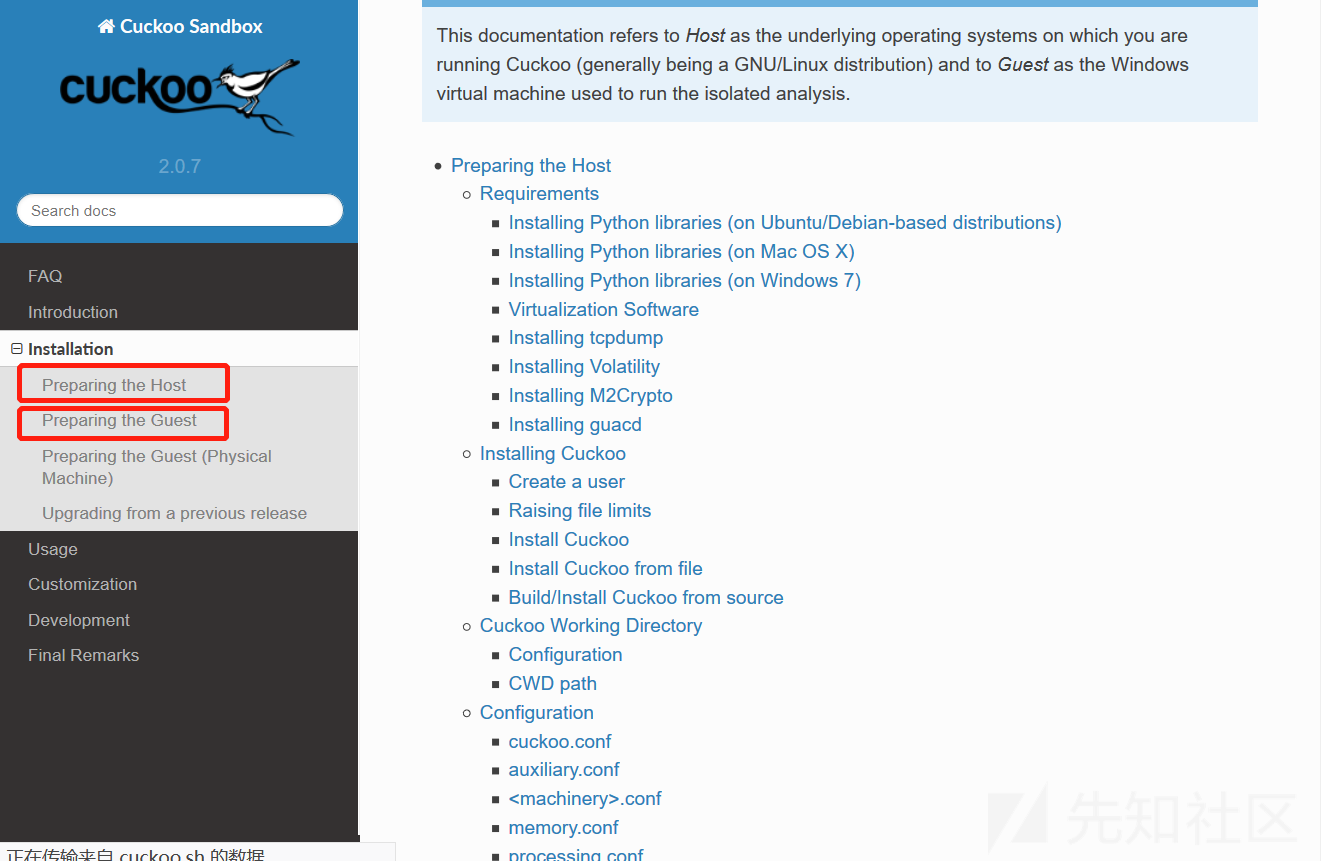
官方提供了相对详细的文档配置,包括安装过程中会出现的问题。有些棘手的问题可以在github上提问,如果以前没接触过,我强烈建议好好阅读官方文档,对整个项目有梳理梳理,这将对你帮助很大。
Cuckoo部署两个节点:1. Guest  2. Host ,Ubuntu上部署Host, 虚拟机上部署guest

Guest支持4大类,可以是windows/linux/android/OS X,基本支持所有的文件类型分析

Host负责管理沙箱机制,Guest负责执行不同类型的恶意软件。Guest沙箱本质在一个虚拟的操作系统中模拟过程,监控病毒执行流程,梳理、取证、分析、决策,Guest反馈最后的结果给Host,可以通过API或Web页面查看最终的执行结果
Host安装步骤(官网有依赖性缺陷):
解决virtualBox报错所依赖的环境:
apt-get install libopus0 libqt5core5a libqt5gui5 libqt5opengl5 libqt5printsupport5 libvpx5 libxcursor1 libxcursor1 libxmu6 libxt6 libqt5x11extras5安装virtualBox :
dpkg -i virtualbox-6.0_6.0.8-130520~Ubuntu~bionic_amd64.deb安装依赖库 :
apt-get install tcpdump apparmor-utils aa-disable /usr/sbin/tcpdump apt-get install tcpdump groupadd pcap apt-get install libcap2-bin apt-get install swig解决m2cryp依赖环境 否则安装签名CR3会报错解析错误(第二次未成功),多次尝试即可,网络下载会超时:
apt-get install python-dev python-pip libxml2-dev libxslt1-dev zlib1g-dev libffi-dev libssl-dev pip3尝试安装 pip install m2crypto==0.24.0创建cuckoo账户 :
sudo adduser cuckoo
usermod -a -G vboxusers cuckoo
usermod -a -G libvirtd cuckoo
Downloader Cuckoo:
pip install -U pip setuptools
apt install --no-install-recommends python2.7-minimal python2.7
apt install python-numpy python-scipy
官方建议在virtualenv环境下运行:一个独立的Python环境下运行:
$ . venv/bin/activate (venv)

$ pip install -U pip setuptools (venv)

$ pip install -U cuckoo
解决报错Pillow问题:
你需要官方下载Pillow-master.tar的包
apt-get install libtiff5-dev libjpeg8-dev zlib1g-dev libfreetype6-dev liblcms2-dev libwebp-dev libharfbuzz-dev libfribidi-dev tcl8.6-dev tk8.6-dev python-tk
cd Pillow-master/
python setup.py install
安装Cuckoo,安装过程中如果你遇到了以上问题,请参考上述解决方案:
$ pip download cuckoo
$ pip install Cuckoo-2.0.0.tar.gz
$ pip install *.tar.gz
安装更多cuckoo支持 :cuckoo --cwd /opt/cuckoo community
接下来你需要设置cukoo的工作目录与环境变量:
$ sudo mkdir /opt/cuckoo
$ sudo chown cuckoo:cuckoo /opt/cuckoo
$ cuckoo --cwd /opt/cuckoo

# You could place this line in your .bashrc, for example.
$ export CUCKOO=/opt/cuckoo
$ cuckoo  --启动杜鹃 如果你只做了以上的步骤,你一定会报错,可以先运行试一试看看错误
这时候基本的环境安装好了,过程也许你还要克服很多困难,希望你能多查阅官方文档与百度谷歌,解决这些部署问题。
然而对于cuckoo运行,你才完成了一半,你可以先尝试一下运行,看一看会报什么样的错误:
进入一个独立的虚拟环境,官方推荐的方式去做:
root@ubuntu:~# . venv/bin/activate
(venv) root@ubuntu:~#
$ sudo mkdir /opt/cuckoo
$ sudo chown cuckoo:cuckoo /opt/cuckoo
$ cuckoo --cwd /opt/cuckoo

# You could place this line in your .bashrc, for example.
$ export CUCKOO=/opt/cuckoo
$ cuckoo  --启动杜鹃 如果你只做了以上的步骤,你一定会报错,可以先运行试一试看看错误
你应该先会看到这样的界面,这将是一个很不错的开始:
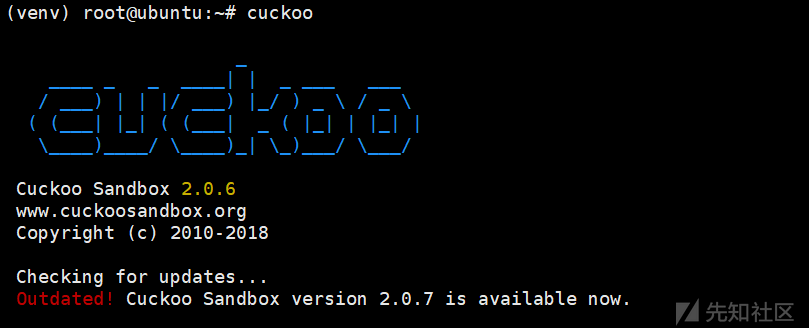
接下来,你又会发现报错信息如下:
[cuckoo] CRITICAL: CuckooCriticalError: Unable to bind ResultServer on 192.168.56.1:2042 [Errno 99] Cannot assign requested address. This usually happens when you start Cuckoo without bringing up the virtual interface associated with the ResultServer IP address. Please refer to https://cuckoo.sh/docs/faq/#troubles-problem for more information.原因是你没创建虚拟机也就是Guest,也没创建主机与宿主机之间的端口,虚拟网卡,如何去做呢?你可以参照以下解决方案:
virtualbox    virtualboxvm
前面你已经安装过virtualbox虚拟机,当然vm也是一样的,但这里我使用官方推荐的虚拟机。
你需要图形化界面启动virtualbox,安装一个win7的镜像,创建的win7名字叫做cuckoo1,可以后面自己配置,都是一样的,创建虚拟网卡,这很重要。
VirtualBoxManag管理命令这里只提供网络相关:
下载VBoxManage包,安装执行以下指令:
VBoxManage extpack install ./Oracle_VM_VirtualBox_Extension_Pack-6.0.8.vbox-extpack
解决问题: CuckooCriticalError: Unable to bind result server on 192.168.56.1:2042: [Errno 99] Cannot assign requested address
If the hostonly interface vboxnet0 does not exist already.
$ VBoxManage hostonlyif create

Configure vboxnet0.
$ VBoxManage hostonlyif ipconfig vboxnet0 --ip 192.168.56.1 --netmask 255.255.255.0
你还需要打开wind7的Guest主机,设置静态ip,wind7的虚拟机请设置成Host模式,仅主机模式!这个也很重要,然后在win7里面安装Python2.7的环境基本设置完成。
假设win7 ip 设置为 192.168.56.101(随便),后面我们需要在cuckoo提供的配置文件中配置即可。Host可以ping通虚拟网卡,Guest也可以ping通虚拟网卡,理想的效果是这个样子的,如下所示:

你需要配置cuckoo提供的配置文件,但是大多都是默认设置好的,也许你需要做一些其他的操作:
root@ubuntu:/opt/cuckoo/conf# pwd
/opt/cuckoo/conf
root@ubuntu:/opt/cuckoo/conf# ls
auxiliary.conf  cuckoo.conf  kvm.conf     physical.conf    qemu.conf       routing.conf     vmware.conf   xenserver.conf
avd.conf        esx.conf     memory.conf  processing.conf  reporting.conf  virtualbox.conf  vsphere.conf
你会发现很多配置文件,详细配置我建议你去官方认真阅读以下,因为大多数配置不太难,相对目前阶段你需要配置auxiliary.conf  cuckoo.conf virtualbox.conf,你需要看看文件里面配置都什么含义:
auxiliary.conf:
[sniffer]
# Enable or disable the use of an external sniffer (tcpdump) [yes/no].
enabled = yes

# Specify the path to your local installation of tcpdump. Make sure this
# path is correct.
tcpdump = /usr/sbin/tcpdump  --路径要对
这个默认开启就好
[mitm]
# Enable man in the middle proxying (mitmdump) [yes/no].
enabled = no
[services]
# Provide extra services accessible through the network of the analysis VM
# provided in separate, standalone, Virtual Machines [yes/no].
enabled = no
这两项看个人,我选择了默认
cuckoo.conf :
[cuckoo]
# Enable or disable startup version check. When enabled, Cuckoo will connect
# to a remote location to verify whether the running version is the latest
# one available.
version_check = yes  --这个可以关掉,当然不建议

# If turned on, Cuckoo will delete the original file after its analysis
# has been completed.
delete_original = no

# If turned on, Cuckoo will delete the copy of the original file in the
# local binaries repository after the analysis has finished. (On *nix this
# will also invalidate the file called "binary" in each analysis directory,
# as this is a symlink.)
delete_bin_copy = no

# Specify the name of the machinery module to use, this module will
# define the interaction between Cuckoo and your virtualization software
# of choice.
machinery = virtualbox  --虚拟机

# Enable creation of memory dump of the analysis machine before shutting
# down. Even if turned off, this functionality can also be enabled at
# submission. Currently available for: VirtualBox and libvirt modules (KVM).
memory_dump = no

# When the timeout of an analysis is hit, the VM is just killed by default.
# For some long-running setups it might be interesting to terminate the
# monitored processes before killing the VM so that connections are closed.
terminate_processes = no


[resultserver]
# The Result Server is used to receive in real time the behavioral logs
# produced by the analyzer.
# Specify the IP address of the host. The analysis machines should be able
# to contact the host through such address, so make sure it's valid.
# NOTE: if you set resultserver IP to 0.0.0.0 you have to set the option
# `resultserver_ip` for all your virtual machines in machinery configuration.
ip = 192.168.56.1  --虚拟网卡,如果创建虚拟网卡使用的其他ip,这里需要更改

# Specify a port number to bind the result server on.
port = 2042  --端口

# Force the port chosen above, don't try another one (we can select another
# port dynamically if we can not bind this one, but that is not an option
# in some setups)
force_port = no

# Maximum size of uploaded files from VM (screenshots, dropped files, log).
# The value is expressed in bytes, by default 128 MB.
upload_max_size = 134217728
virtualbox.conf:
[virtualbox]
# Specify which VirtualBox mode you want to run your machines on.
# Can be "gui" or "headless". Please refer to VirtualBox's official
# documentation to understand the differences.
mode = headless

# Path to the local installation of the VBoxManage utility.
path = /usr/bin/VBoxManage
# If you are running Cuckoo on Mac OS X you have to change the path as follows:
# path = /Applications/VirtualBox.app/Contents/MacOS/VBoxManage

# Default network interface.
interface = vboxnet0  --虚拟网卡名称,如果创建虚拟网卡的时候名称不同需要修改

# Specify a comma-separated list of available machines to be used. For each
# specified ID you have to define a dedicated section containing the details
# on the respective machine. (E.g. cuckoo1,cuckoo2,cuckoo3)
machines = cuckoo1 --宿主机的名称,根据创建名称修改

# If remote control is enabled in cuckoo.conf, specify a port range to use.
# Virtualbox will bind the VRDP interface to the first available port.
controlports = 5000-5050

[cuckoo1]
# Specify the label name of the current machine as specified in your
# VirtualBox configuration.
label = cuckoo1

# Specify the operating system platform used by current machine
# [windows/darwin/linux].
platform = windows

# Specify the IP address of the current virtual machine. Make sure that the
# IP address is valid and that the host machine is able to reach it. If not,
# the analysis will fail.
ip = 192.168.56.101  -- win7的静态这里需要修改
以上是一些关键的配置,再次运行cuckoo指令,也许还有有其他问题,你可以查阅官方或谷歌百度解决,如果正常你会看到以下信息,如下所示:


cuckoo已经能启动了,但是我们需要Web页面,如果在独立的Python环境中,别忘了临时变量,这个问题会导致迷之错误,当初排查了好久:
export CUCKOO=/opt/cuckooreporting.conf配置文件:
# Enable or disable the available reporting modules [on/off].
# If you add a custom reporting module to your Cuckoo setup, you have to add
# a dedicated entry in this file, or it won't be executed.
# You can also add additional options under the section of your module and
# they will be available in your Python class.

[feedback]
# Automatically report errors that occurred during an analysis. Requires the
# Cuckoo Feedback settings in cuckoo.conf to have been filled out properly.
enabled = yes --反馈关闭 no,一般都会报错

[jsondump]
enabled = yes  --JSON开启
indent = 4
calls = yes


# The various modes describe which information should be submitted to MISP,
# separated by whitespace. Available modes: maldoc ipaddr hashes url.
mode = maldoc ipaddr hashes url

[mongodb]
enabled = yes   --开启数据库mongodb
host = 127.0.0.1
port = 27017
db = cuckoo   -- 你需要登陆mongodb创建数据库cuckoo
store_memdump = yes
paginate = 100
# MongoDB authentication (optional).  --我这里没有用账号密码
username =
password =MongoDB authentication (optional). --我这里没有用账号密码 username = password =
以上是主要配置,你需要执行以下指令启动Web界面,提供了三种方式都可以,你有可能会报错MongoDB:
cuckoo web runserver
cuckoo web runserver 0.0.0.0:PORT
cuckoo web -H host -p port
如果你Mongodb报错如下,先排查是不是环境变量问题,先尝试导入环境变量:
Error: In order to use the Cuckoo Web Interface it is required to have MongoDB up-and-running and enabled in Cuckoo. Please refer to our official documentation as well as the $CWD/conf/reporting.conf file.
解决方案一:export CUCKOO=/opt/cuckoo
如果还是报错,查看你的Mongodb版本,apt-get默认安装的老版本3.6的,可以更新到db version v4.0.10或者更高版本,如何更新呢?可以参考如下:
个人建议先卸载干净,有些依赖包没有被升级也会报错
Uninstall:
apt-get purge mongodb-org*
sudo rm -r /var/log/mongodb
sudo rm -r /var/lib/mongodb
dpkg -P xxx
apt-get clean

Install:
sudo apt-get install -y mongodb-org=4.0.10 mongodb-org-server=4.0.10 mongodb-org-shell=4.0.10 mongodb-org-mongos=4.0.10 mongodb-org-tools=4.0.10
echo "mongodb-org hold" | sudo dpkg --set-selections
echo "mongodb-org-server hold" | sudo dpkg --set-selections
echo "mongodb-org-shell hold" | sudo dpkg --set-selections
echo "mongodb-org-mongos hold" | sudo dpkg --set-selections
echo "mongodb-org-tools hold" | sudo dpkg --set-selections重新启动Mongodb服务,创建数据库cuckoo,工作目录与环境变量都没问题,Web就OK了,执行指令,成功信息如下:
(venv) root@ubuntu:/opt/cuckoo# cuckoo web runserver Performing system checks...
(venv) root@ubuntu:/opt/cuckoo# cuckoo web runserver
Performing system checks...

System check identified no issues (0 silenced).
July 08, 2019 - 20:37:21
Django version 1.8.4, using settings 'cuckoo.web.web.settings'
Starting development server at http://127.0.0.1:8000/
Quit the server with CONTROL-C.
先来看看Web页面:
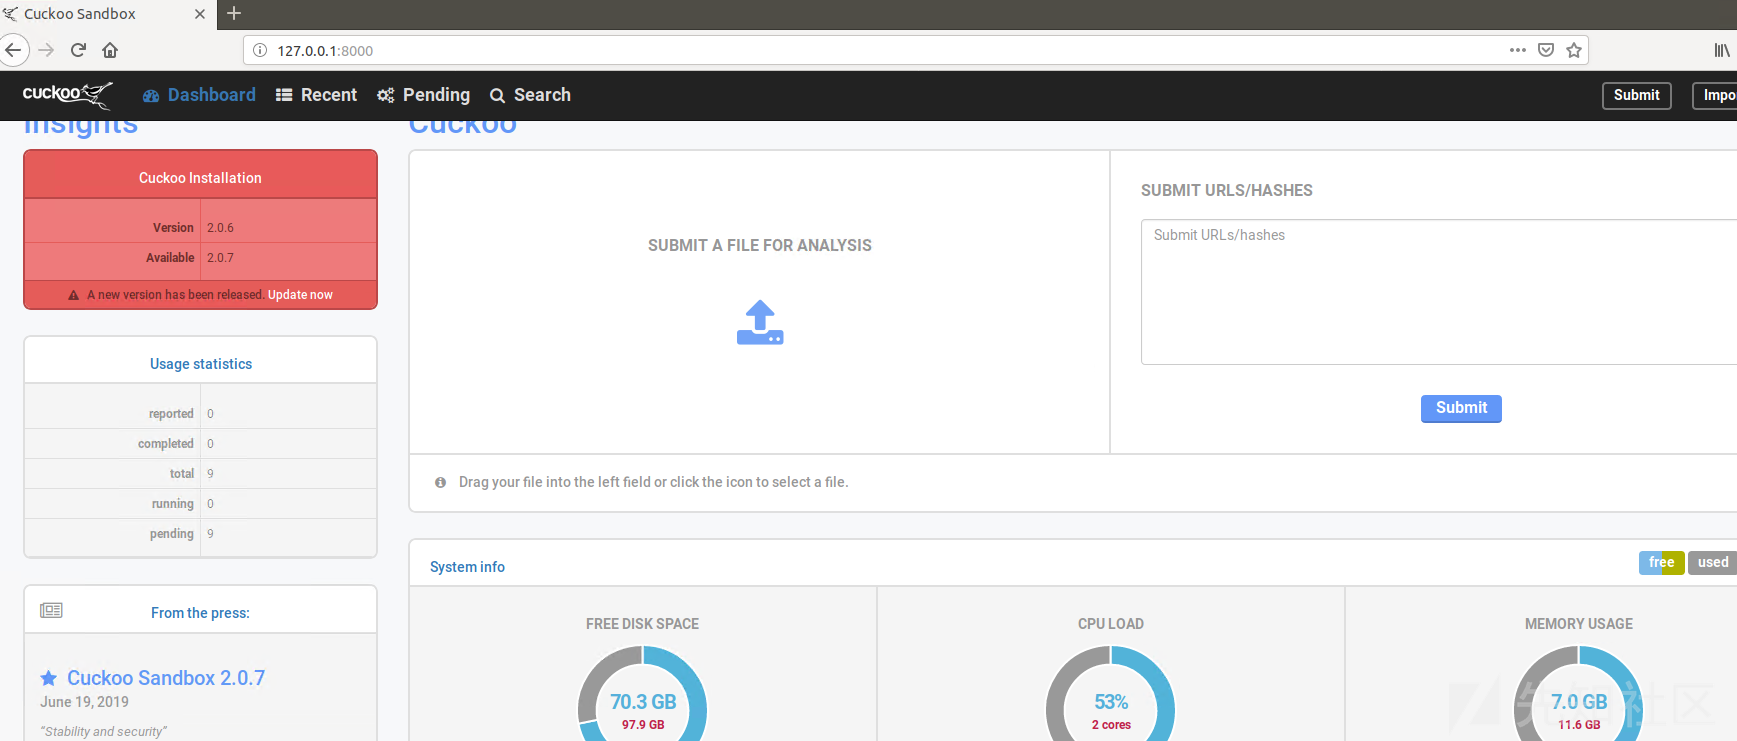
看起来还不错,但是cukoo没办法分析的,因为没还安装内存分析的工具。还需要把API接口联调成功,Python有成熟cuckoo api库,我们只需要让cuckoo支持api响应,官方参考如下:
Starting the API server
In order to start the API server you can simply do:
$ cuckoo api

By default it will bind the service on localhost:8090. If you want to change those values, you can use the following syntax:
$ cuckoo api --host 0.0.0.0 --port 1337
$ cuckoo api -H 0.0.0.0 -p 1337
和Web的启动方式是一样的,如果你用Pycharm也许会遇到一些问题Windows下,你可以尝试安装VCForPython27.msi:
解决Pycharm 调用 cuckoo api包接口依赖关系: VCForPython27.msi其实cuckoo还支持Nginx代理等扩展,非常灵活,更多信息需要参考文档与手册。
➄ Online virus api:你需要到提供免费api情报或者沙箱网站,注册账号,获取属于自己的私钥Key,然后参考api手册,去使用.
微步云 API:
API官方参考手册:https://s.threatbook.cn/api
免费支持接口模块:文件类型与URL扫描

VirusTotal API:
API官方参考手册: https://developers.virustotal.com/reference#getting-started
免费支持接口模块:文件、URL、域名及端口
➅ Volatitity: https://www.volatilityfoundation.org/ Github:https://github.com/volatilityfoundation/volatility 它的强大无容置疑,主流平台全部支持,都可以进行内存取证:
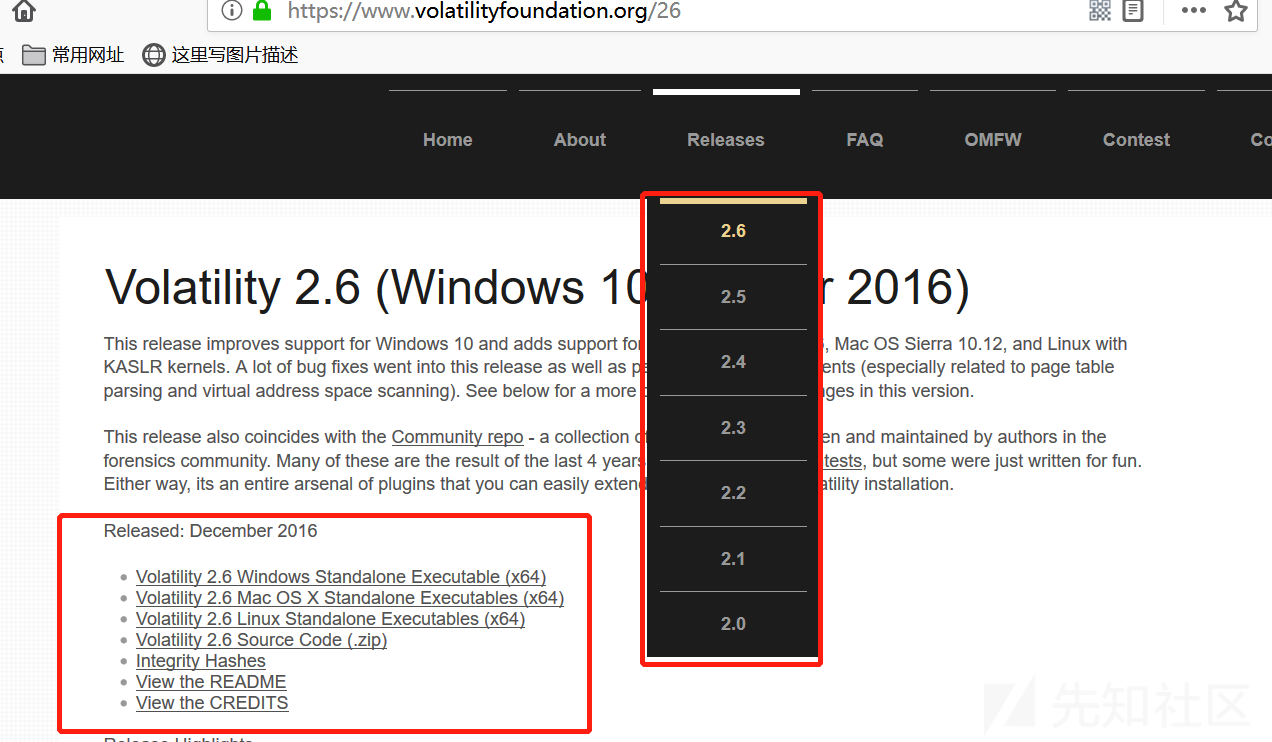
安装如下:
unzip volatility_2.6_lin64_standalone.zip
cd volatility_2.6_lin64_standalone
root@ubuntu:~/volatility_2.6_lin64_standalone#   ls
AUTHORS.txt  CREDITS.txt  LEGAL.txt  LICENSE.txt  README.txt  volatility_2.6_lin64_standalone
root@ubuntu:~/volatility_2.6_lin64_standalone#  ./volatility_2.6_lin64_standalone -h
你可以看到输出信息
如果在Linux下单独使用该工具,需要Profile,你可以通过该网站获取: https://code.google.com/archive/p/volatility/wikis/LinuxMemoryForensics.wiki
Github直接下载制作好的Profile: https://github.com/KDPryor/LinuxVolProfiles 获取内存:https://github.com/504ensicslabs/lime 也可以 apt-get install volatility volatility-tools
获取内存: 也可以 apt-get install volatility volatility-tools
我们关注的是cuckoo上配置与使用volatility工具来完成内存分析,你需要去理解memory.conf配置文件,在这之前你必须满足两个条件:
启用volatility中$CWD/conf/processing.conf
启用memory_dump中$CWD/conf/cuckoo.conf
cuckoo.conf:
# Enable creation of memory dump of the analysis machine before shutting
# down. Even if turned off, this functionality can also be enabled at
# submission. Currently available for: VirtualBox and libvirt modules (KVM).
memory_dump = yes --改为yes
processing.conf:
[memory]
# Create a memory dump of the entire Virtual Machine. This memory dump will
# then be analyzed using Volatility to locate interesting events that can be
# extracted from memory.
enabled = yes   -- 改为yes
你还可以配置扫描线程等
memory.conf:
# Volatility configuration

# Basic settings
[basic]
# Profile to avoid wasting time identifying it
guest_profile = WinXPSP2x86 --内存镜像设置
# Delete memory dump after volatility processing.
delete_memdump = no

后面每个小节都是插件的配置,支持virustotal api,可以开启辅助分析:

[virustotal]
enabled = yes   -开启virustotal模块扫描
# How much time we can wait to establish VirusTotal connection and get the
# report.
timeout = 60
# Enable this option if you want to submit files to VirusTotal not yet available
# in their database.
# NOTE: if you are dealing with sensitive stuff, enabling this option you could
# leak some files to VirusTotal.
scan = yes
# Add your VirusTotal API key here. The default API key, kindly provided
# by the VirusTotal team, should enable you with a sufficient throughput
# and while being shared with all our users, it shouldn't affect your use.
key = a0283a2c3d55728300d064874239b5346fb991317e8449fe43c902879d758088   -- 请求私钥
打开cuckoo的Web页面,然后提交测试的样本,如下所示:

cuckoo与cuckoo web都正常运行,发现提交的样本无法分析一直pending,有可能cuckoo与cuckoo web不再同一个环境下,因为运行都在venv Python独立的环境下运行的,别忘了临时变量问题,你需要看一看两个evn是不是相同的,都设置了CUCKOO=/opt/cuckoo:
(venv) root@ubuntu:/opt/cuckoo/conf# env | grep cuckoo
OLDPWD=/opt/cuckoo
PWD=/opt/cuckoo/conf
CUCKOO=/opt/cuckoo
点击文件名查看详细的样本信息,因为签名与yara都没有下载,详细有很多分析显示不完善:
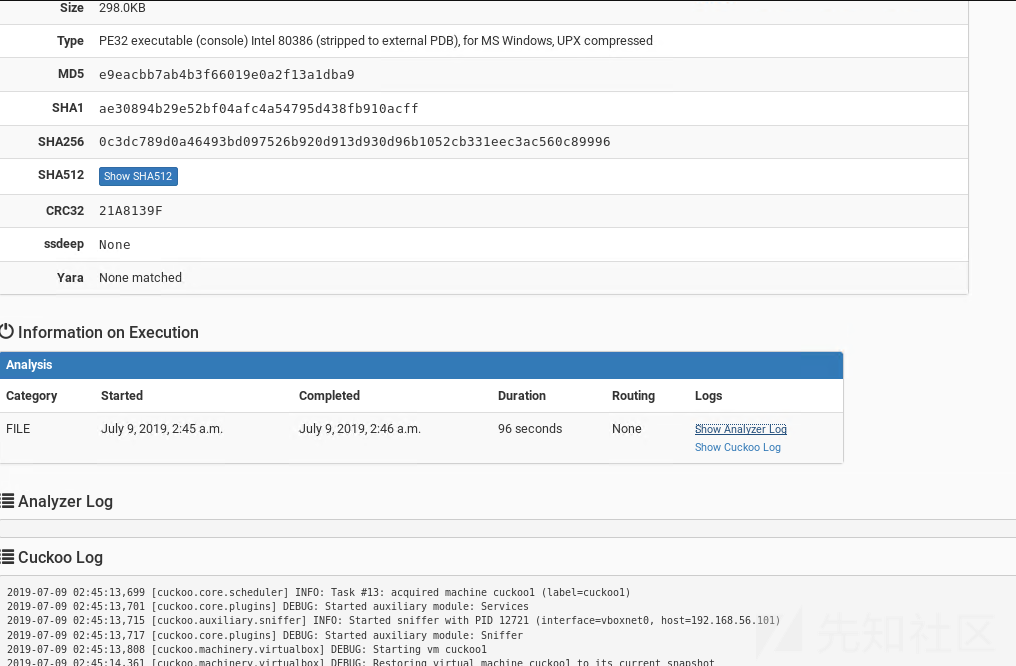
➆ Cowrie蜜罐安装: 本想介绍HoneyDrive 与 t-pot,但是这些并不复杂,他们也是由多个蜜罐组成。
☣ T-pot有着良好的可视化,es数据库插件会让你的展示更绚丽,HoneyDrive镜像3.9g左右,不过你在安装过程中.ova镜像导入虚拟机会遇到一些问题,比如不符合ovf的规范,你需要下载VMware-ovftool-4.2.0-5965791-win.x86_64.msi工具,去把你的ova转换成VM镜像打开,如果上述环境都搭建成功,这些东西将很简单,。
☽ 介绍Cowrie主要想聊聊表与字段关联,这些数据很重要这是一个恶意链的概念:
这是一个低交互蜜罐或者中交互蜜罐,简单说可以记录ssh与telnet暴力破解,记录黑客爆破后指令,你可以参考官方:https://cowrie.readthedocs.io/en/latest/index.html#
这里不再介绍安装与数据库配置,我们来看一看cowrie数据库表,这里使用的mysql(你需要导入生成这些表),如下所示:
mysql> show tables;
+------------------+
| Tables_in_cowrie |
+------------------+
| auth             |
| clients          |
| downloads        |
| input            |
| ipforwards       |
| ipforwardsdata   |
| keyfingerprints  |
| params           |
| sensors          |
| sessions         |
| ttylog           |
+------------------+
部署后去理解这些表与表之间的关系,当运行cowrie之后,数据库也都开始了工作,他们之间依赖session字段串联,利用字段可以串烧一条简单的恶意链,当然没有进行任何扩展,比如对ip进行扩展,地区查询域名查询等,如下所示:
ip(攻击者ip) --> session(连接会话) --> exec(执行的命令) --> file(下载的恶意代码) --> count(排行及次数,定性)
➥ 如果你是一个SQL新手,你可以参考这些SQL语句来帮助你更好的使用mysql:
# GRANT ALL PRIVILEGES ON *.* TO 'cowire'@'%'IDENTIFIED BY 'cowrie' WITH GRANT OPTION;远程连接提权
# update user set host = '%' where user = 'root';
# update user set authentication_string=password('yibanrensheng1997.') where user='cowrie';修改密码
# select TABLE_NAME,COLUMN_NAME,CONSTRAINT_NAME from INFORMATION_SCHEMA.KEY_COLUMN_USAGE where CONSTRAINT_SCHEMA ='cowrie' AND REFERENCED_TABLE_NAME = 'sessions';  查看外键
# SET FOREIGN_KEY_CHECKS=0;   设置外键约束不起效
# flush privileges            刷新
# show variables like 'collation_%';   查看所有格式
# truncate table 表名;
# select username, count(*) as count from auth group by username order by count desc limit 20; 统计爆破账户排行
# select password, count(*) as count from auth group by password order by count desc limit 20; 统计爆密码排行
# select ip, count(*) as count from sessions group by ip order by count desc limit 20; 统计爆破次数最多的ip
# select distinct ip from sessions;  去掉重复的ip
# select distinct input from input;  获取去重后的指令
ϡ 其实这篇文章主要介绍了基础知识与思路,附加串烧部署,这部分也是非常耗费精力,所以不要把部署不太当回事,后面会遇到很多莫名的BUG。下次有时间将会带来串烧工具,用高乐积木真正的运作起来。
✍ 后记:研究这东西有用吗?
总会有一些朋友说我这东西有啥用,也不挣钱,确实,也许有用,也许一点用都没。我也总会想一些问题,就像下面着几种情况:
搞渗透的一定要会系统漏洞?熟悉保护模式?
搞二进制,玩逆向一定要懂web漏洞?java反序列化之类的。
搞安服的就不能挖漏洞?不能花时间研究学习,业余时间也尝试一下自动化如何挖cve、src?
最后对于我来说,这些知识一定会有辅助作用,对工作是一定有提升与帮助的,这并不意味是个全栈工程师,仅仅代否愿意去接触新的知识,或说热爱某些东西,更多的精力去做你喜爱的事情,所以说这是格局问题,一个人一个想法。
☭ 关于二次开发个人也是学习道路上的一员,平常业余时间去研究,所以并不一定有第三篇文章,二次开发与优化基本属于系统层面、内核、保护模式、HOOK关联性很大,像逆一个sandbox时长也好久,希望有兴趣的你一起学习交流。
☪ 后续:
《利用Python开源工具部署自己的恶意代码自动化(二)高乐积木》
《利用Python开源工具部署自己的恶意代码自动化(三)深度优化与二次开发》
如有侵权请联系:admin#unsafe.sh